Before starting to import the order to Autocount, you need to setup which orders status to automatically show in the Autocount application sync?
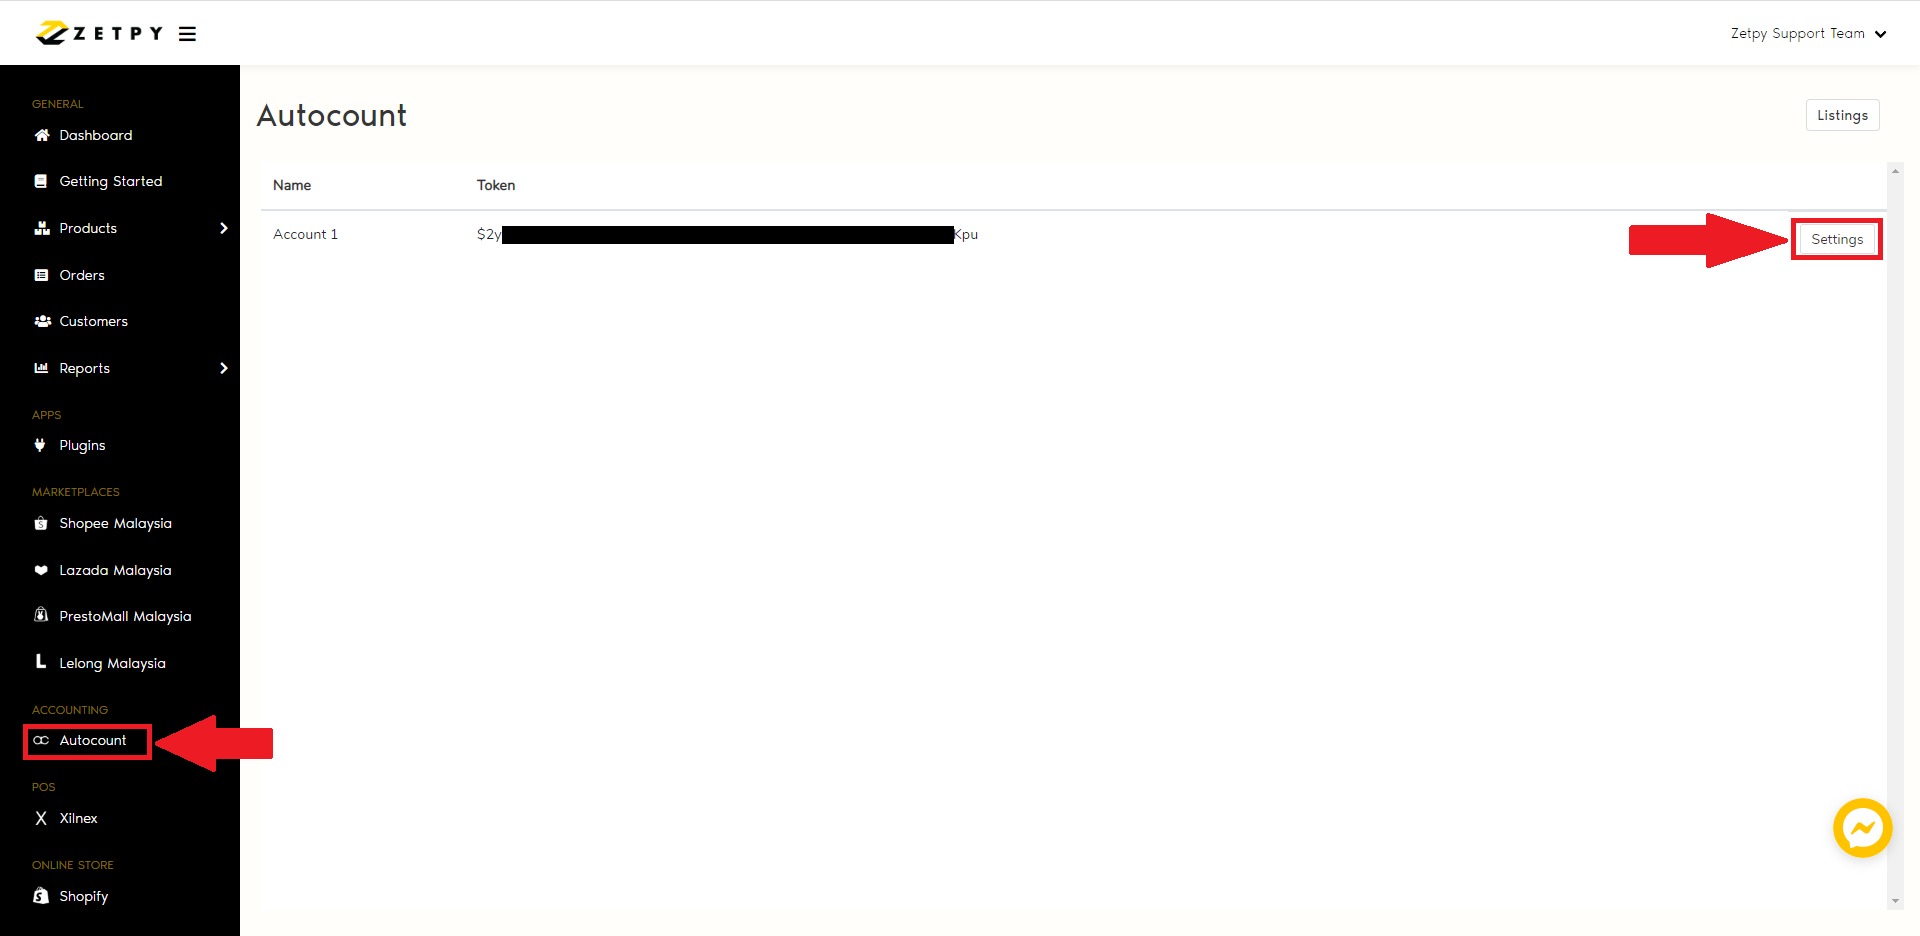
1) Go to Autocount.
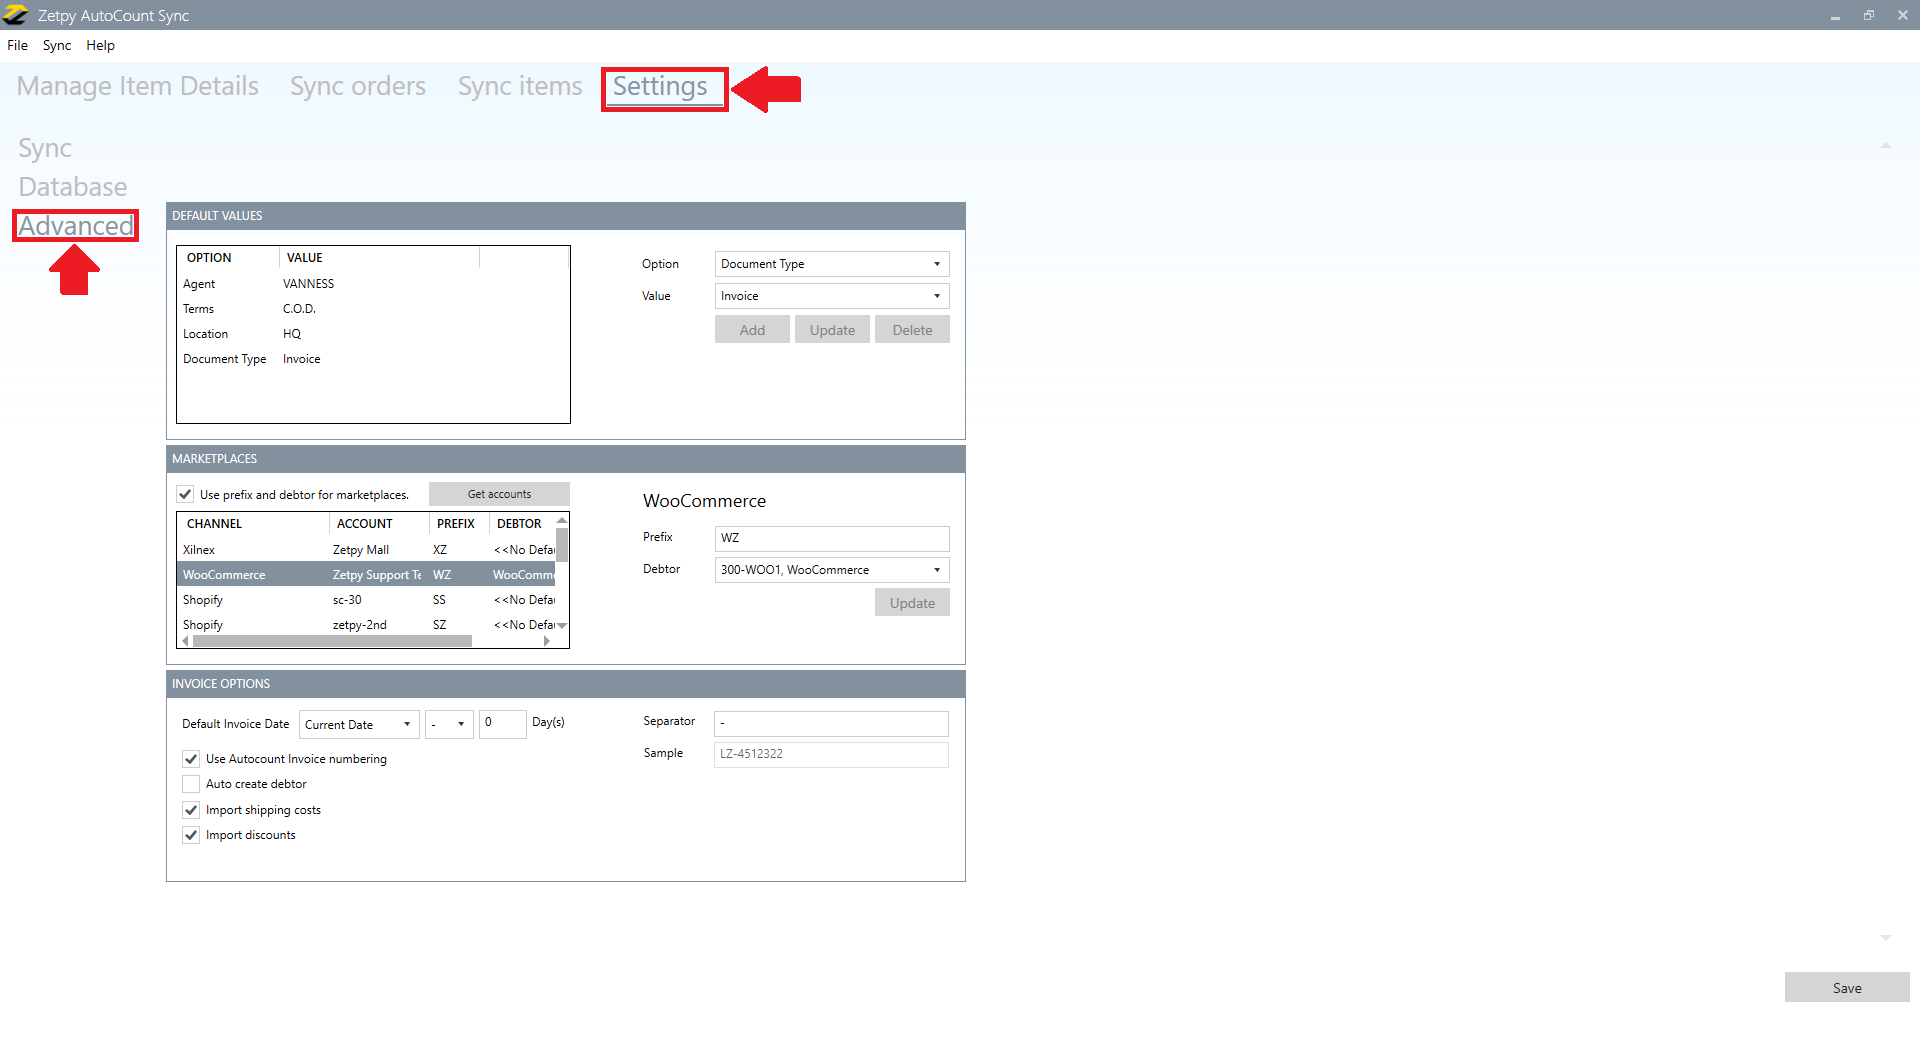
2) Click on the Settings.
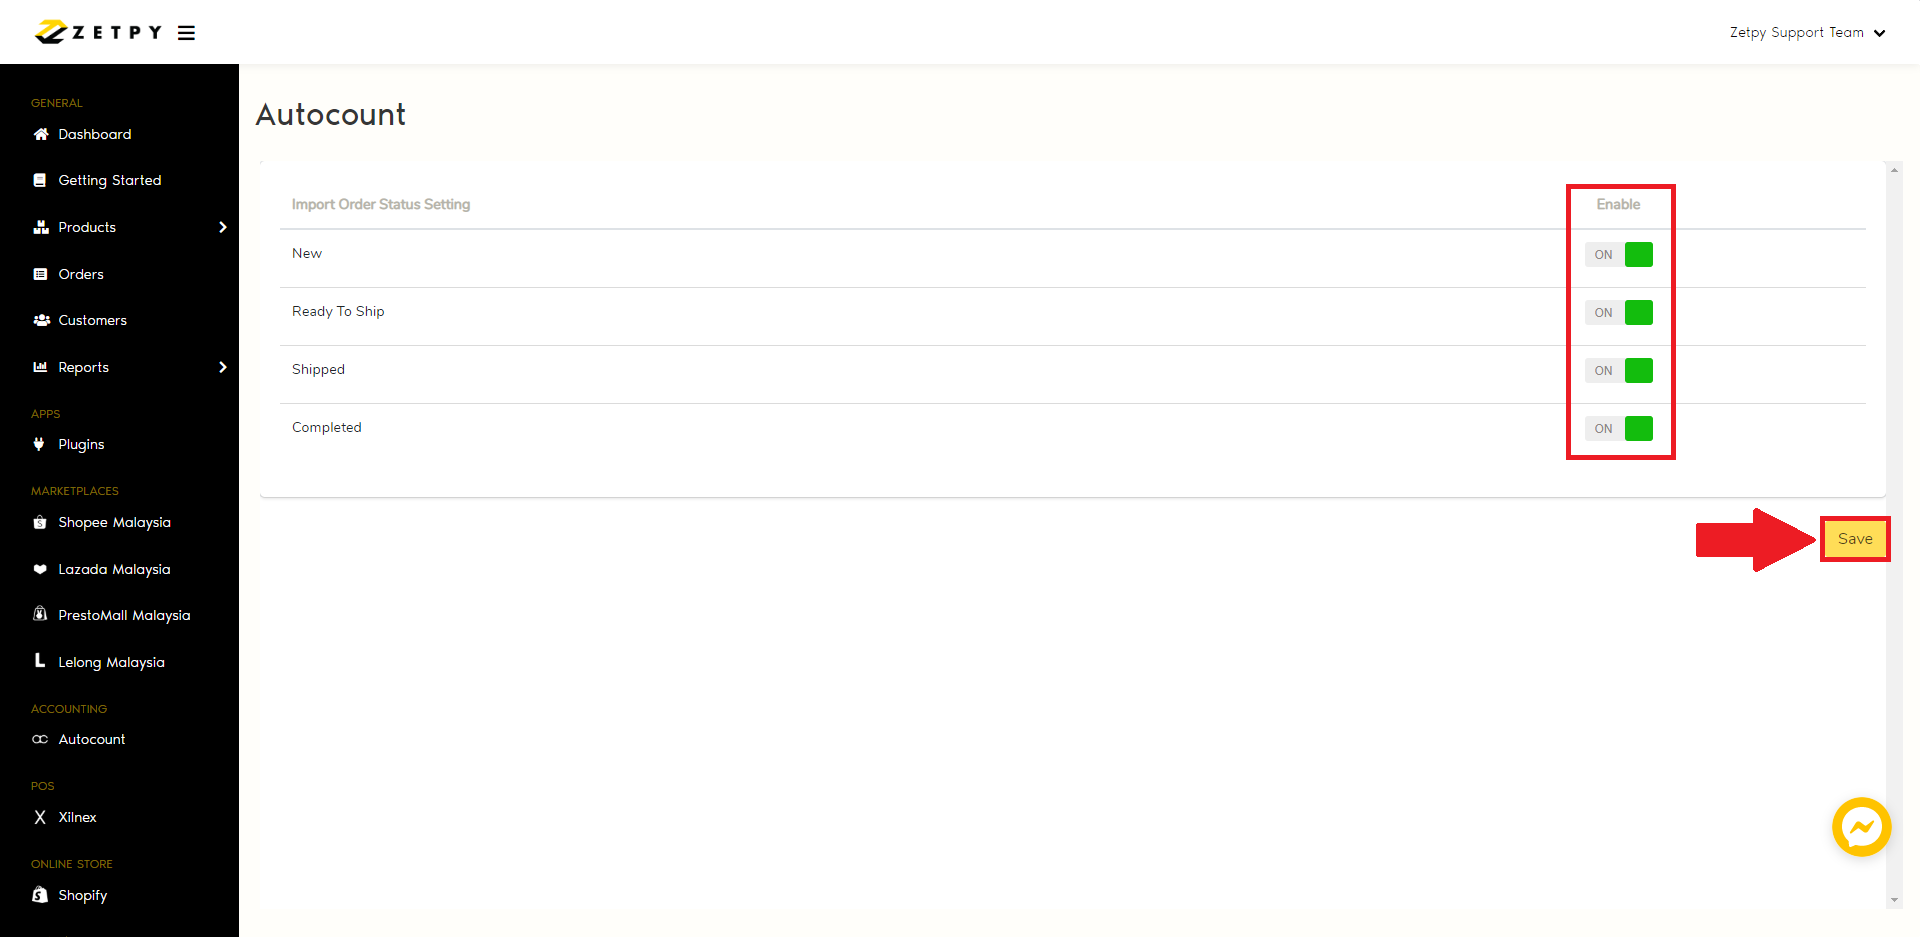
3) Kindly to click to enable button to enable which orders status you want to automatically show in the Autocount application sync.
NOTE: Example, If you just enable the Shipped status of the order, if the order under New, Ready to ship and Completed status it will not automatically show in Autocount application sync.
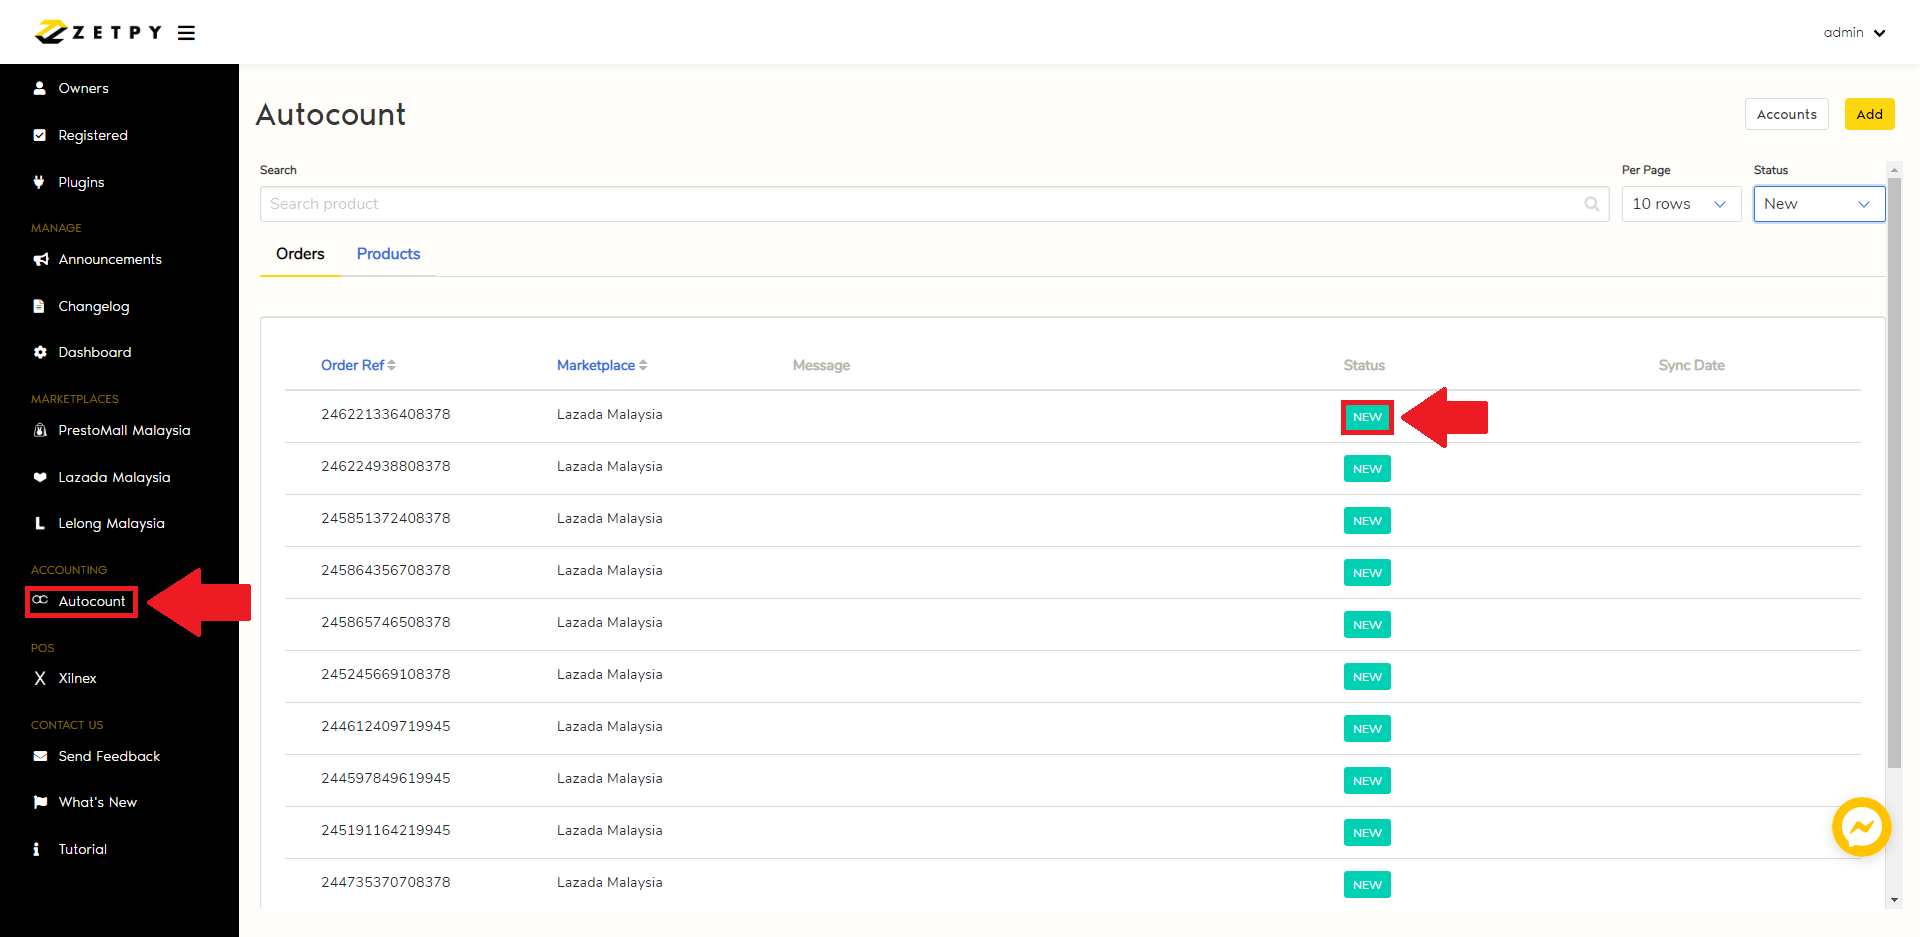
A) New Status
These orders did not yet imported to your Autocount system.
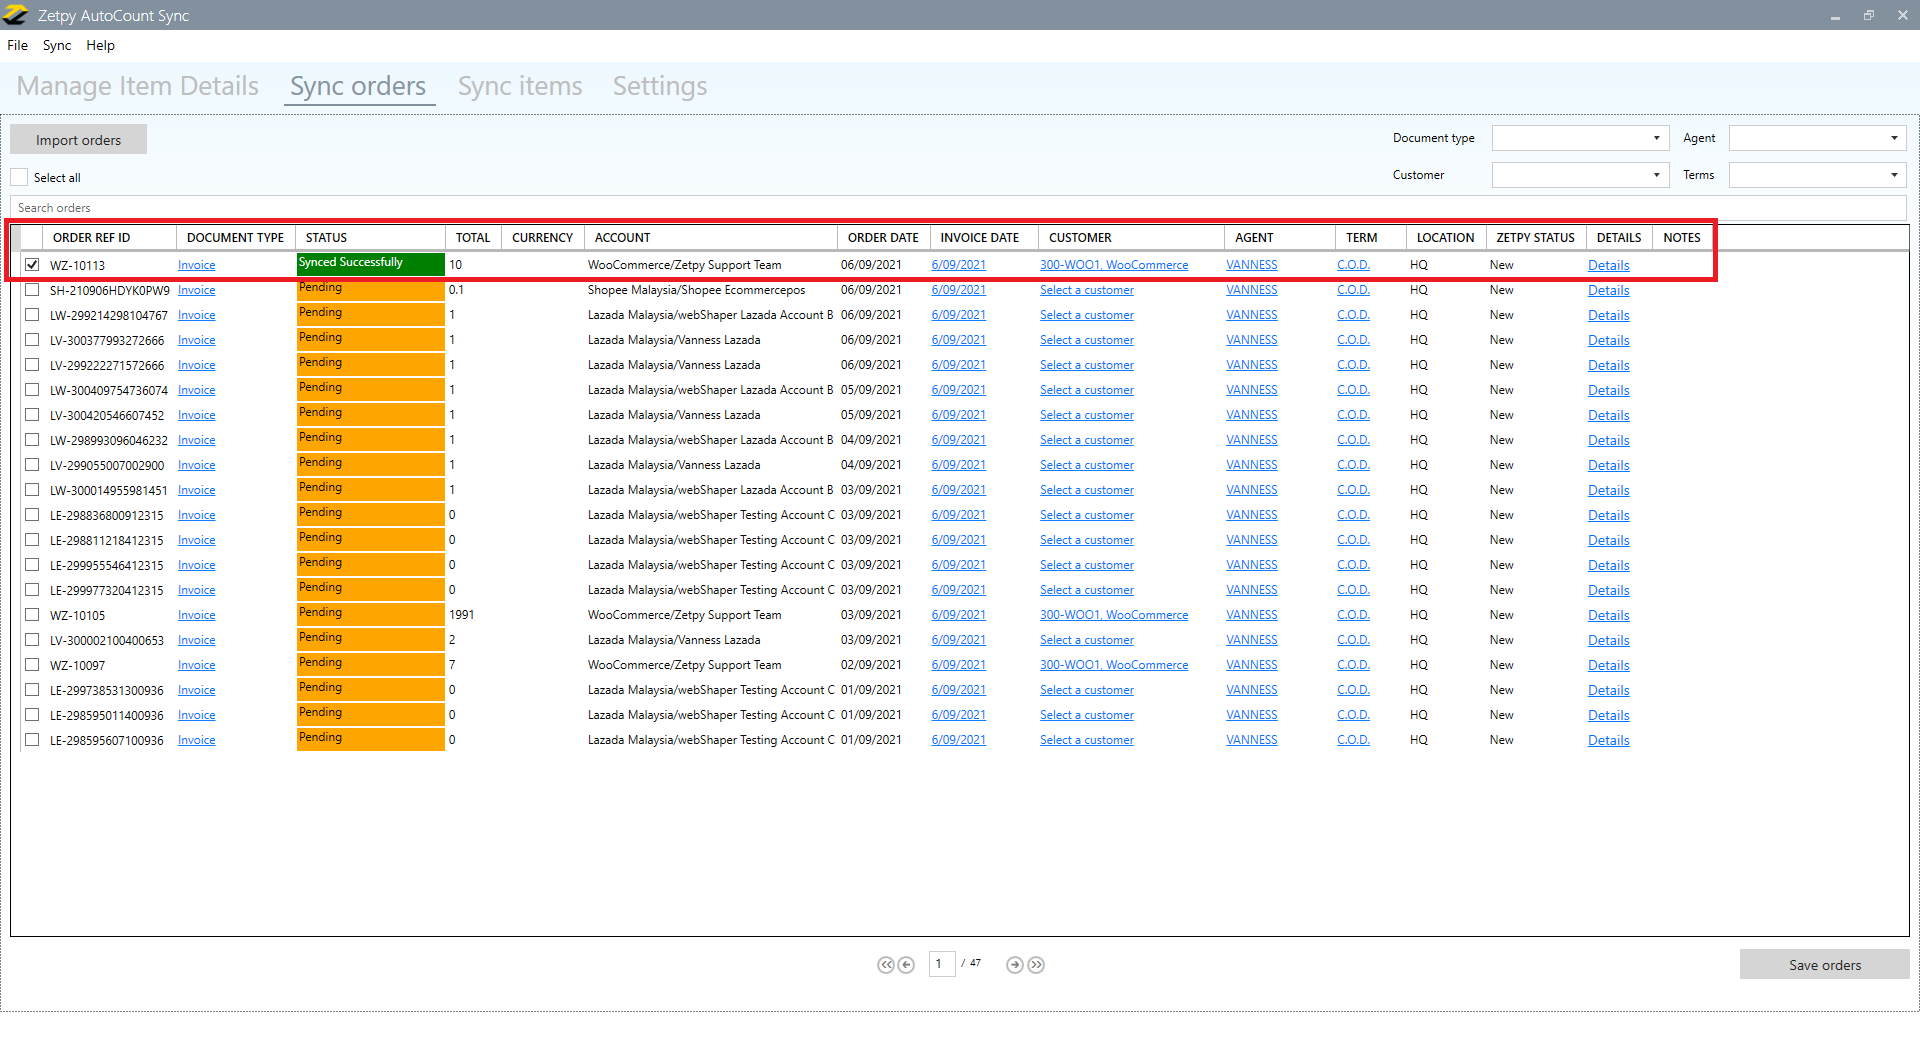
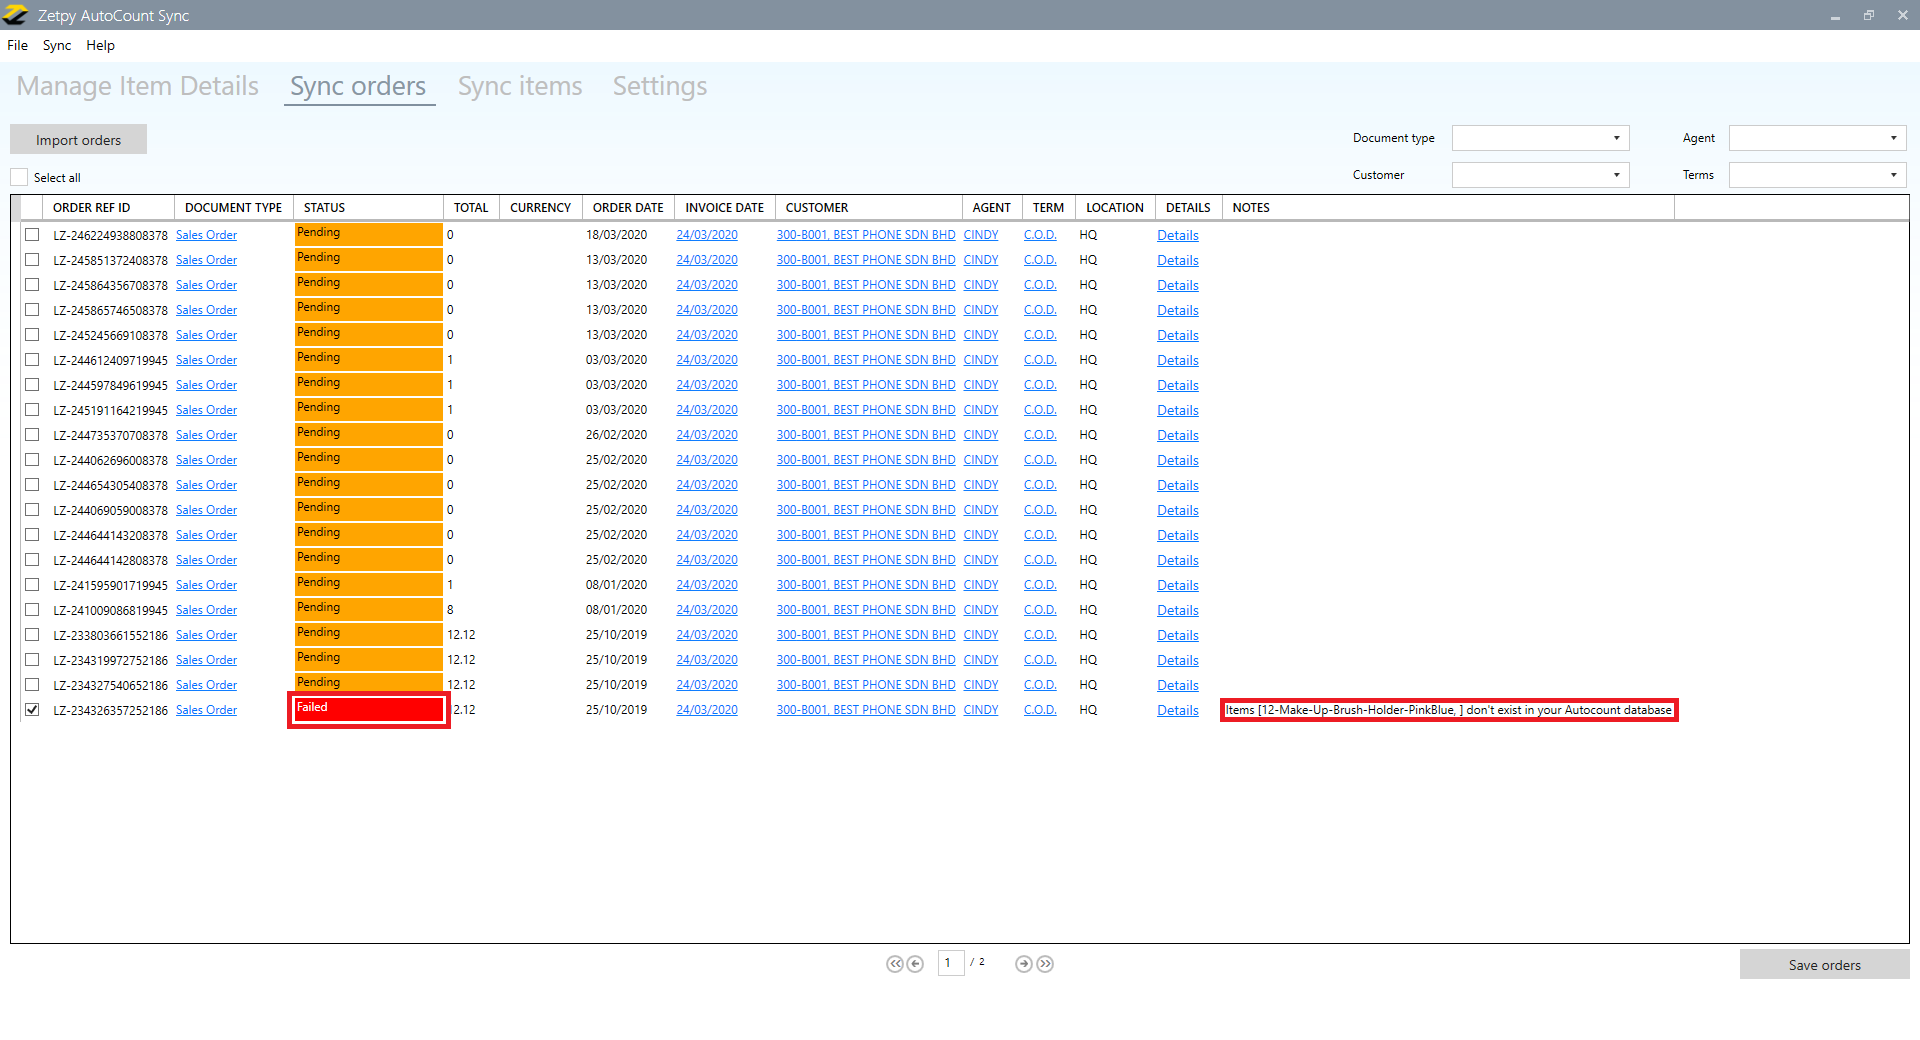
1. Go to Zetpy AutoCount accounting sync application.
2. Click Sync Orders.
3. Click Import Orders.
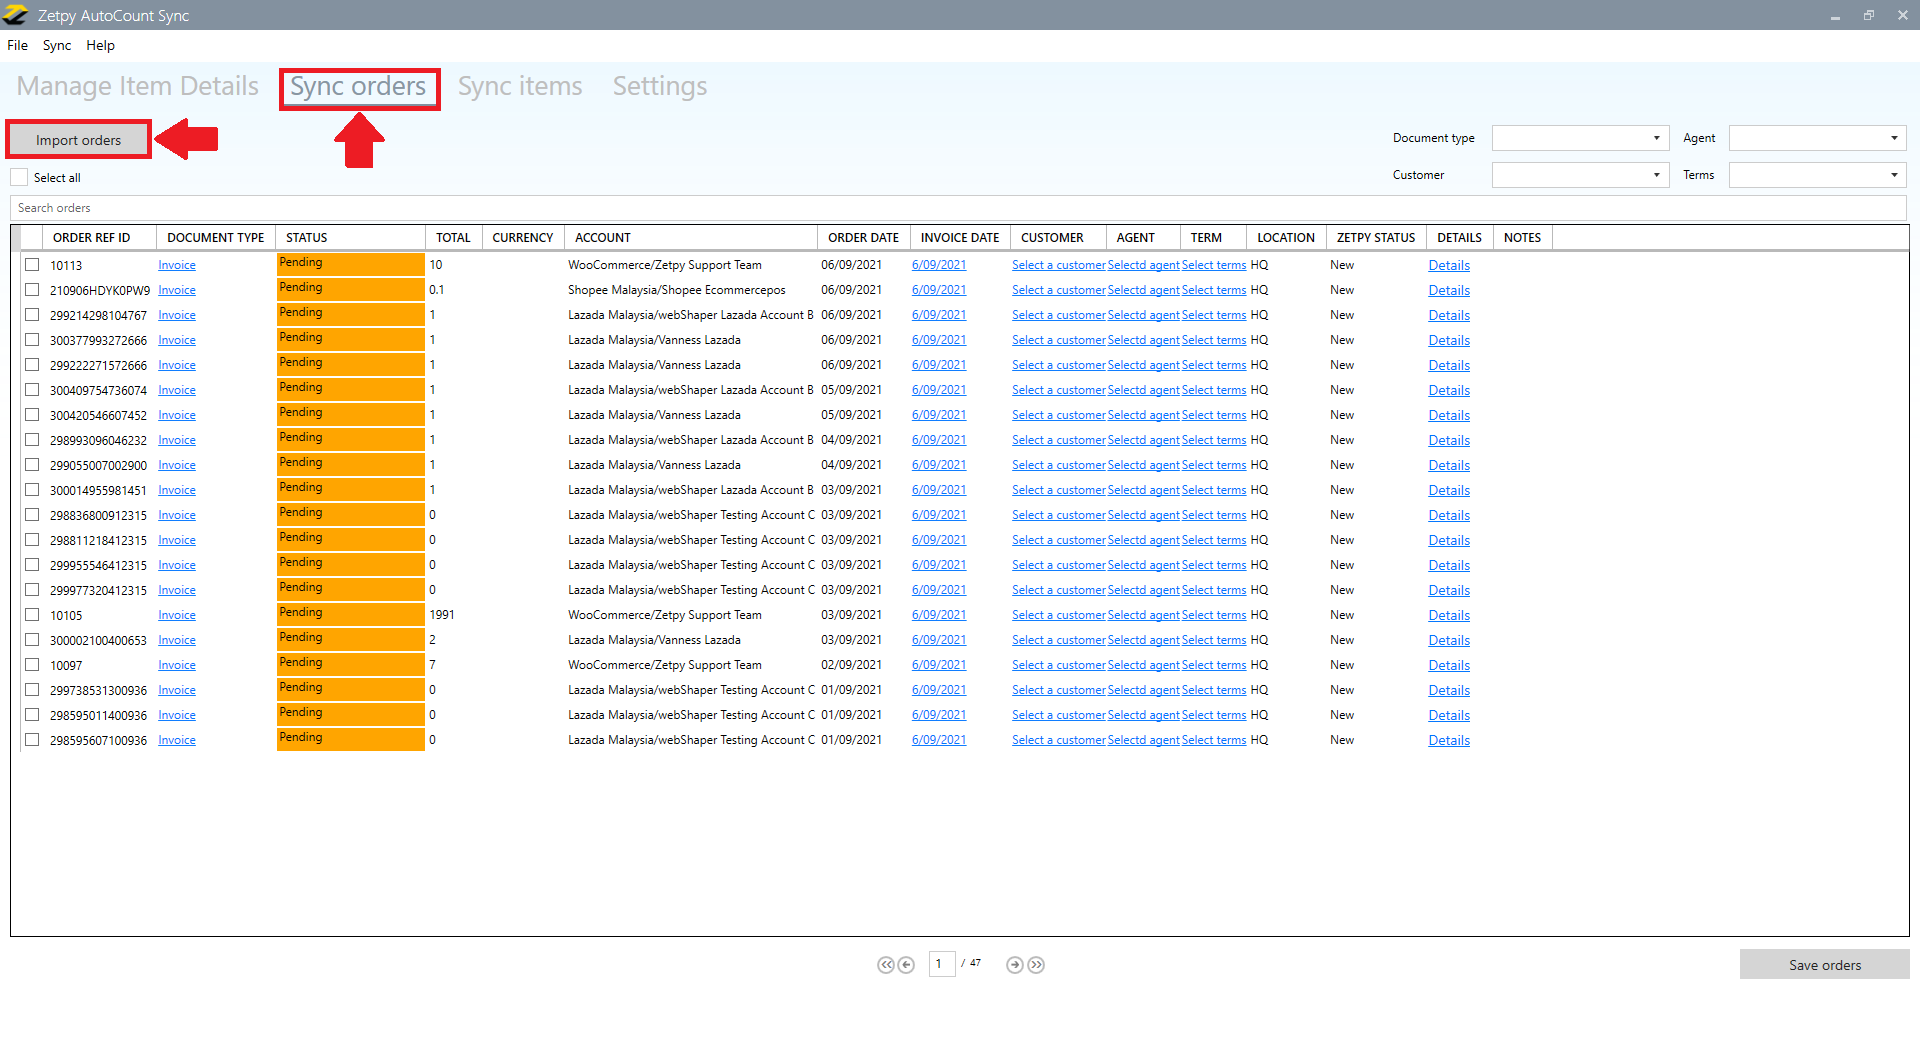
4. In the section below, you can change the details before import to Autocount system:
i) Document type = Cash Sales or Invoice or Sales Order

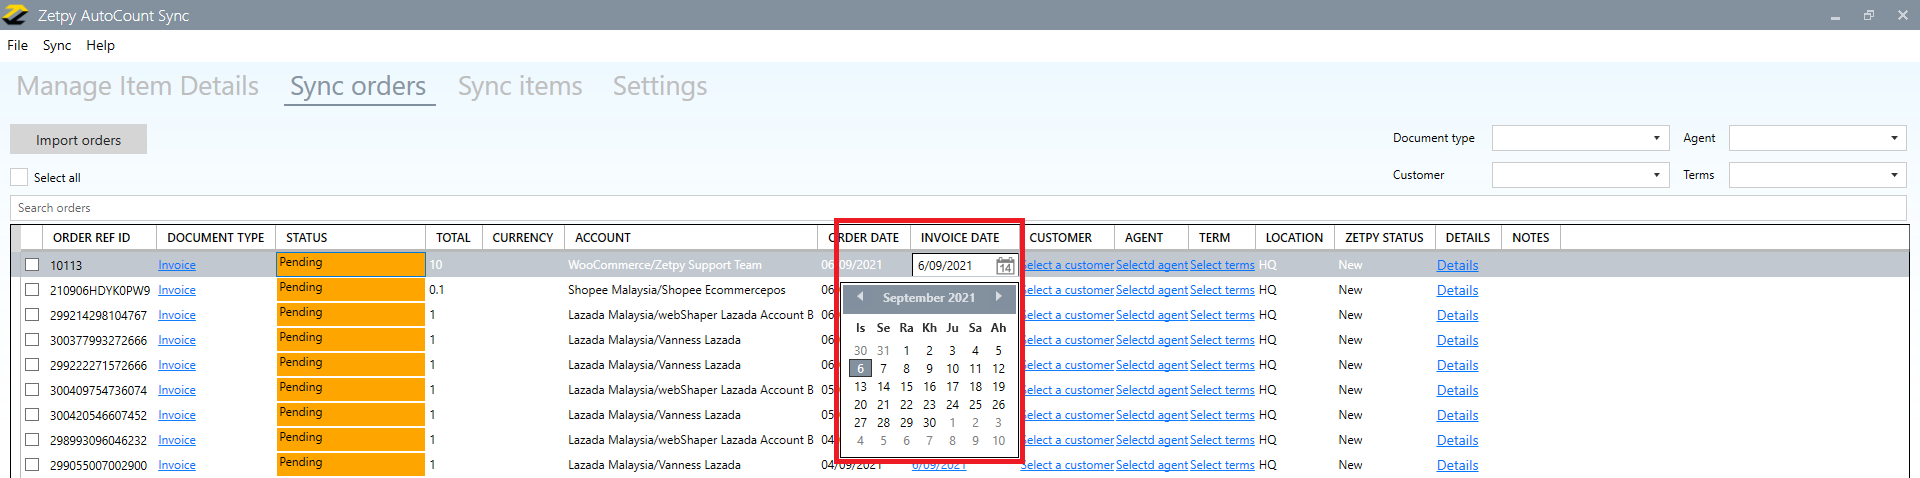
ii) Invoice Date = Re-select the date
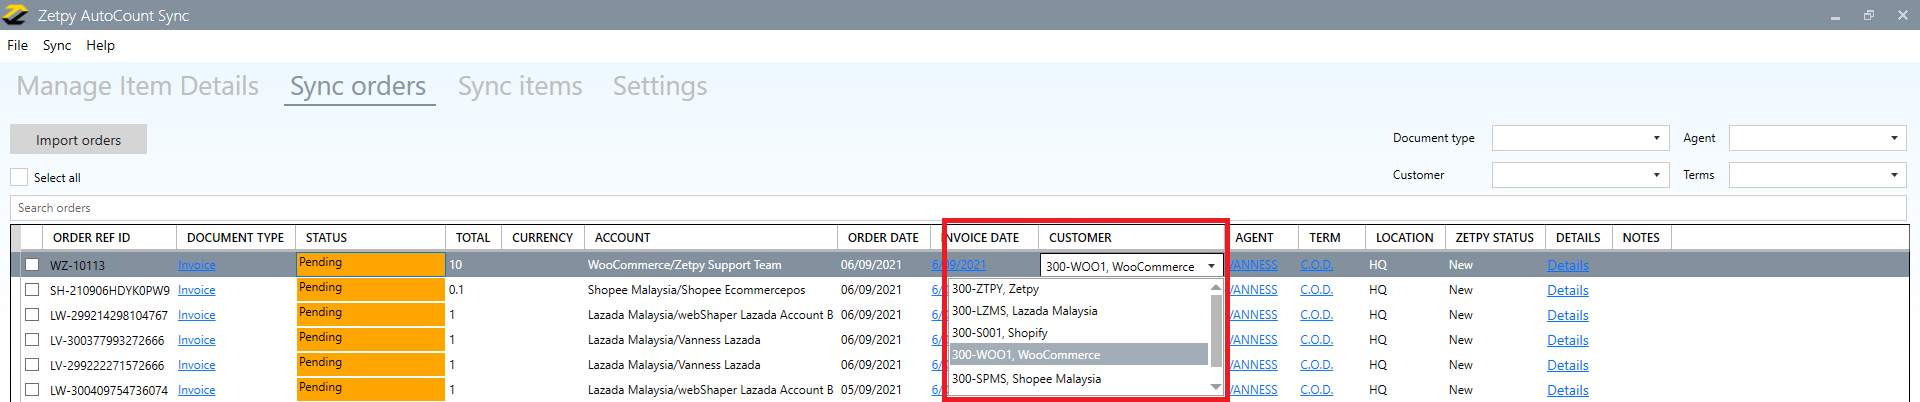
iii) Customer = Re-select the debtor
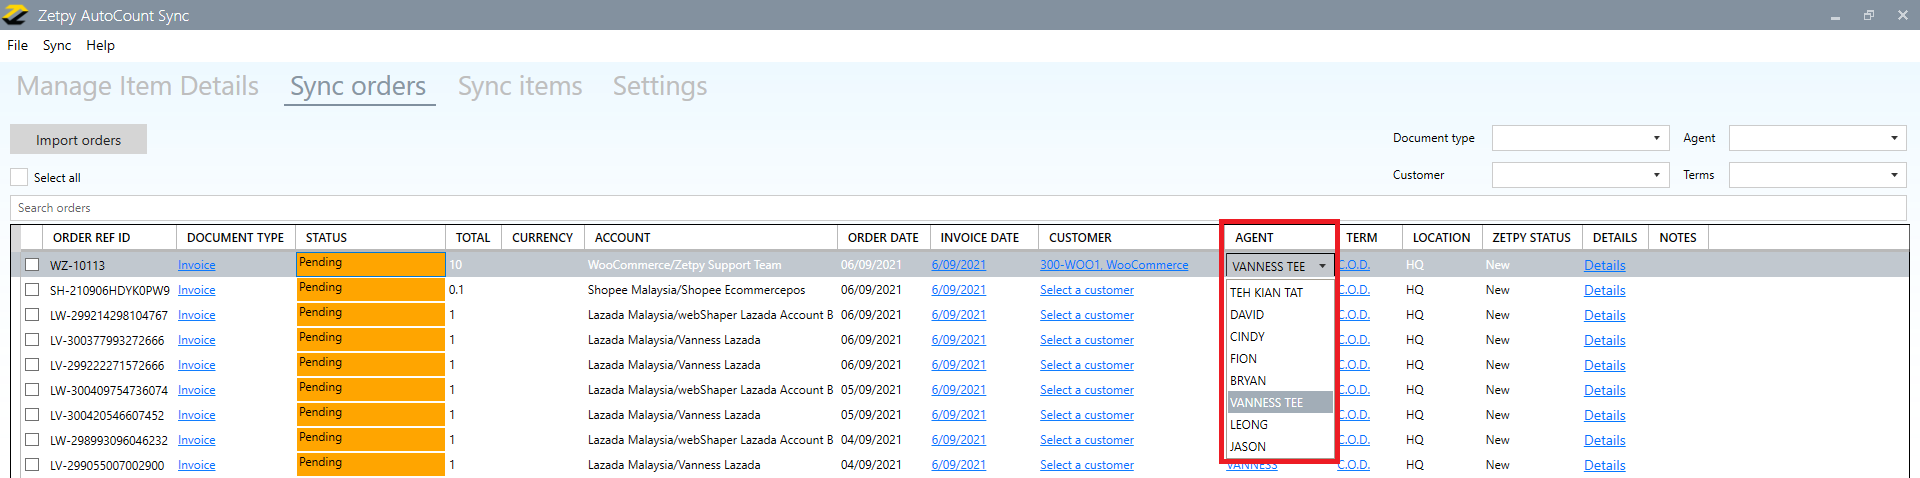
iv) Agent = Re-select the agent
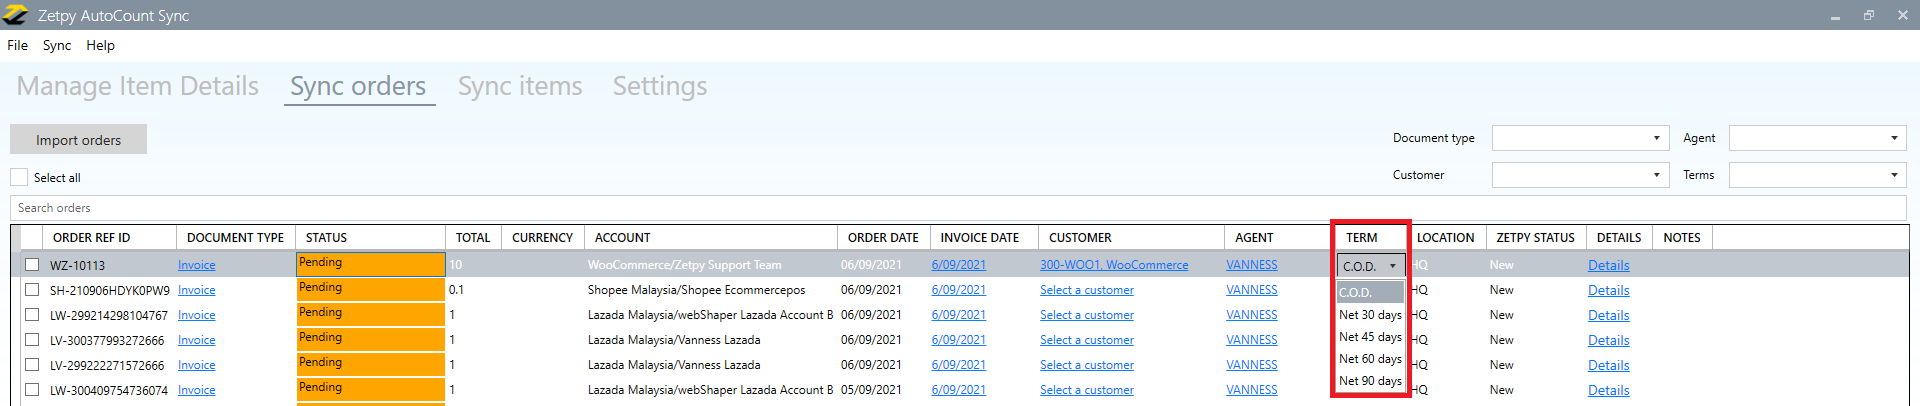
v) Term = Re-select the term
vi) Or you can ignore it to follow the settings based on the Default Values, Marketplaces and Invoice option in Setting on Advanced.
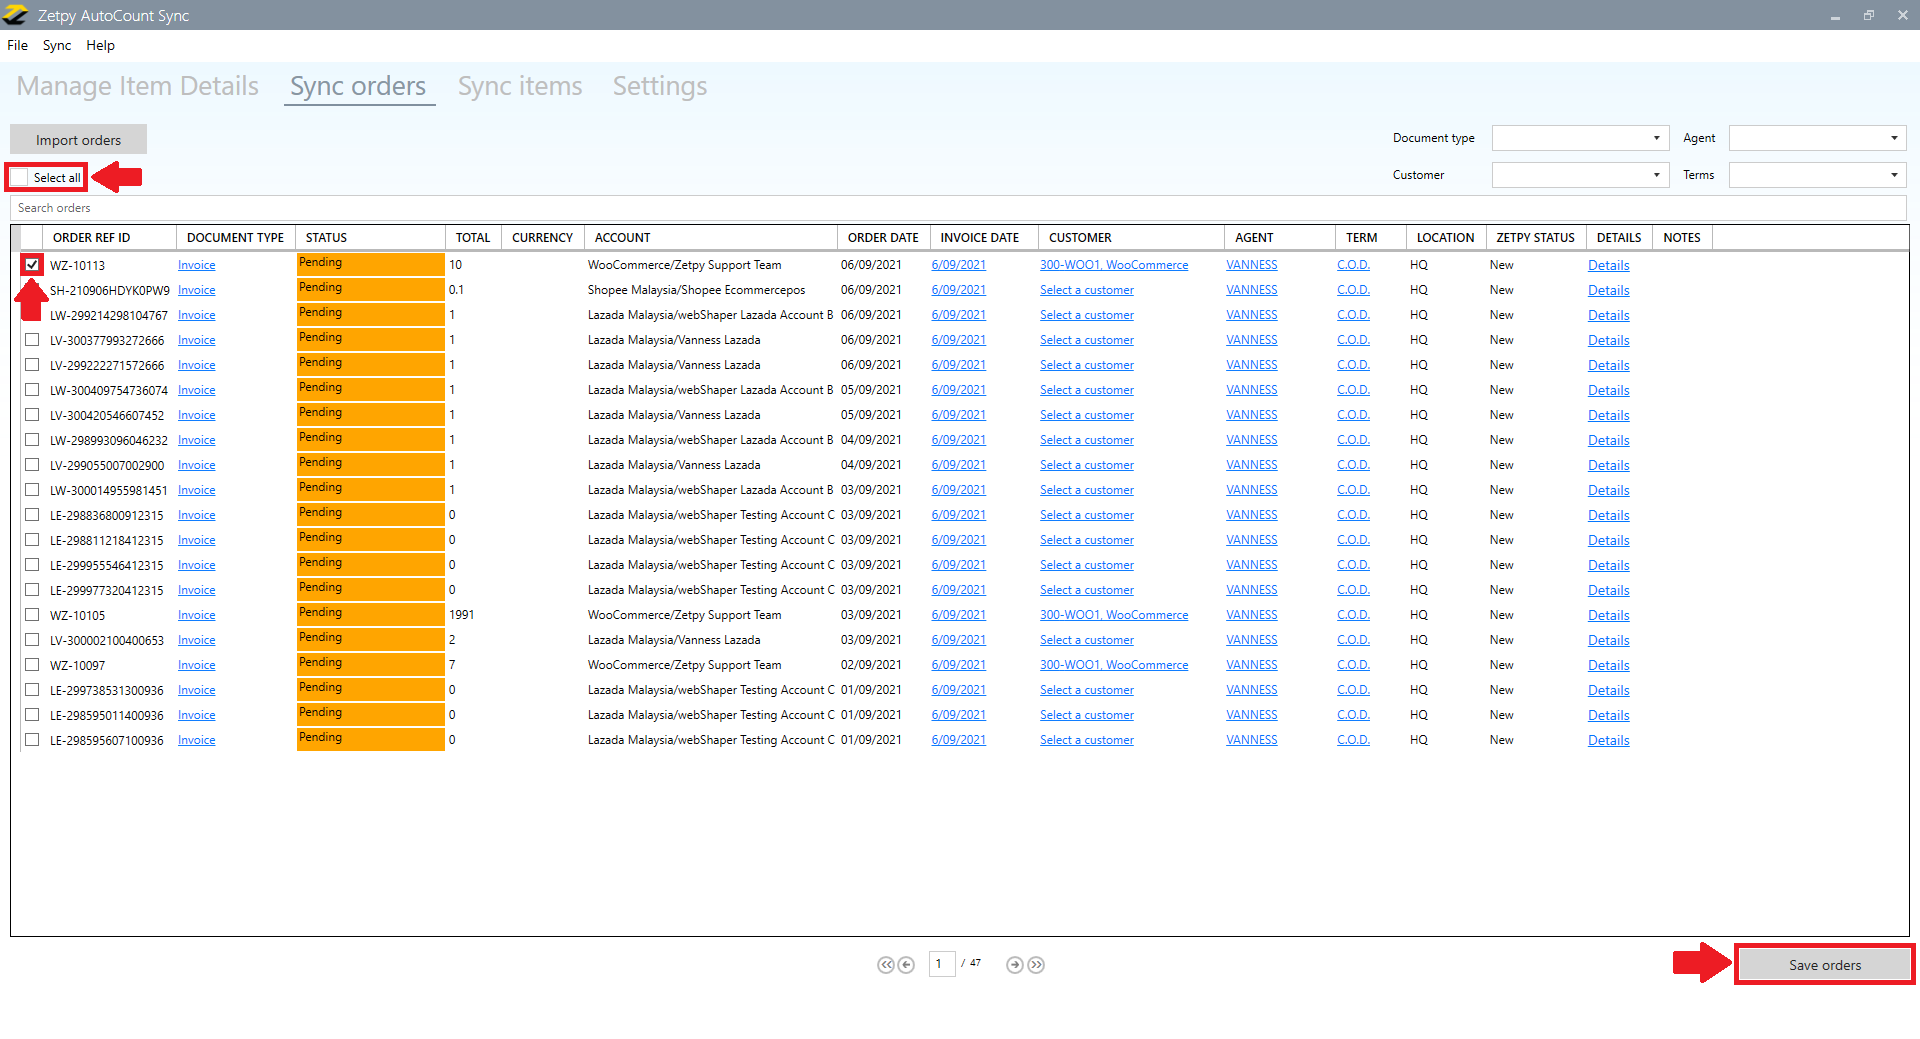
5. You can search order numbers,

or you can tick to Select All or tick one of orders.
6. Click the Save Orders button.
7. Then you can see your order status change from Pending to Synced Successfully.
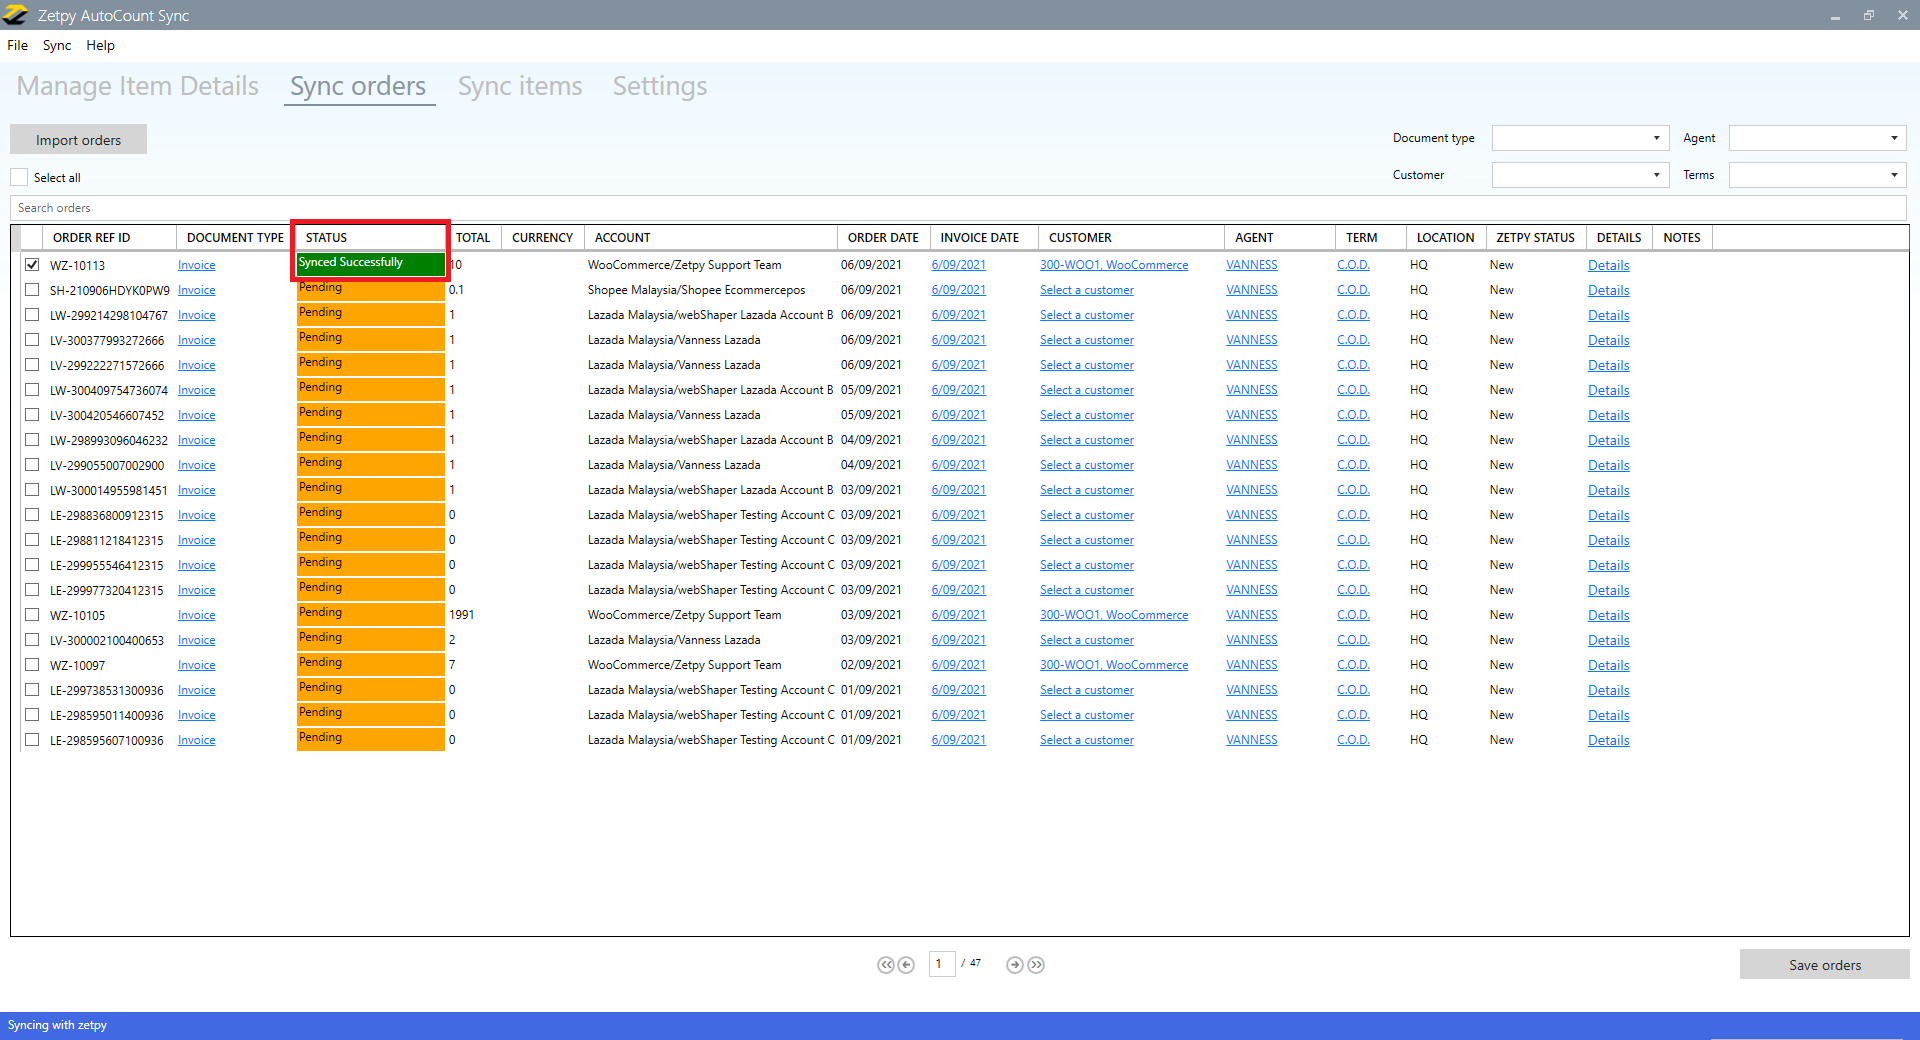
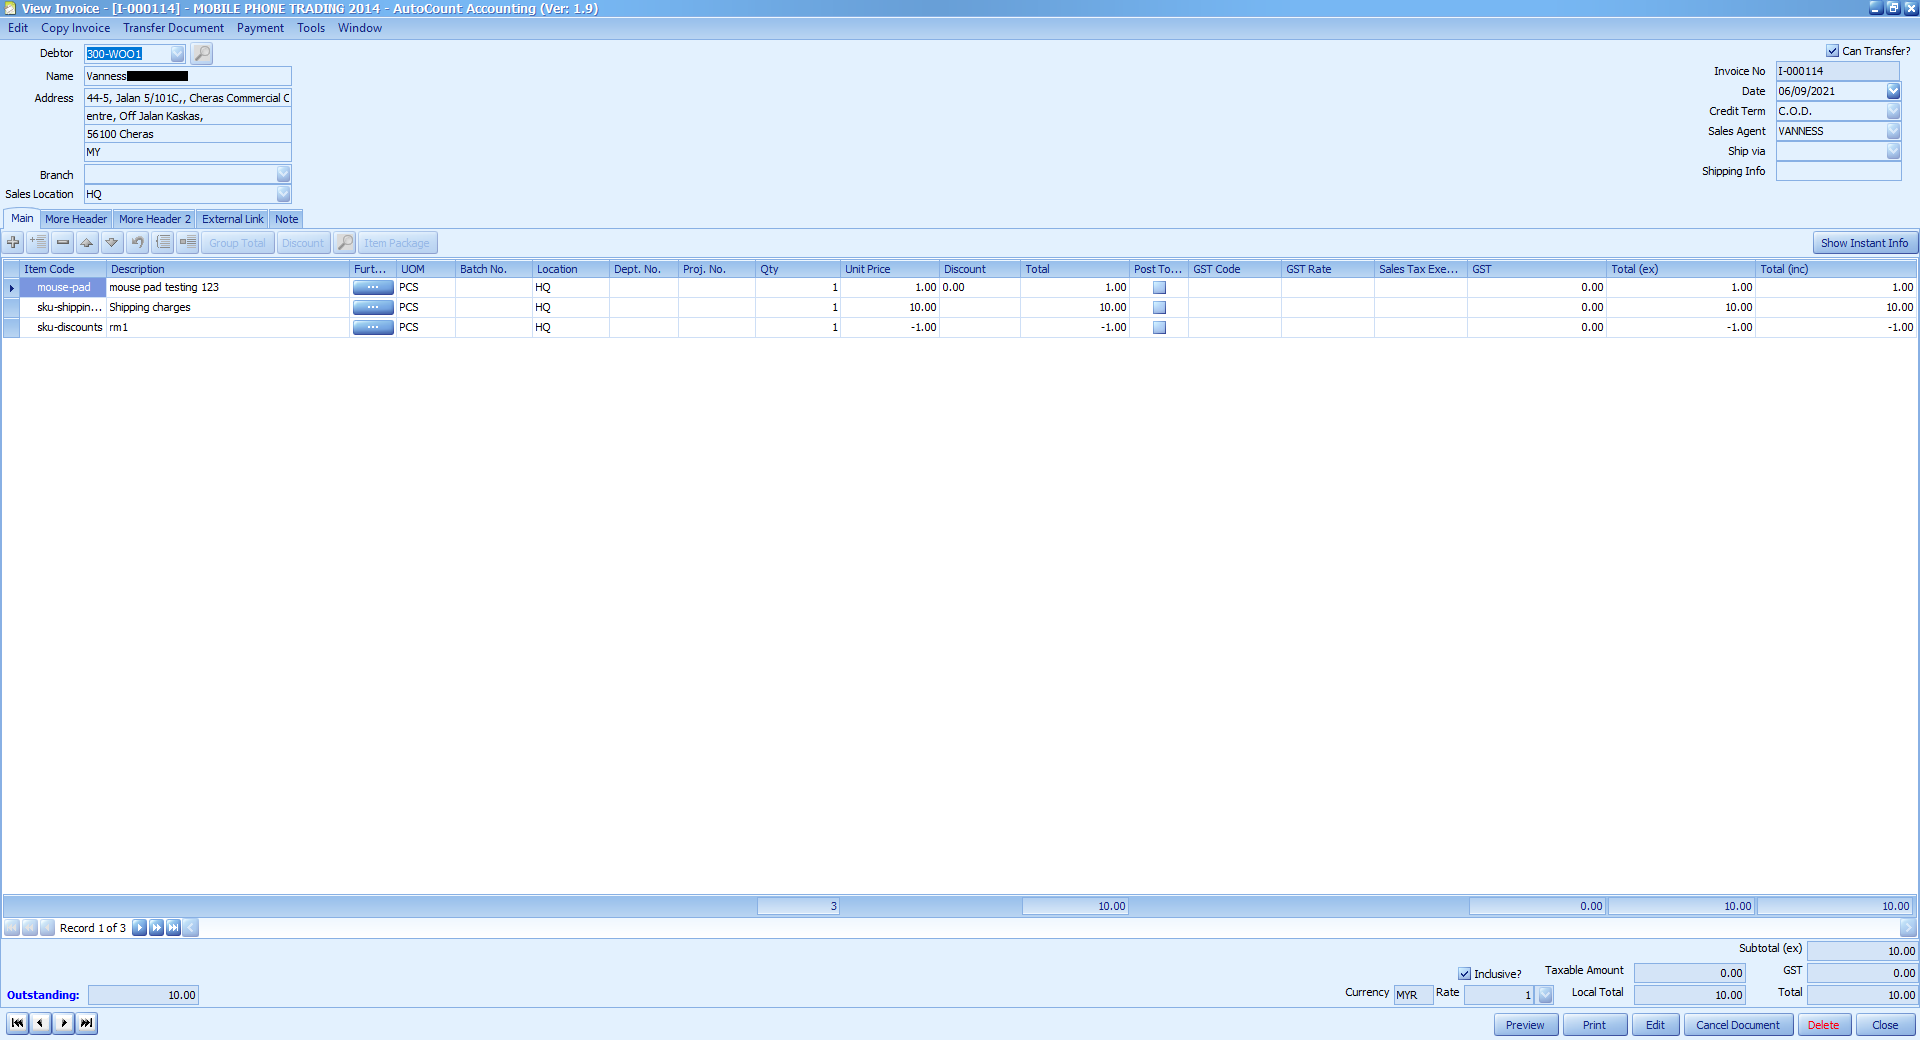
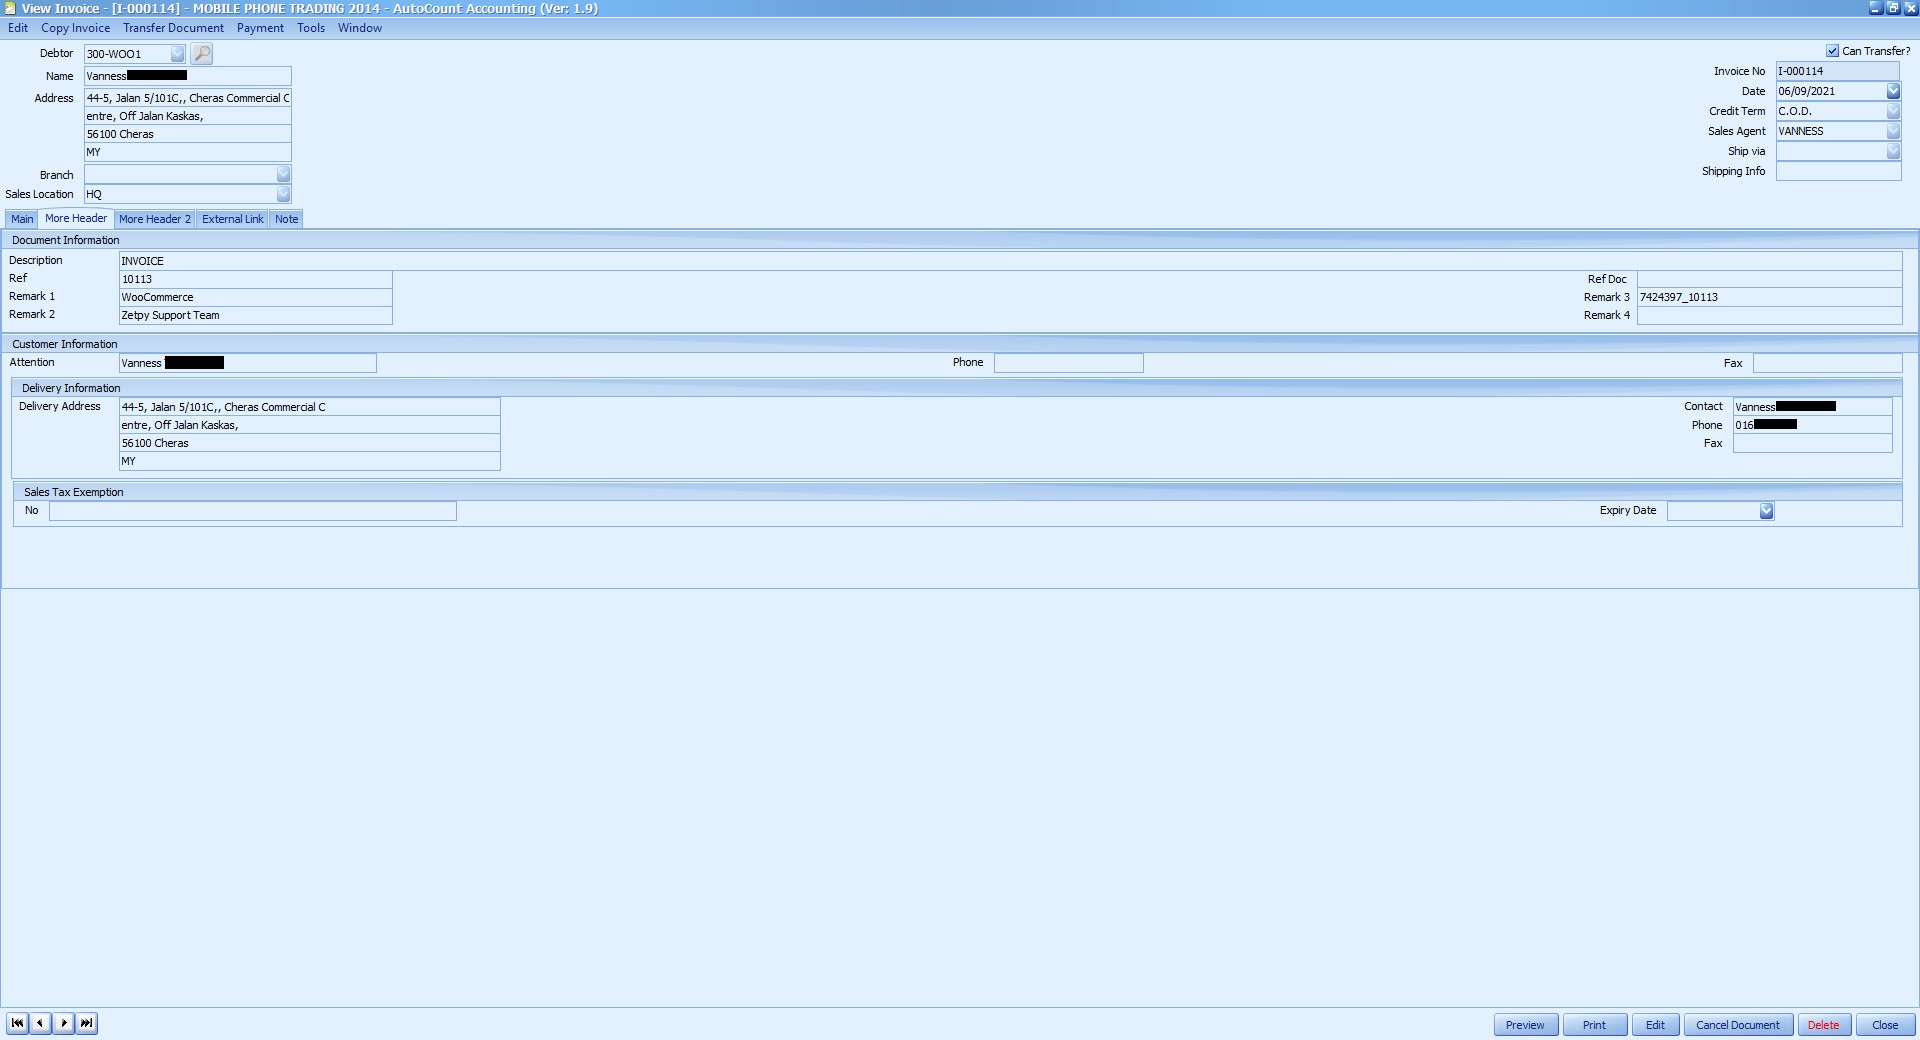
Then the order will be created on your Autocount system.

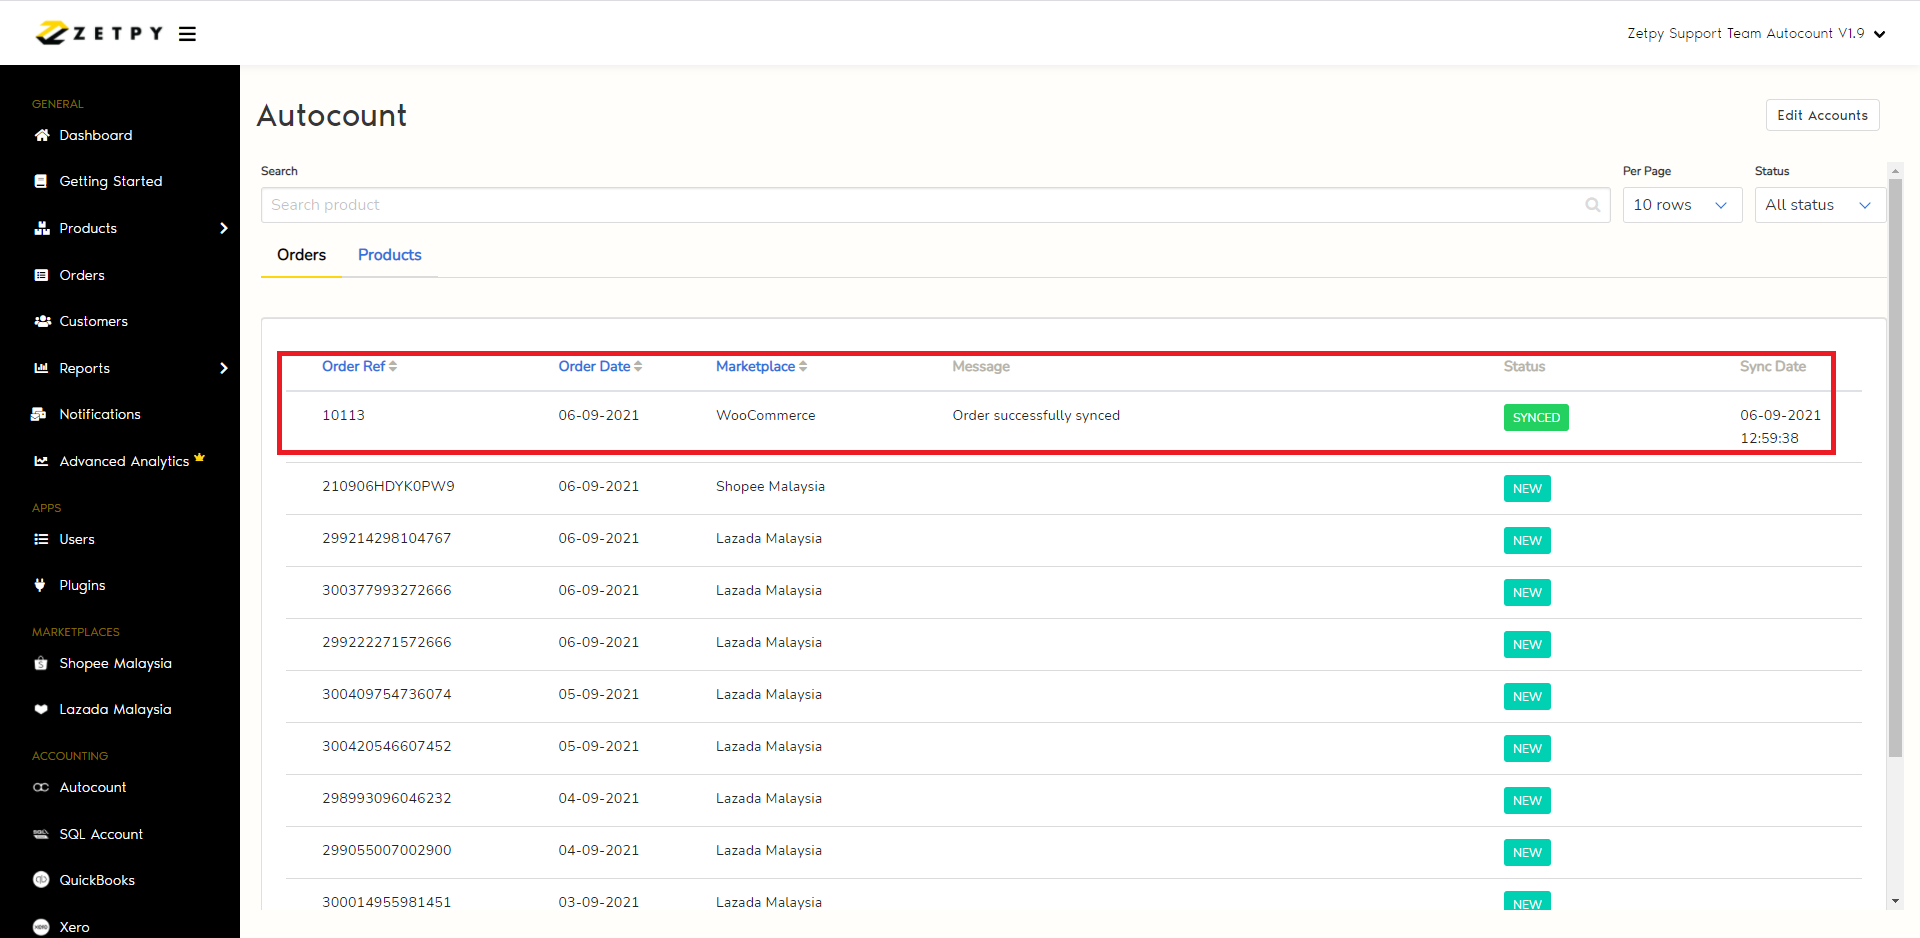
B) Synced Status
These orders are already synced to the Autocount system.
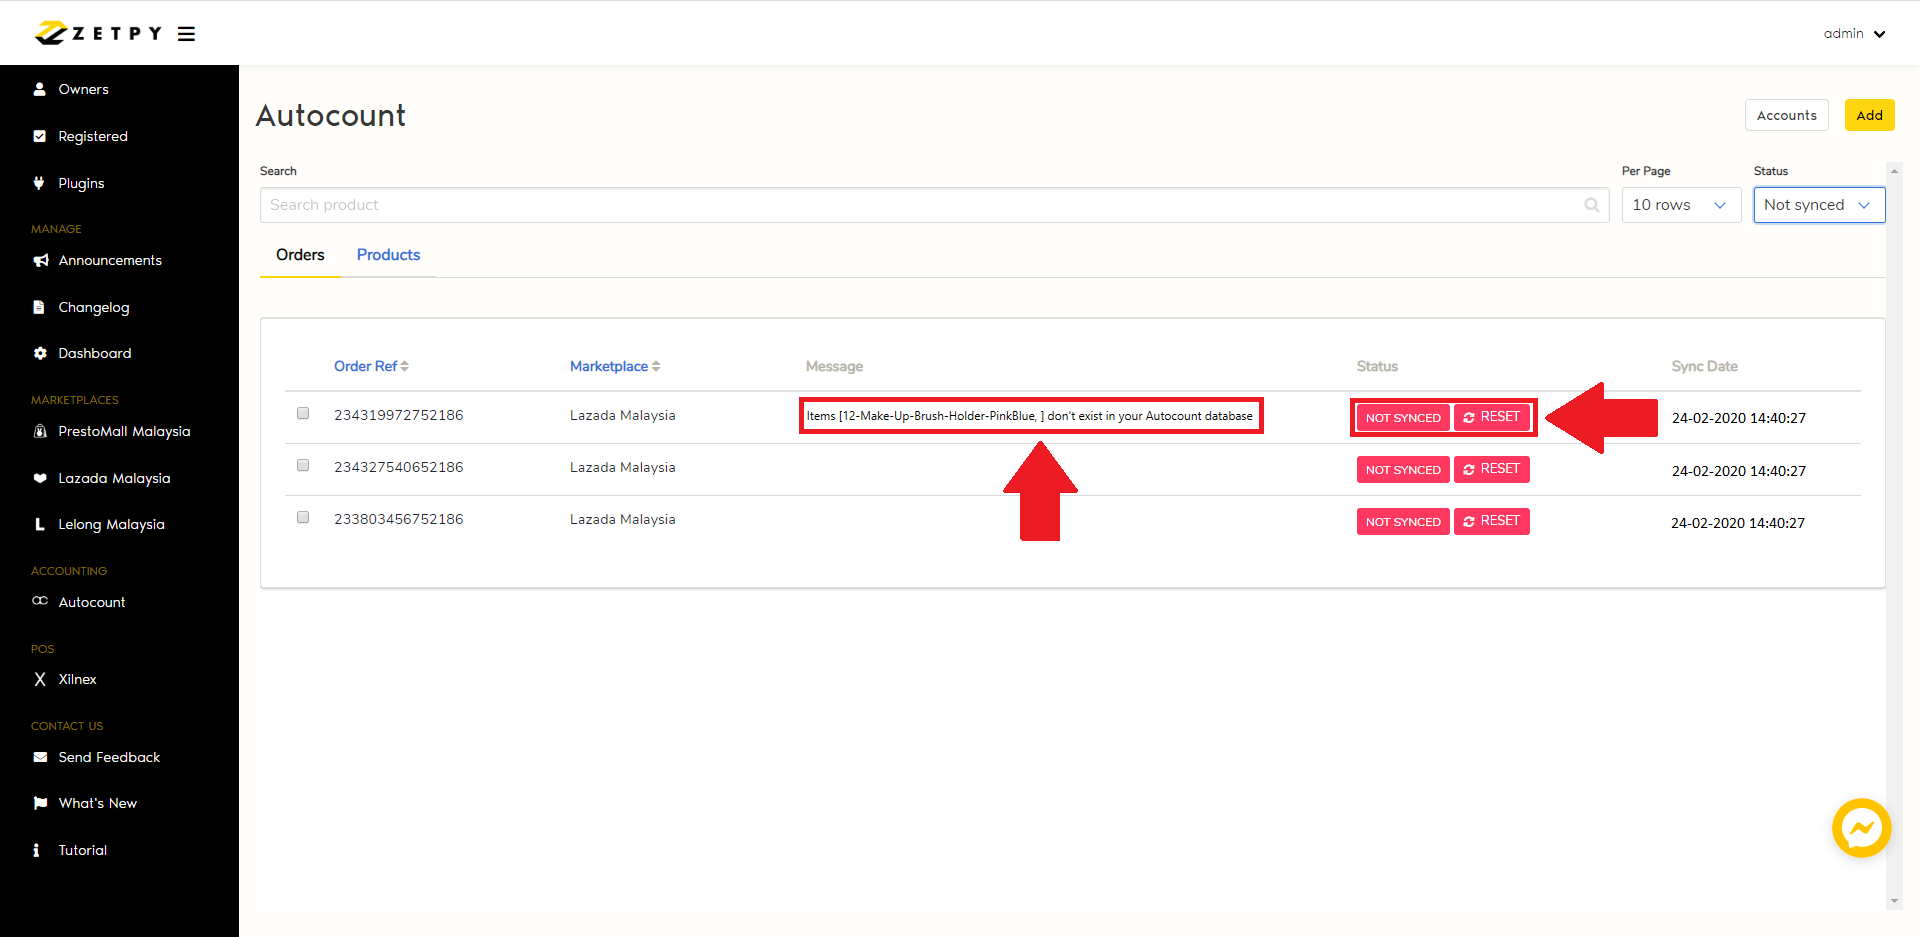
C) Not Synced Status
There could be some issues that will cause not being able to import the order to the Autocount system.
You can drop us an email at support@zetpy.com to request assistance.
If you have any issues or questions, please drop us an email at support@zetpy.com