Setup sync orders
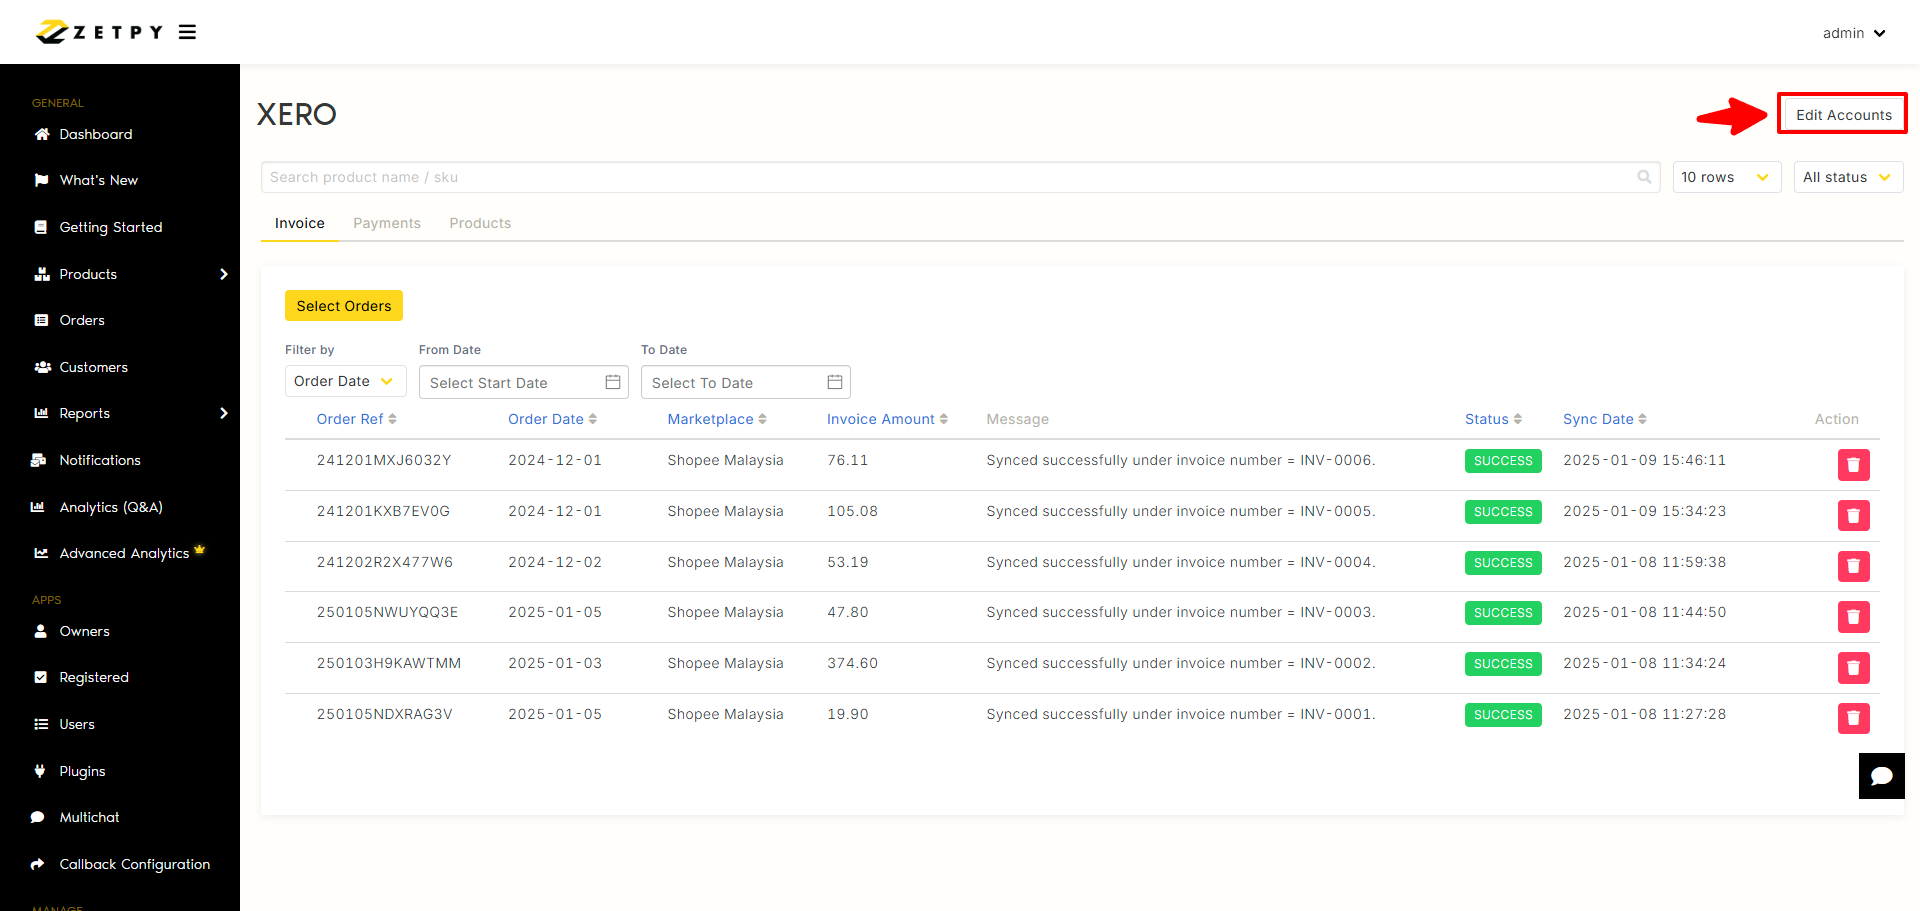
1. Go to Xero plugin.
2. Click on Edit Accounts.
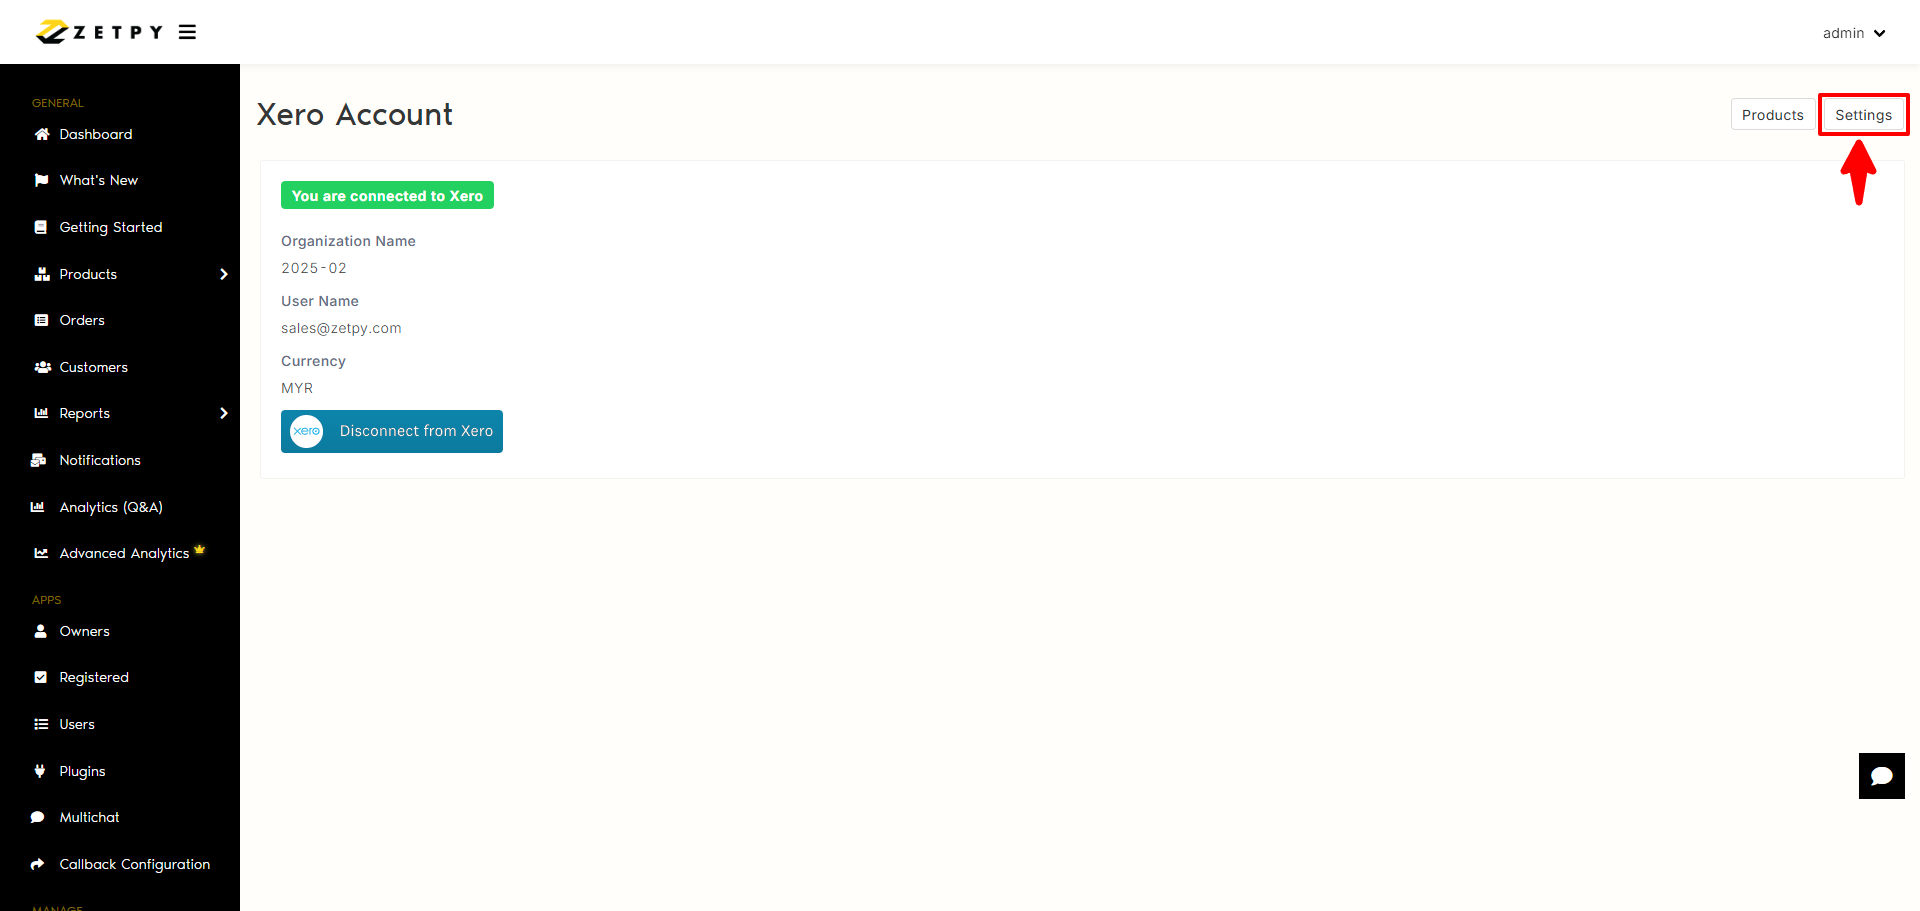
3. Click on Settings.
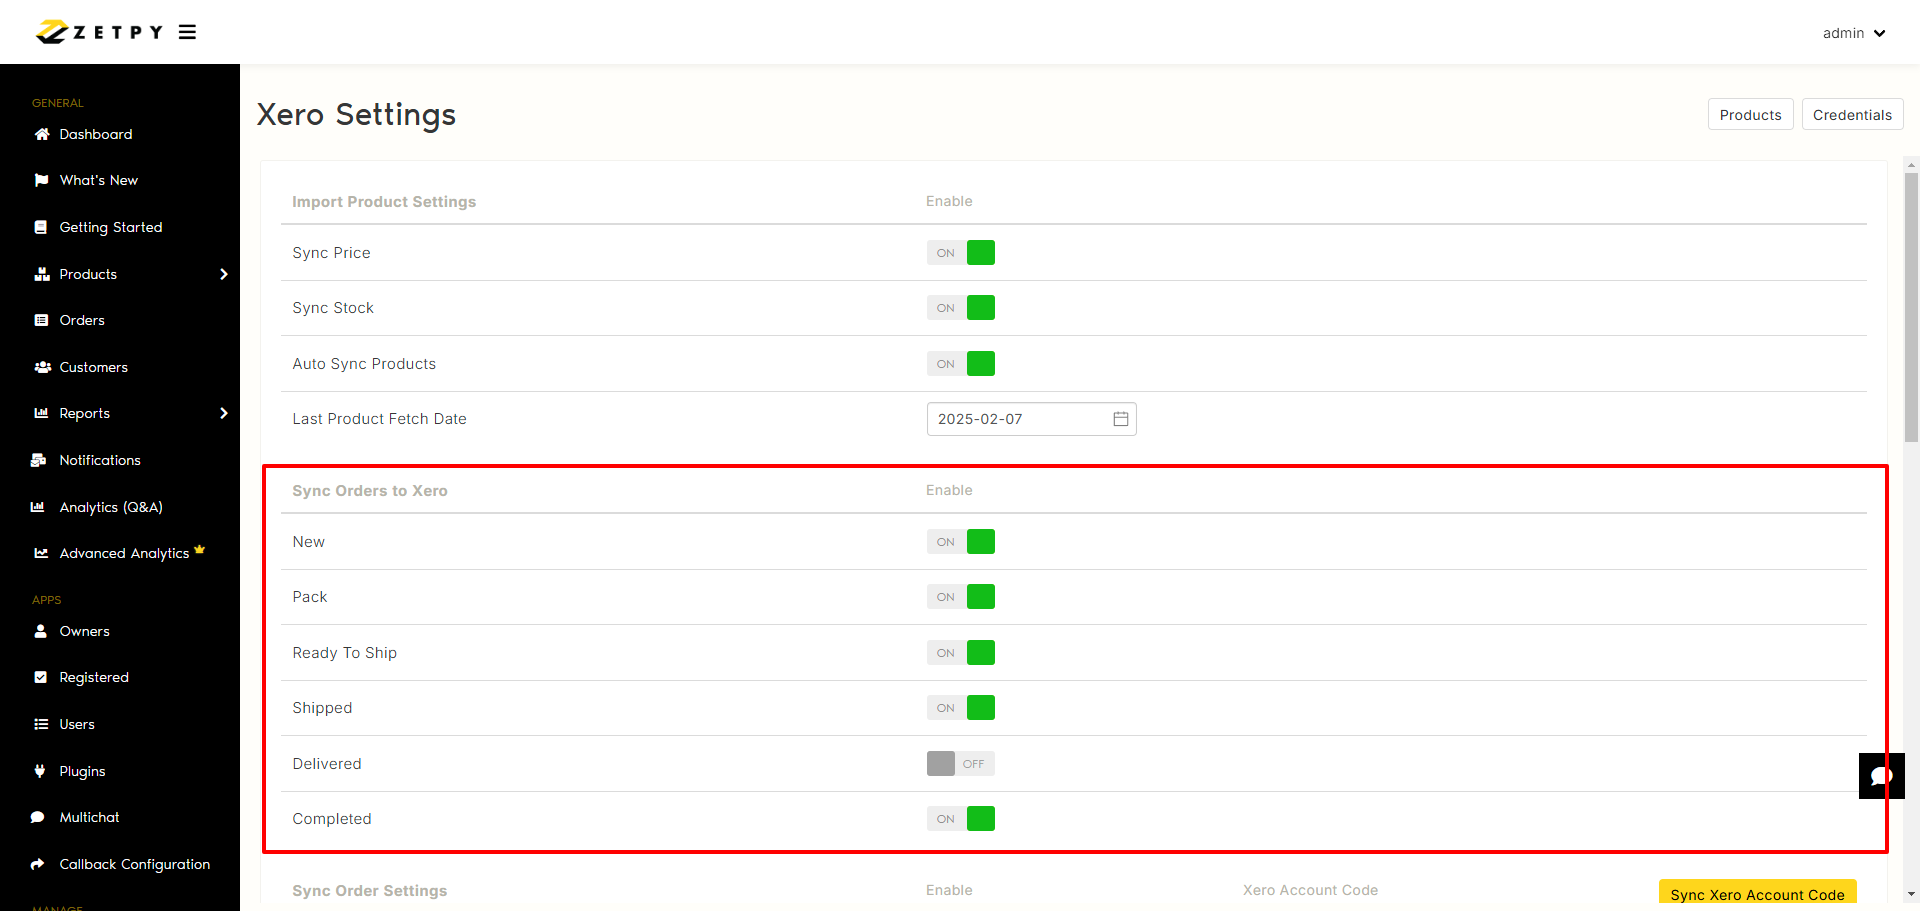
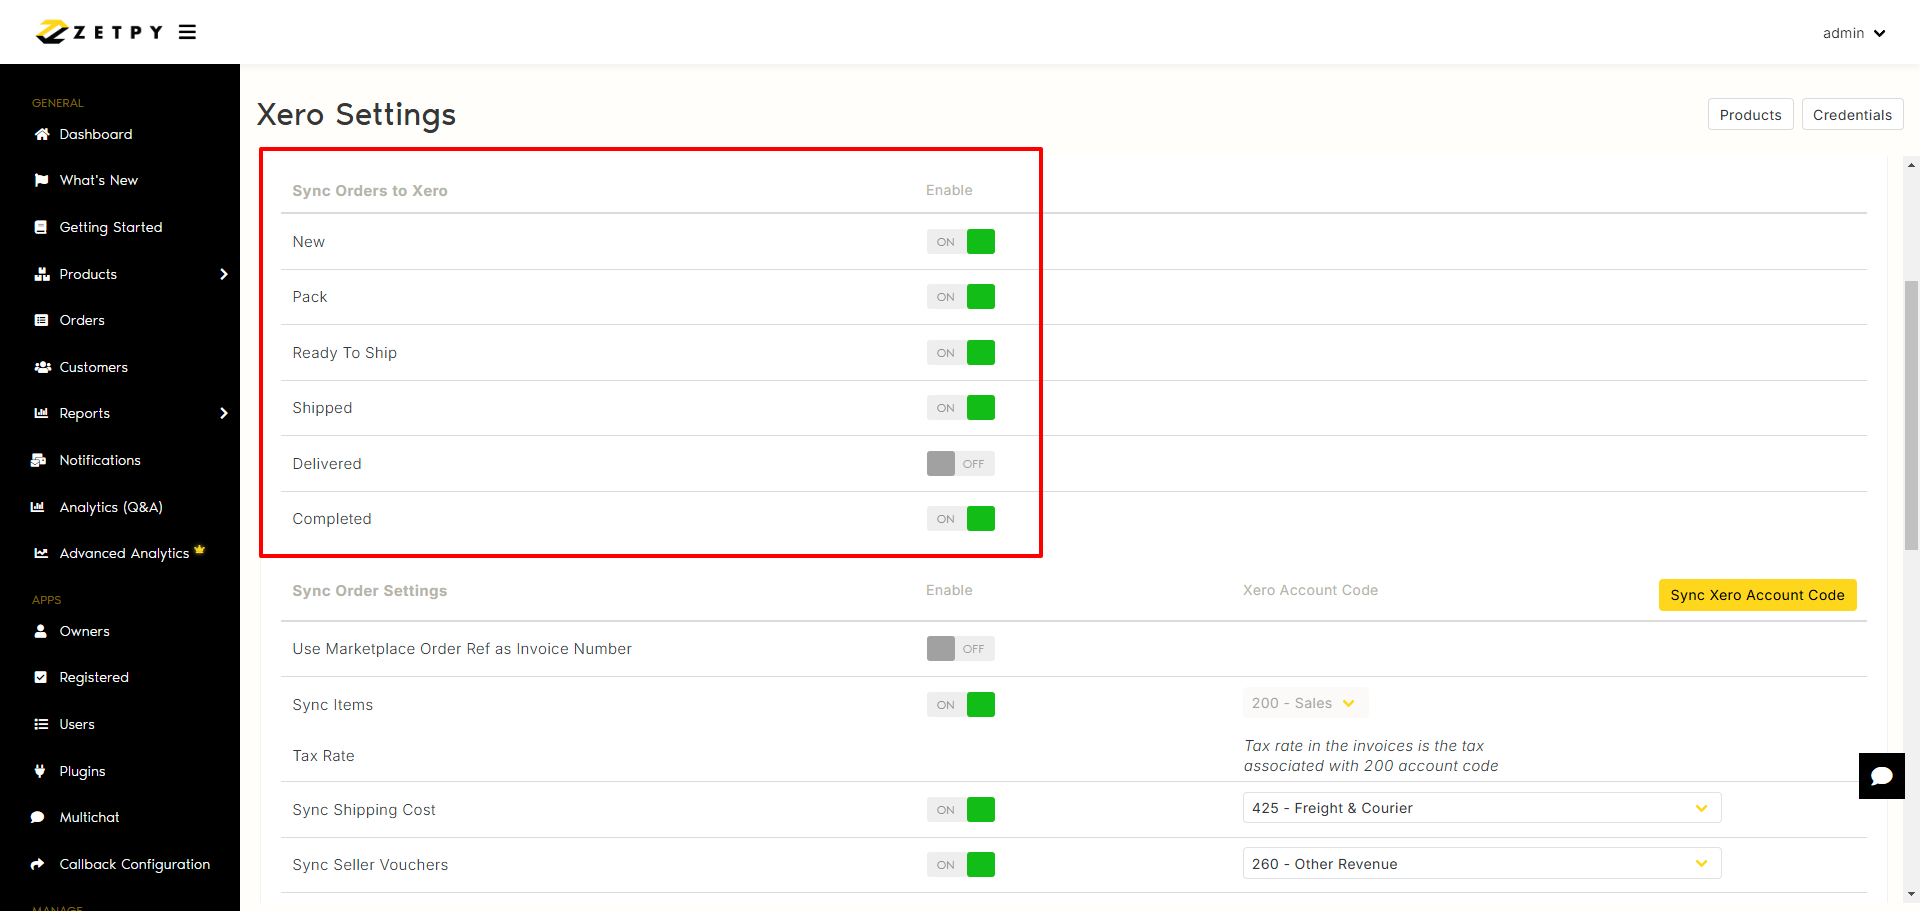
(A) Import Order Status Settings
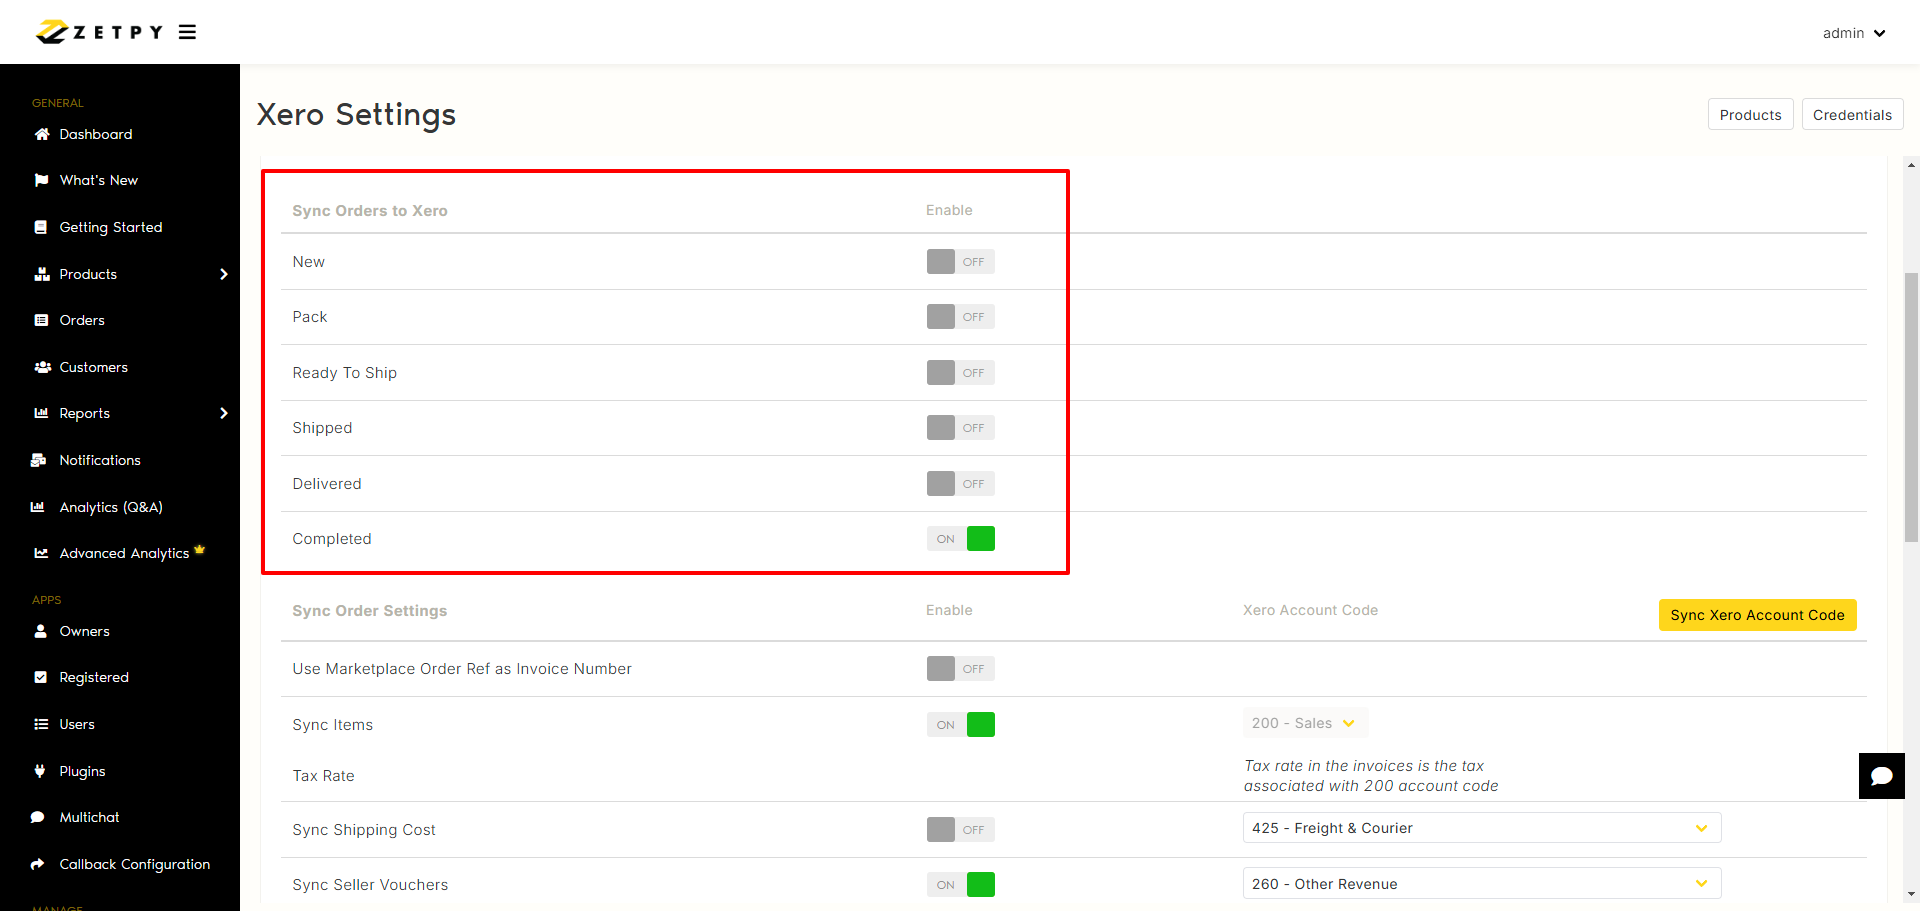
1. For your information, on Sync Orders to Xero, kindly click Enable button to enable the status of the orders you want to automatically show in the sync order lists.
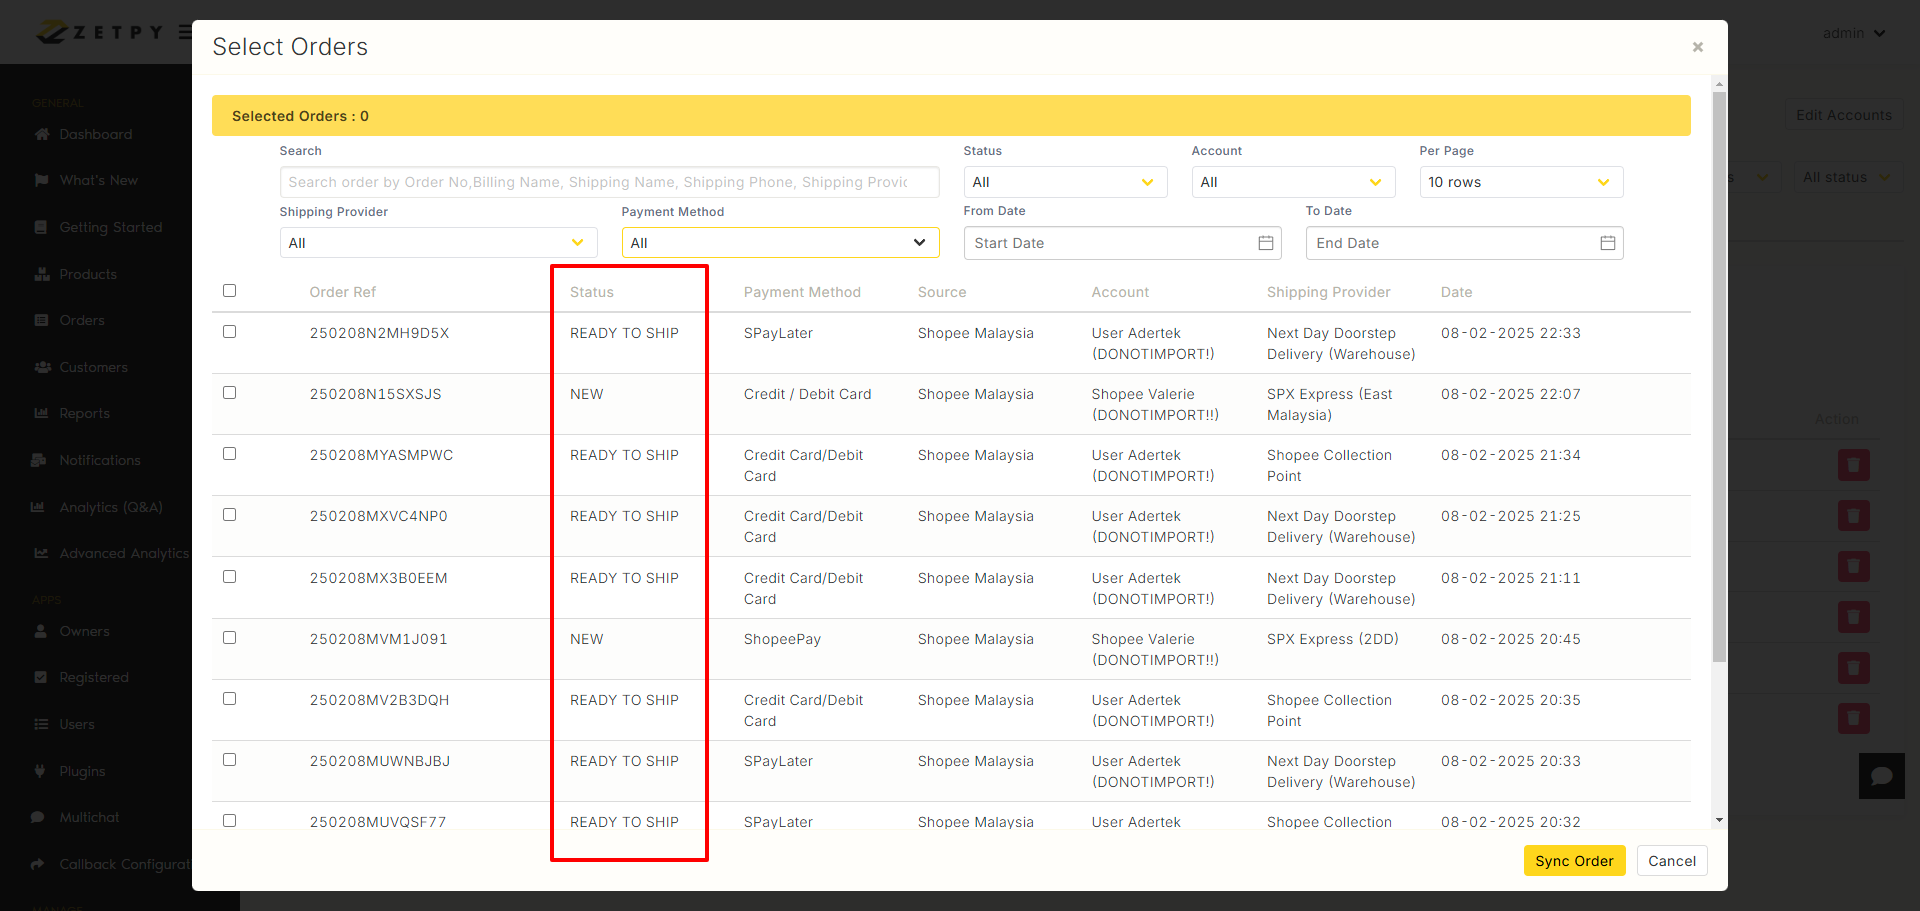
2. Go back to Xero plugin.
3. Click on Select Orders.
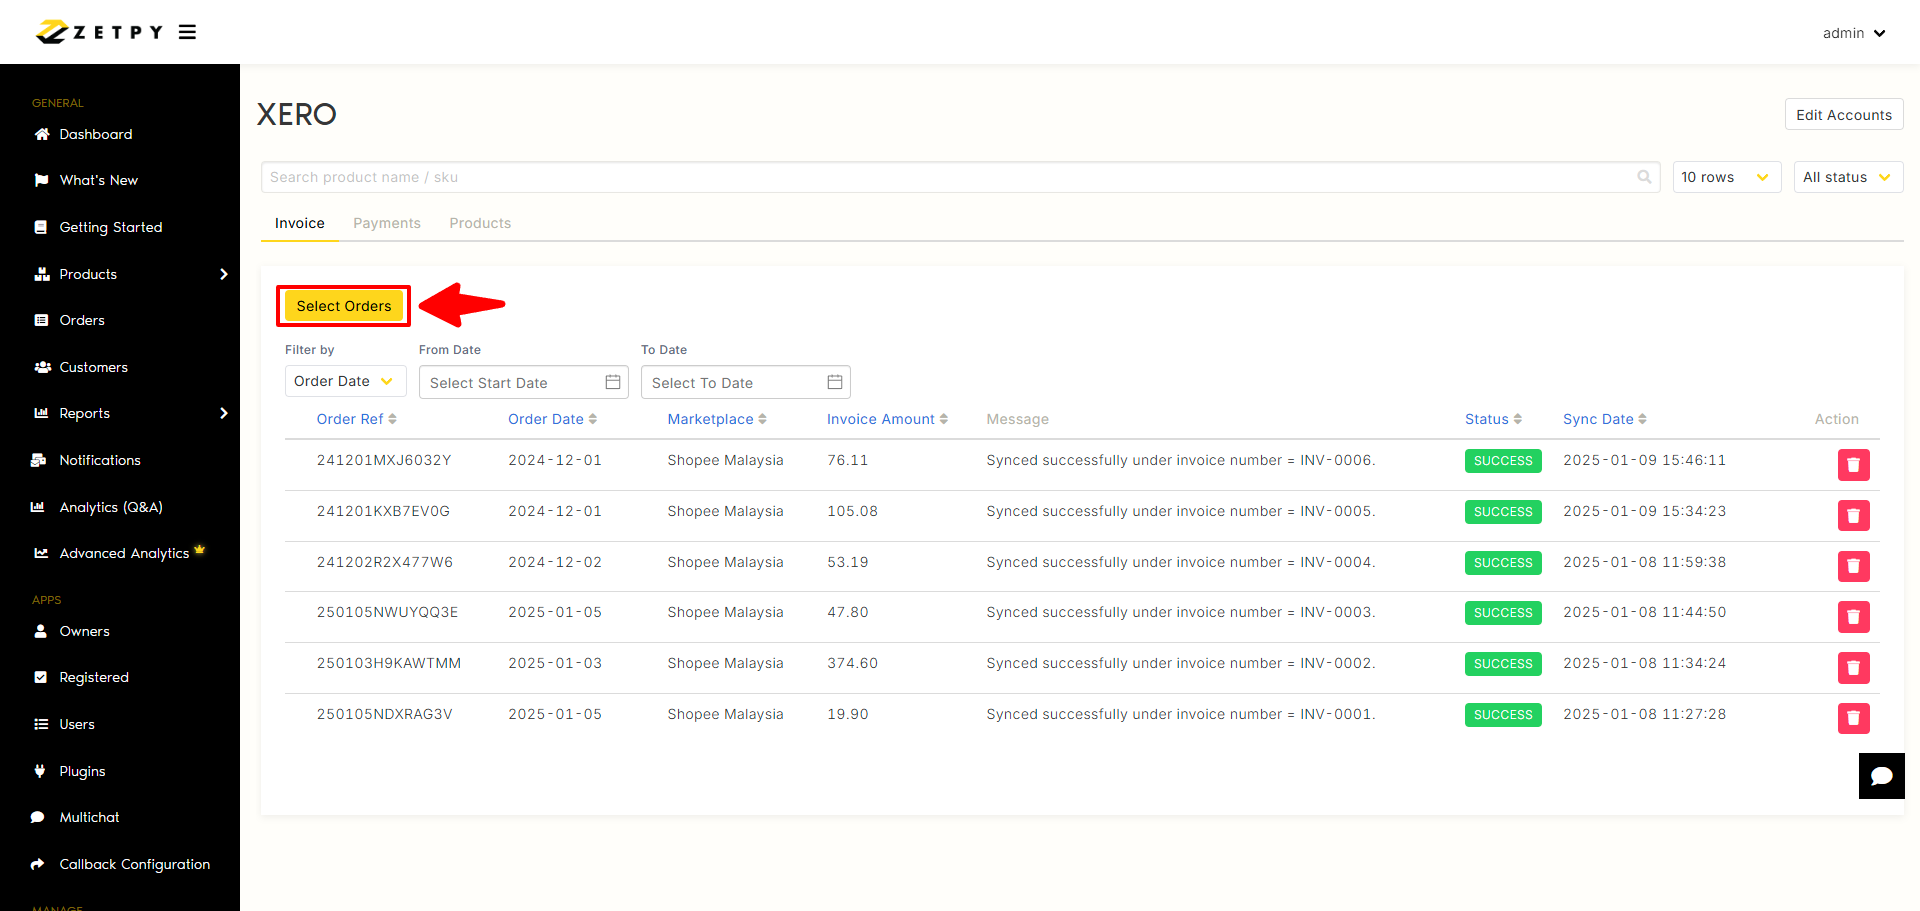
4. You can see the order status in sync lists.
NOTE: If you just enable the Shipped status of the order, the order under New, Ready to ship and Completed status will not automatically show in sync lists.
(B) Export Order Settings
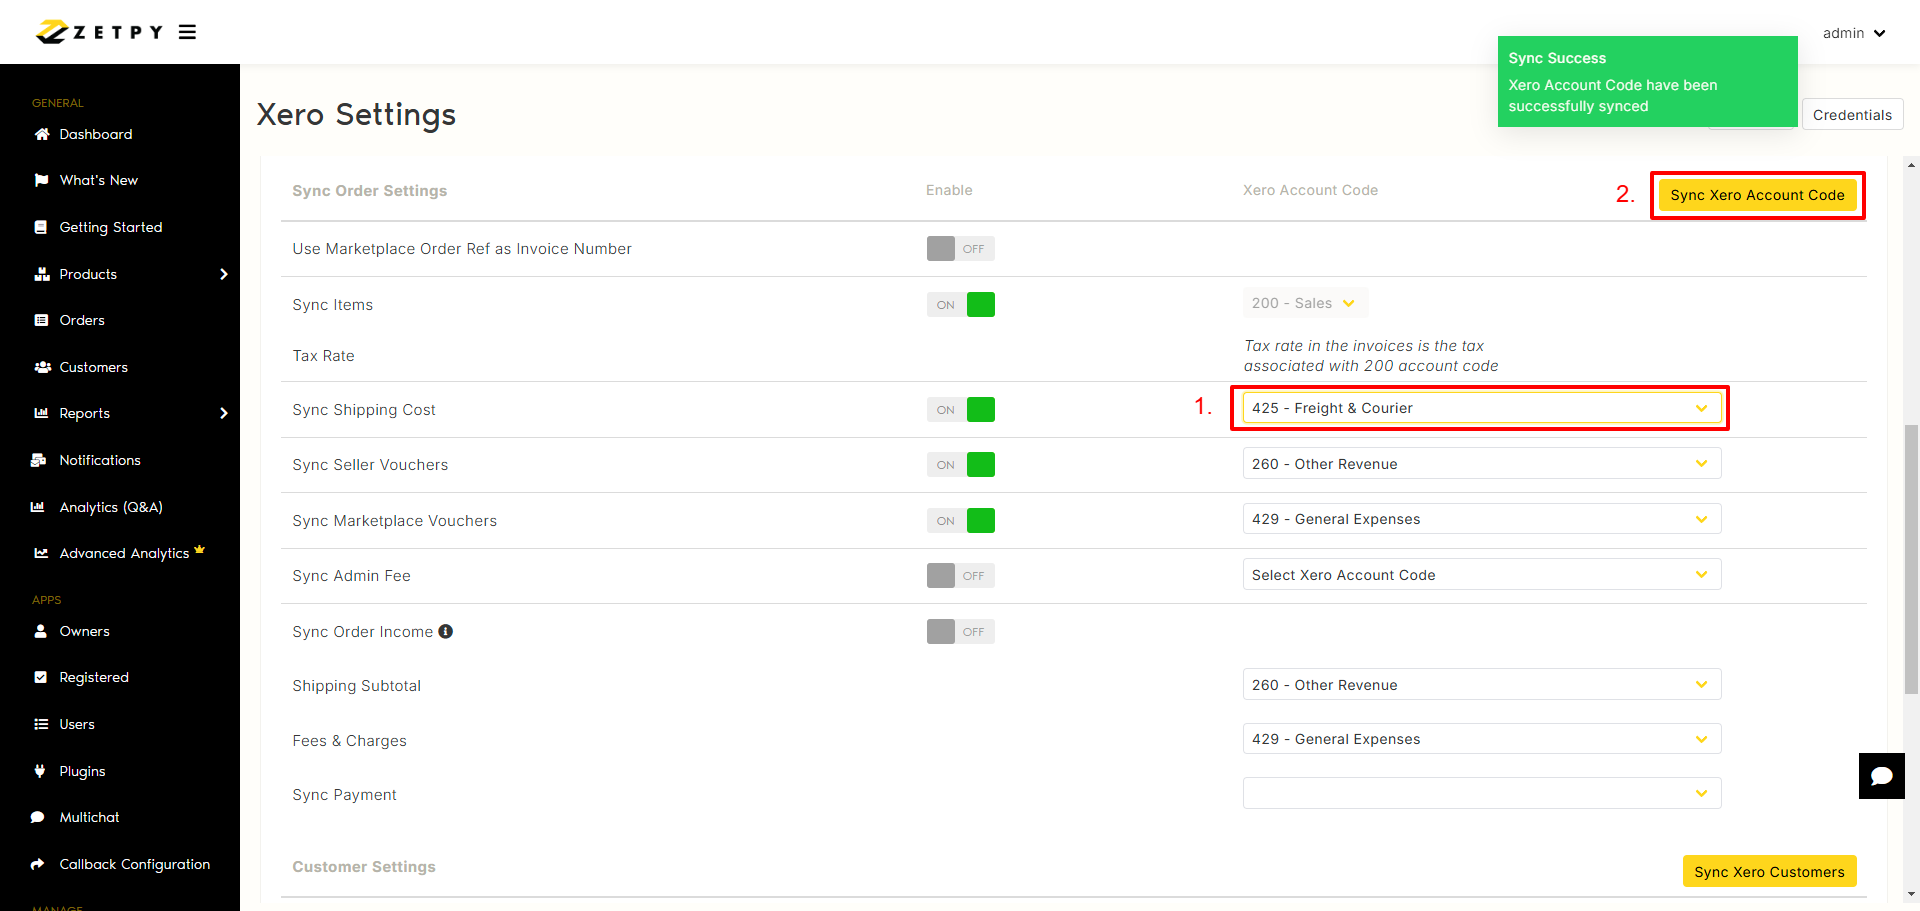
I. Use Marketplace Order Ref as Invoice Number: Only enable this if you want to use marketplace Order ID. Disable this if you want to use Xero numbering.
II. Tax Rate: Follows the tax rate associated with code 200
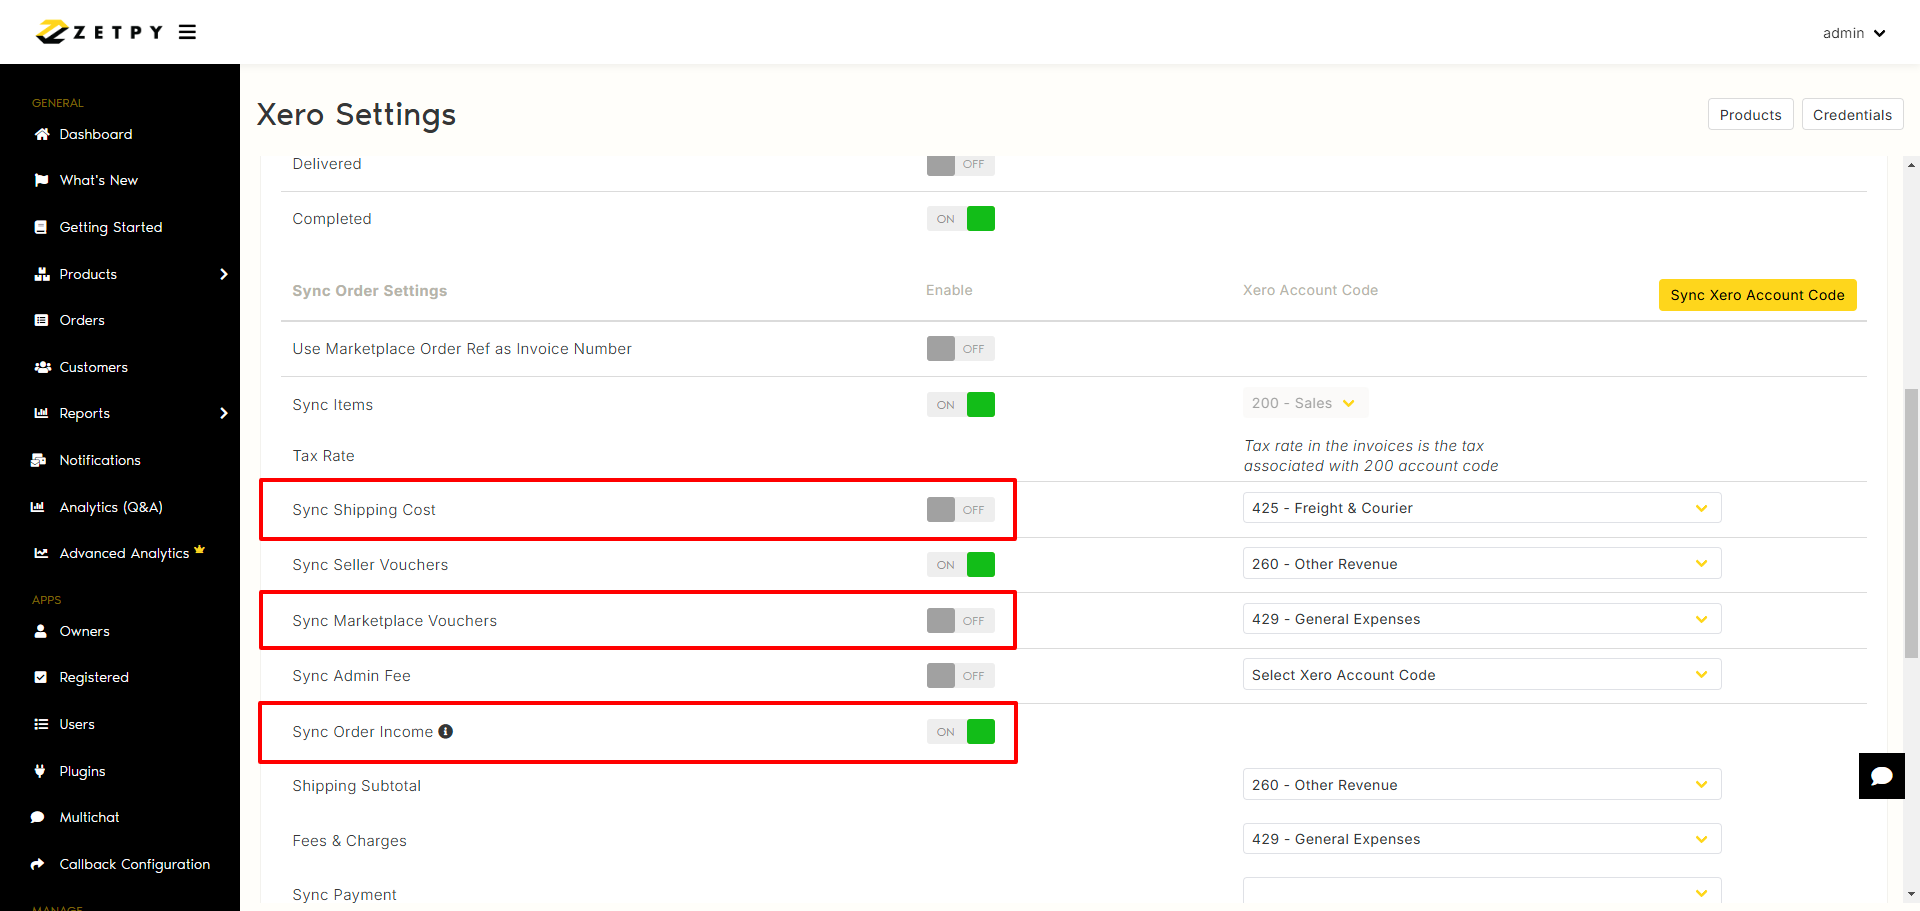
III. Sync Shipping Cost: Shipping fee in the orders.
IV. Sync Seller Vouchers: Vouchers provided by the seller.
V. Sync Marketplace Vouchers: Vouchers provided by the platform.
VI. Sync Admin Fee: Extra charges by platform(WooCommerce or Shopify).
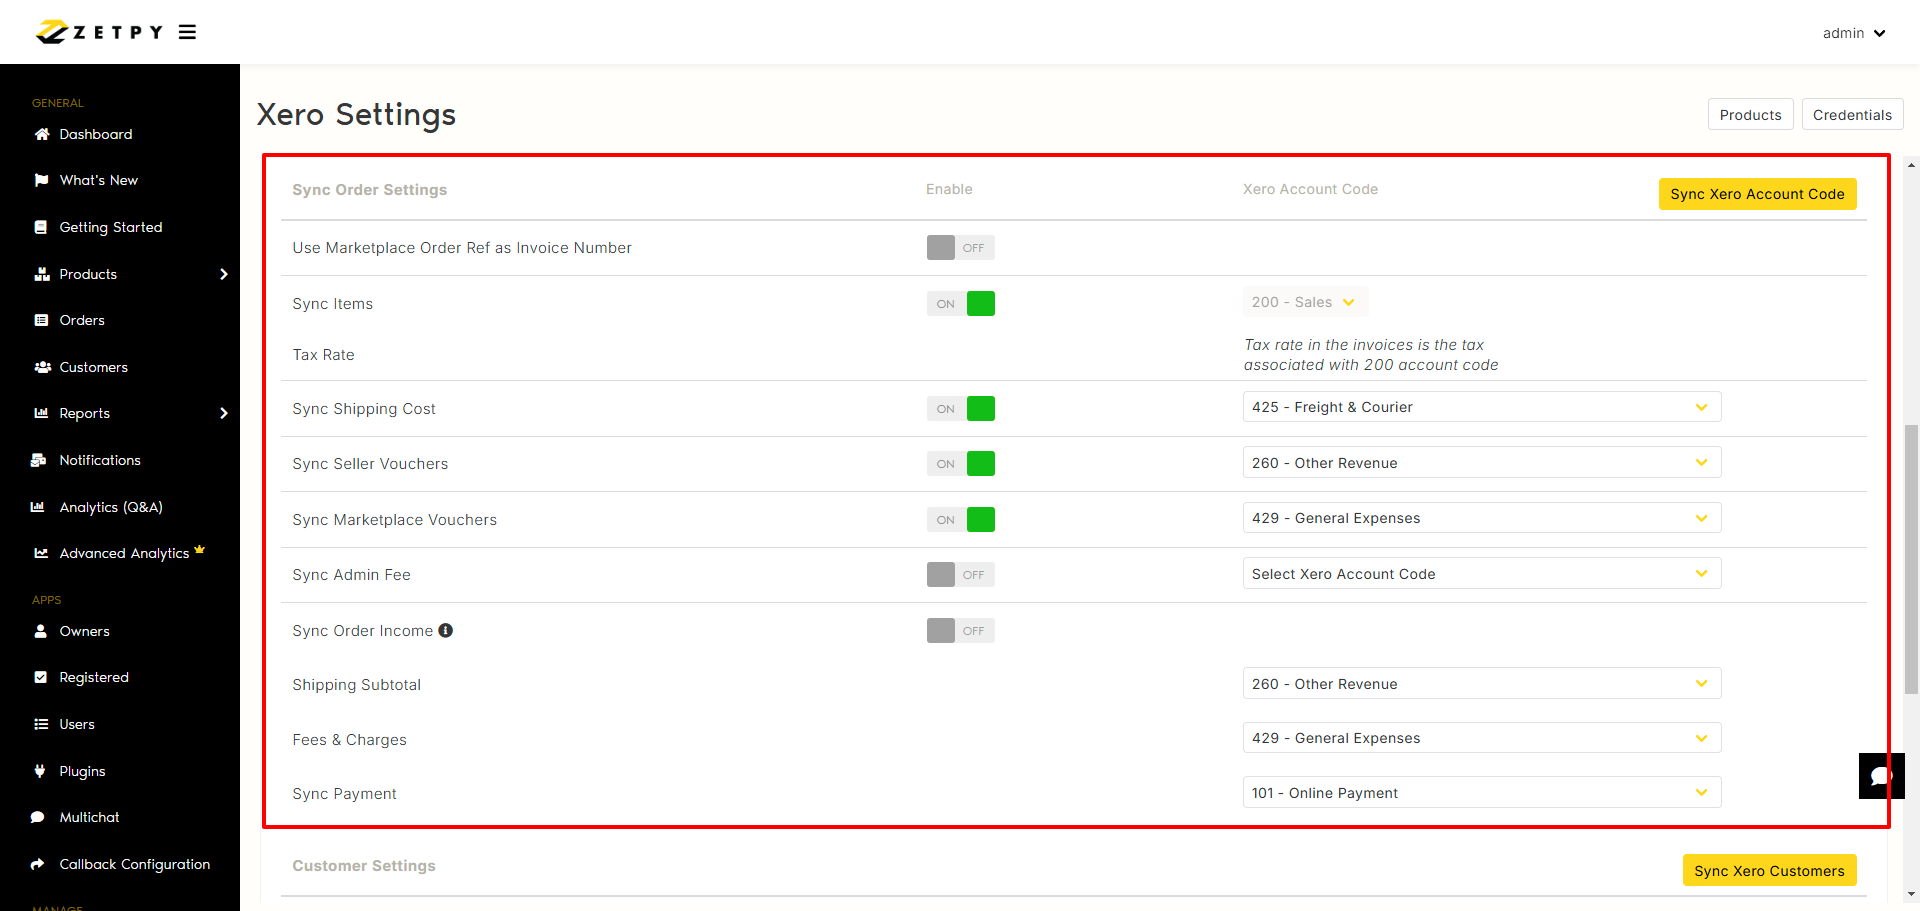
VII. Sync Order Income:
When turn ON: Shipping Cost and Marketplace Voucher settings will be TURN OFF. Only COMPLETED status can be sync because when the status is COMPLETED, the order income is finalized and accurate.
When Turn OFF: Able to show all orders status include completed.
VIII. How to select the account code from Xero?
Before doing an account code mapping in Zetpy Xero plug-in, you can click on the tutorial link below how to create the account code in Xero:
I. Click here to Add, edit or delete an account
II. Click here to Add an account code in Xero
1. Click on Sync Xero Account Code.
2. Then, map your shipping cost, vouchers, and admin fee to the account code.
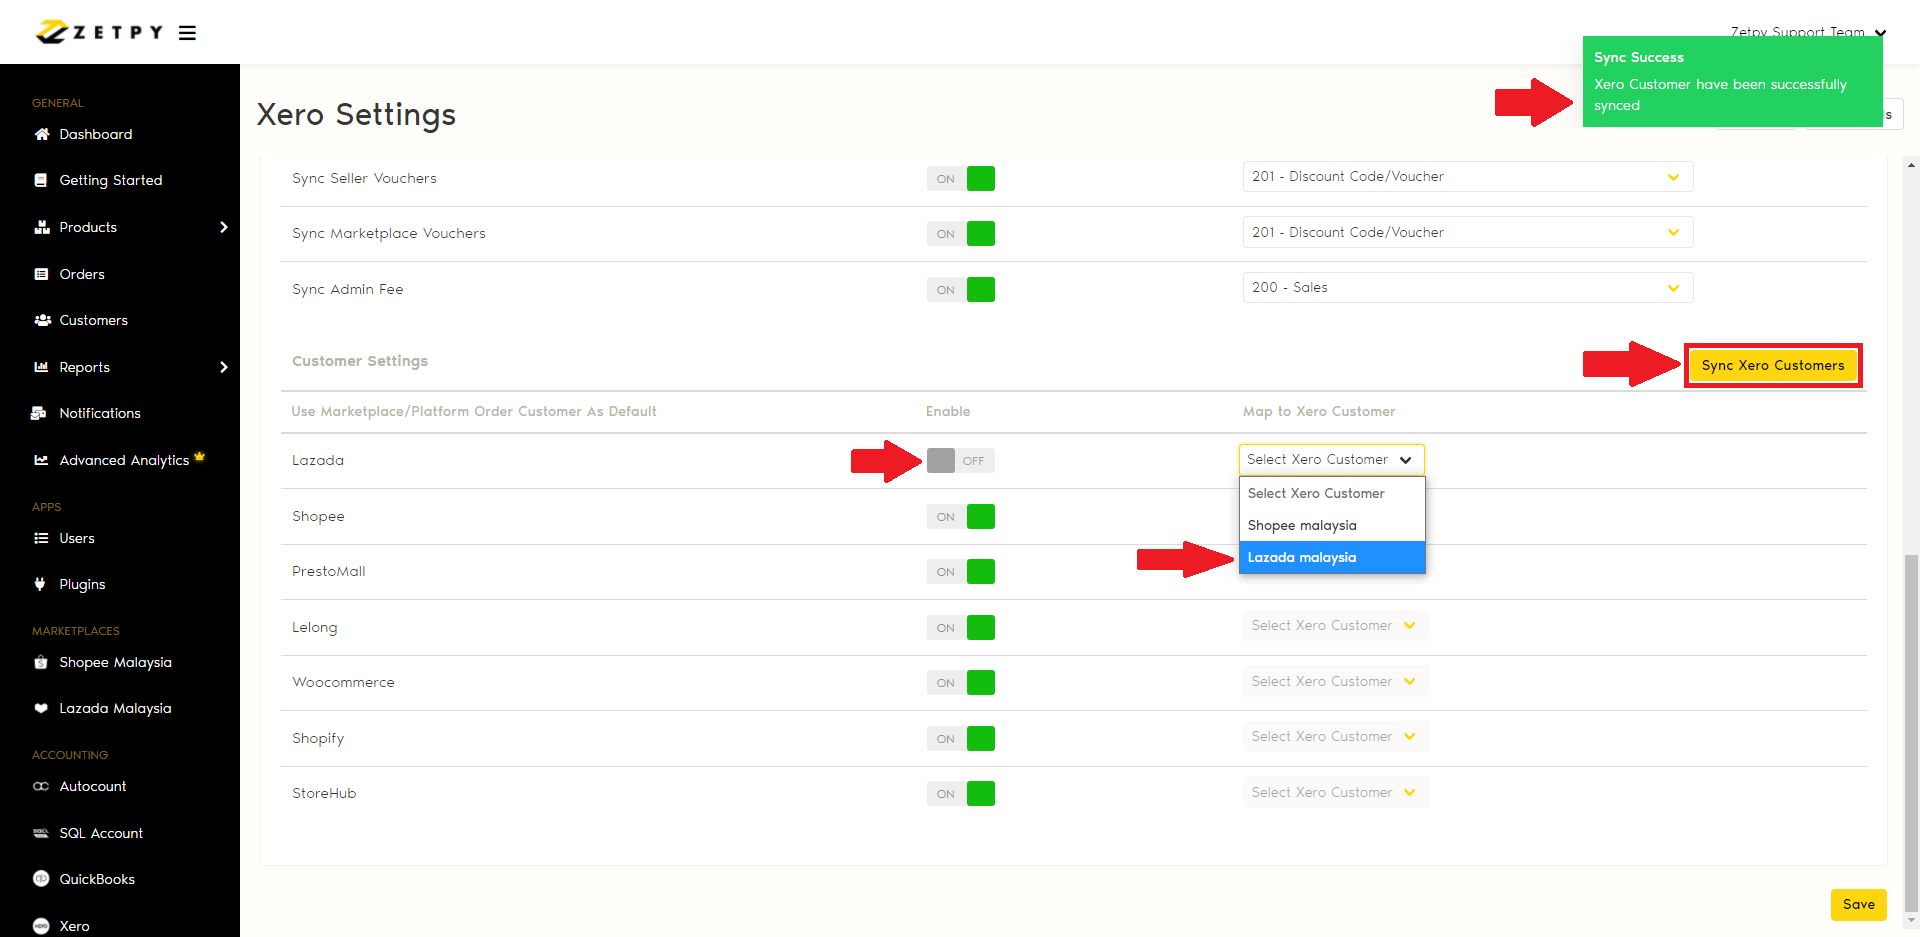
(C) Customer Settings
Before doing an customer mapping in Zetpy Xero plugin, you can click on the tutorial link below how to create the contact in Xero:
I. Click here to Add a new contact
II. Click here to Add a contact in Xero
1. Click on Sync Xero Customers.
2. You can import the order into Xero invoice as Xero customer (e.g. Lazada Malaysia) or order customer details as default:
I. If you turn off, you can map the customer in Xero.
II. If you turn on, use Marketplace/Platform order customer details as default.
Sync orders to Xero
Once you have any new orders in Zetpy.
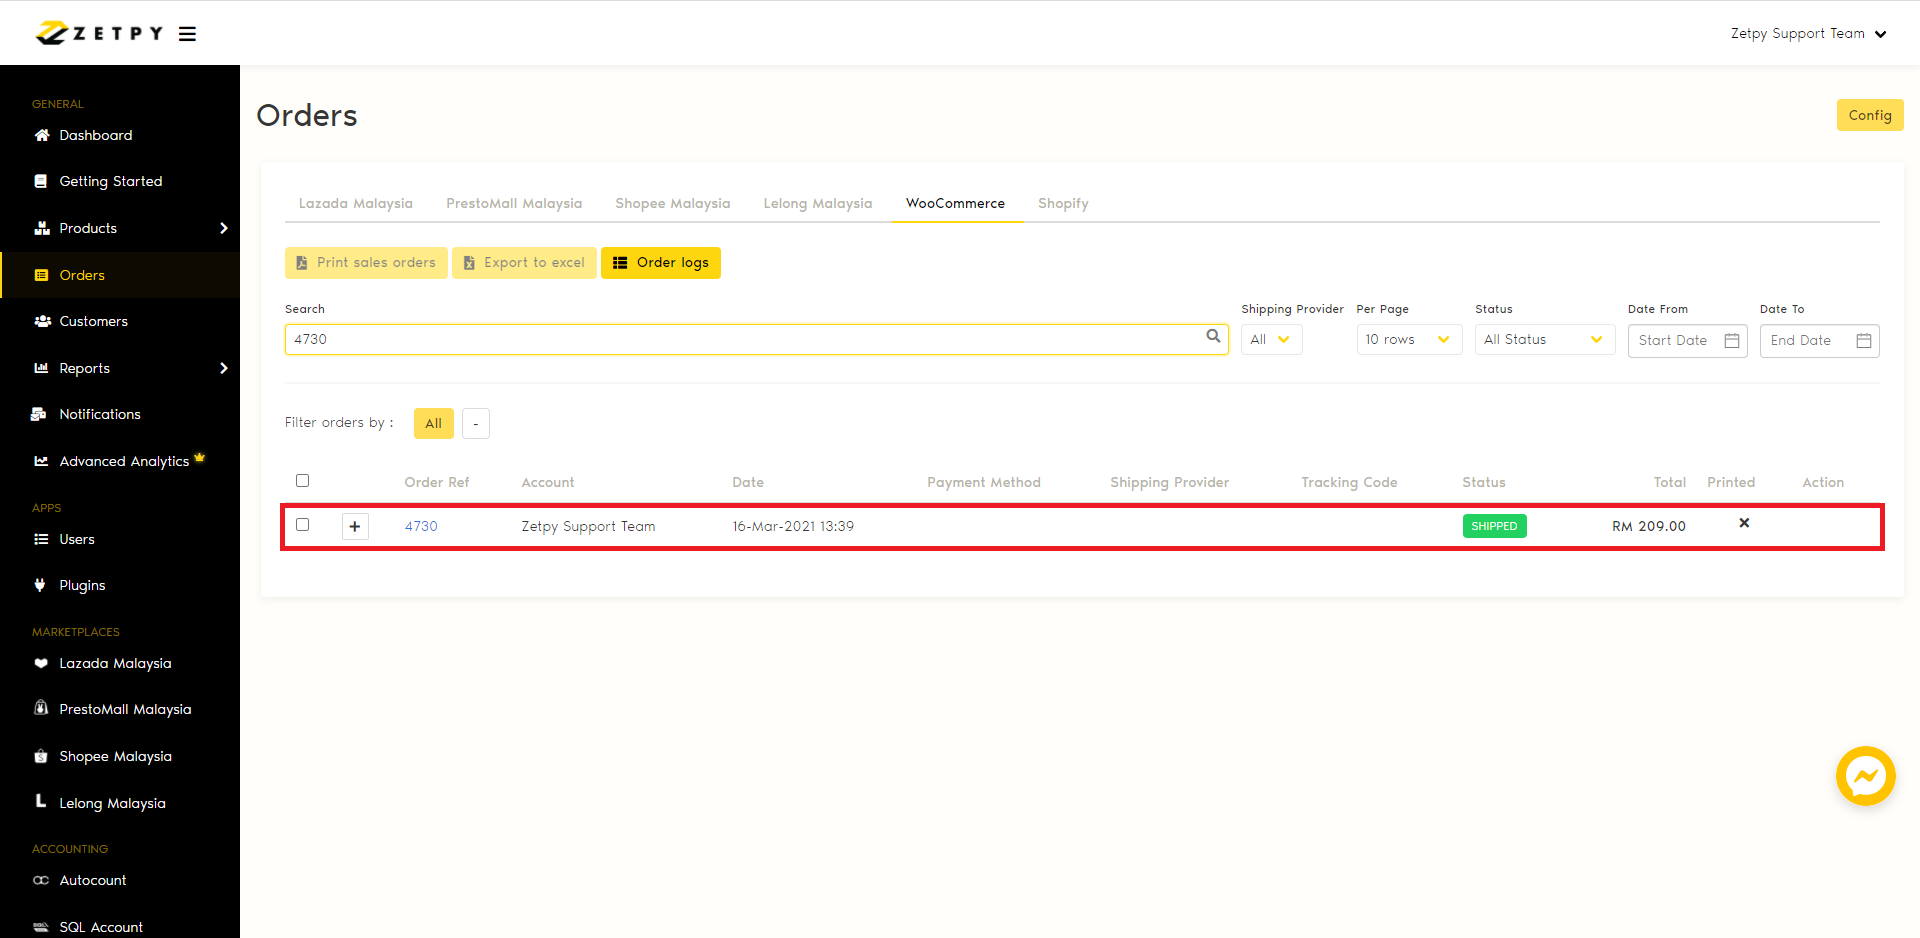
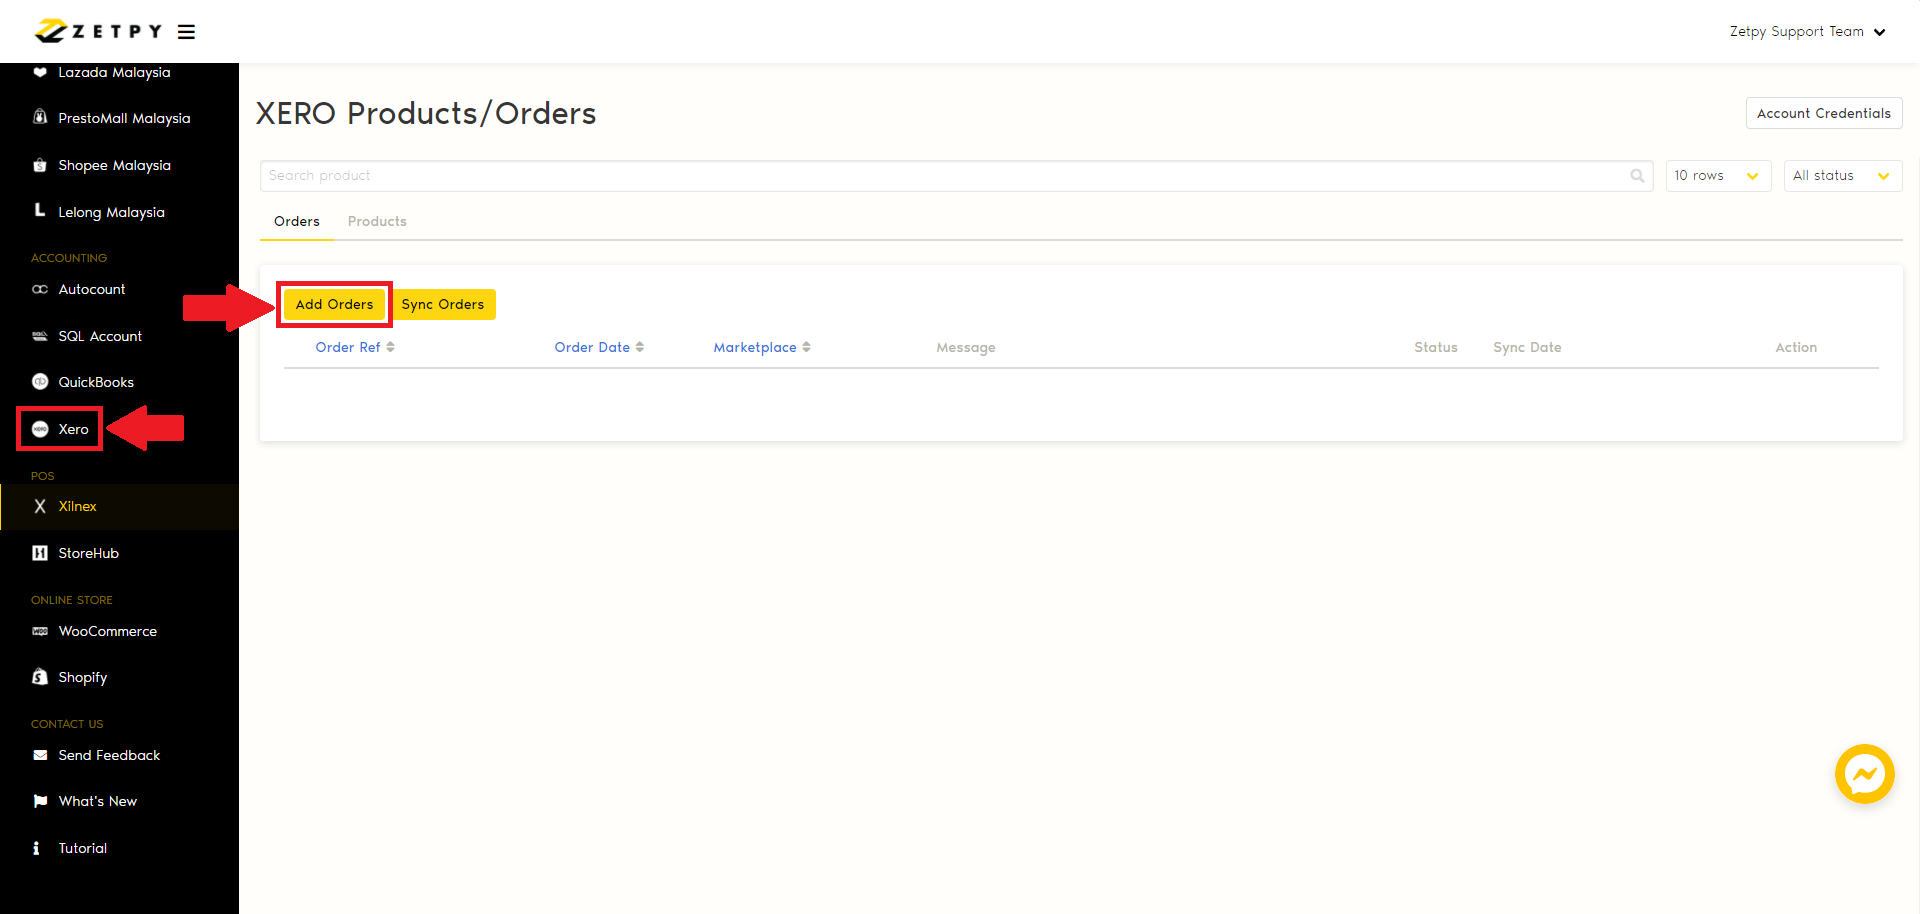
1. Go to Xero.
2. Click on Add Orders.
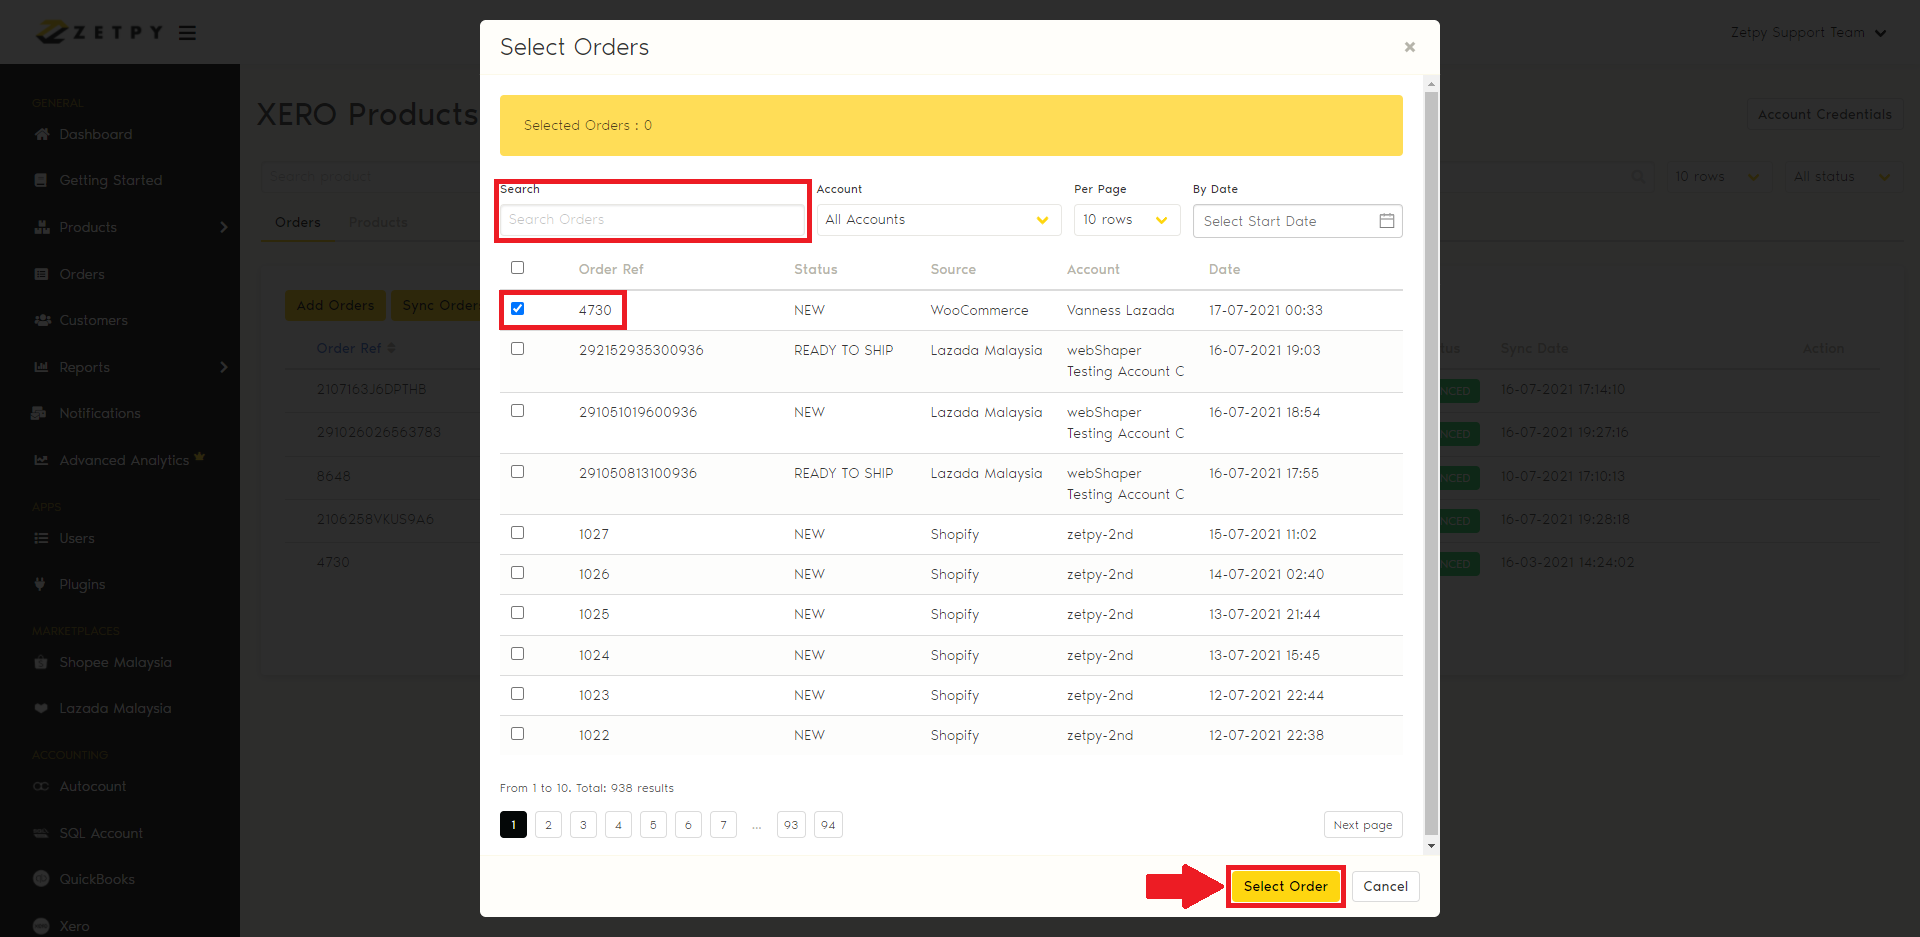
3. You can search and select one or multiple orders, then click on Select Order.
4. You can click on Sync Orders or the order will be synced automatically to Xero.
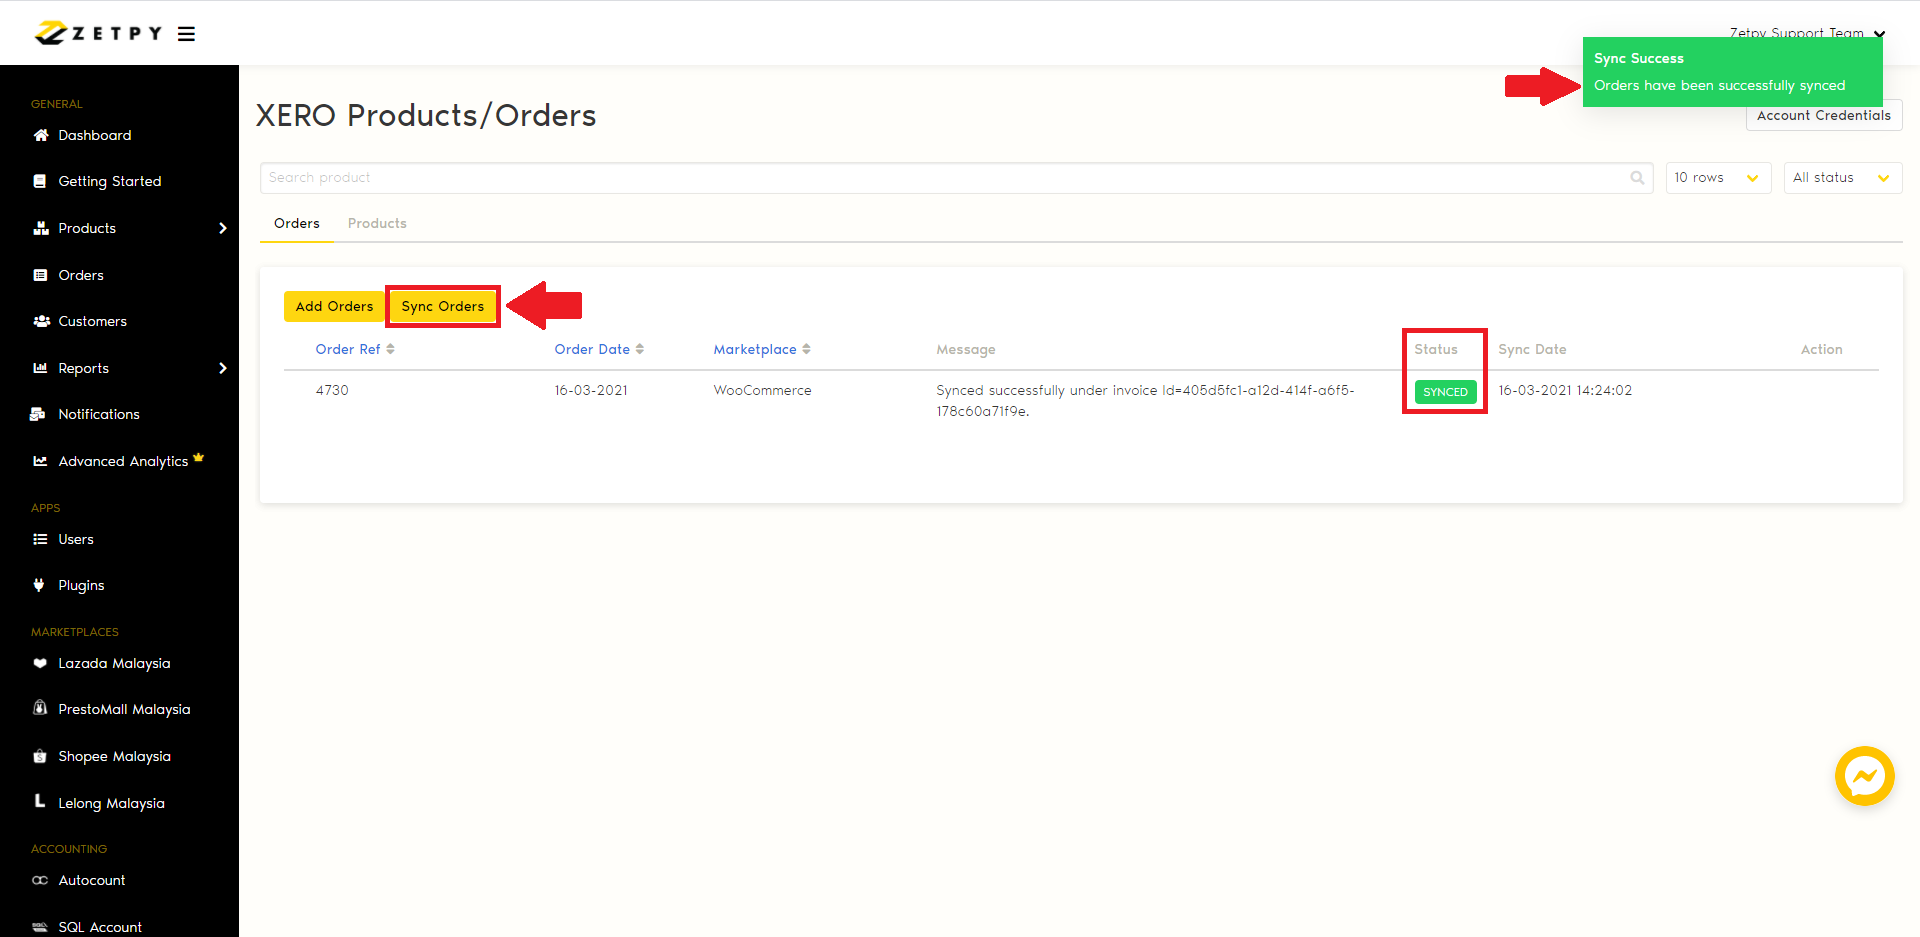
5. The order will be synced into Xero.
6. All of the order details will be created in Xero.
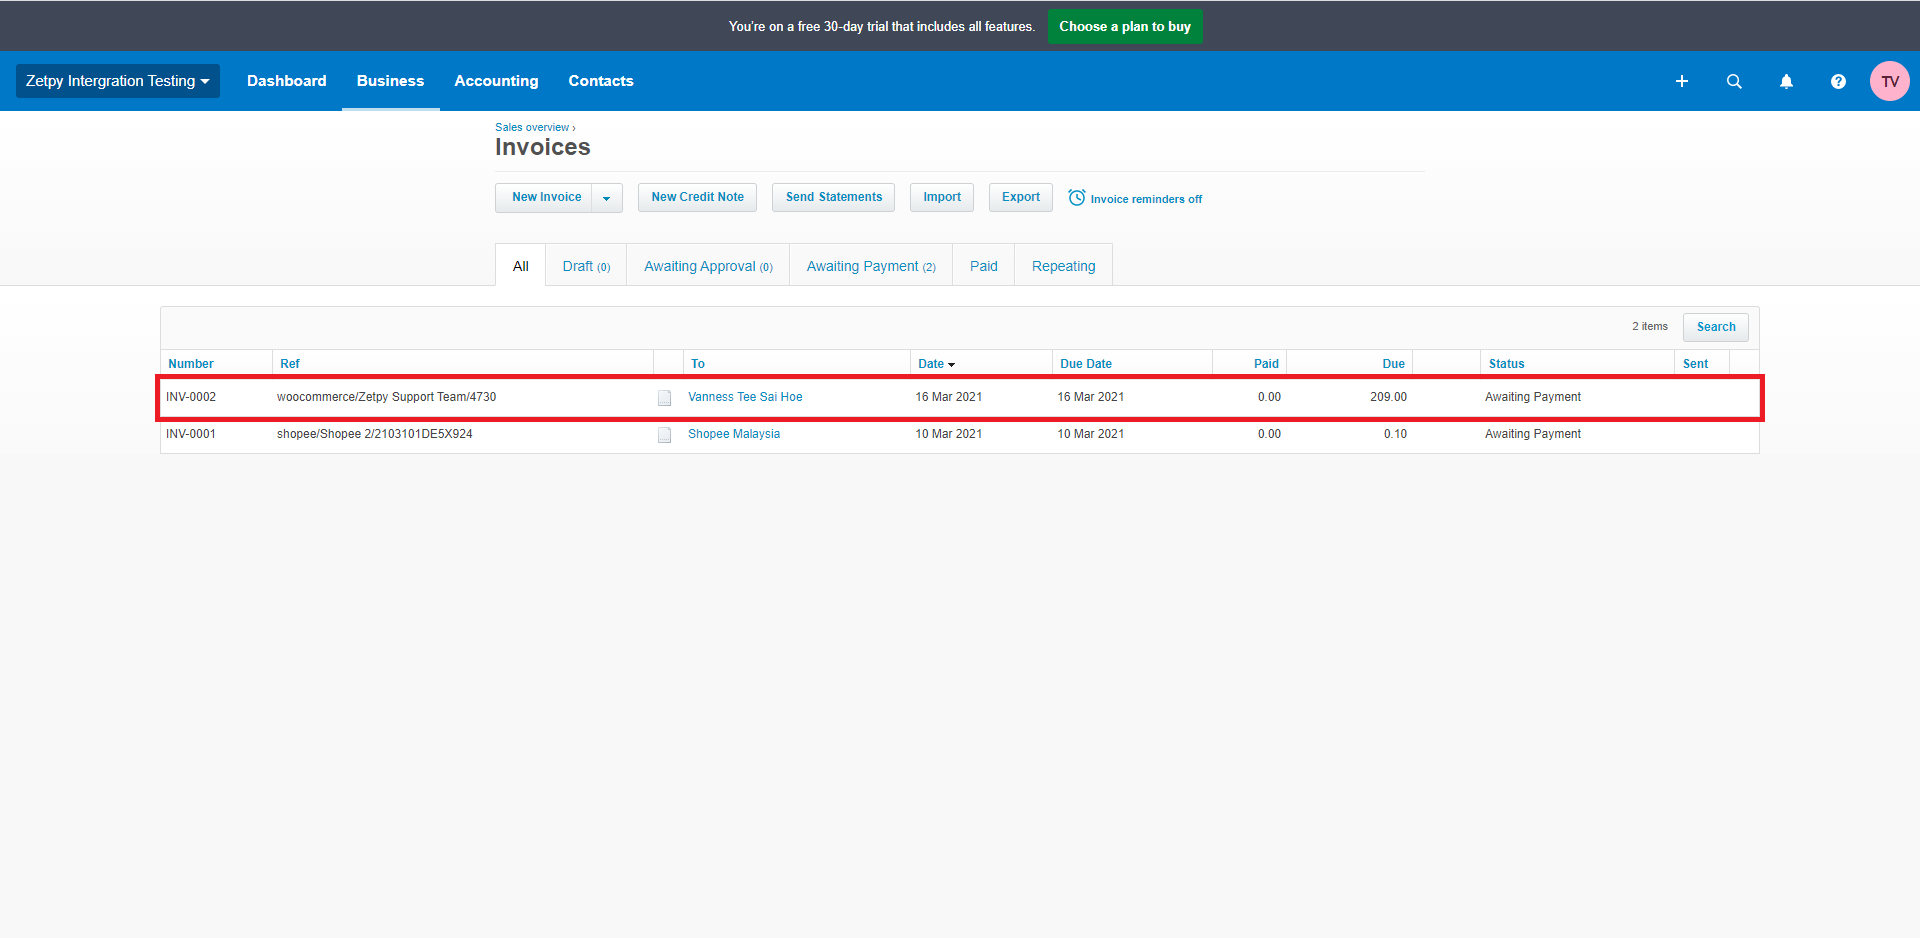
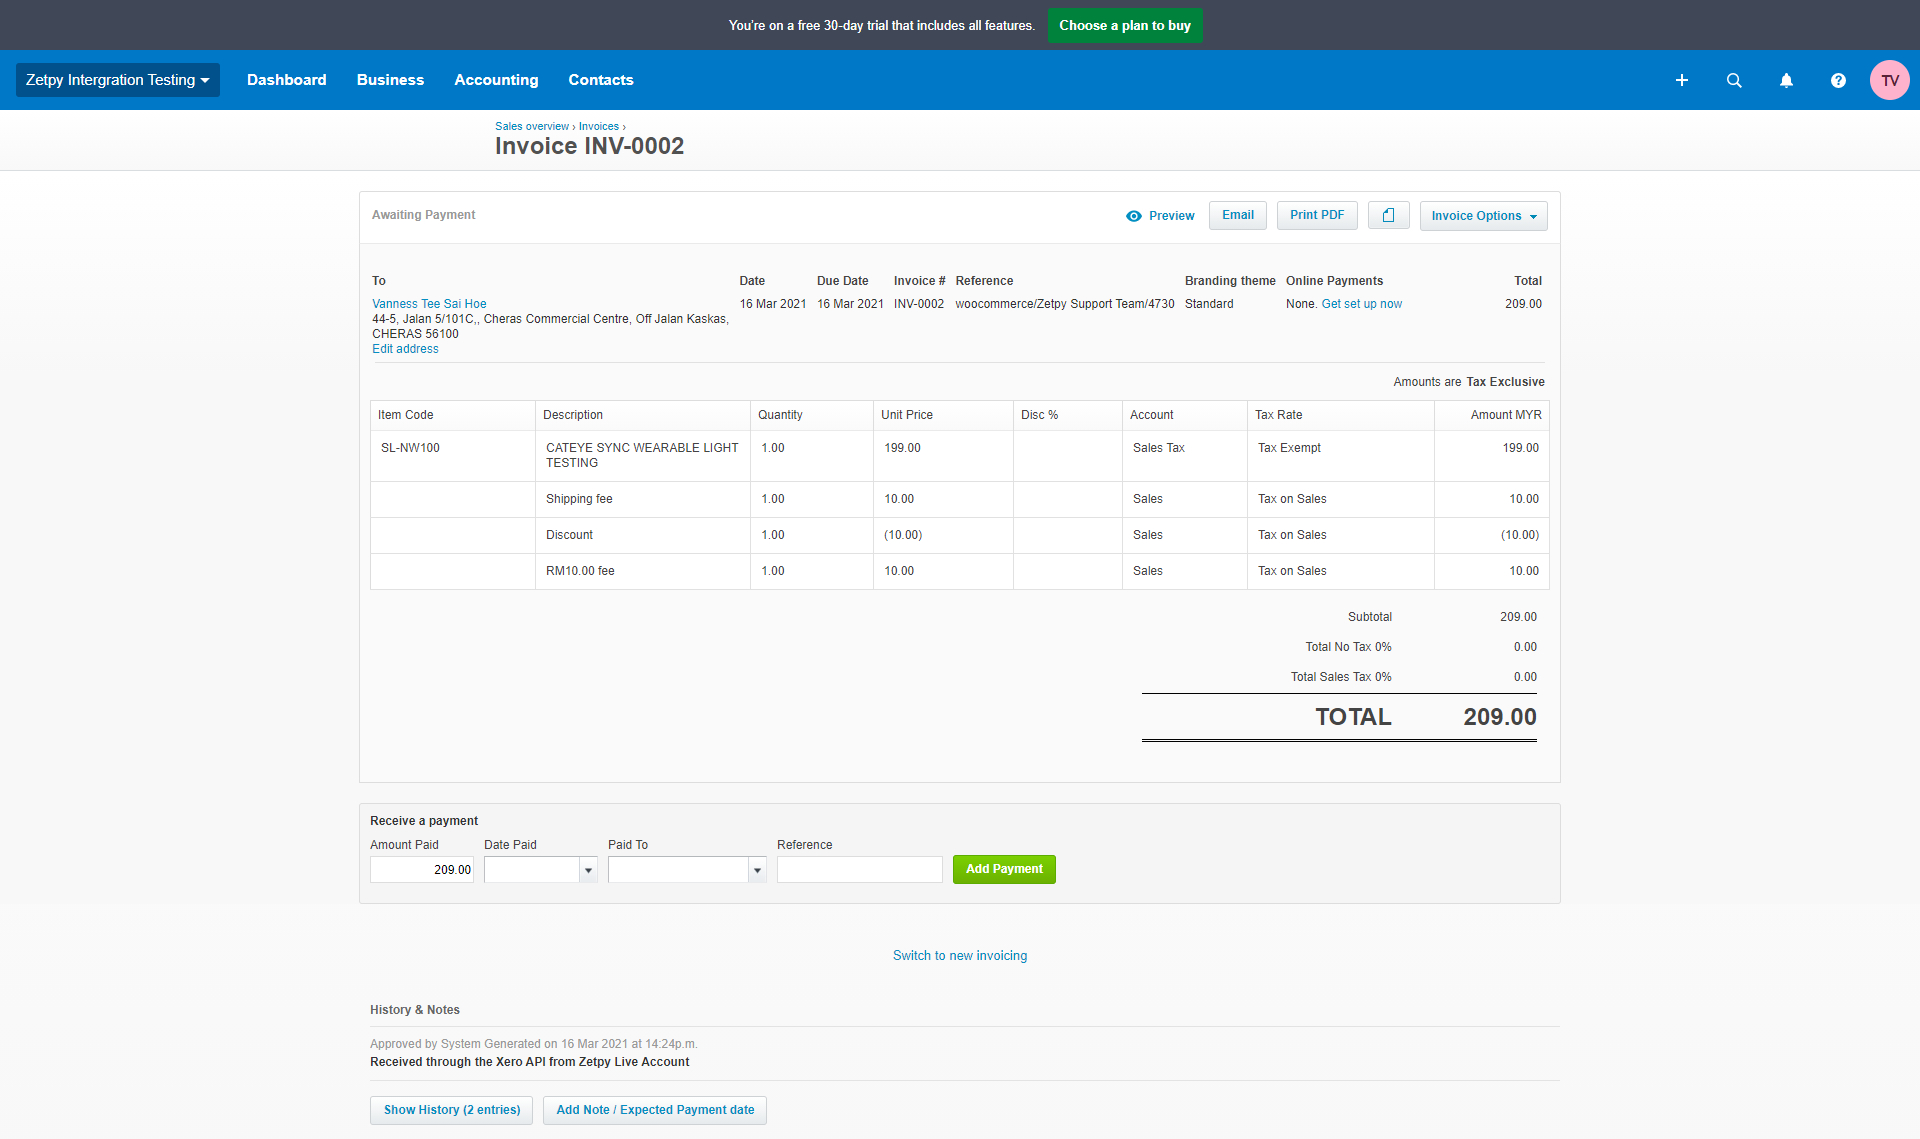
Invoice in Xero:
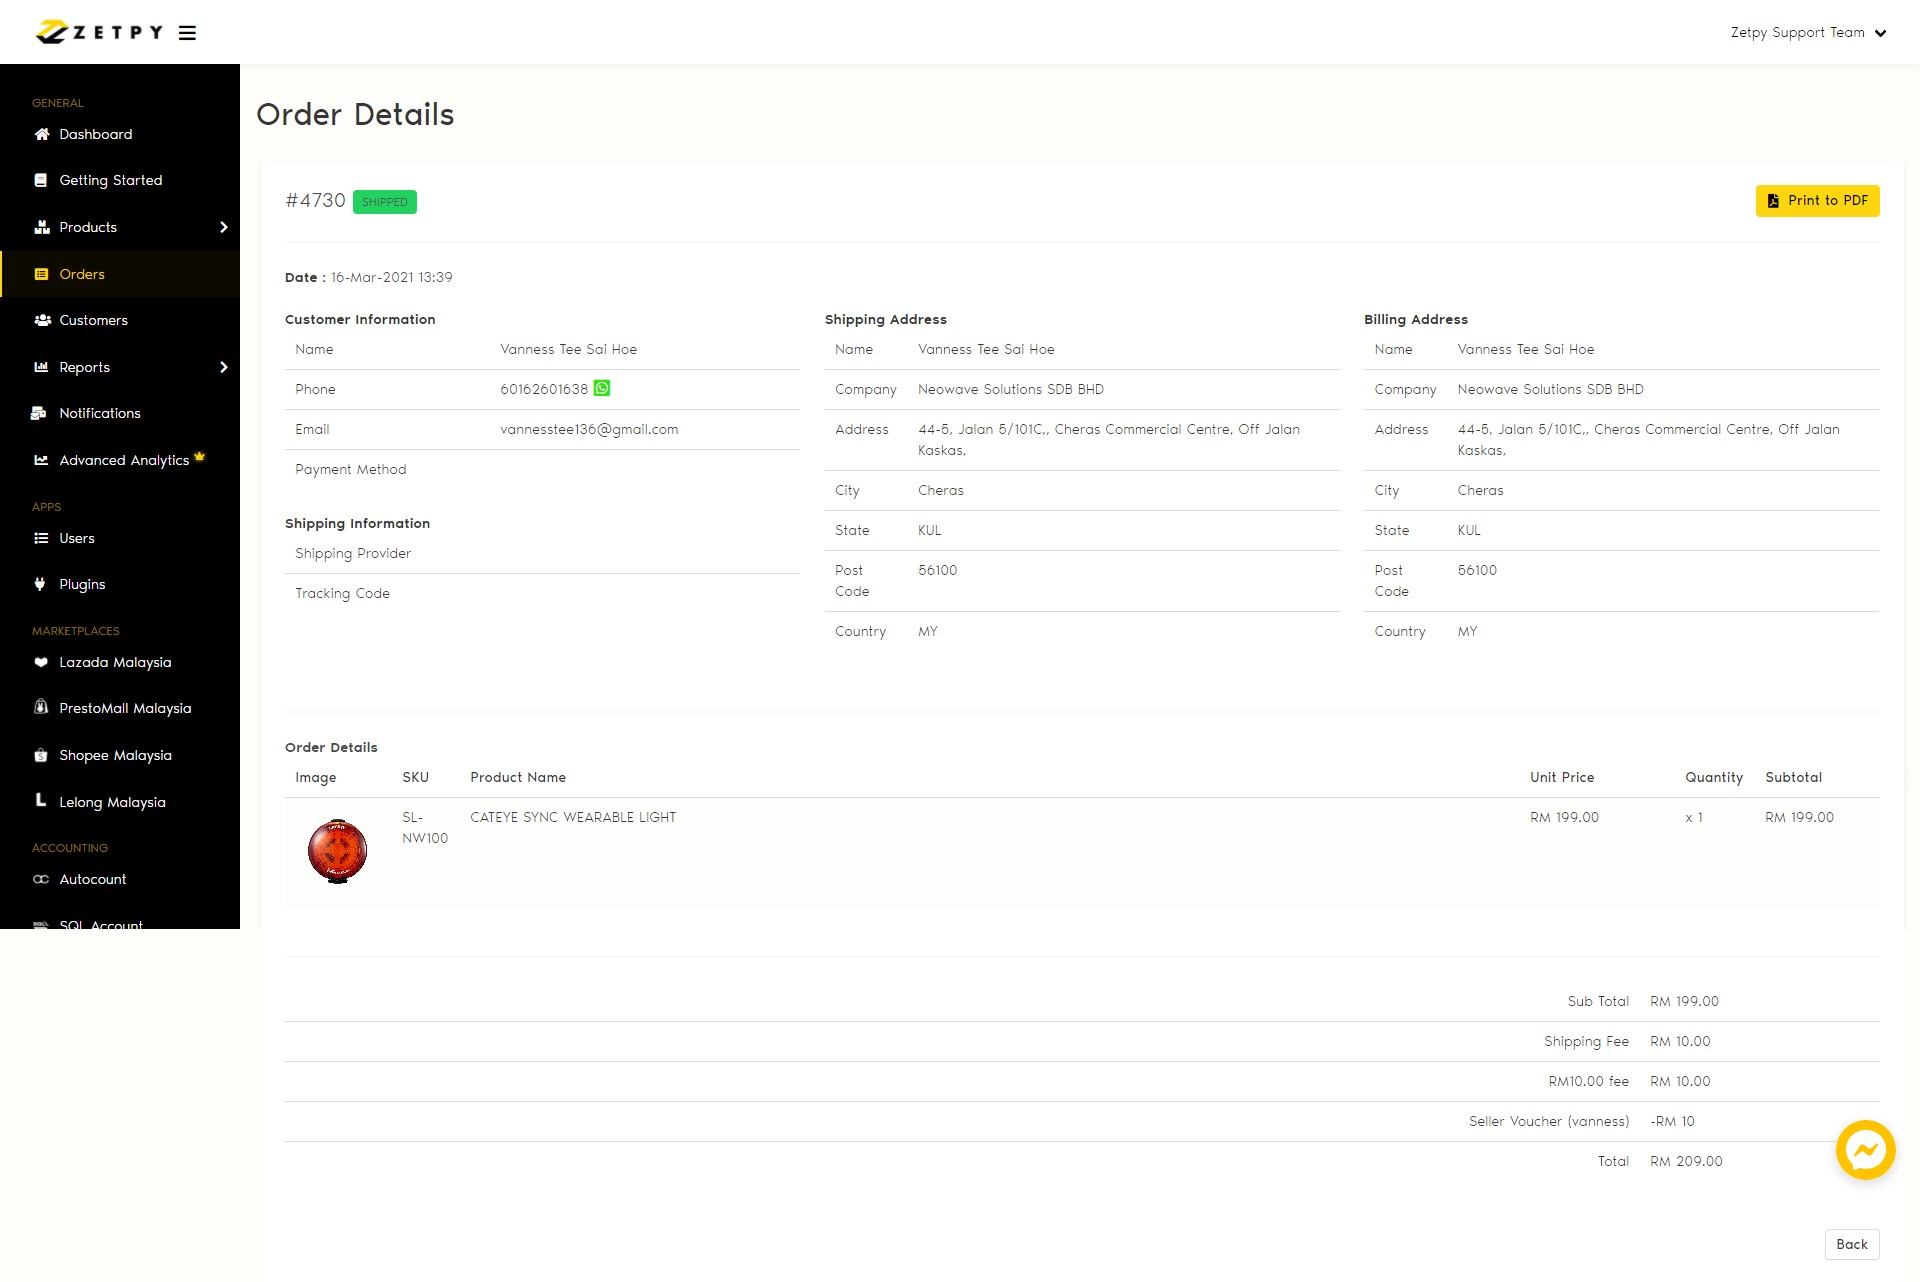
Sales Order in Zetpy:
Need Assistance?
If you encounter any issues, contact Zetpy Support via:
Email: support@zetpy.com
Live Chat: Available on the Zetpy dashboard