(A) Setup QuickBooks plugin in Zetpy
1. Login to your Zetpy control panel.
2. Go to Plugins > Click on Add Plugin tab.
3. Click on Add on QuickBooks.

4. Click on Install button and you are done.

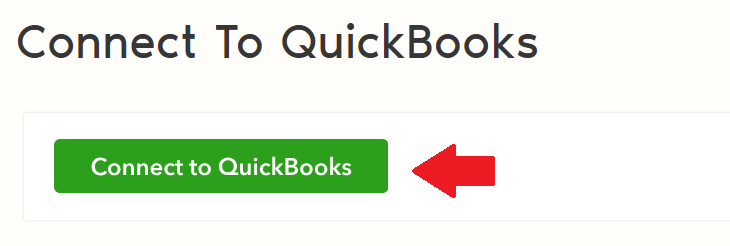
5. Click Connect to QuickBooks button.
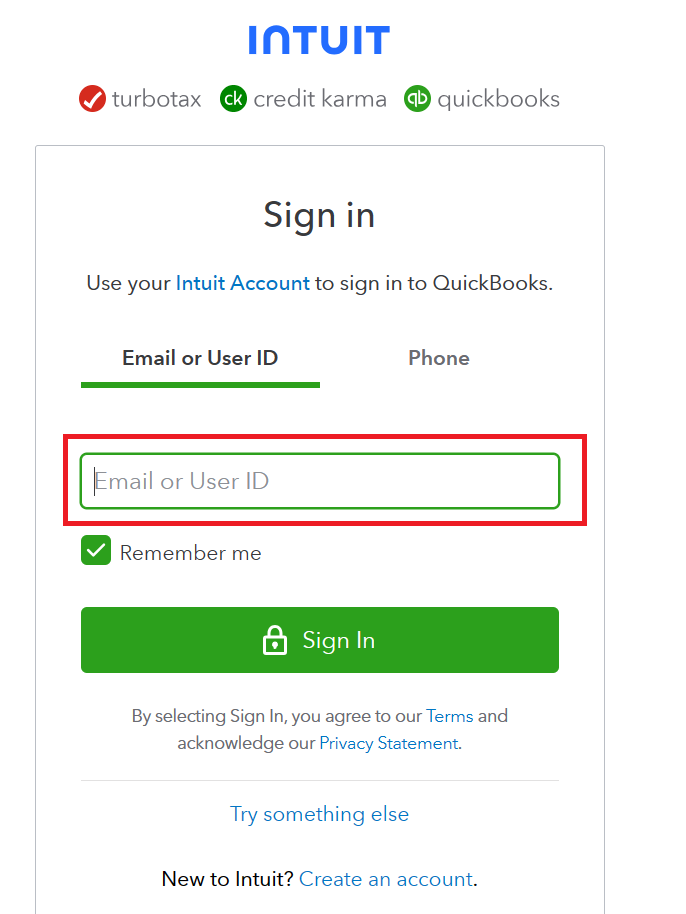
6. It will redirect you to QuickBooks Online login page. Login to your QuickBooks Online account using your email and password.
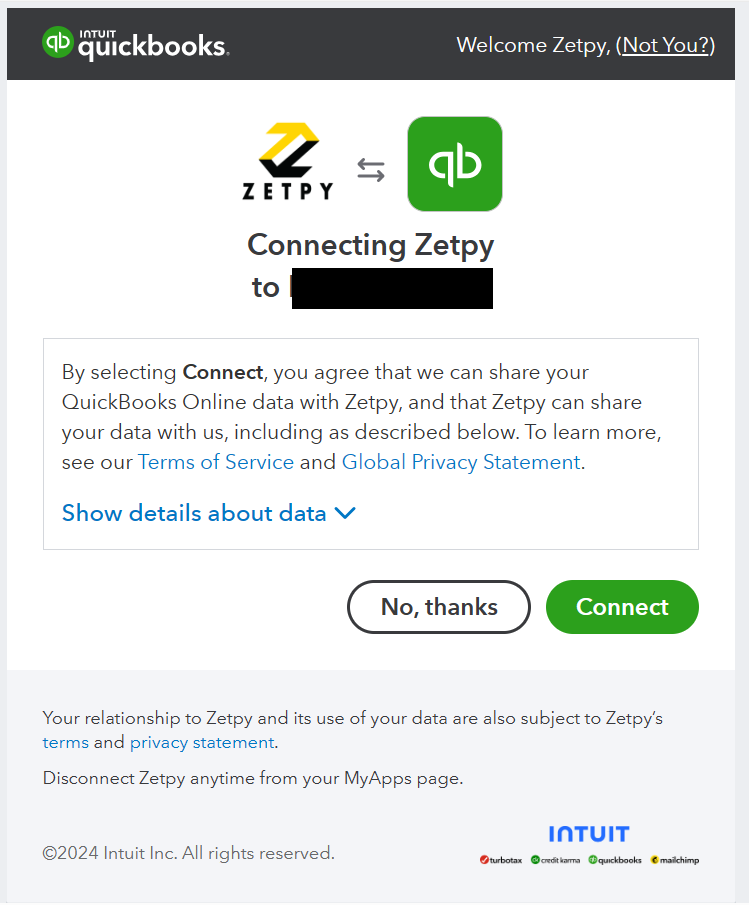
7. Make sure the company is the one to connect with Zetpy, click 'connect' to proceed.
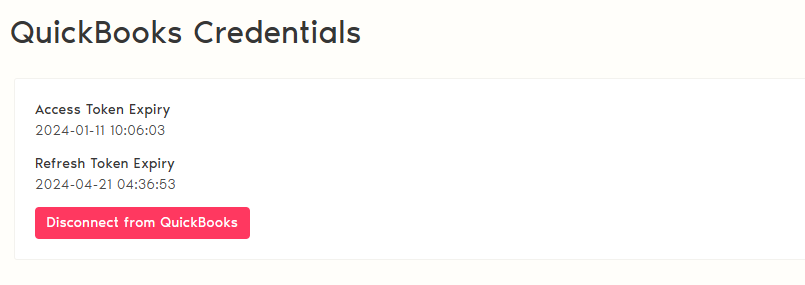
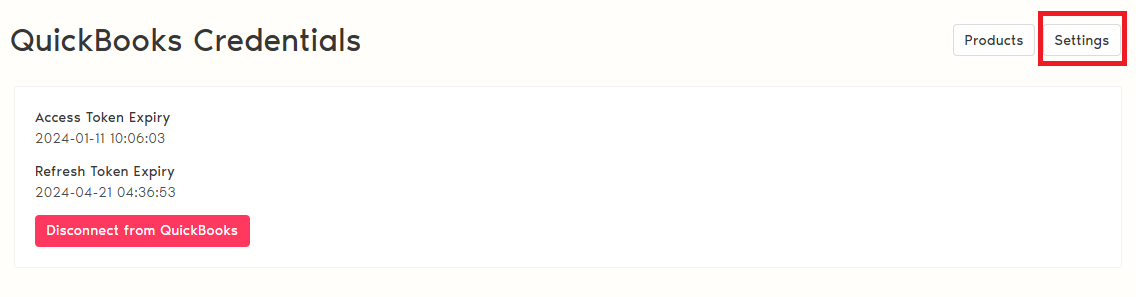
8. Once connected, it will redirect you back to QuickBooks plugin with the updated Access Token Expiry and Refresh Token Expiry.
9. Next, you may go to settings page and configure the settings before start syncing products and orders with QuickBooks.
(B) Enable settings in QuickBooks plugin
1. Click on Settings button.
2. On Import Product Settings, choose if you want to enable:
i. Sync Price: To auto update price from QuickBooks to Zetpy Product Core.
ii. Sync Stock: To auto update stock from QuickBooks to Zetpy and sync to Marketplace/Webstore.
iii. Auto Sync Products: To auto import new product from QuickBooks to Zetpy
3. On Import Order Status Settings, you can enable the order status that you want to sync to QuickBooks and the orders will appear on the select order list.
4. On Export Order Settings,
i. Auto Sync Orders: Select order from the list and will auto sync to QuickBooks in 5 minutes.
ii. Sync Shipping Cost: To include shipping fee in the QuickBooks invoice. You may follow the steps below to enable the shipping field in QuickBooks:
Gear on the top corner > Your Company > Account and Settings > Advanced > Chart of accounts > Shipping account > Select account > Save
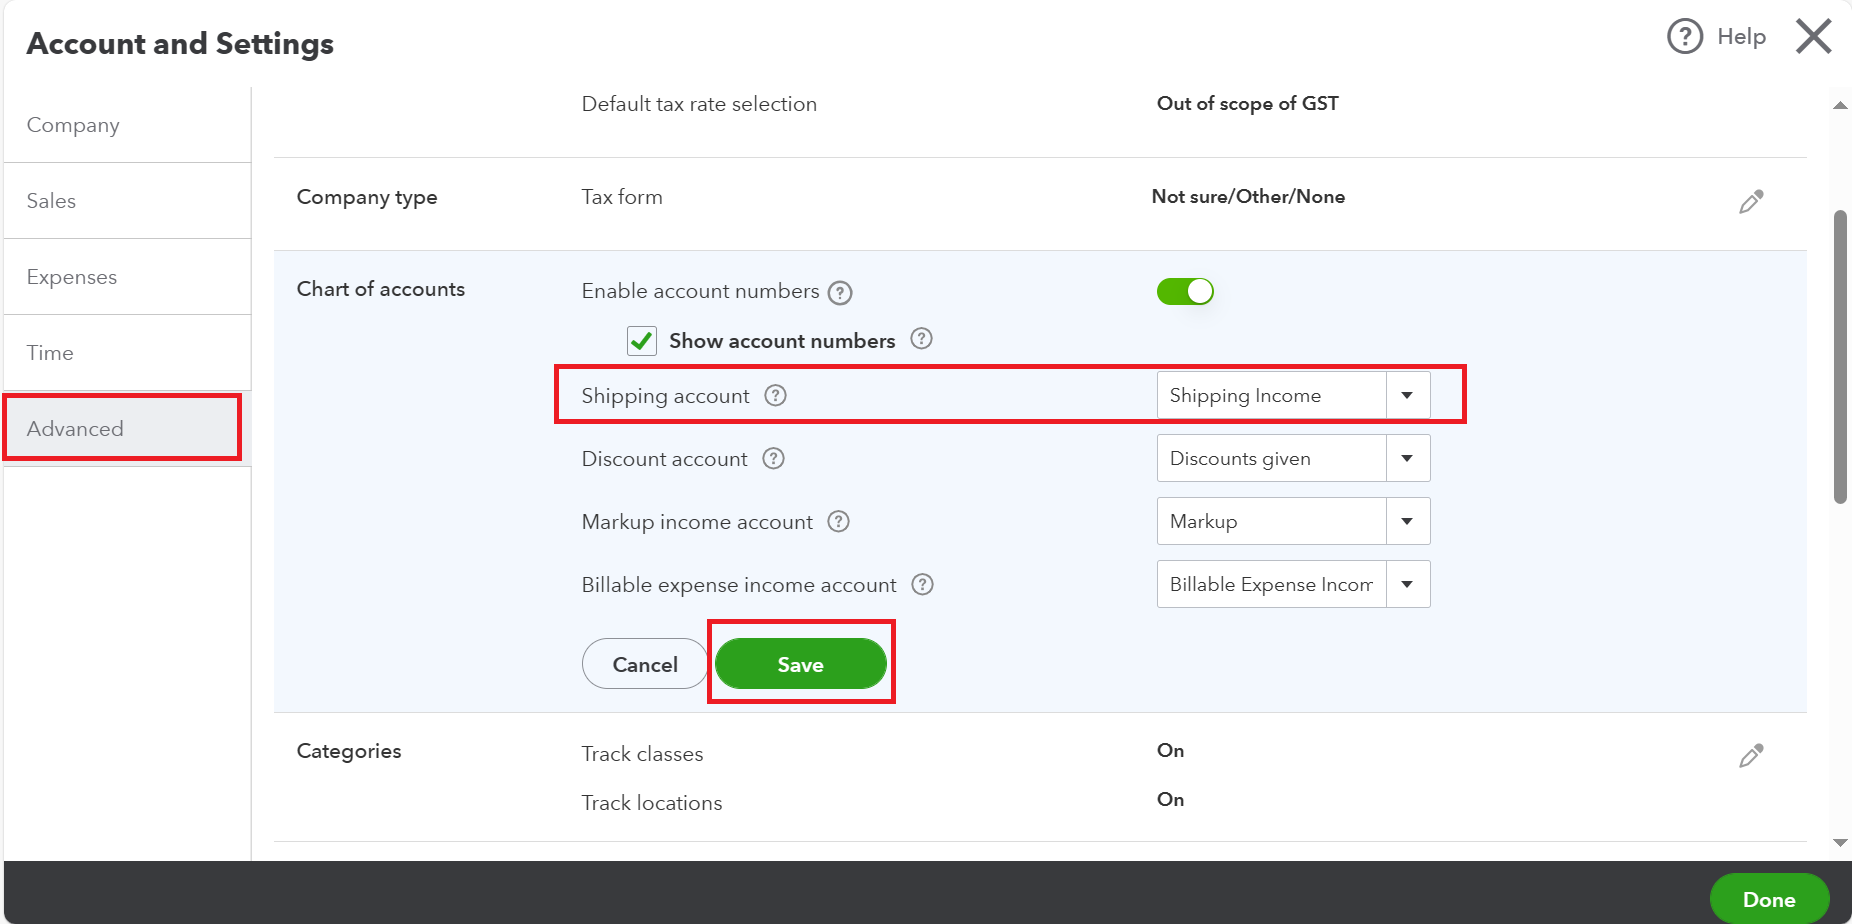
Furthermore, you will also need to enabled the Shipping option your QuickBooks account.
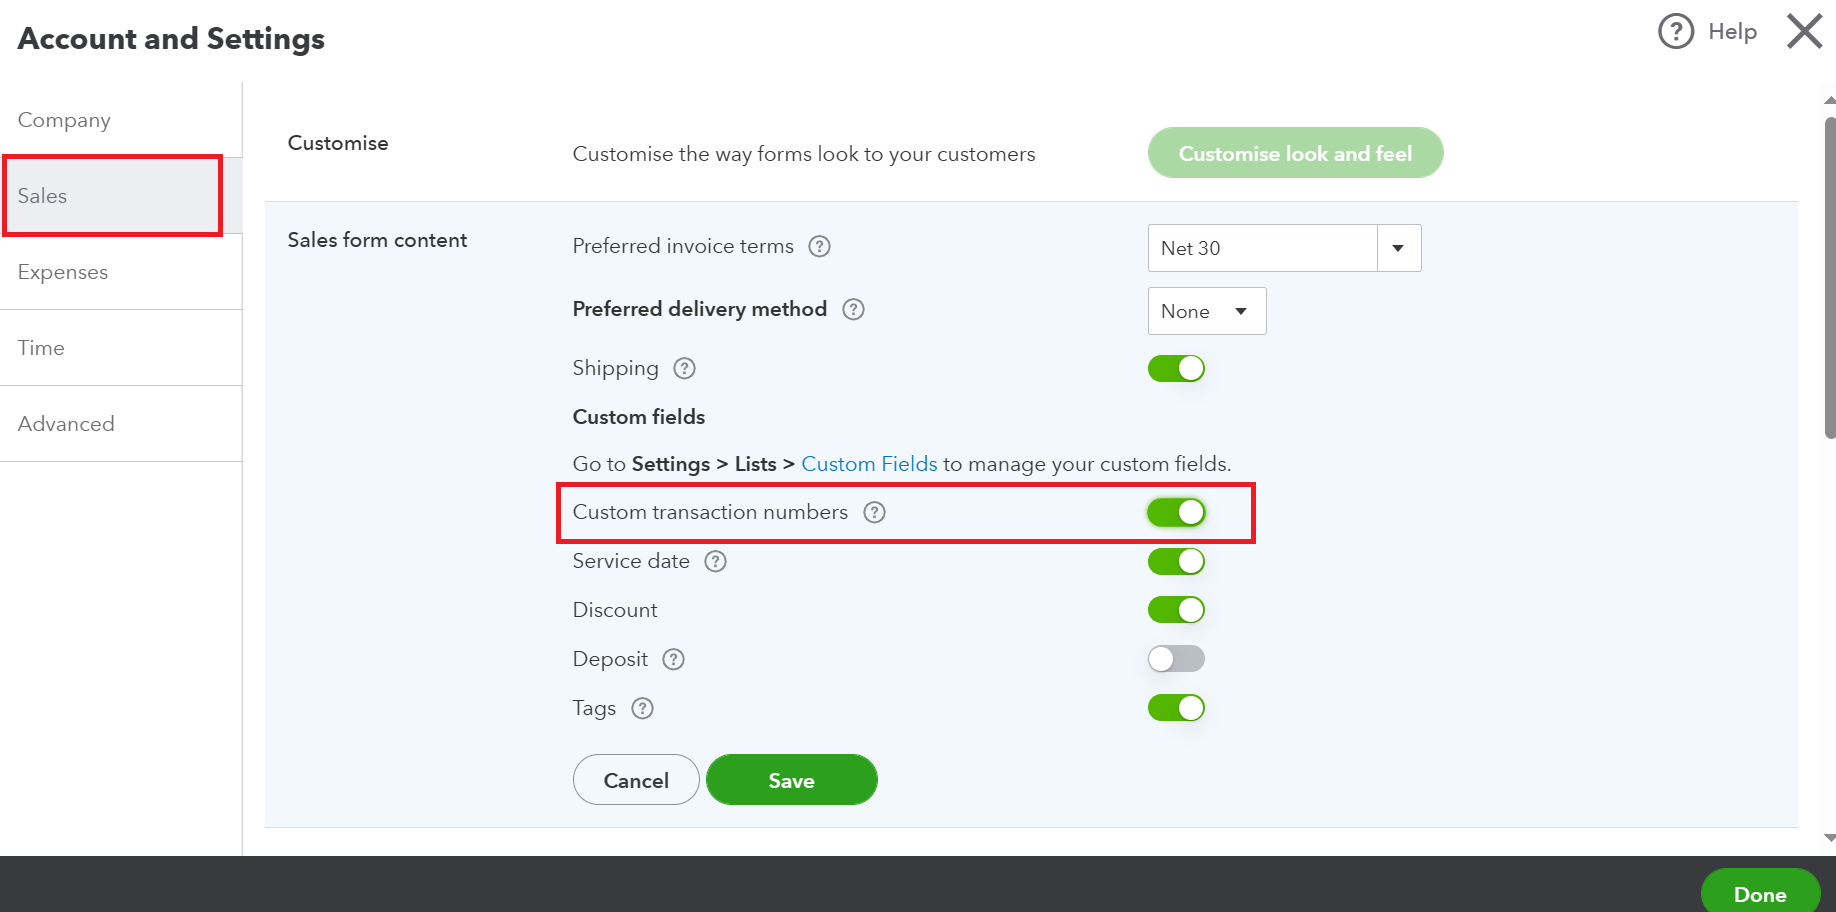
Go Setting > Account and Setting > Sales.

iii. Sync Seller Vouchers: To sync seller vouchers in QuickBooks invoice.
For more details click here to learn how to enable the discount line in QuickBooks.

iv. Use Marketplace Order Ref as Invoice Number: Enable this if you want to use marketplace Order ID as the invoice number. Disable this if you want to use QuickBooks running number.
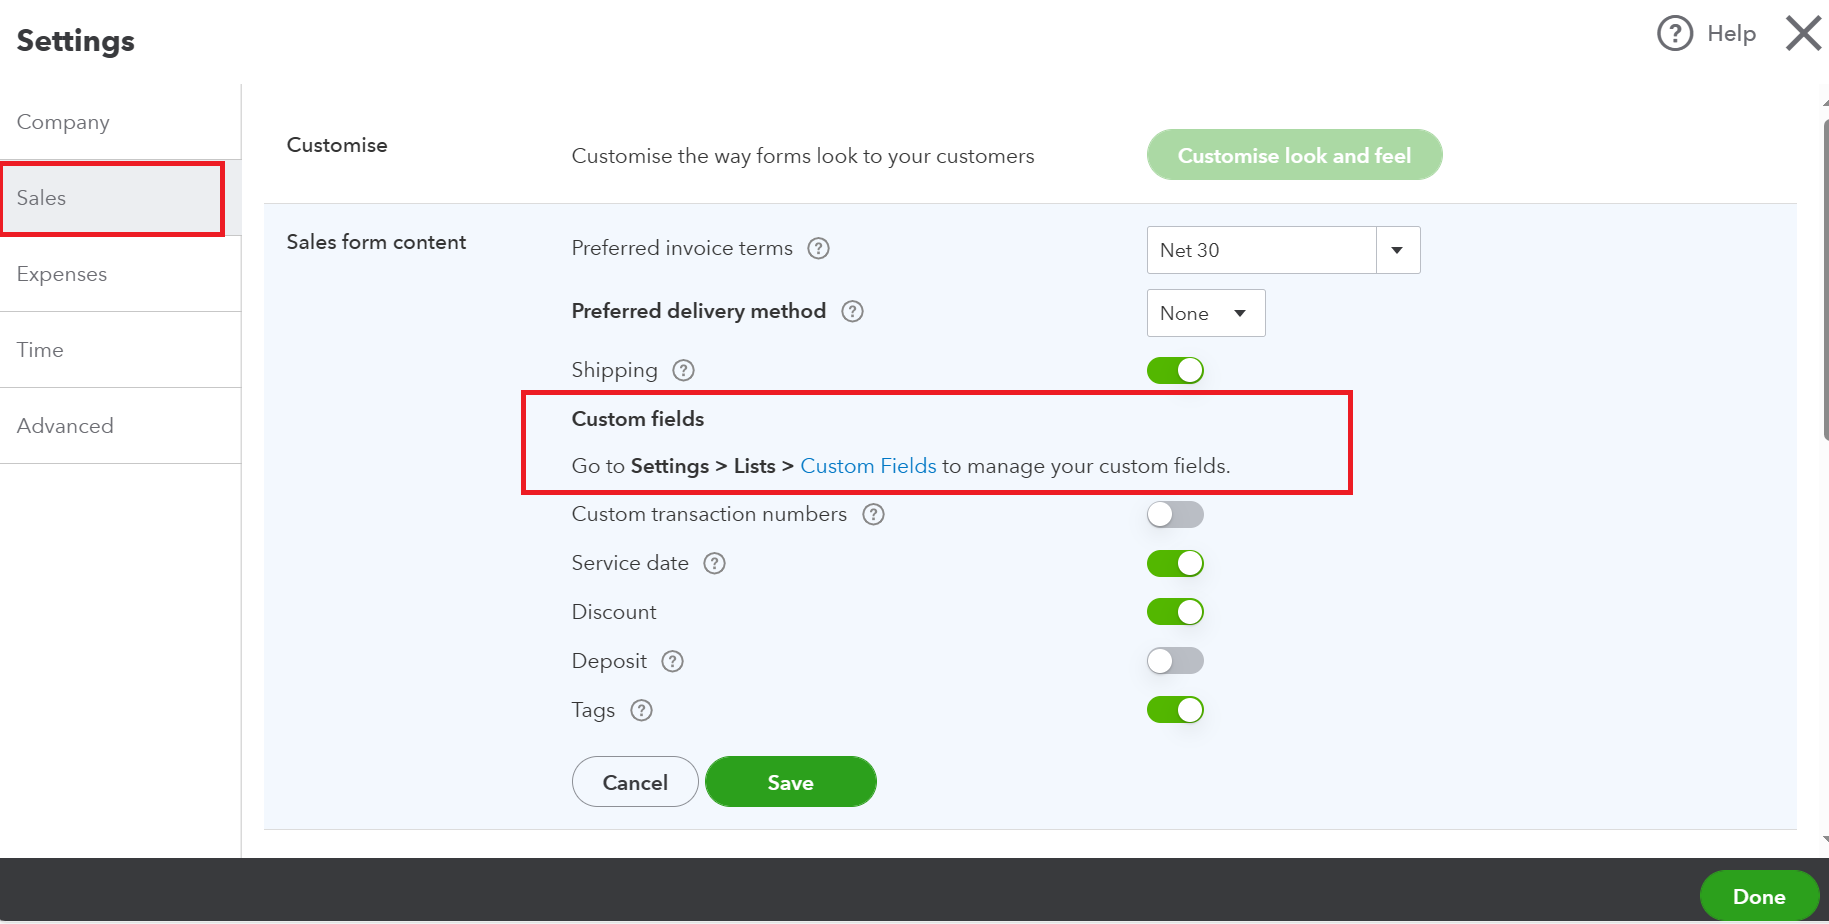
*NOTE: Please turn on the custom transaction number in QuickBooks setting if you want to use marketplace Order ID as the invoice number.
v. Use Order Date as Invoice Date: Enable if you want to use Order Date from marketplaces/webstore. Disable this to use Sync Date (the date of when the order is sync from Zetpy to QuickBooks).
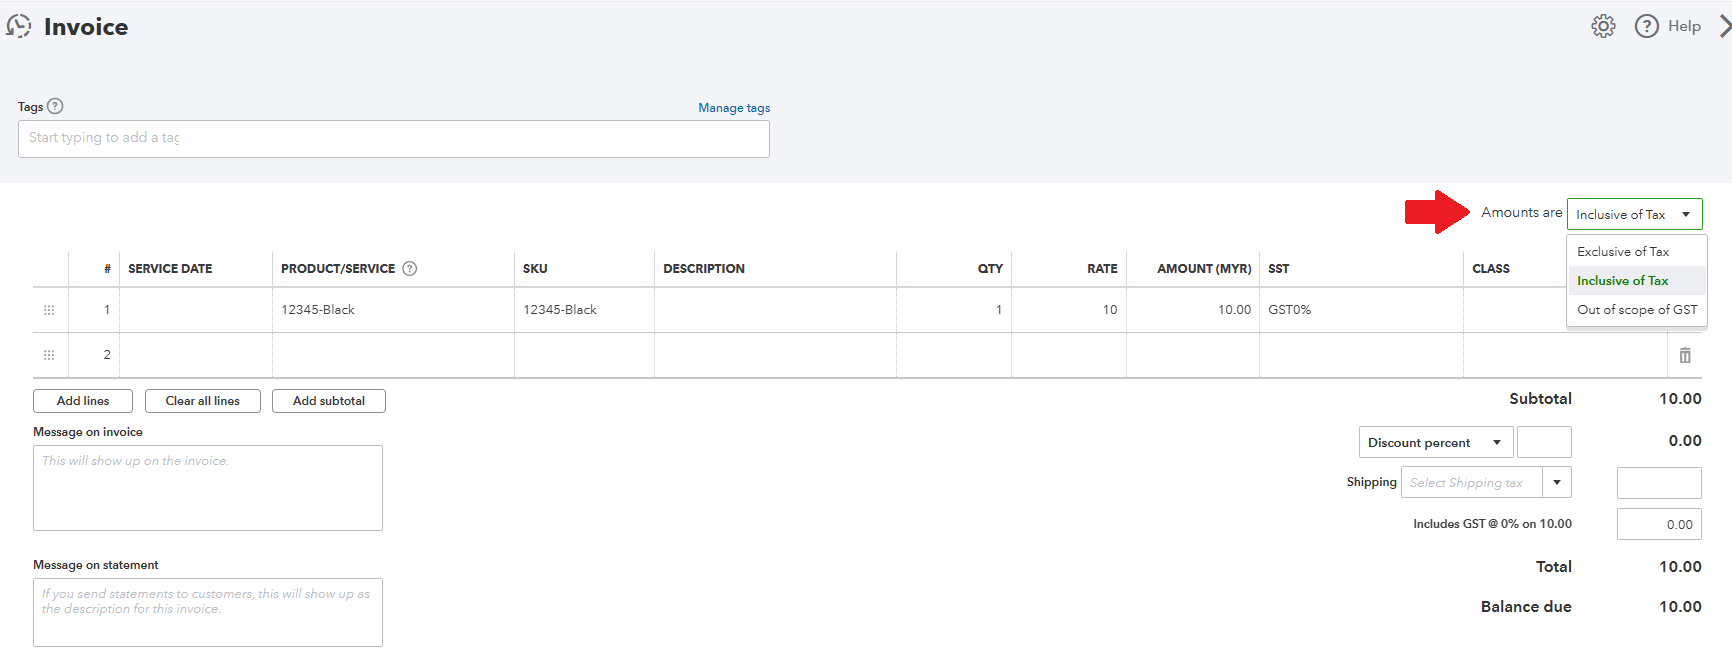
vi. Sales Amount in the Invoice are: Choose the amount to be Exclusive of Tax or Inclusive of Tax
a. Custom Field 1: To show the order from which marketplace and which account.
b. Custom Field 2: To show the order ref ID
c. Custom Field 3: To show the discount code.
You can click here for more details about how to add custom fields to invoices in QuickBooks.
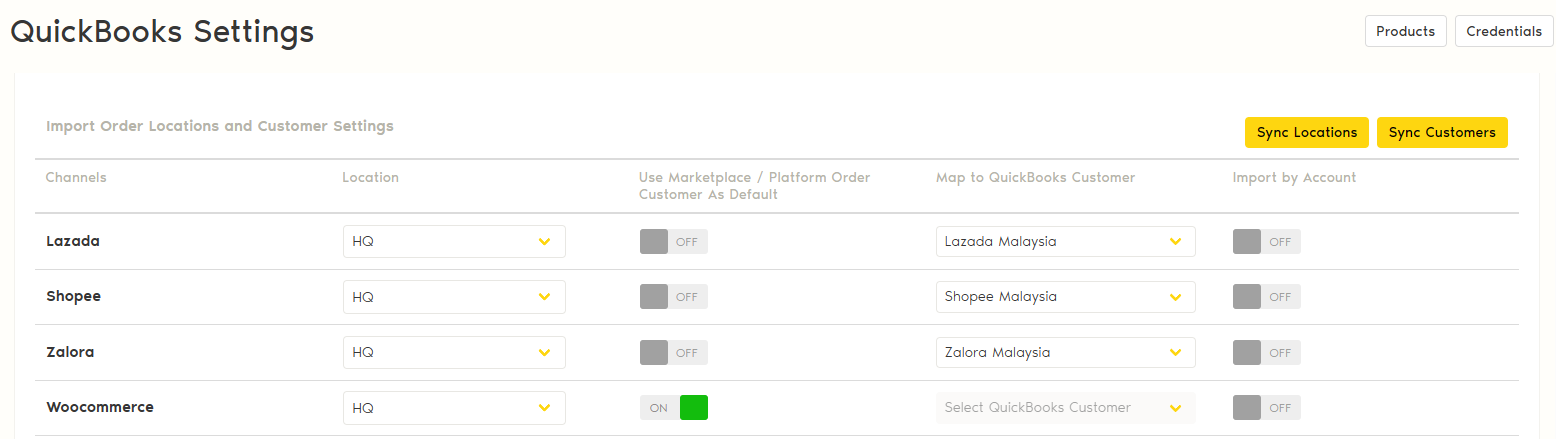
5. Import Order Locations and Customer Settings
First, you need to click on the 'Sync Locations' and 'Sync Customers' to retrieve data from QuickBooks. Then, select the location from the drop down list if necessary.
On 'Use Marketplace / Platform Order Customer As Default' setting:
- Turn ON: to create the customer in QuickBooks as a new customer once invoice is created
- Turn OFF: to map with a specific customer from QuickBooks, then select the customer from the drop down list.
Important Note!
You need to set up your sales tax inside QuickBooks. Click here for more details.

If you have any issues or questions, please drop us an email at support@zetpy.com.