What are you looking for?
Get help straight from our Zetpy team...
Install & Authorize Plugins
How to Authorize Xilnex inside Zetpy?
Sign in to Xilnex account, download to your desktop and copy Token to your Zetpy account.
Updated 1 week ago
1. Click here to Sign In to Xilnex Web Apps.
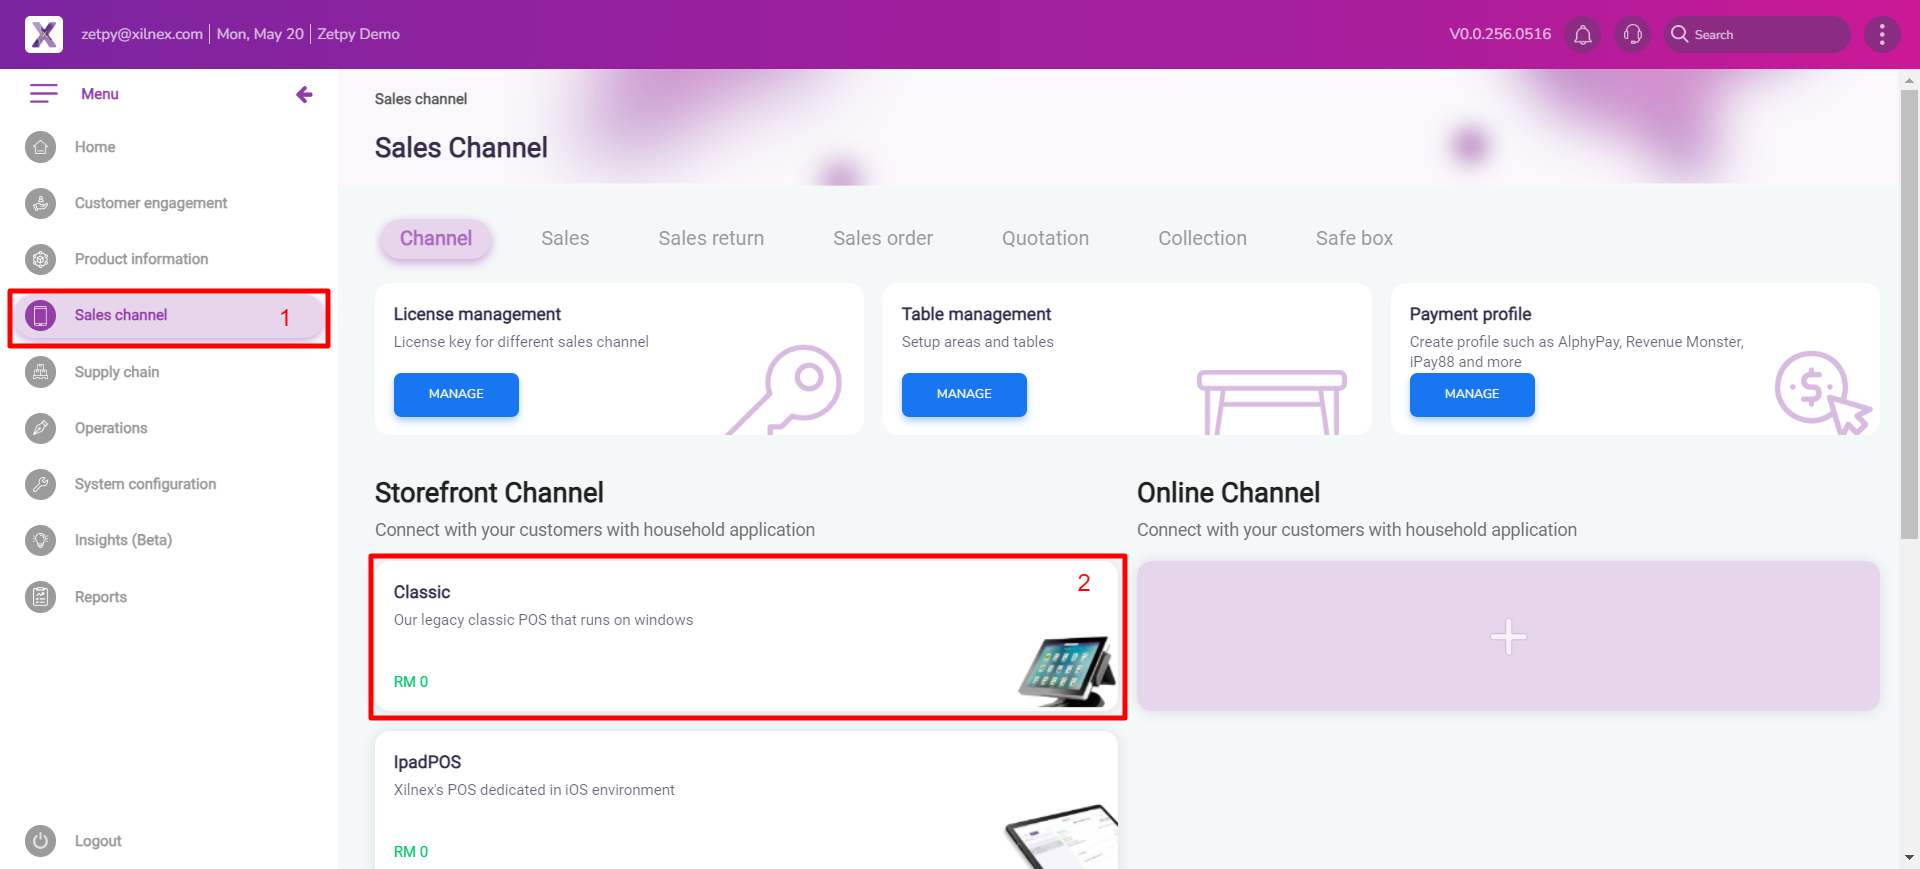
2. After you have signed in. Go to Sales channel and click on Classic Storefront Channel.
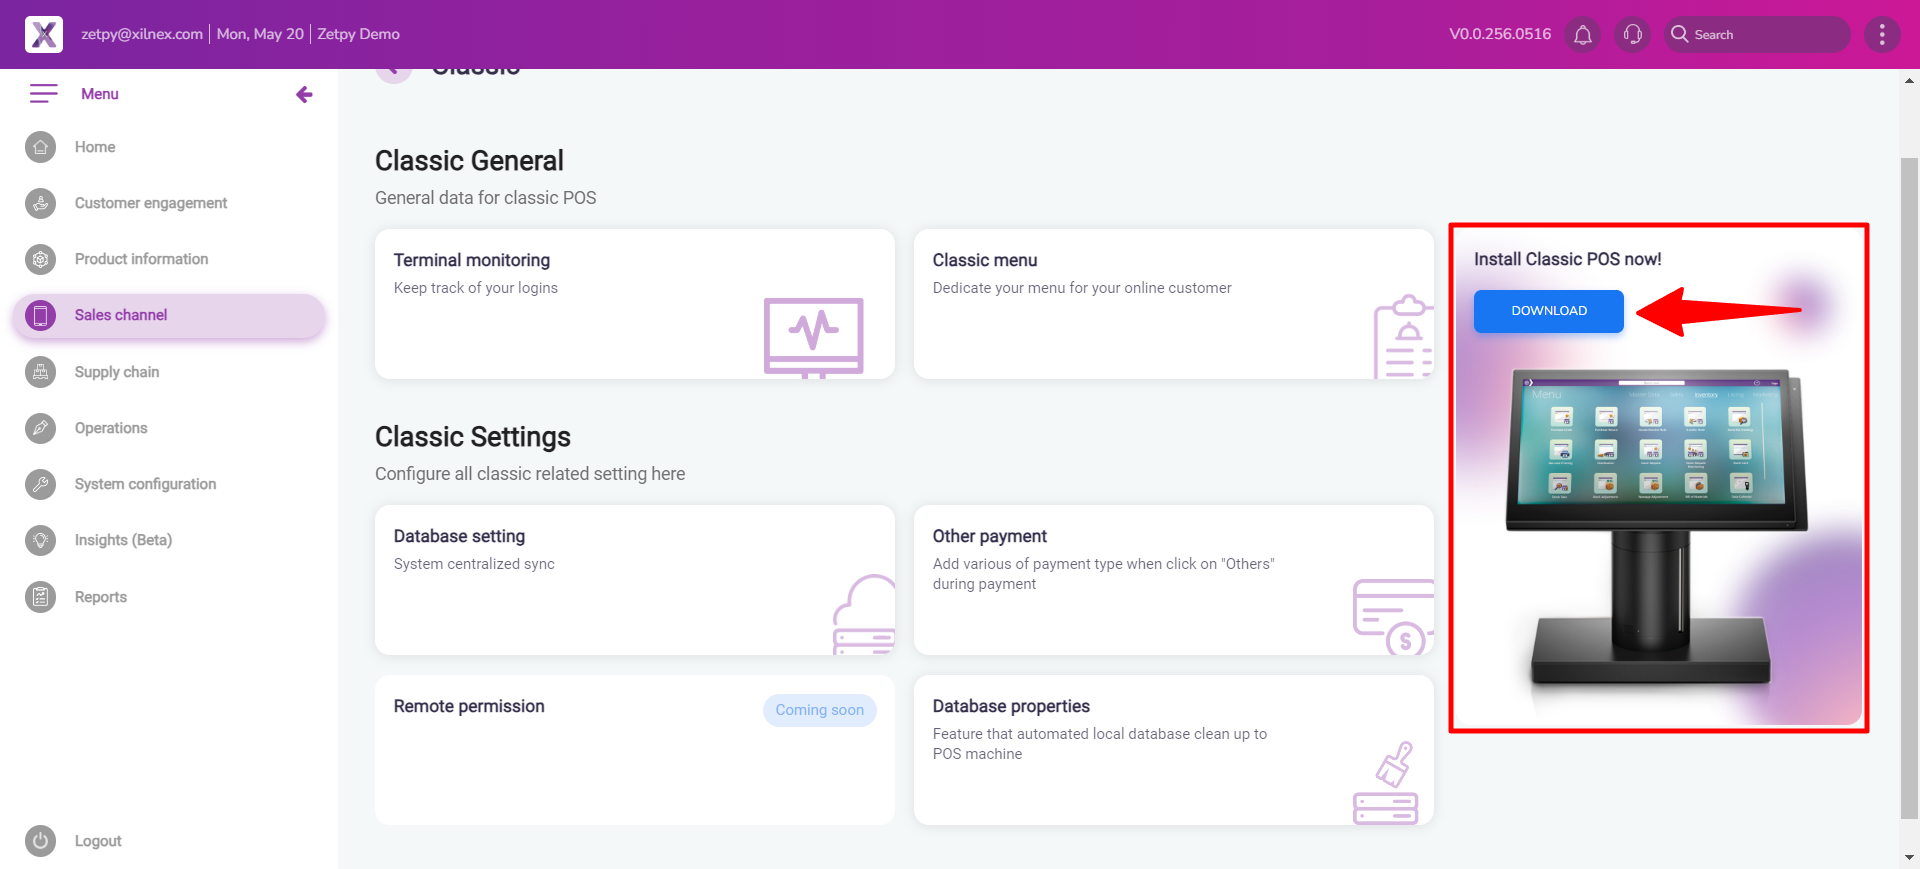
3. After that, click on the Download button "Install Classic POS now!".
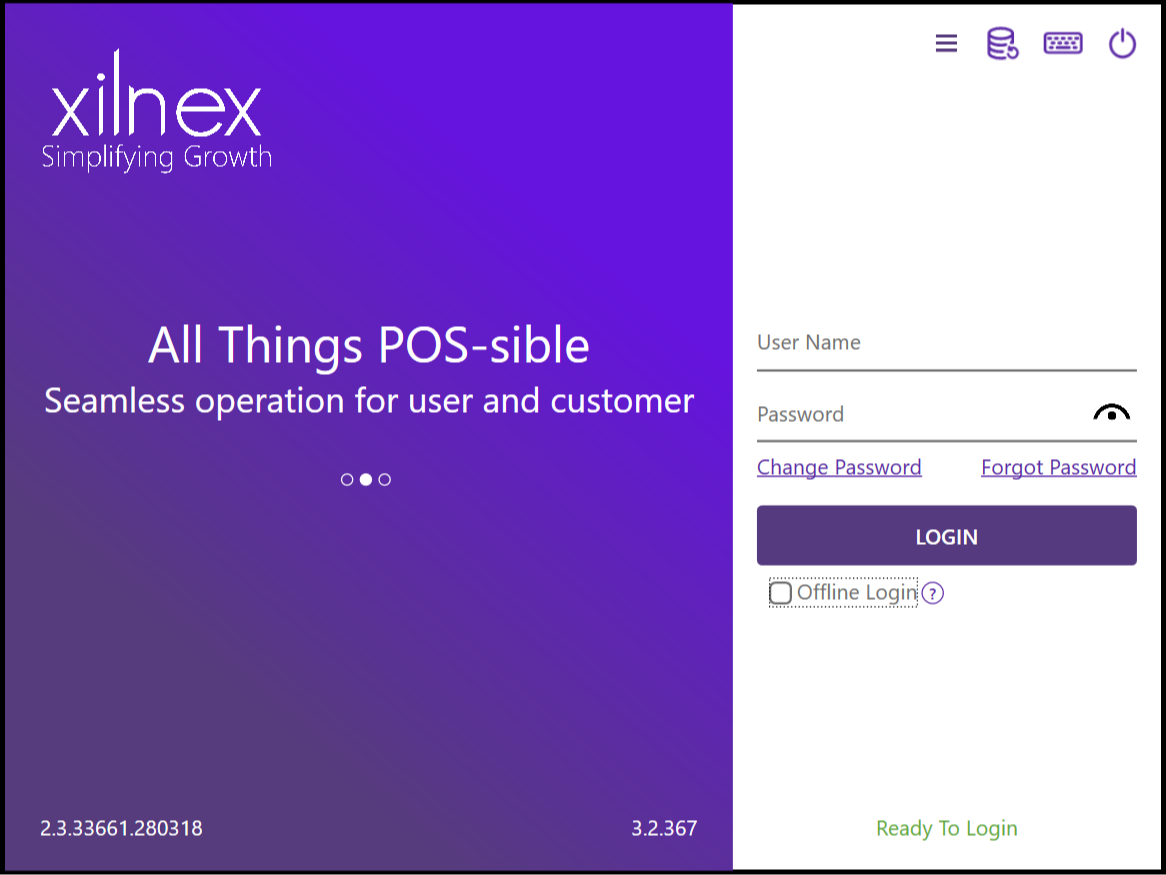
4. Once you have finished setup, you will see the interface bellow. continue by login to your Xilnex RetailPOS account.
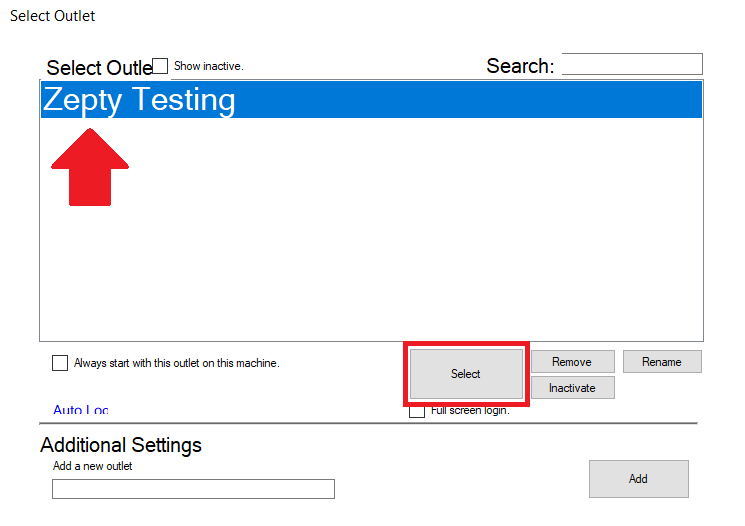
5. Enter your new outlet name in the text field, and click Add.
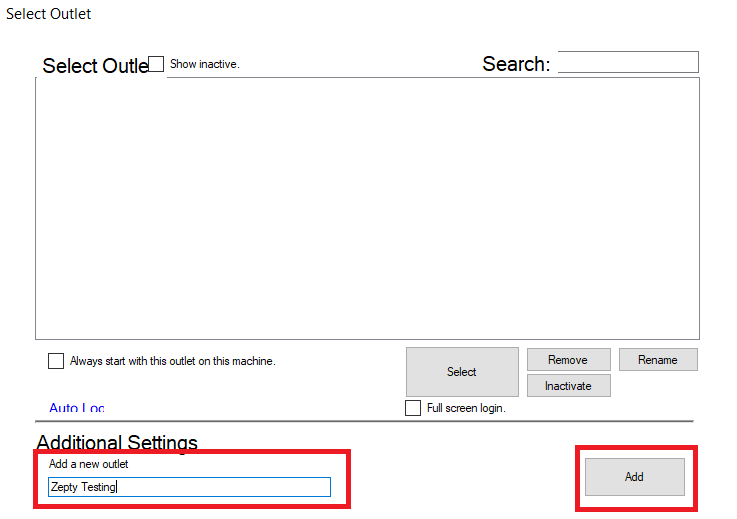
6. Once done, click Select.
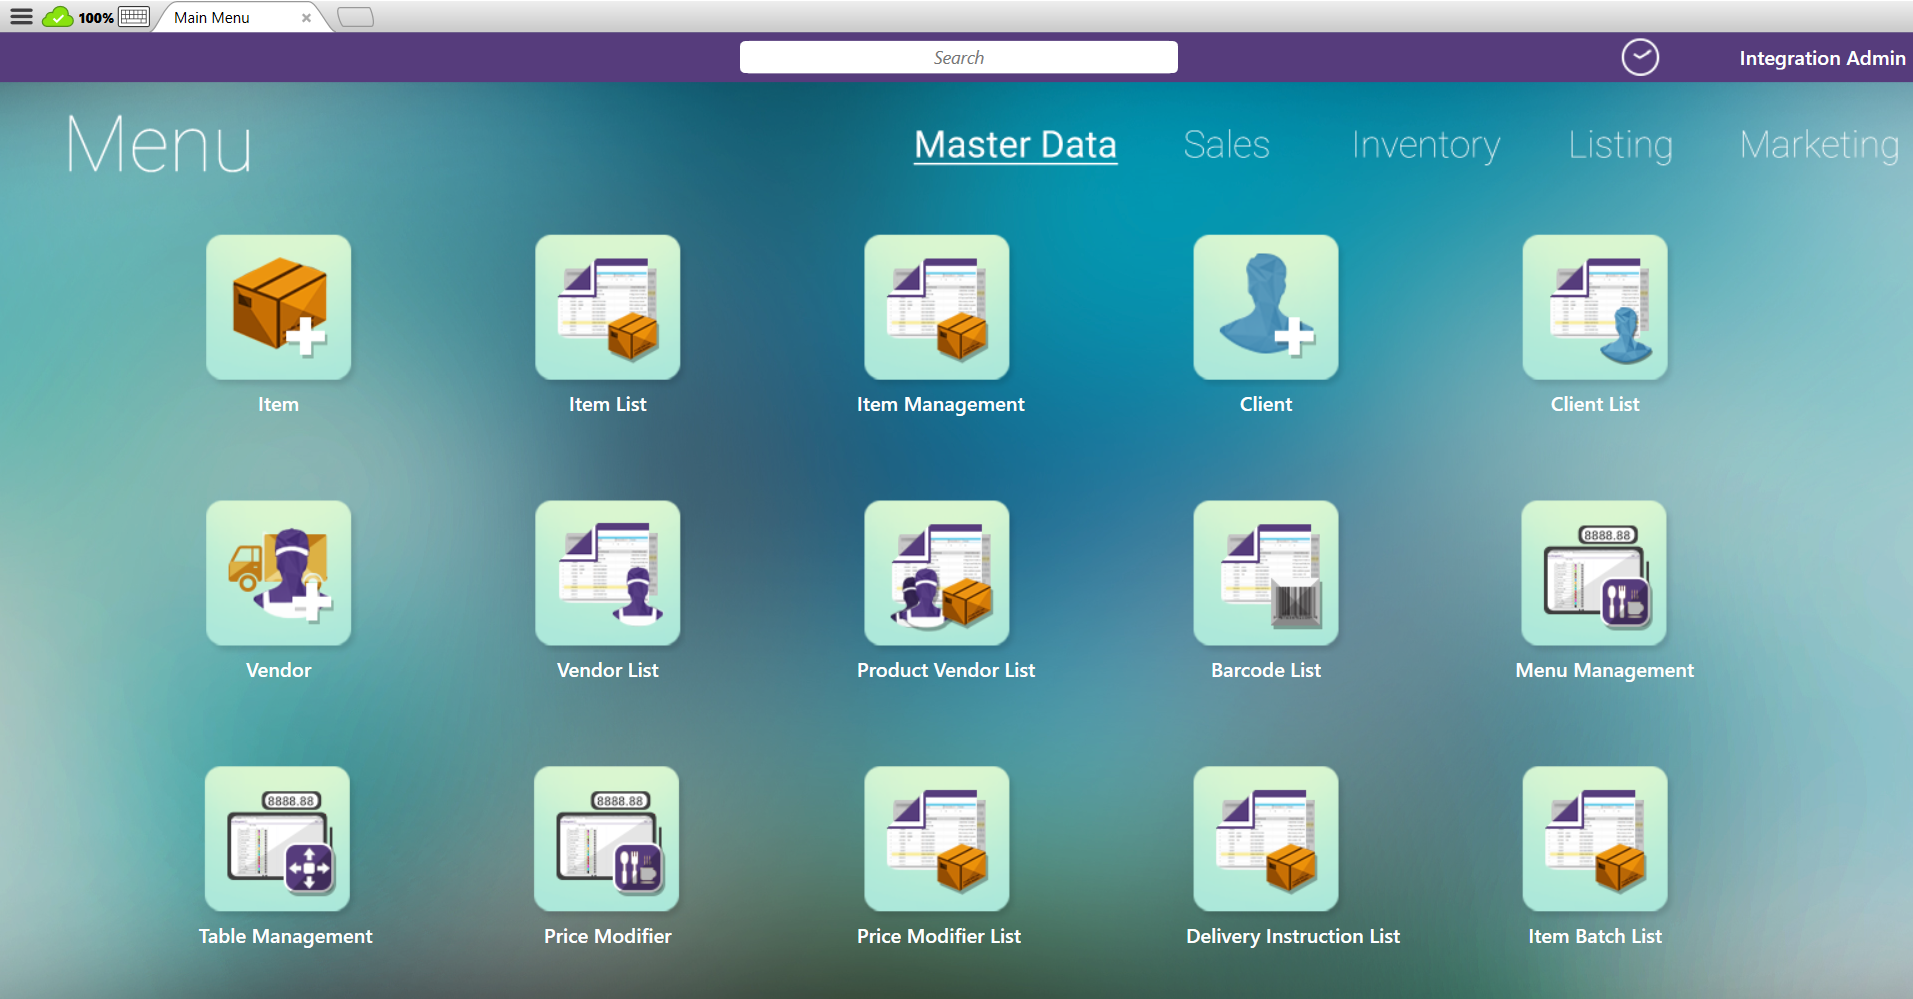
7. You are now successfully login to Xilnex Retail Business Solution.
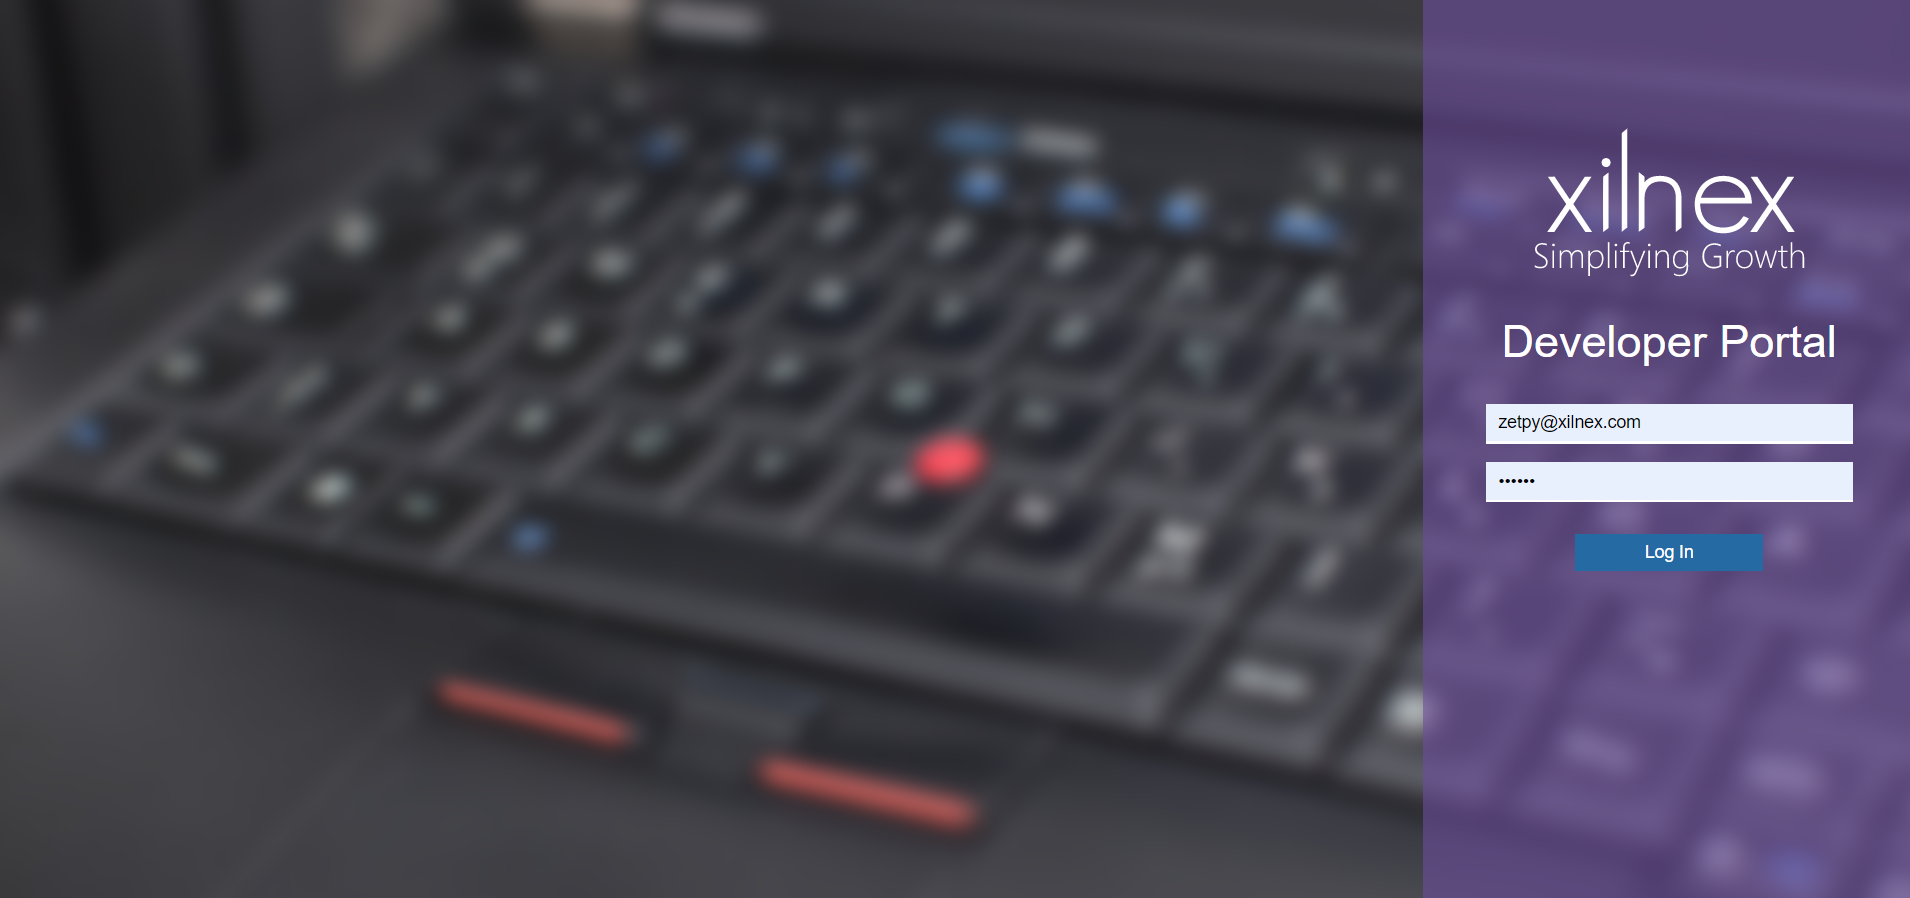
8. Now, click here to login to Xilnex Developer Portal. (Note: Please use Admin Login Access to login as this is required by Xilnex for security reason)
9. Go to Home Page and click Create Project under Project Listing.

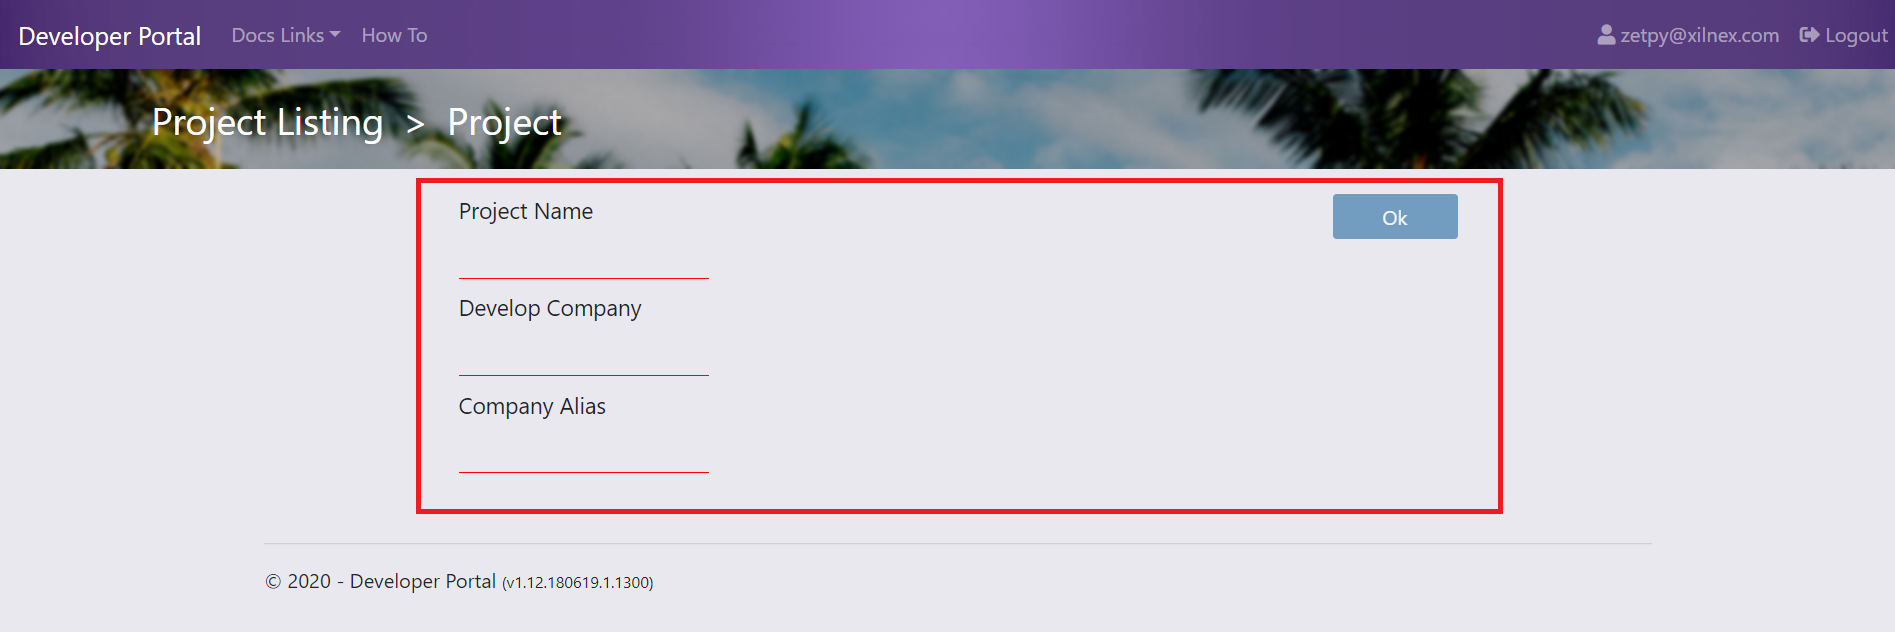
10. Complete all the fields such as Project Name, Develop Company and Company Alias. Suggested to fill in as below:
- Project Name: Your company/brand name x Zetpy
- Develop Company: Zetpy
- Company Alias: support@zetpy.com
11. Click Ok once done. You will be redirected to Access Control page.
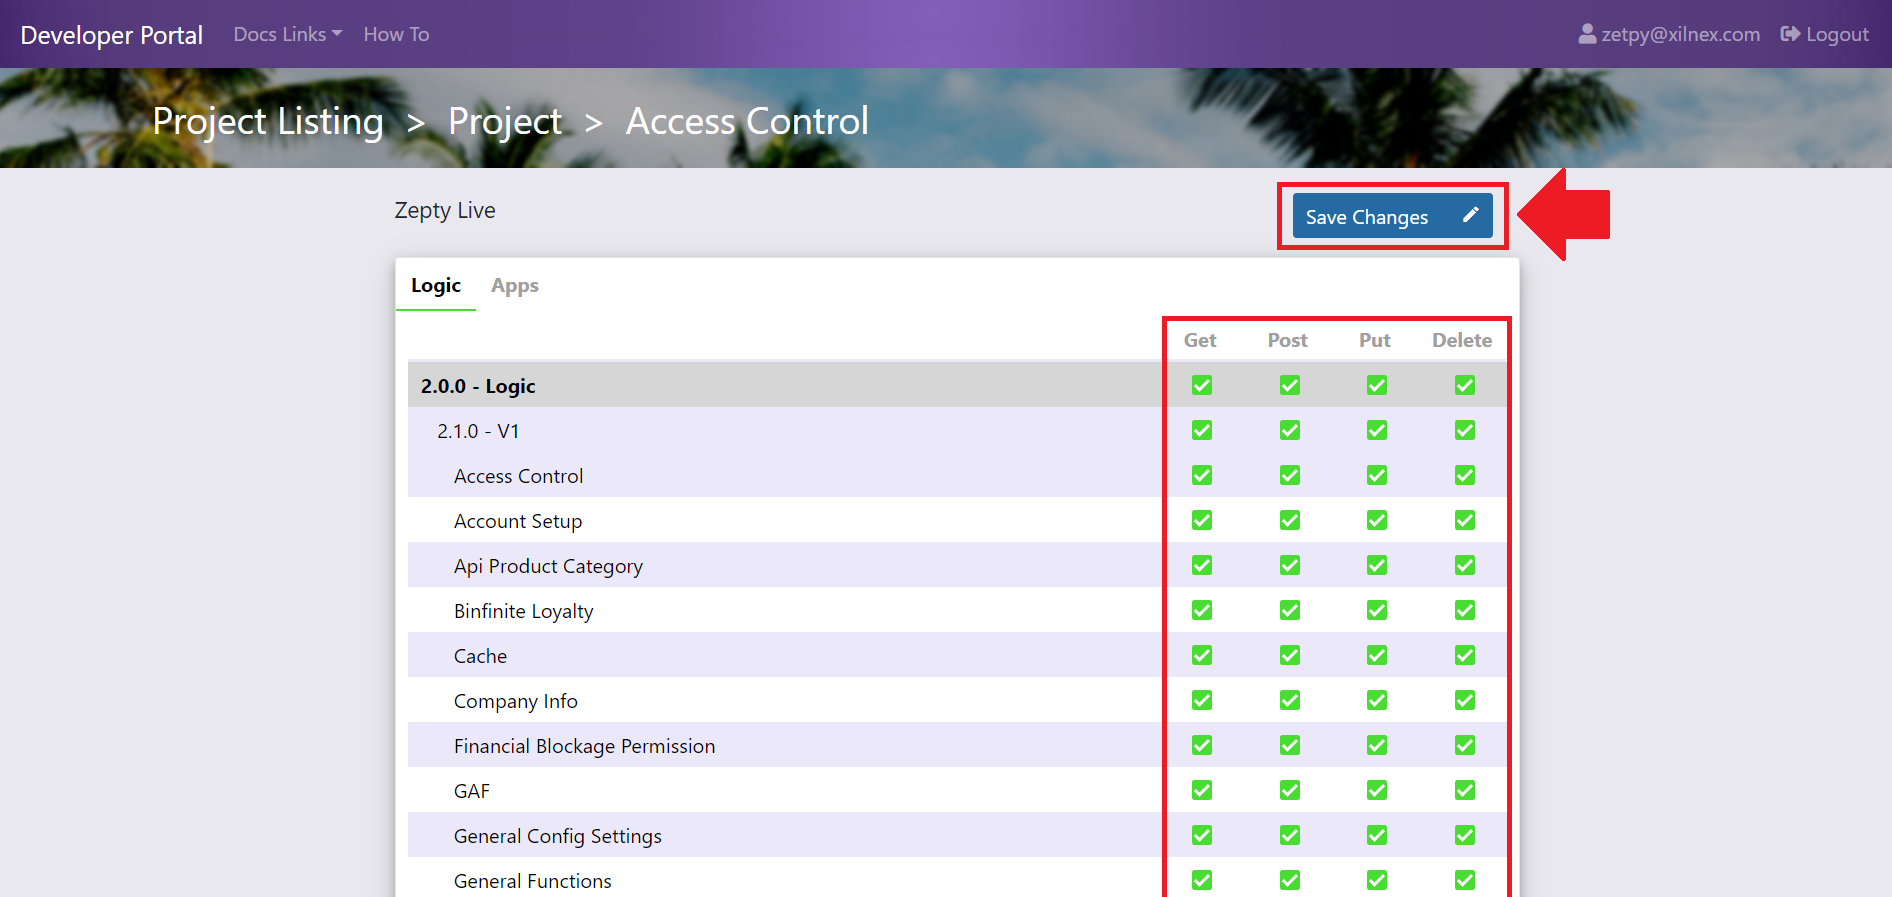
12. On Setup Access Control page, you will be managing the API access of current project.
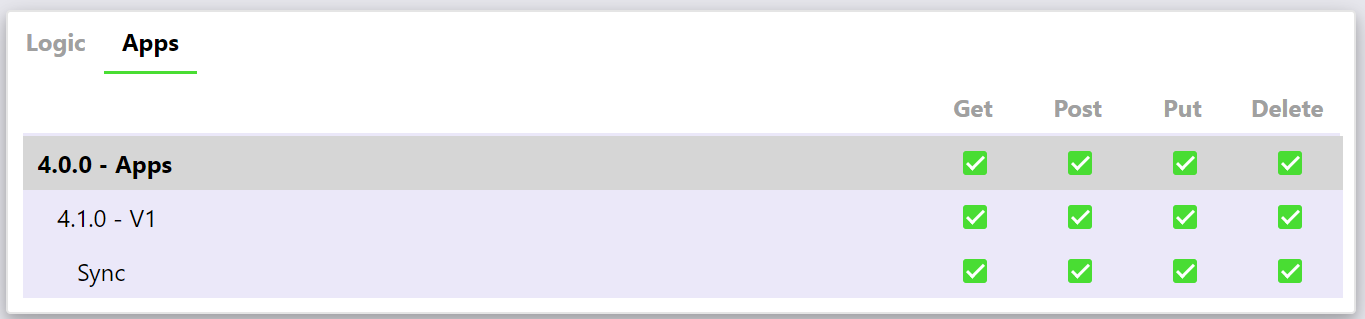
13. Select ALL boxes on Logic and Apps, and click Save Changes when you are done. You will be redirect to the project page.
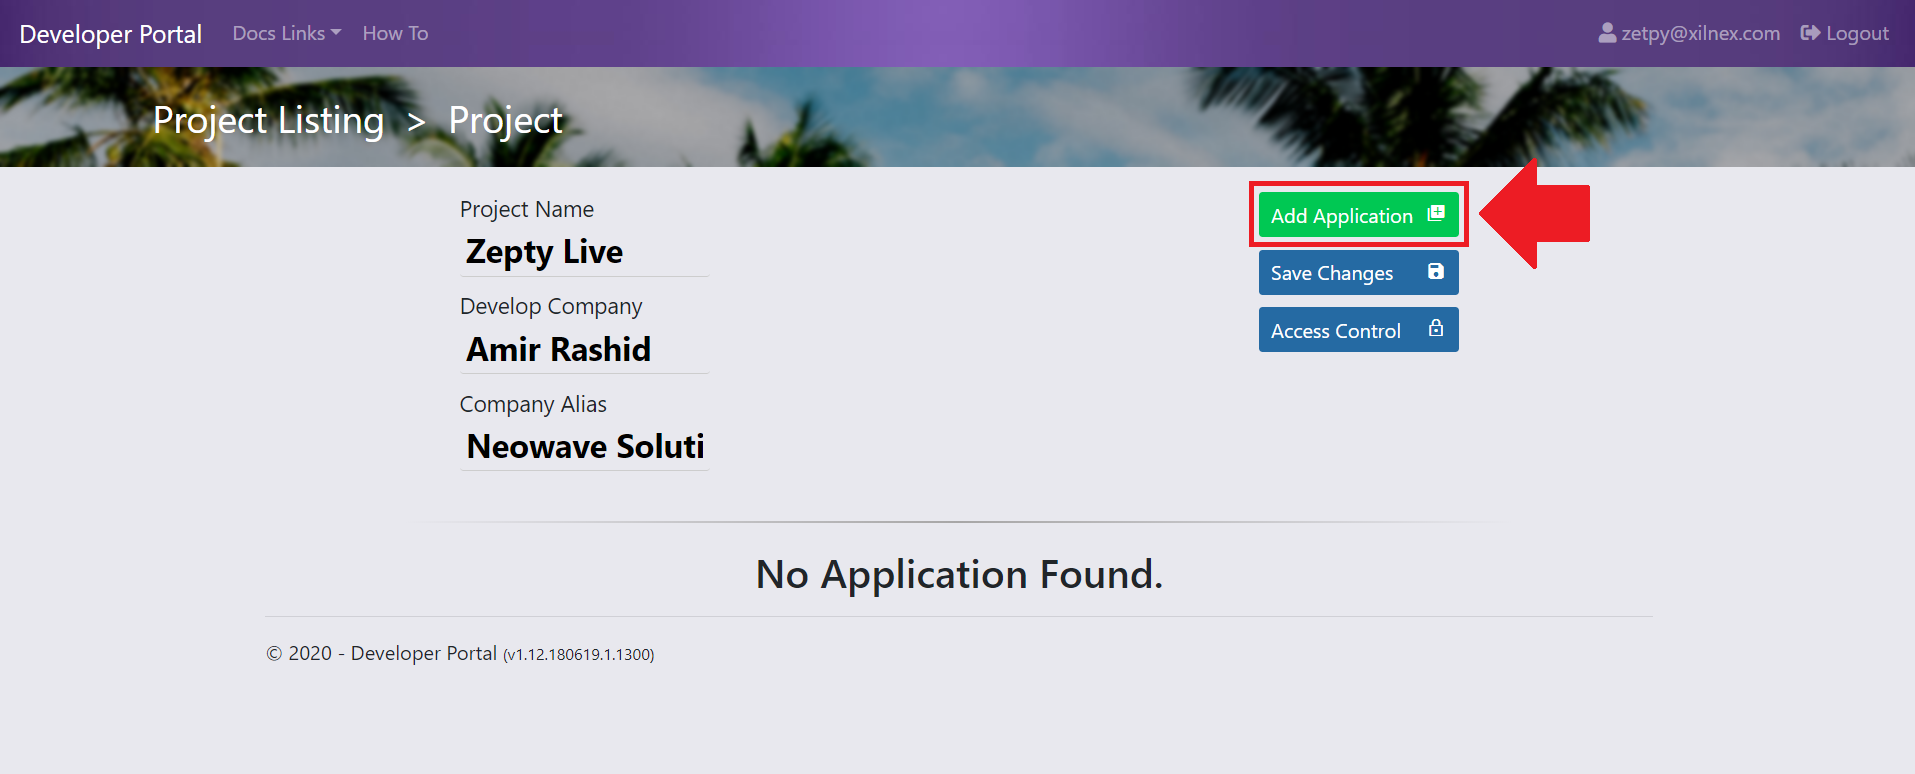
14. Create a new application by clicking Add Application.
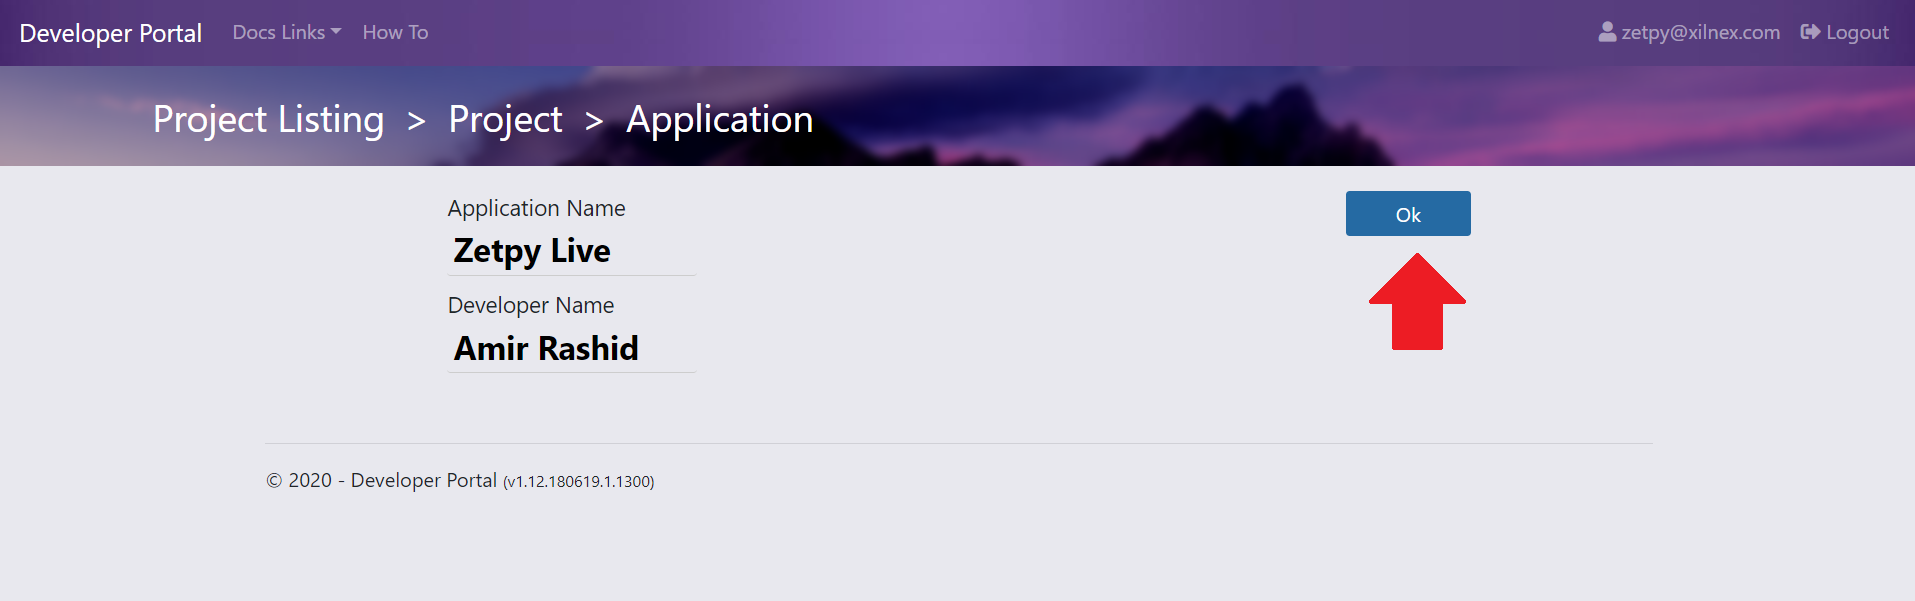
15. Fill in all the fields and click Ok. You will be redirect to application page.
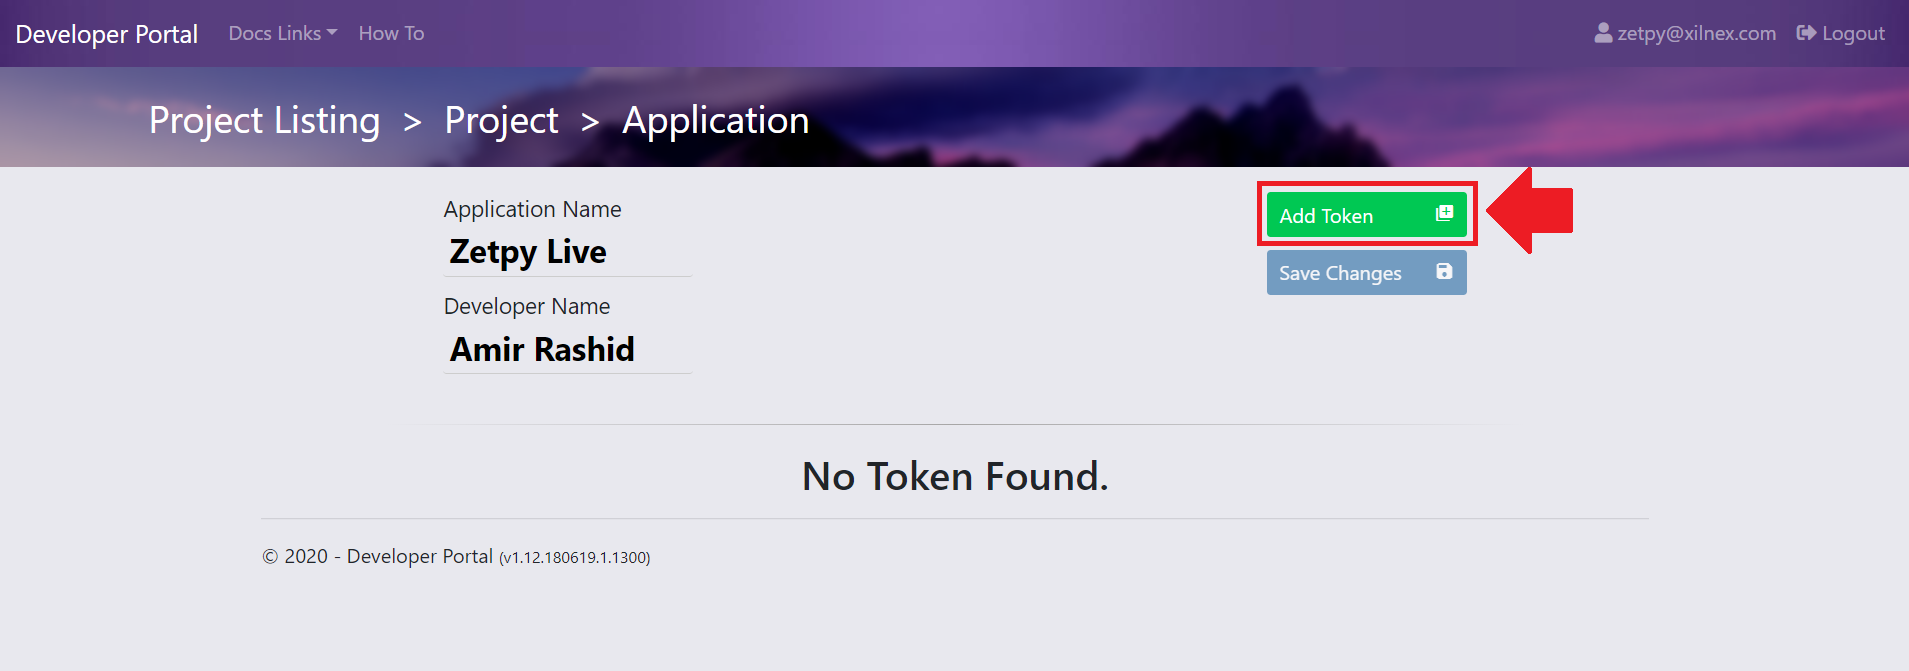
16. Right now you already have the App ID, you need to create Token. Simply click on Add Token to create Token.
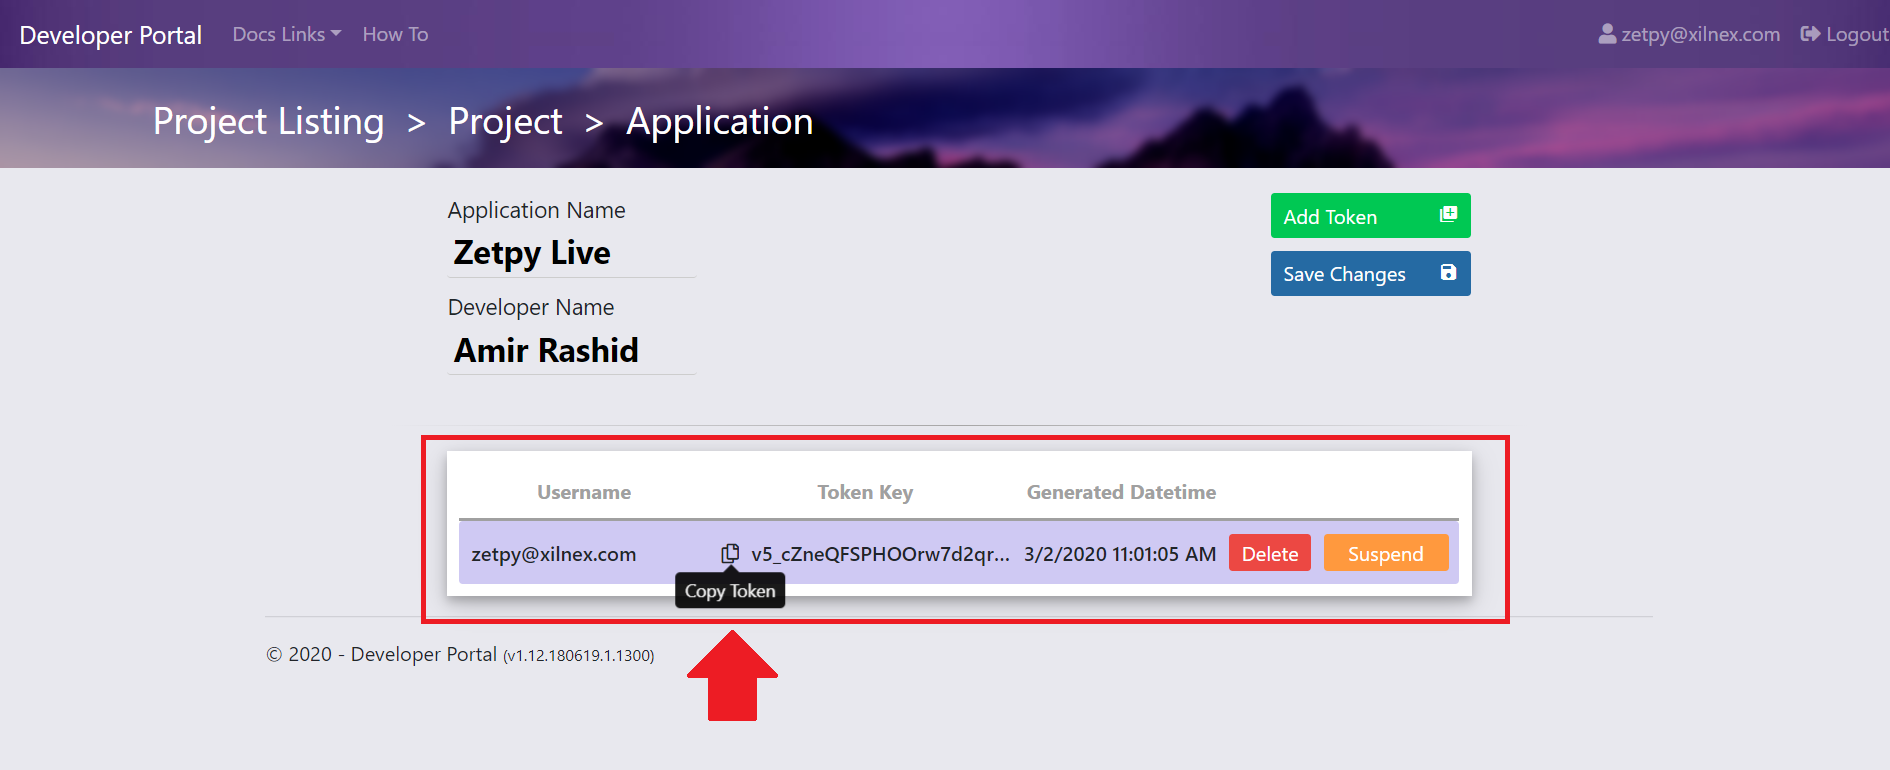
17. Copy the AppID and Token.
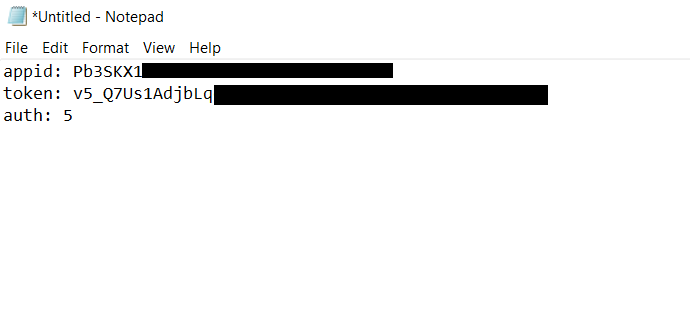
Note that:
Once you copy Token, open Notepad and paste them inside it. Then, you can paste them easily to Zetpy.
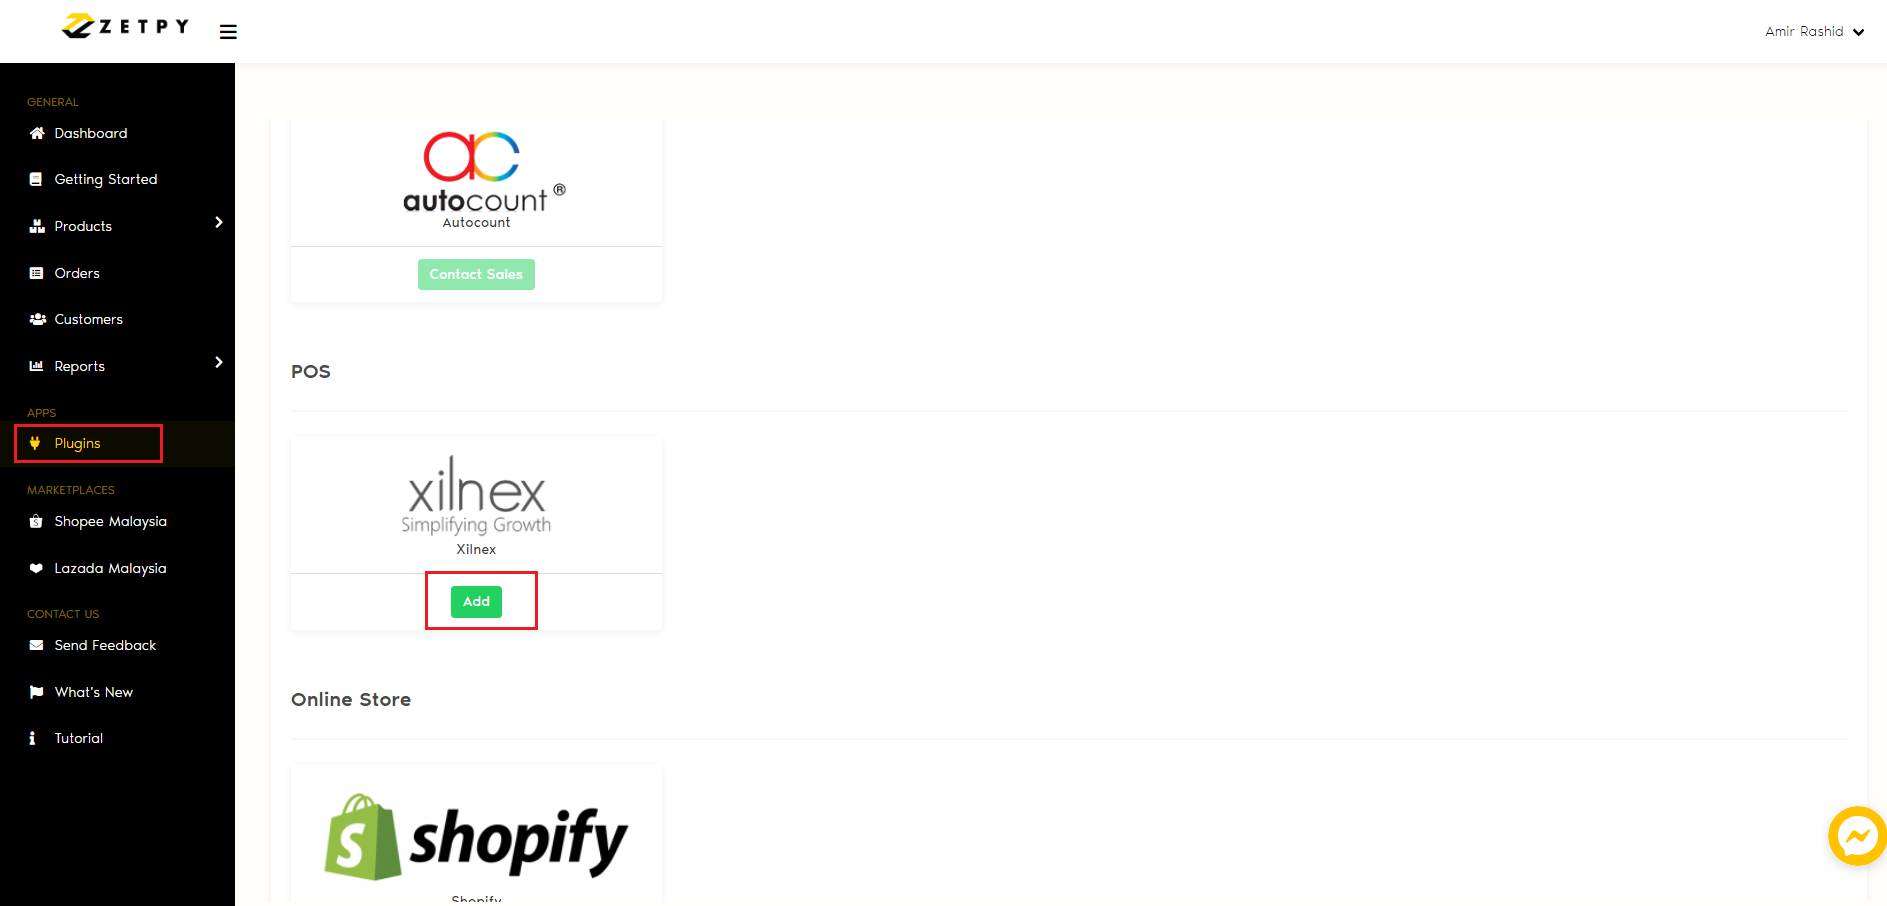
18. Login to Zetpy and go to APPS > Plugins > Add Plugins tab > Add the Xilnex plugin and install it.
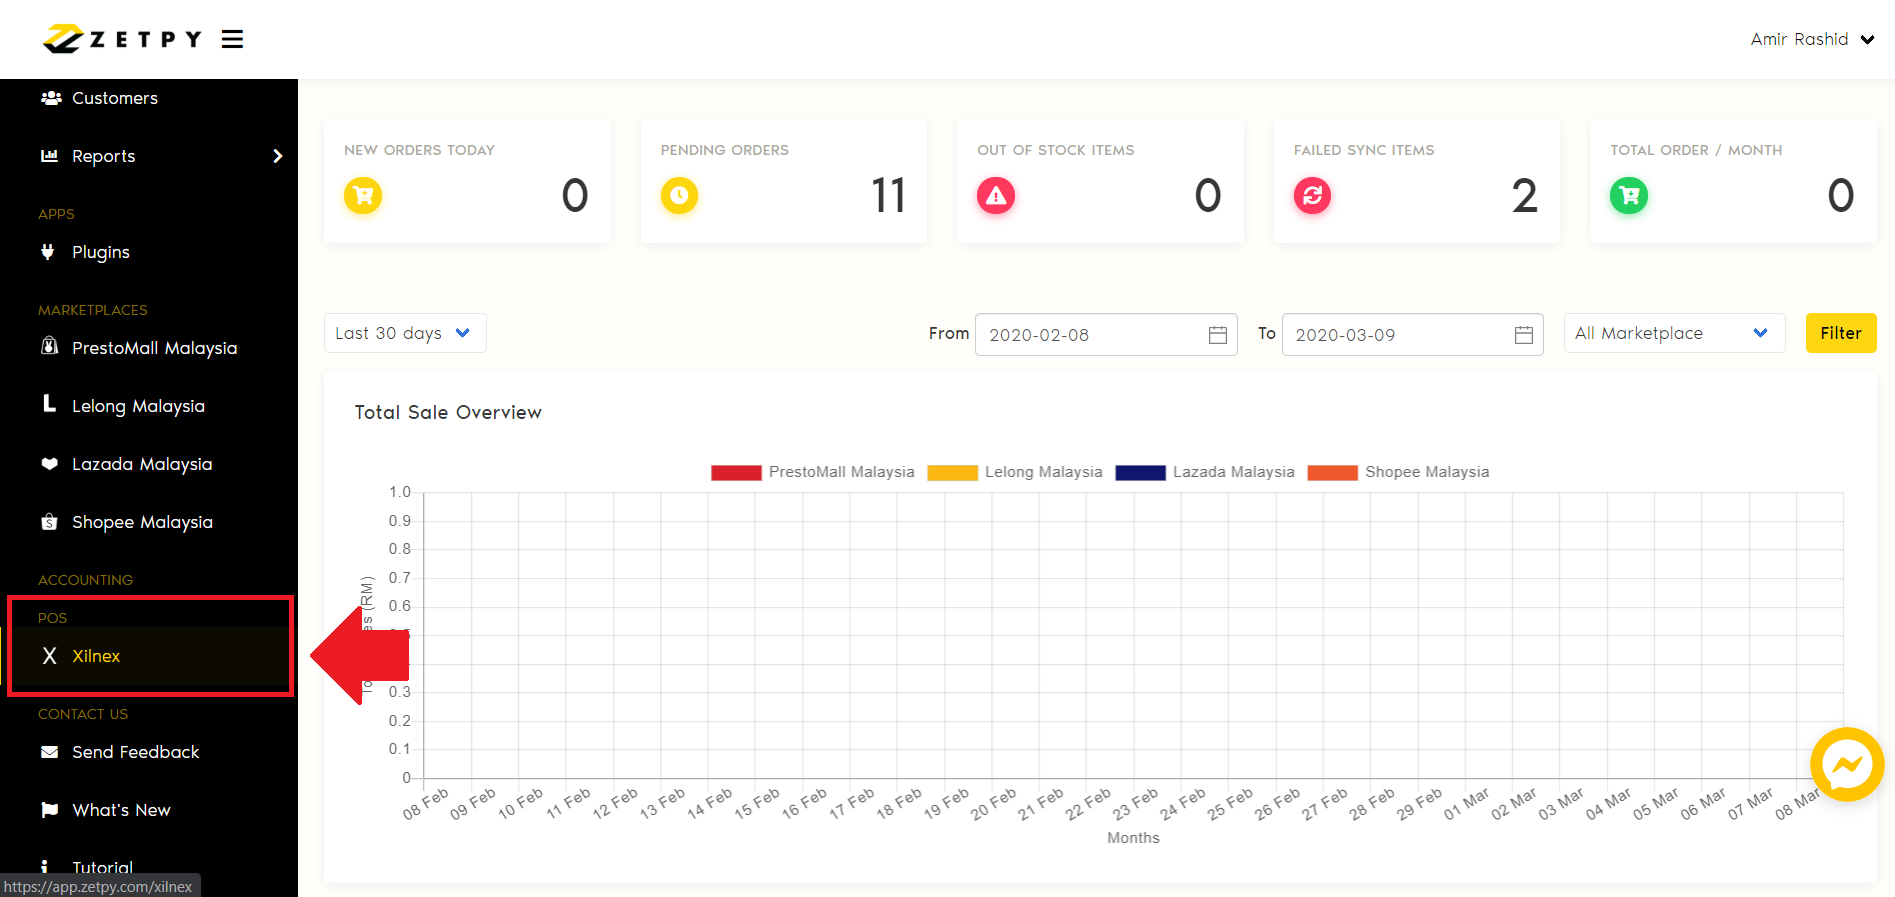
19. Go to POS > Xilnex.
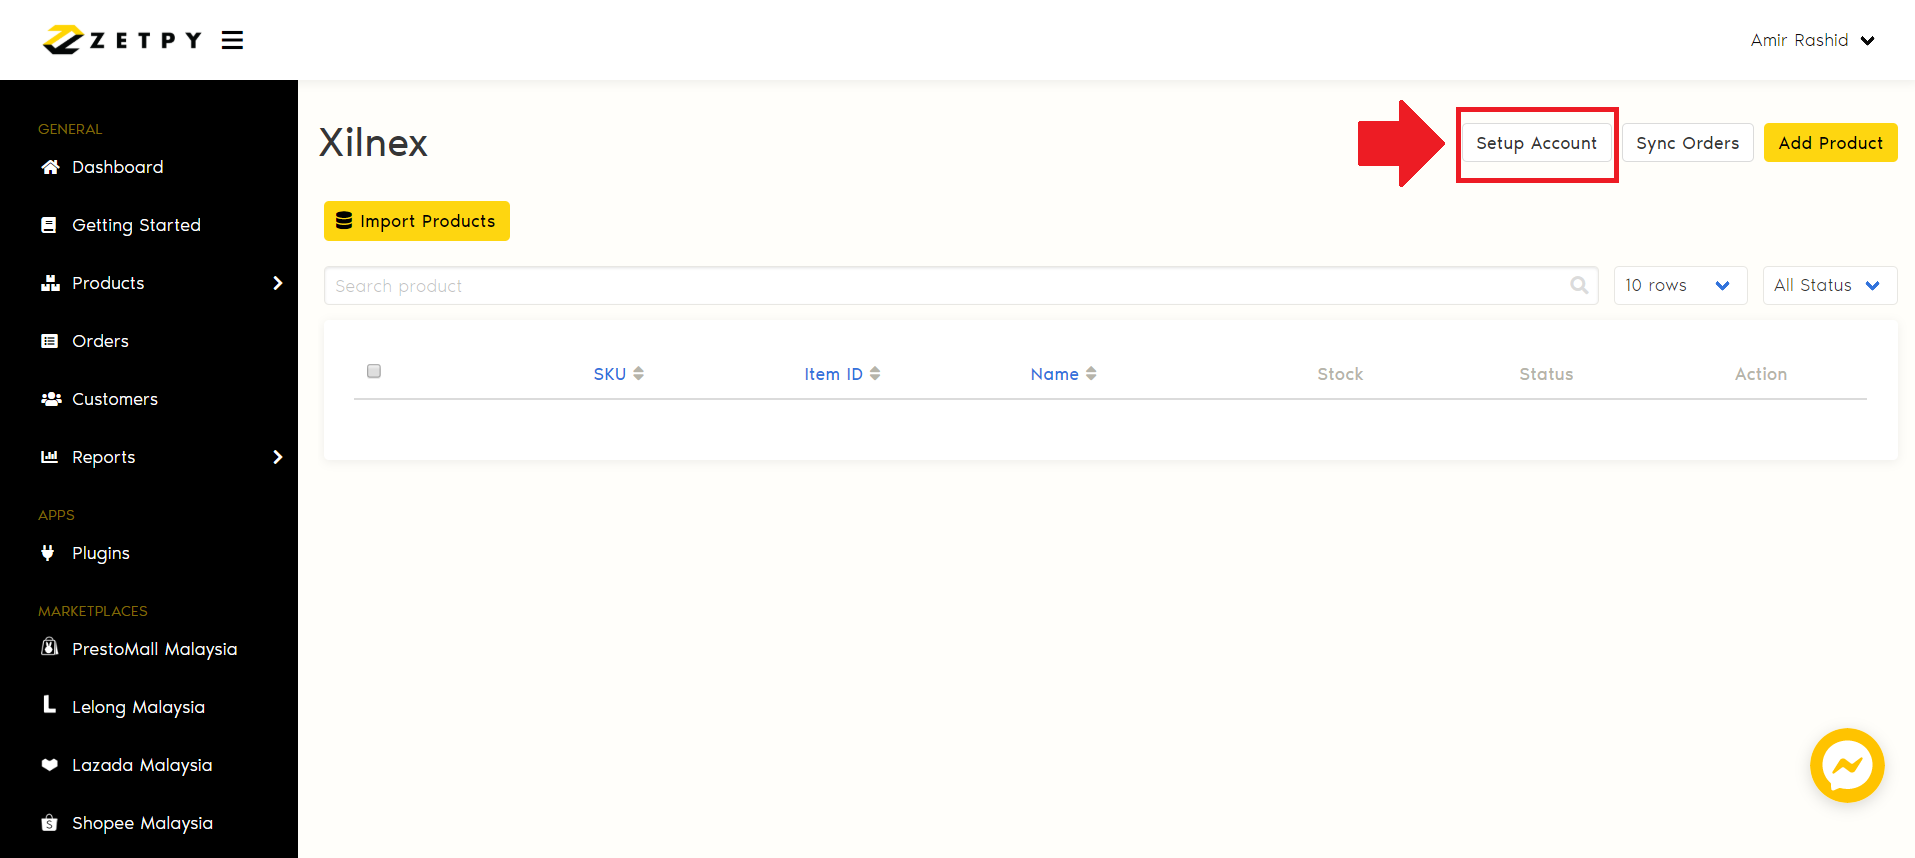
20. Click on Setup Account.
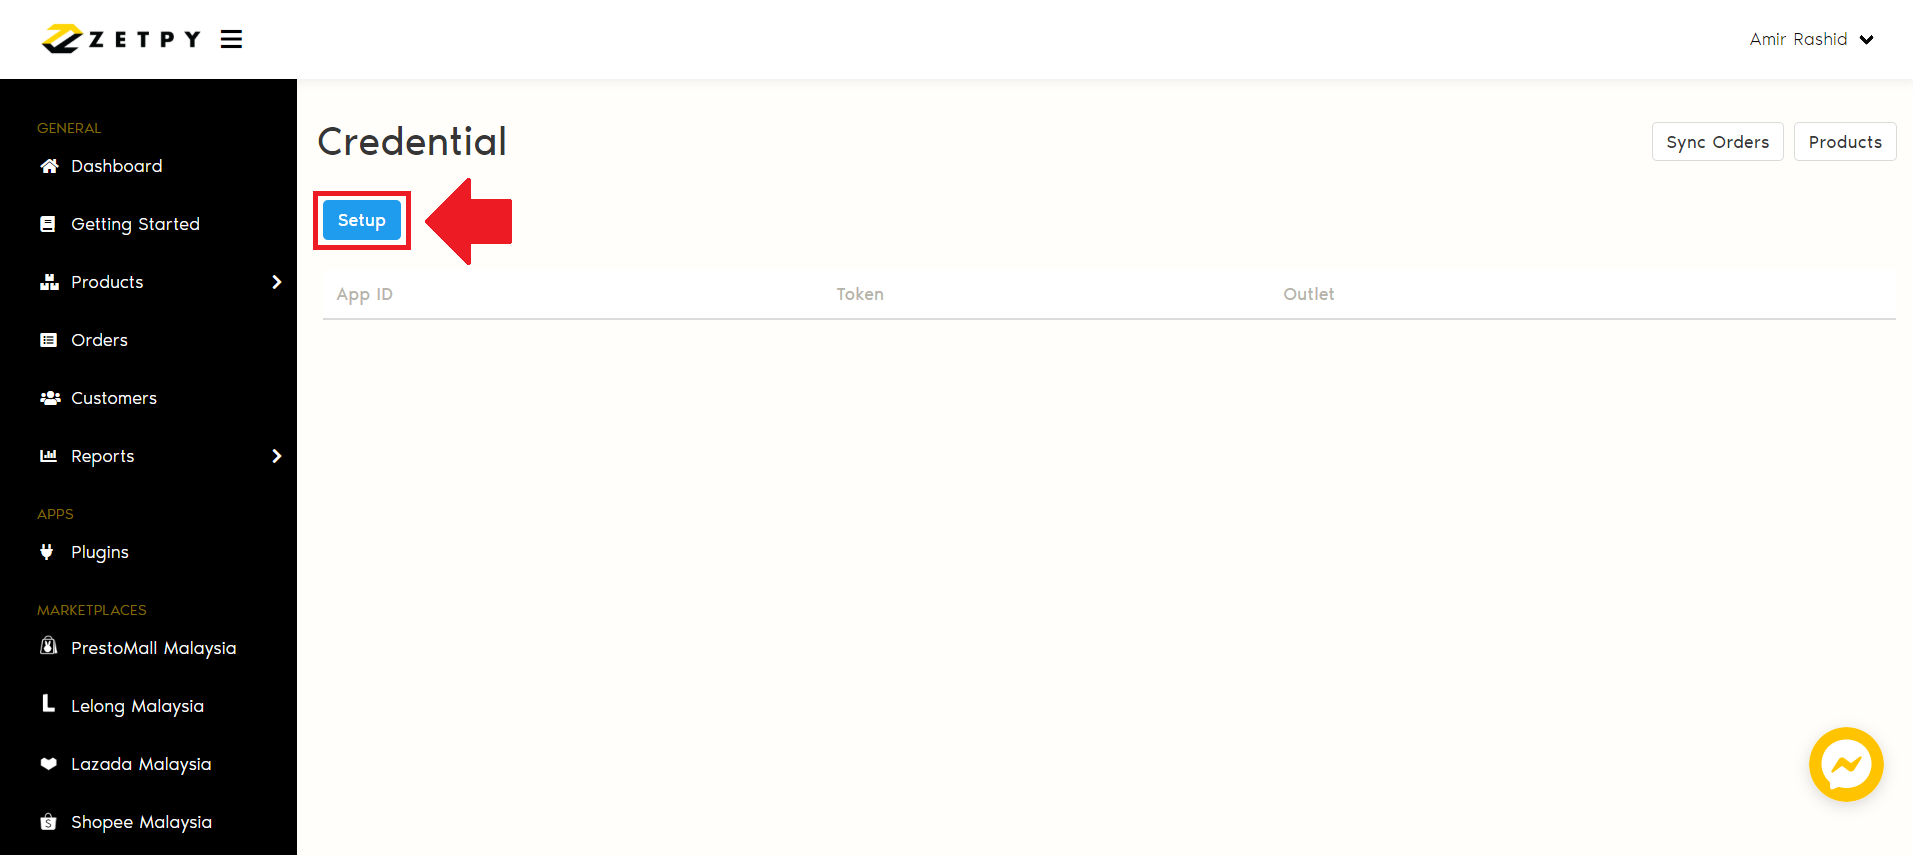
21. Click Setup.
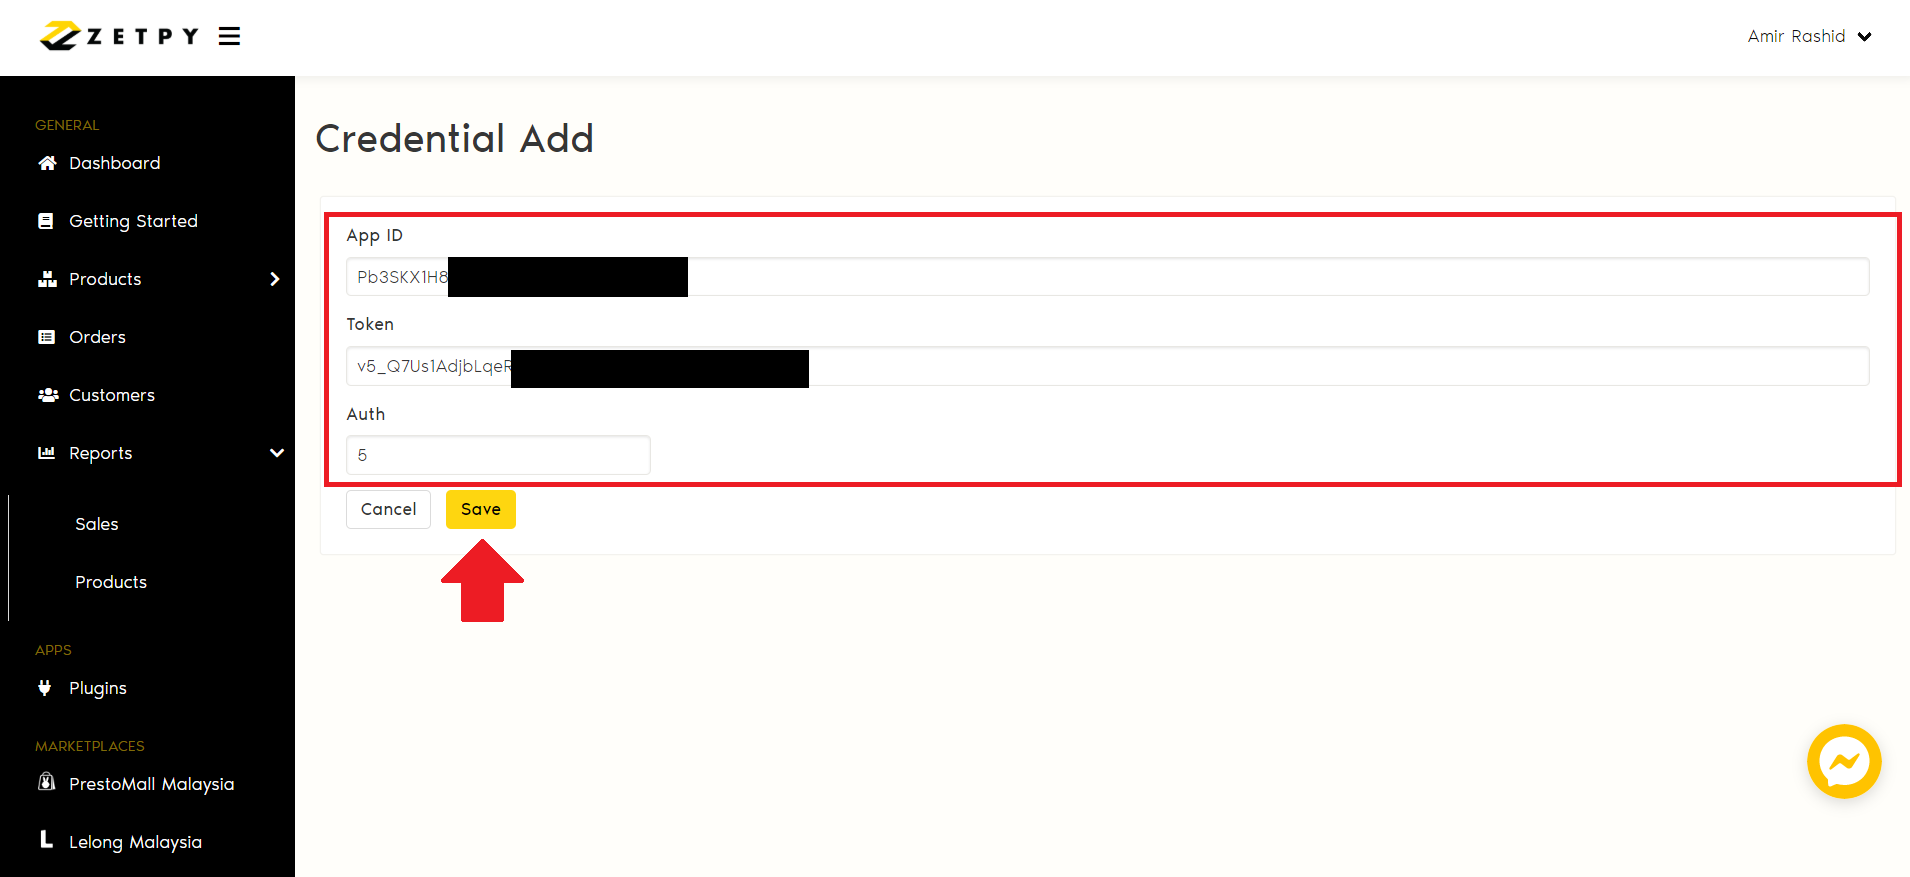
22. Paste your App ID, Token, and Auth. Click Save once done.
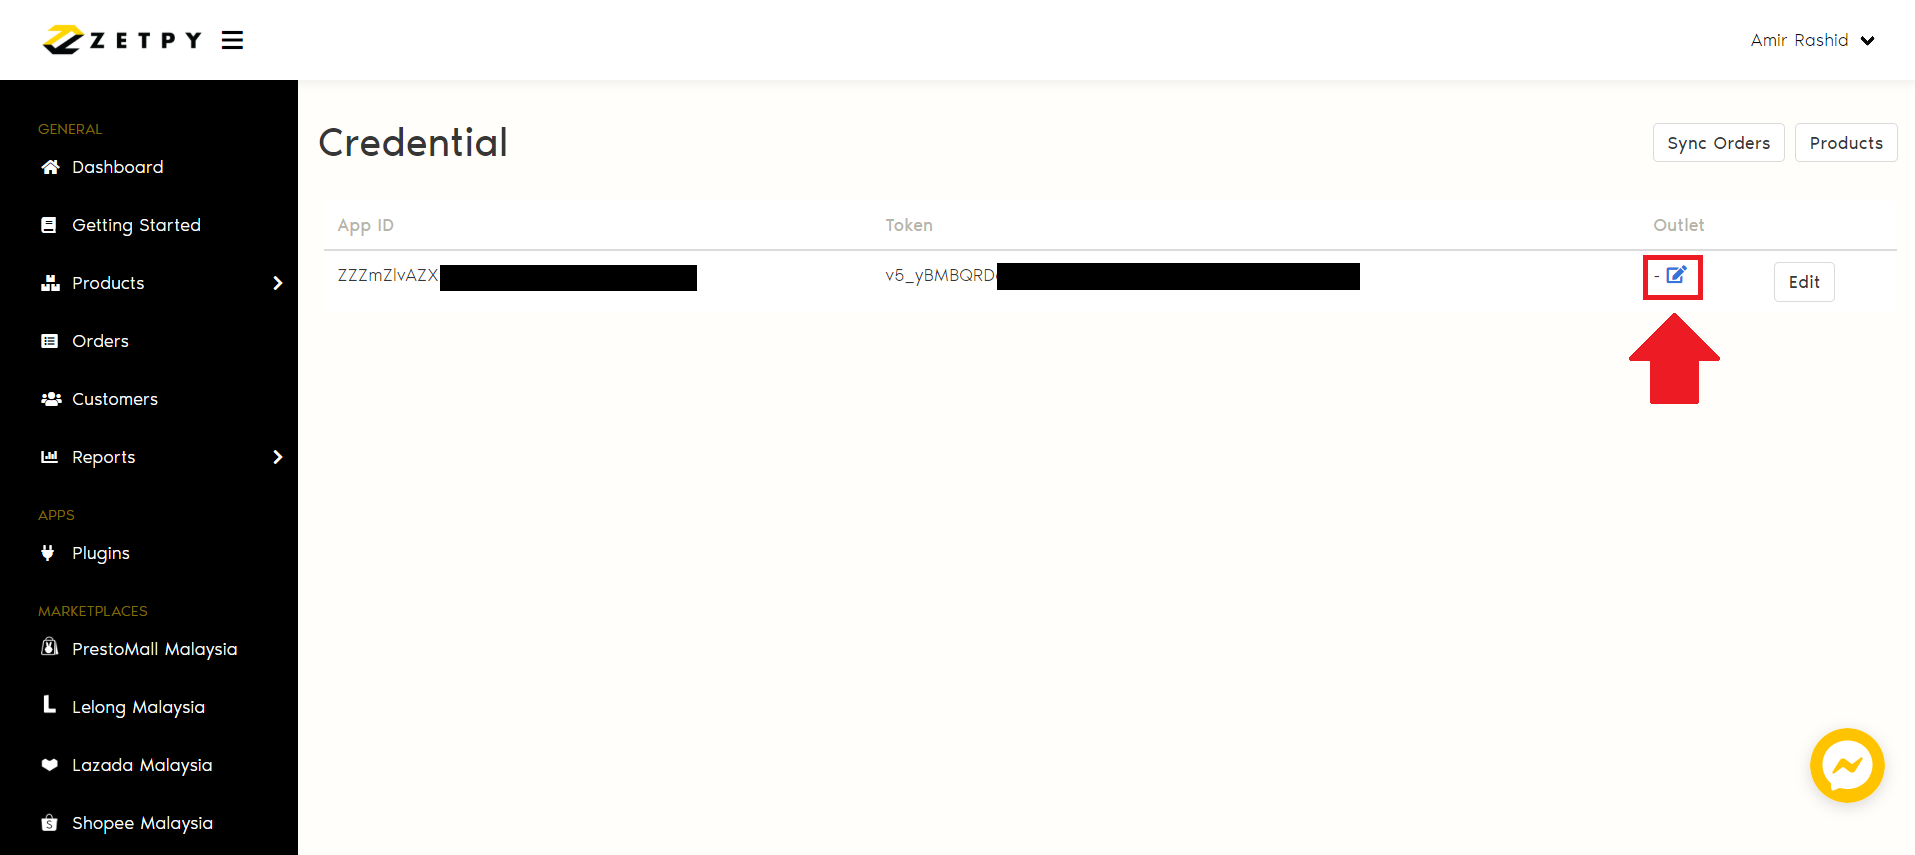
23. Click on Outlet button.
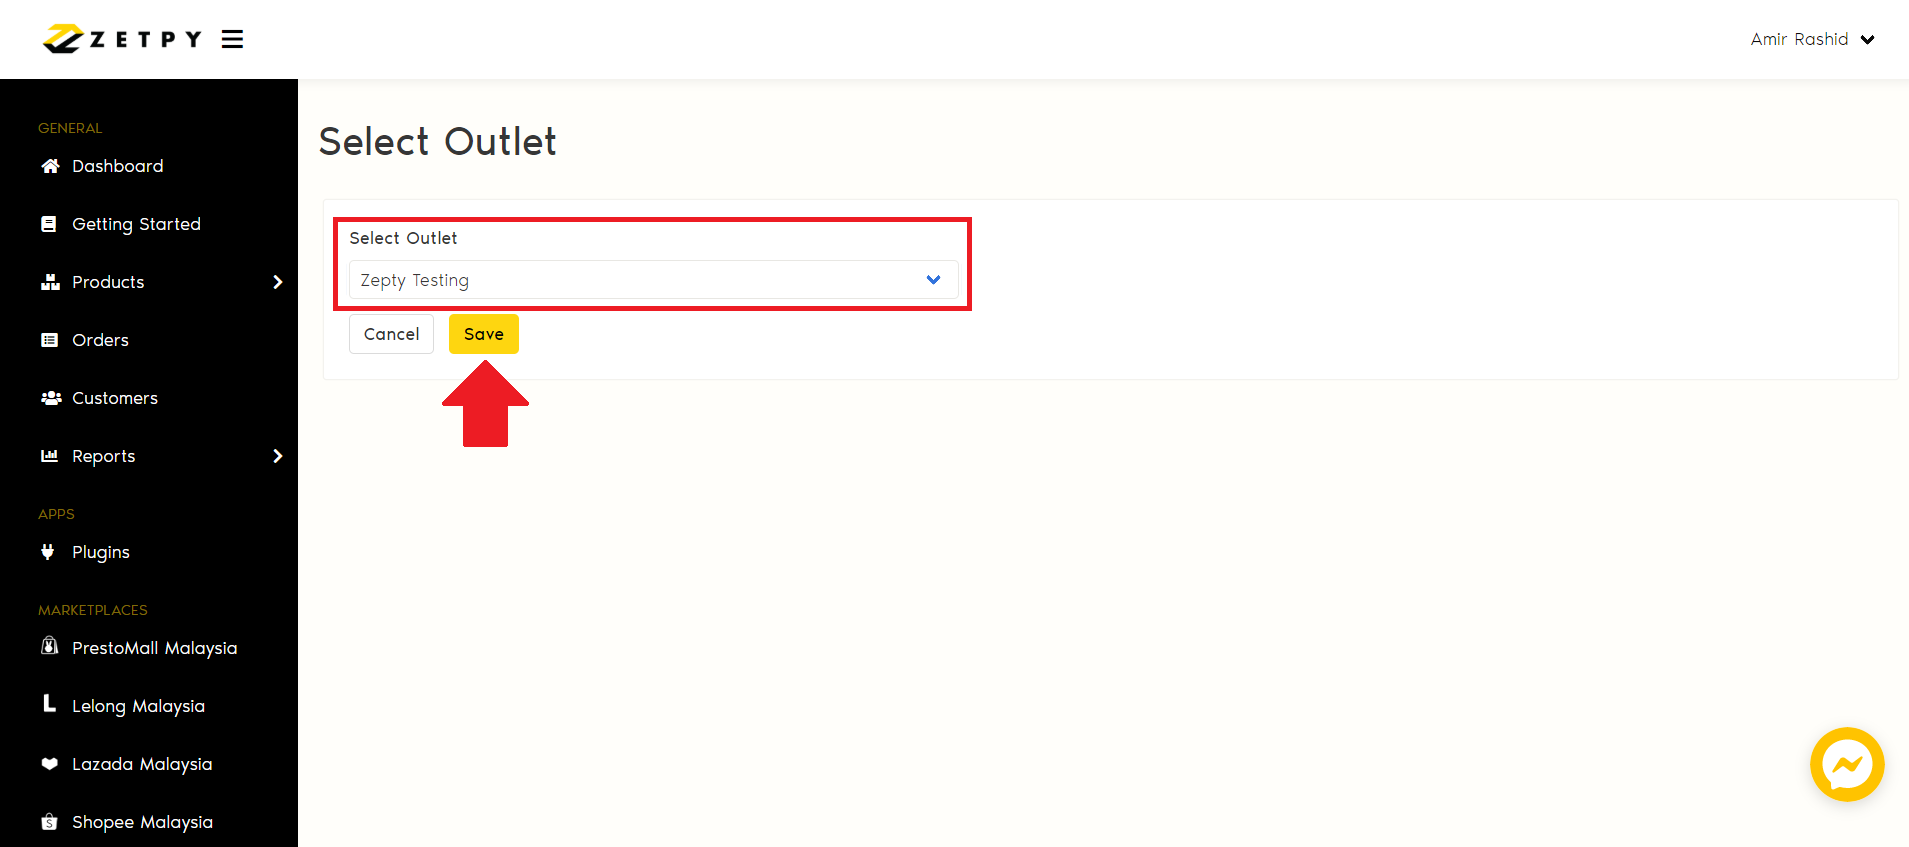
24. Select your outlet and click Save button.
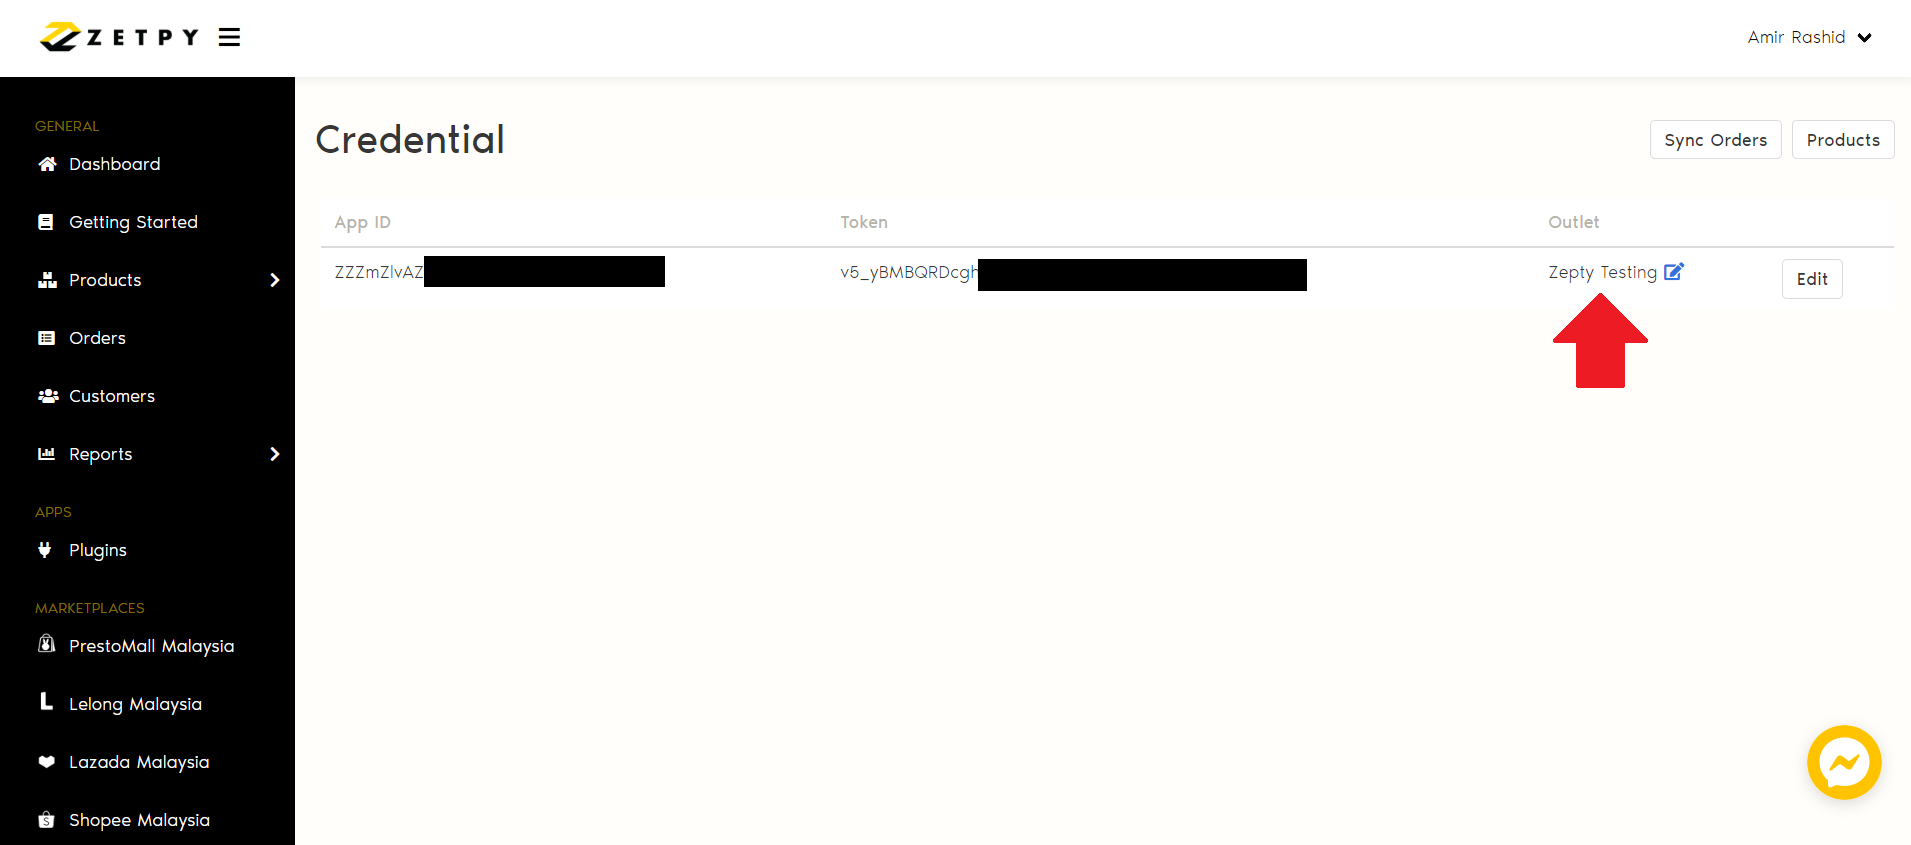
25. Outlet is successfully added.
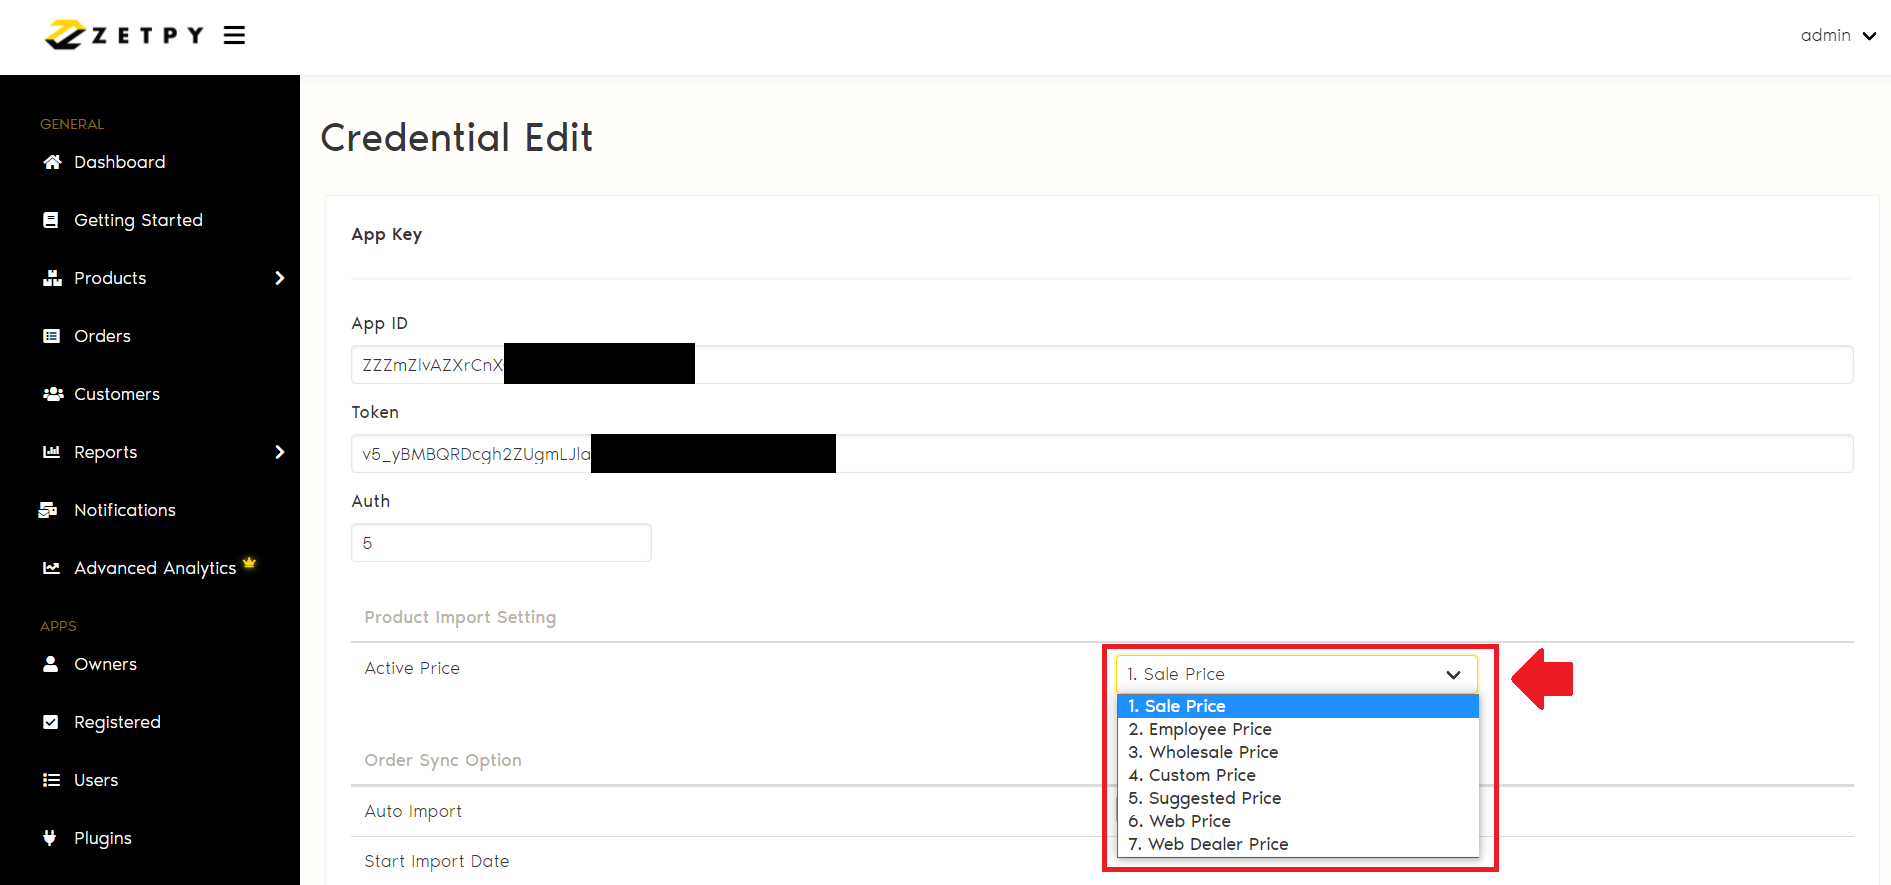
26. Select Active Price on Product Import Setting, based on the following:
i. Sale Price
ii. Employee Price
iii. Wholesale Price
iv. Custom Price
v. Suggested Price
vi. Web Price (Original Price)
vii. Web Dealer Price
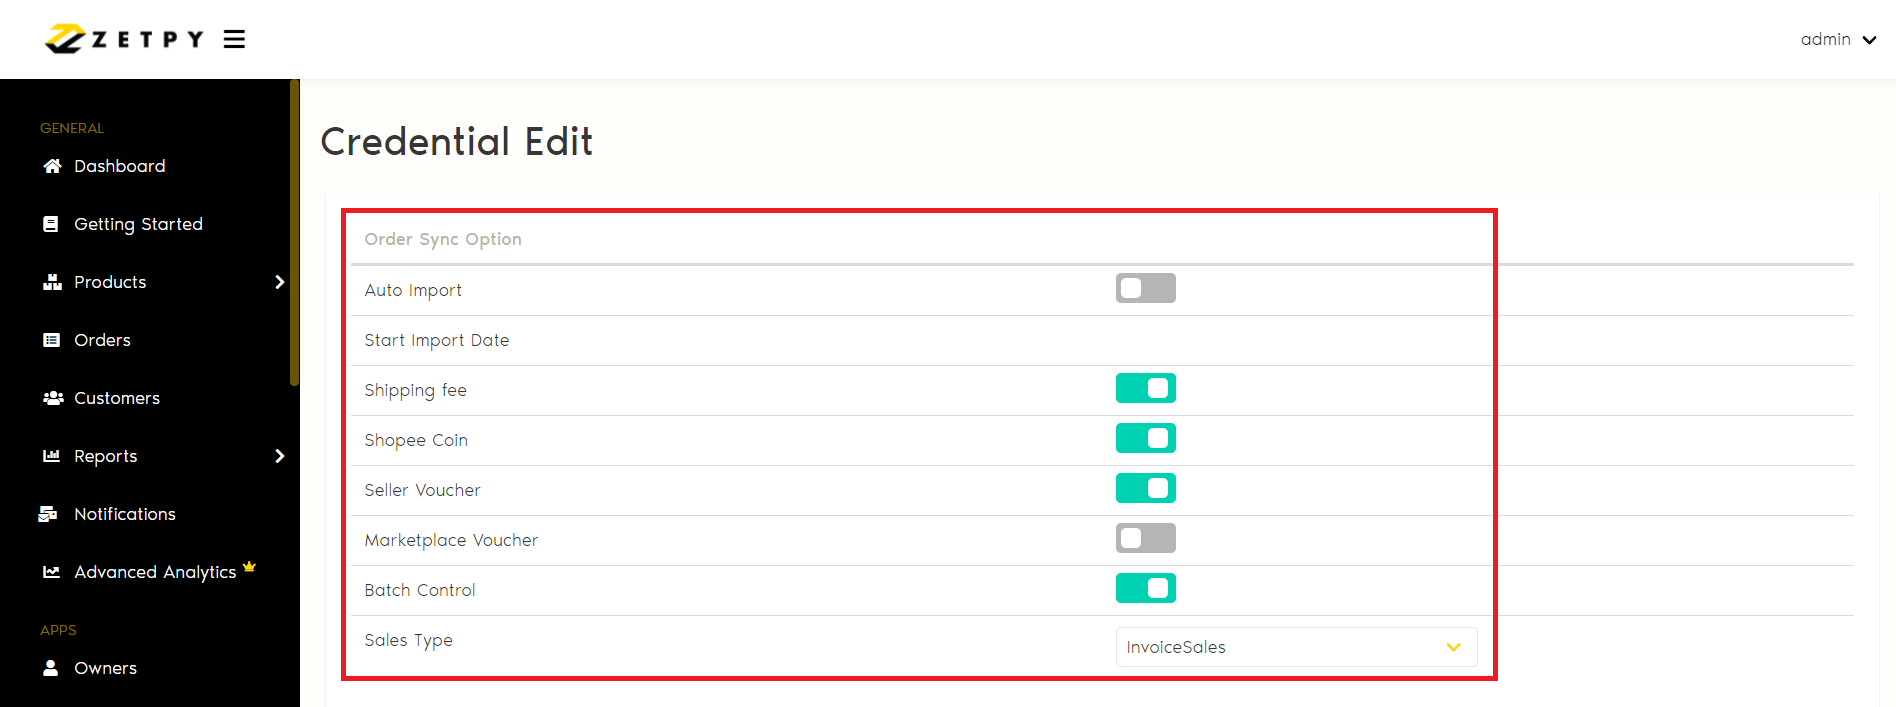
27. Allow setting for Order Sync Option based on the following:
i. Auto Import
ii. Start Import Date
iii. Shipping Fee
iv. Shopee Coin
v. Seller Voucher
vi. Marketplace Voucher
vii. Batch Control
viii. Sales Type: Usually 'E-Commerce'
28. Last but not least, select Client Setting based on the following:
i. Original Client Name
ii. App Name
iii. Client Code
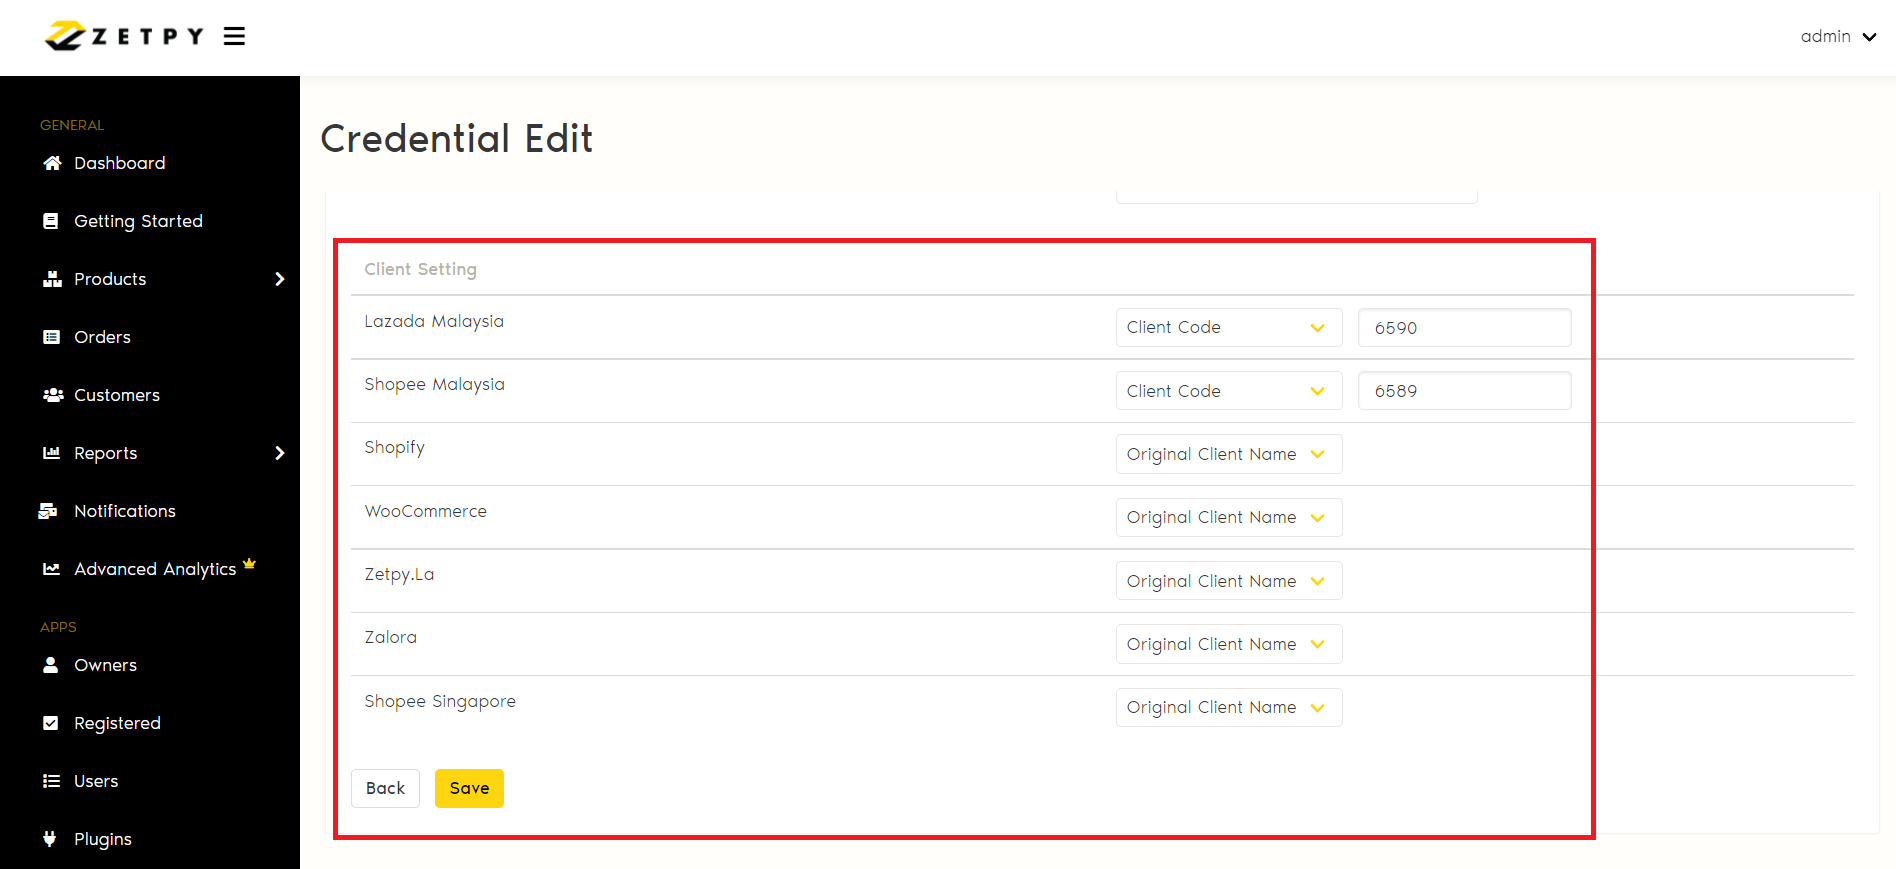
29. Click on the Save button. You are now successfully connected with Zetpy.
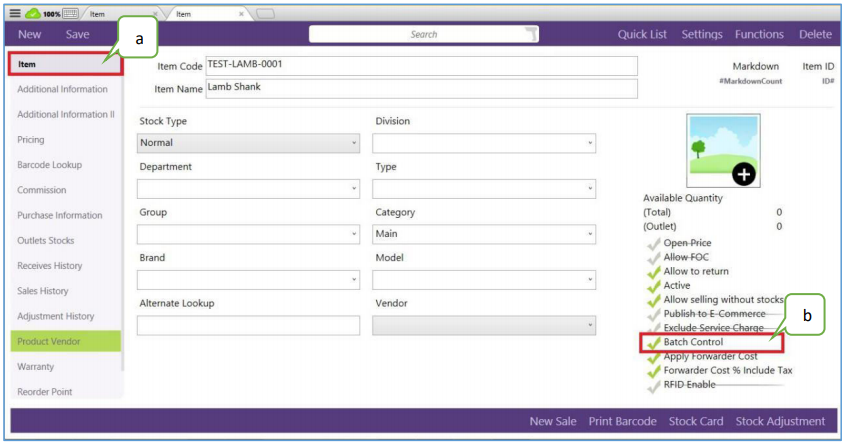
Extra information on Batch Control & Expiry Control
In order for Batch Control to be apply to each individual item, you need to do some extra setting during create new item. These steps will also avoid the error status in Zetpy.

a. Go to Master Date > Select Add Item > Select Item.
b. Tick “ √ “ on batch control.
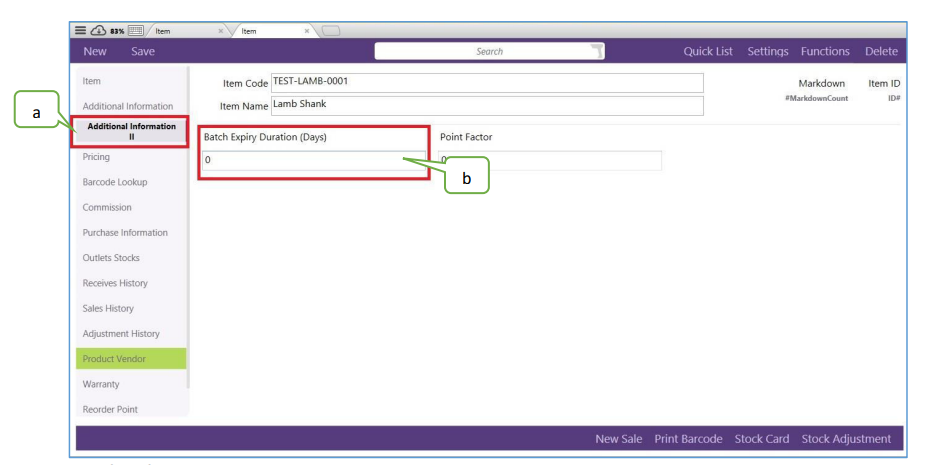
c. Select Additional Information II and fill in Batch Expiry Duration (Days).
If you have any issues or questions, please drop us an email at support@zetpy.com.