A. Setting in Zetpy Xilnex Plugin
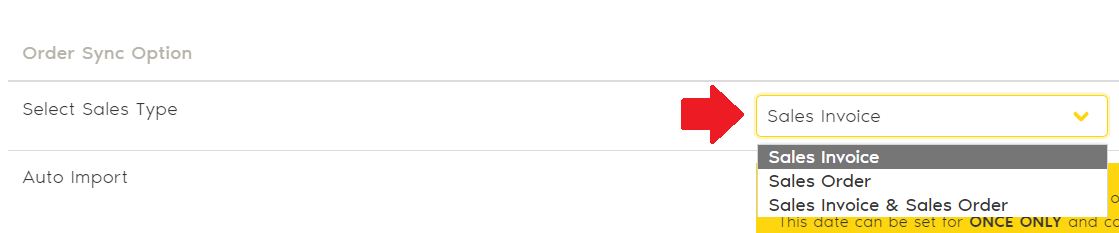
1. Choose to sync orders as Sales Invoice or Sales Order:
Sales Invoice (stock will be deducted in Xilnex) OR
Sales Order (stock will NOT be deducted in Xilnex) OR
Both - manual select which order to sync as Sales Invoice or Sales Order (Note: this option does not support auto import order to Xilnex)
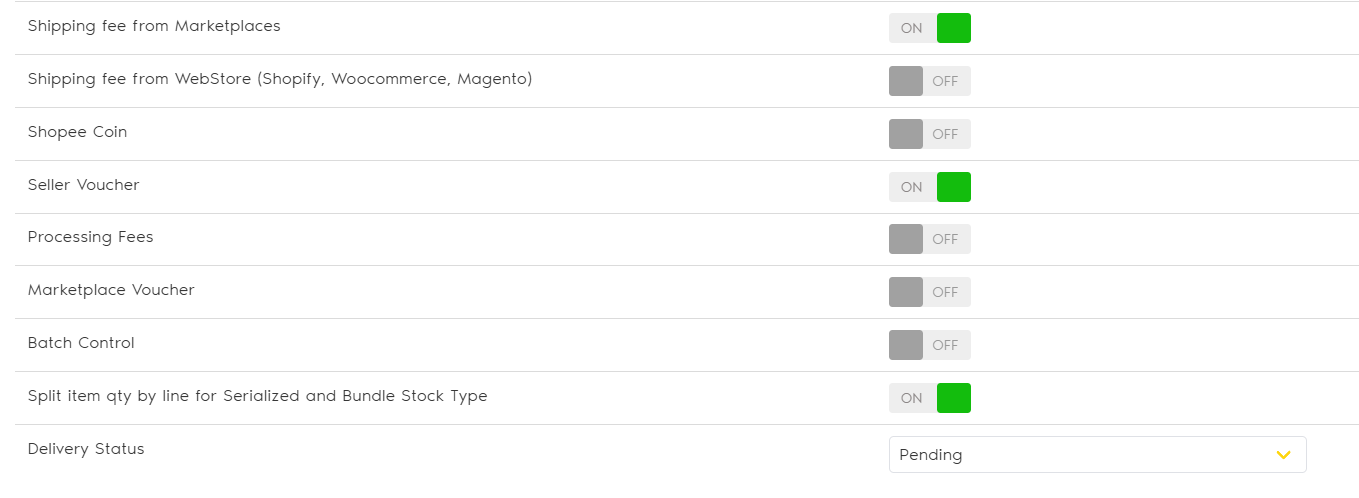
Enable the items that require to include in the Invoice/Sales Order - shipping fee (paid by buyer), Shopee coins, Marketplace voucher, Seller voucher and Processing Fees (for Woocommerce order only).
*If your items on Xilnex are using Batch Control, please enable the Batch Control.
Choose the Delivery Status:
Pending (pending shipment and only available quantity is deducted) OR
Shipped (shipment completed and both available and on-hand quantity are deducted)
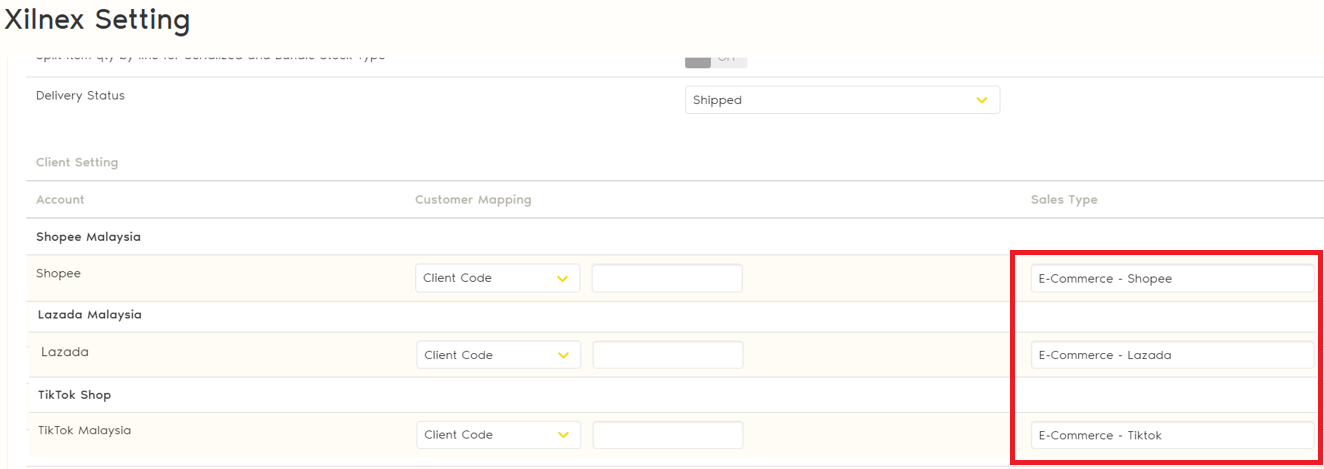
4. Under customer mapping, choose 1 of the option:
Original Client Name: Buyer name from the Order Details - every customer will be created in Xilnex Client List (validate by phone number)
App Name: Zetpy will auto create a client for each channel
Client Code: Map with an existing client in Xilnex by input the Client Code from Xilnex
Map the Sales Type for each online channel and shop to control which transactions require e-invoice submission. (*the default sales Type is E-Commerce)
⚠️ Important: The Sales Type that input in Zetpy must be exactly matched with the value in Xilnex, and the configuration of which Sales Type to enable for e-Invoice submission has to be done in Xilnex.
B. Sync Order to Xilnex
Set Order as Manual Create (after sync)
Auto Import Order
Go to Setup Account > Edit > Toggle the button to enable Auto Import order from Zetpy to Xilnex.
Select the order status that needs to auto import (can select more than 1)
Select the date to start auto import - the date refers to the Order Date and can only choose from the next day onwards
Orders will start auto importing to Xilnex based on the selected date and order status
Example: Today is 1st May and you select to date as 6th May, any orders placed from 1st until 4th May will never auto import, only orders placed on 6th May onwards will be auto imported to Xilnex, according to the status you select.

Manual Import Order (select order to sync)
Go to Sync Orders page > Click Sync Order and a list of orders that have not been synced will be shown. (If you choose Sales Invoice and Sales Order in the setting, then you will be select which document before selecting the orders)
Tick the orders and click Select Order.
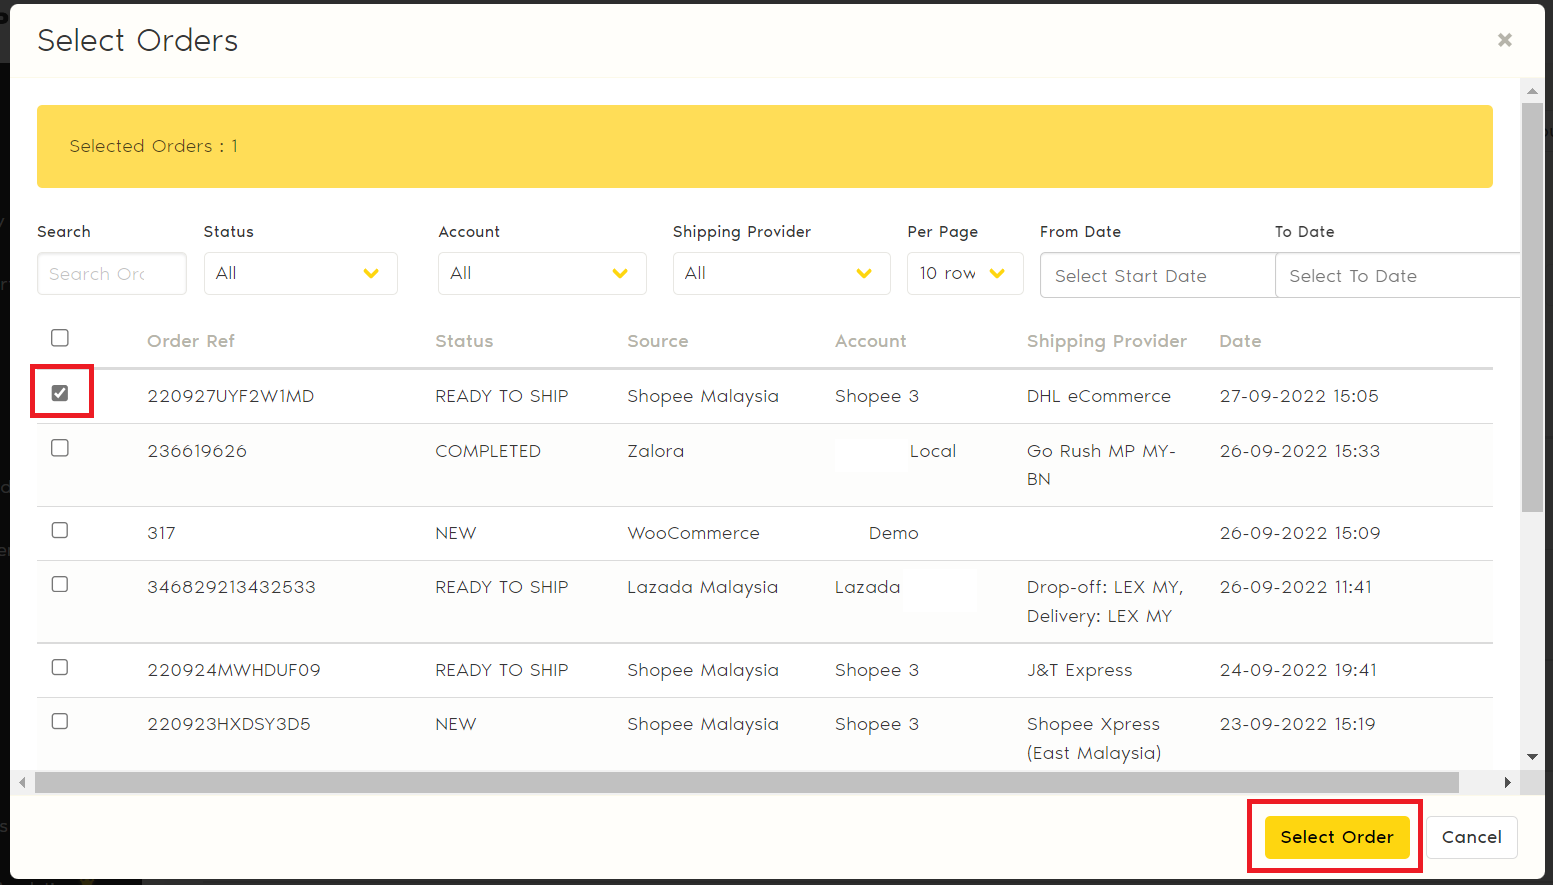
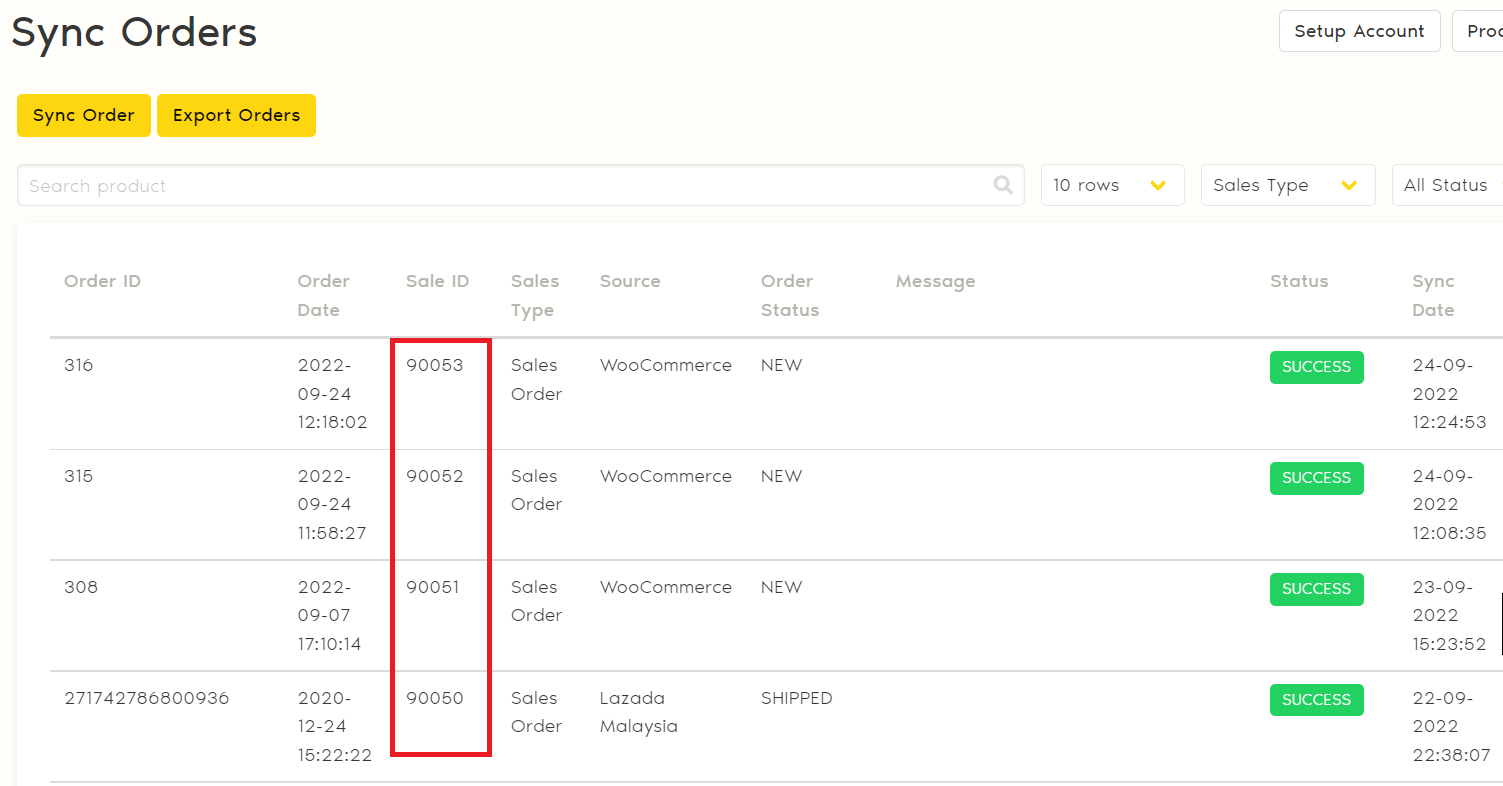
A loading bar will be shown and wait for the order to appear with the Sales ID and status. The sales ID refers to the SI/SO ID in Xilnex.
(Note: Orders that with empty/invalid SKU will not be able to sync)
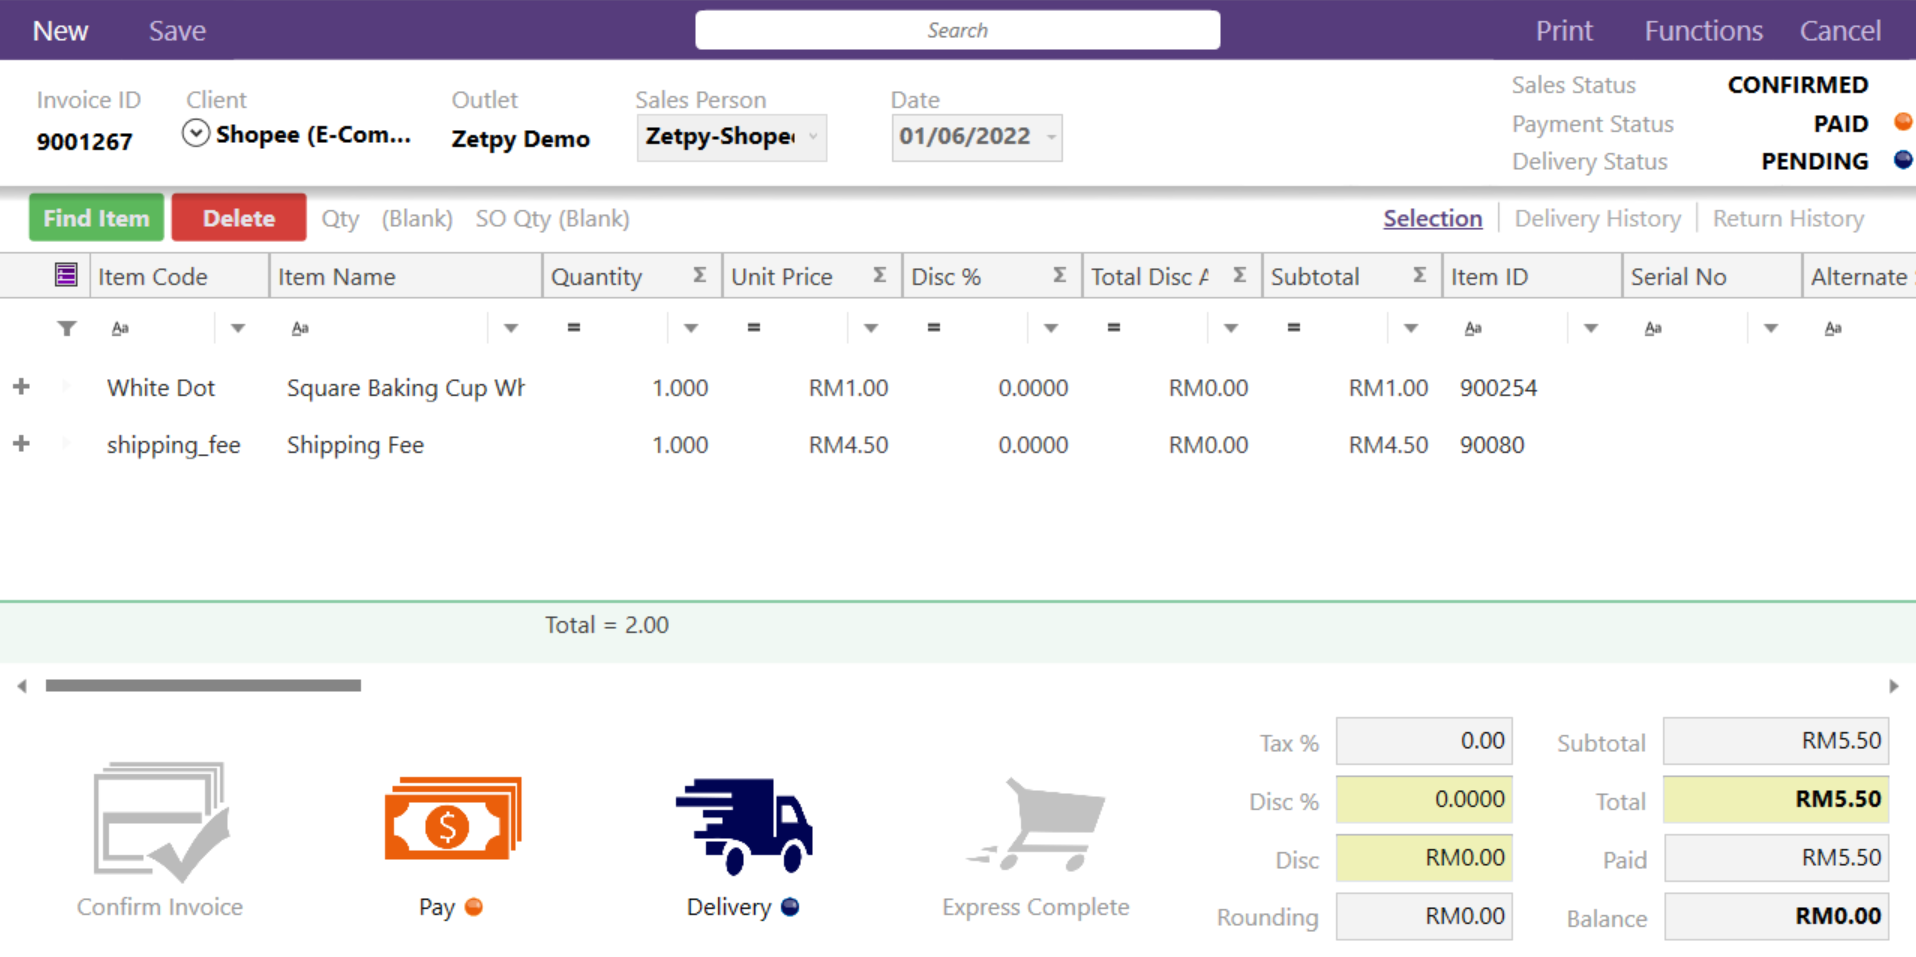
4. Once invoice is created on Xilnex, these are the field used to capture the order details:
Sales Person: Zetpy-channel name (eg: Zetpy-Shopee, Zetpy-Lazada)
Date: Order date or Sync Date
Recipient and Contact: Buyer/customer's name and contact number
External Ref ID: Order Ref Number from the online channels
Sales Remark: Channel name and account name
Payment Method: Others
Set Order as Manual Create (when order fails to sync)
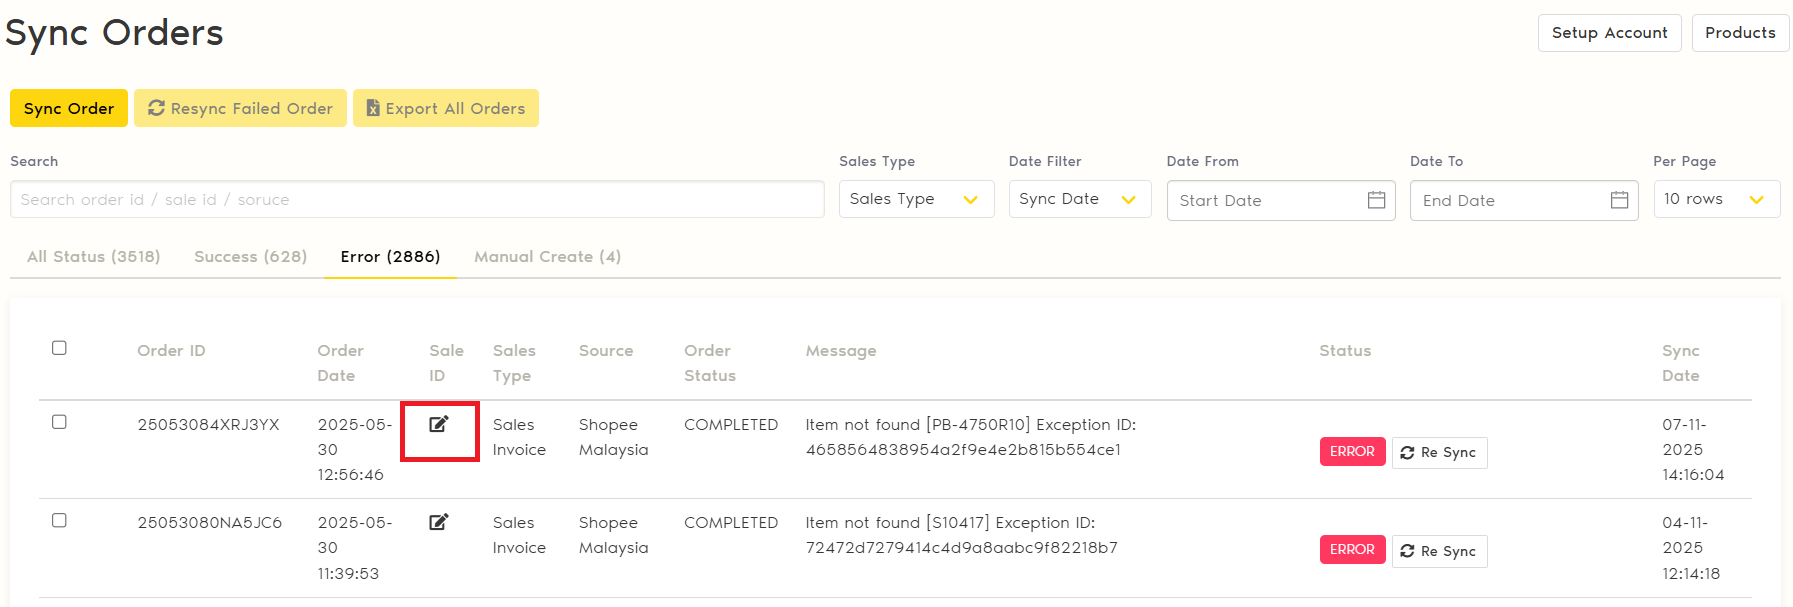
Use this when the sync status is Error (due to empty/invalid SKU found) and the order is required to manually create in Xilnex. You can mark the order as Manual Create status after create manually in Xilnex to avoid accidentally resync.
Search the Order ID or Click 'Error' tab to look for the failed sync orders.
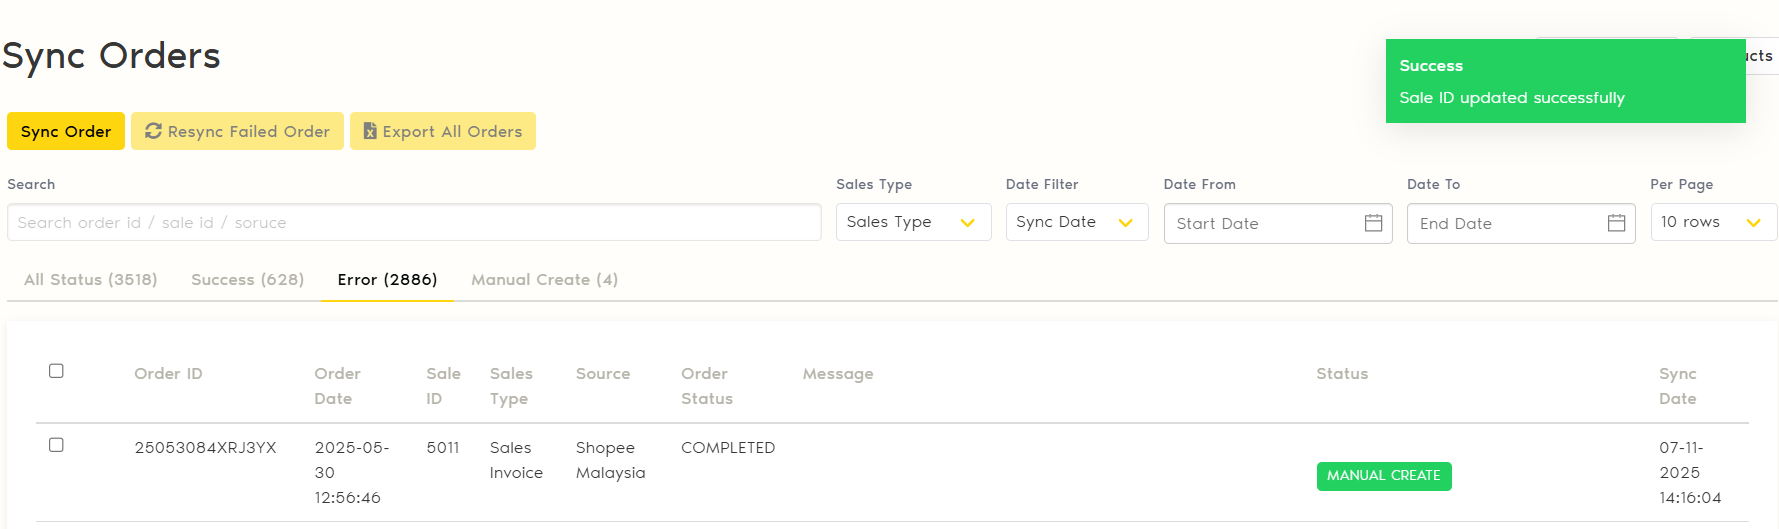
Click Edit icon on the Sales ID > Input the Invoice/Sales Order ID from Xilnex > Click Continue.
The status change from 'Error' to 'Manual Create'.
(Note: This action will be failed if the Sales ID input is not found or invalid)
Settings required in Xilnex
Make sure these item codes below existed on Xilnex Item List before start syncing the orders. By default, these item codes will be auto created in Xilnex once you setup the credential.
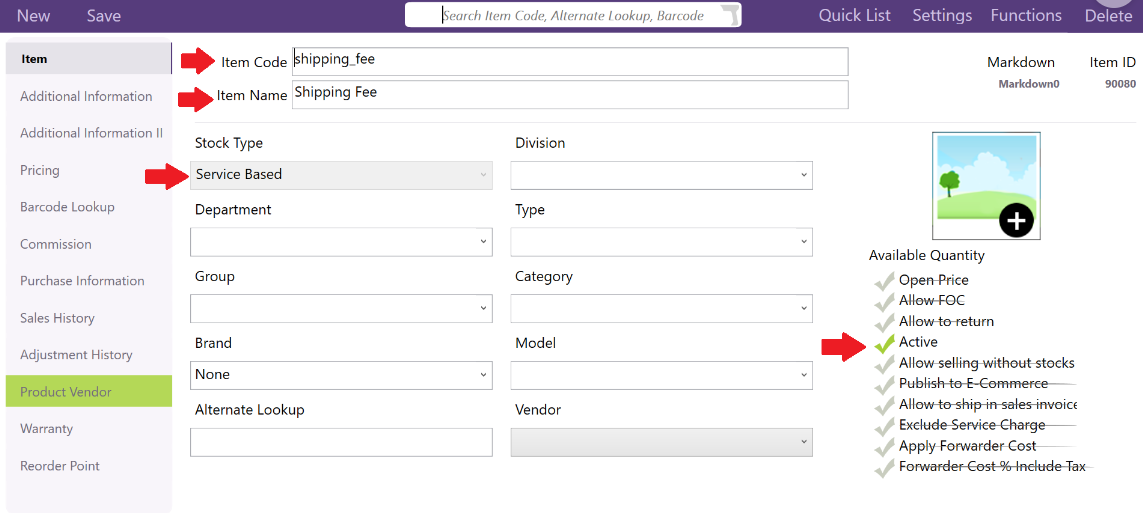
1. Shipping Fee - Service-Based Type
Item Code: shipping_fee (**must follow the same)
Item Name: Shipping Fee (you may set it differently)
Set it as 'Active'
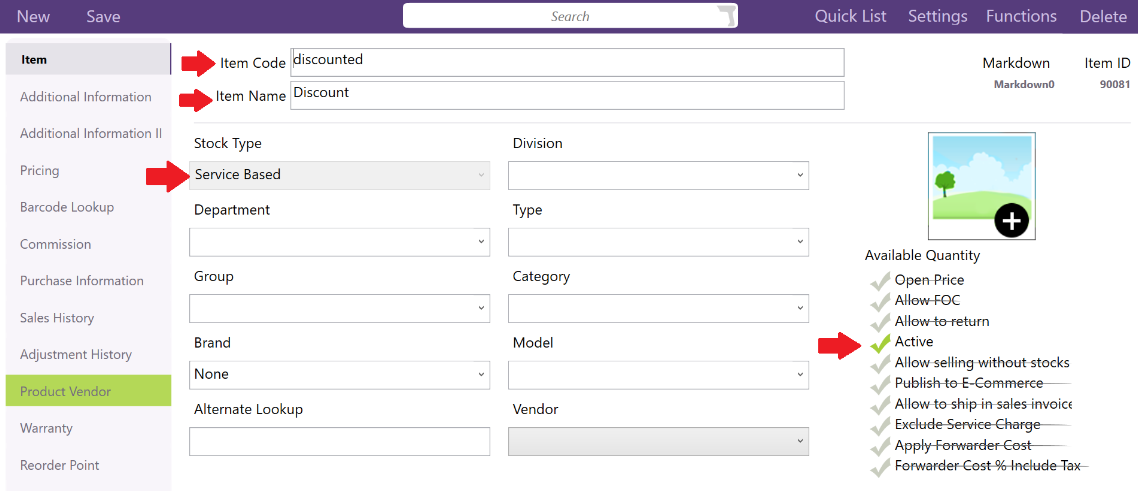
2. Discount - Service-Based Type (for seller voucher and marketplace voucher)
Item Code: discounted (*must follow the same)
Item Name: Discount (you may set it differently)
Set it as 'Active'
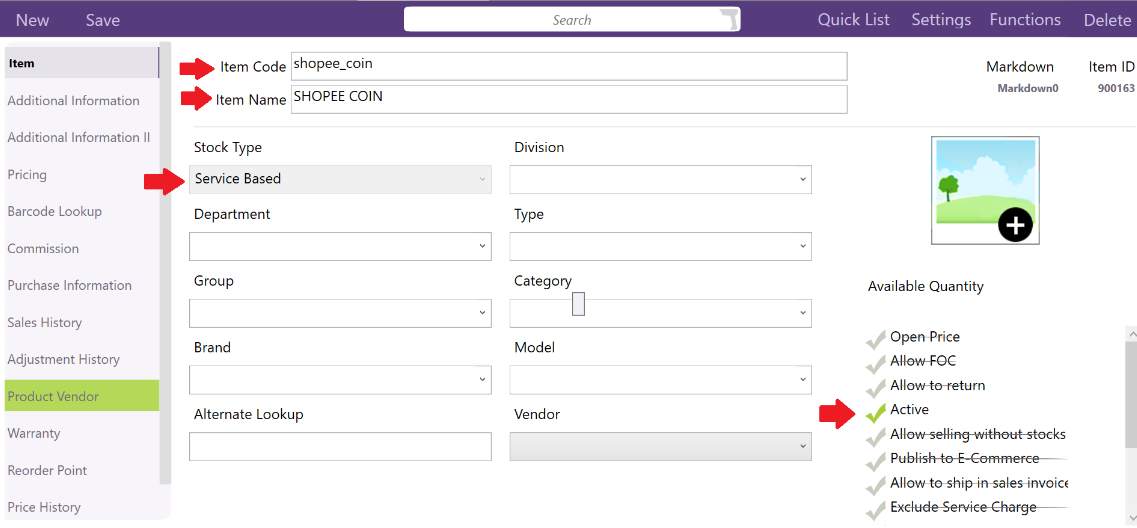
3. Shopee coin - Service-Based Type
Item Code: shopee_coin (**must follow the same)
Item Name: SHOPEE COIN (you may set it differently)
Set it as 'Active'
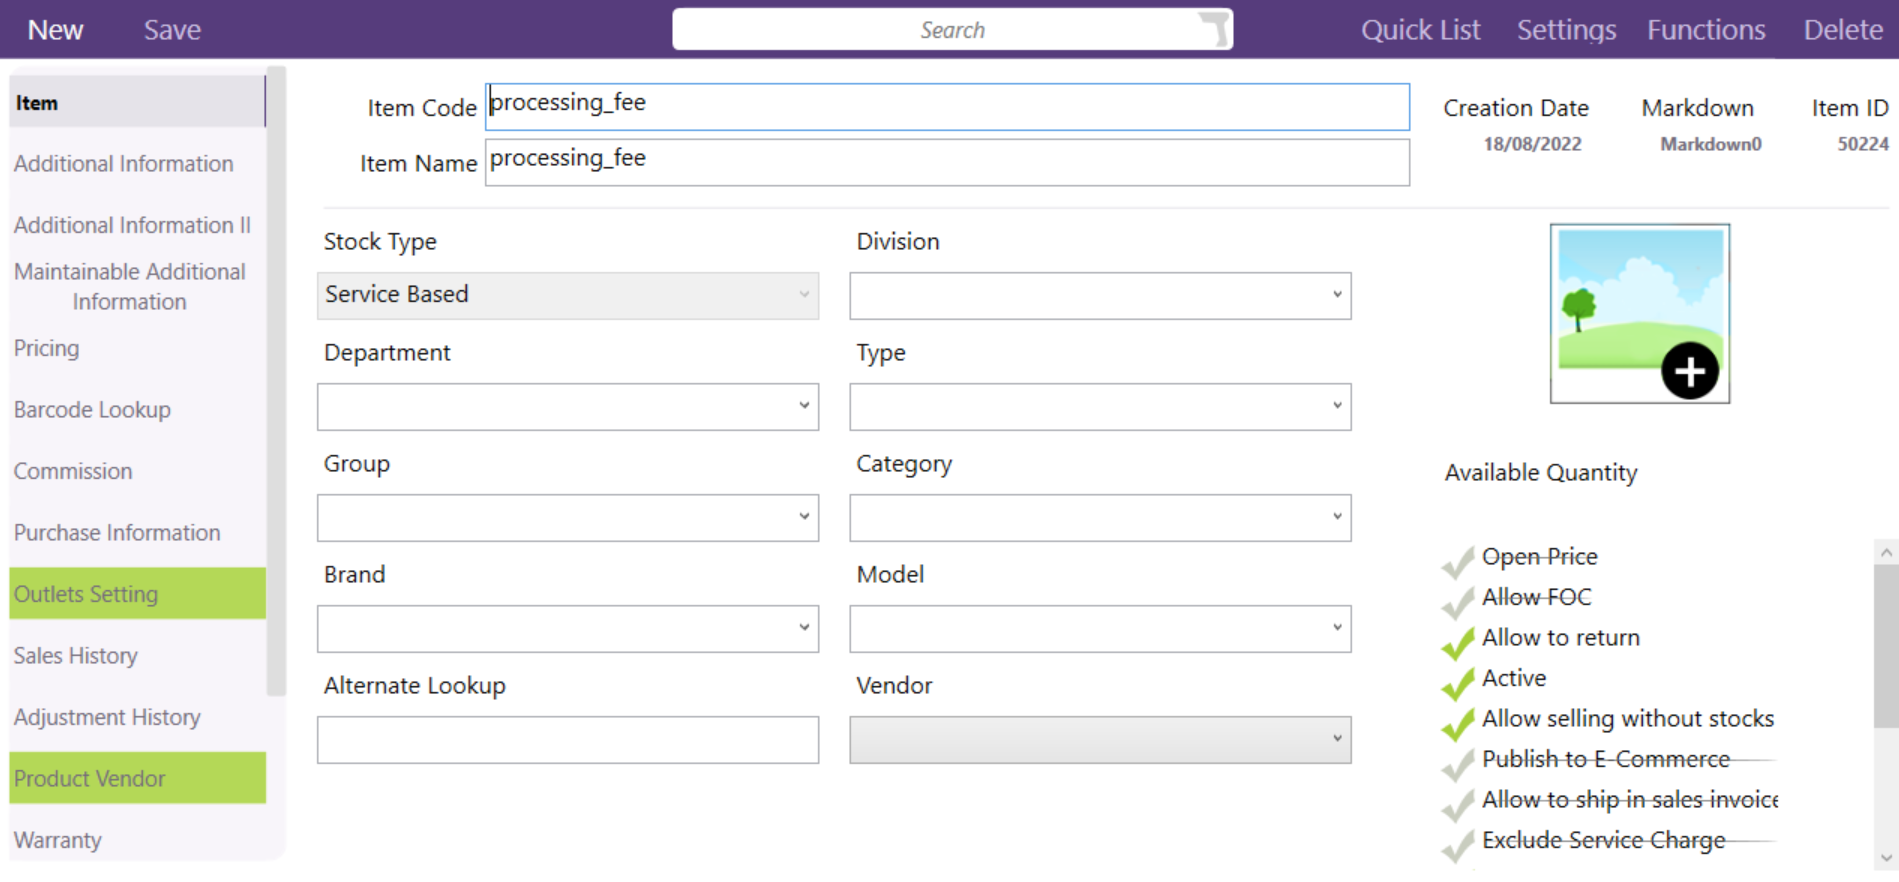
4. Processing Fee - Service-Based Type (for other fees charged on orders from WooCommerce/Shopify)
Item Code: processing_fee (*must follow the same)
Item Name: Processing Fee (you may set it differently)
Set it as 'Active'
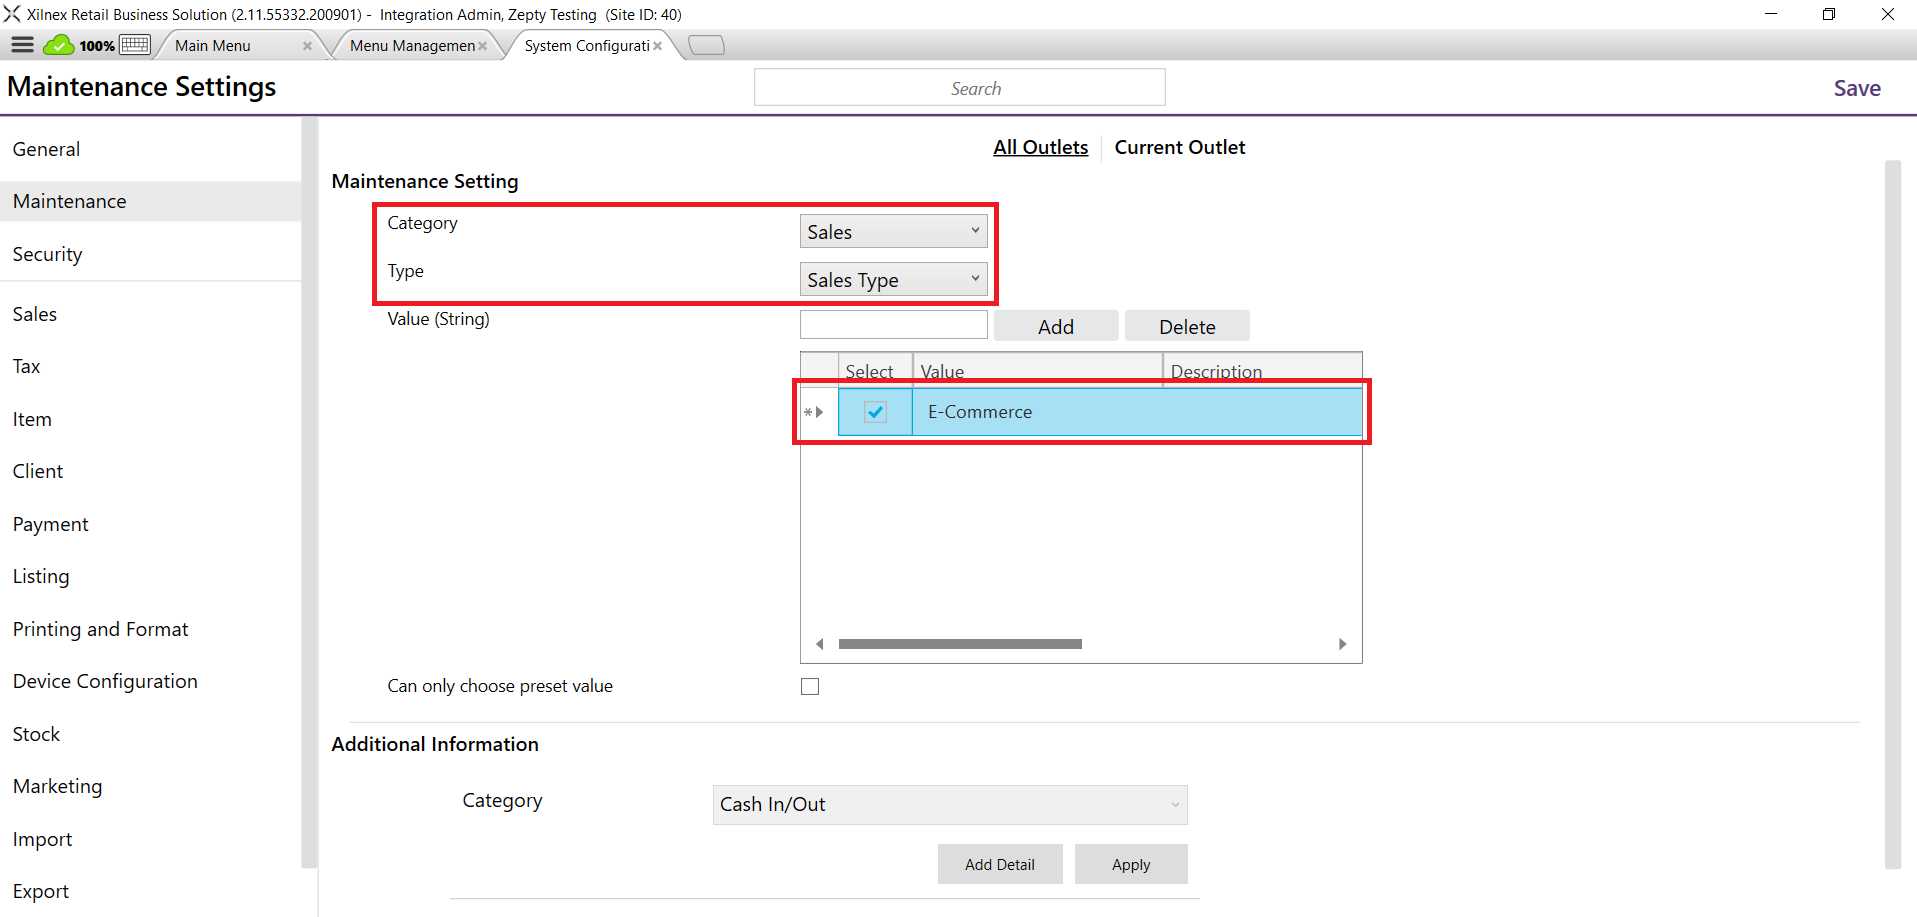
Go to Menu icon > System Configuration > Maintenance setting. Filter Category as Sales and Type as Sales Type.
Enter 'E-Commerce' value and click Add. Then, tick the value and save.
If you have any issues or questions, please drop us an email at support@zetpy.com