Step 1: Open Compress JPEG Website ( online tool )
Go to https://compressjpeg.com in your web browser.
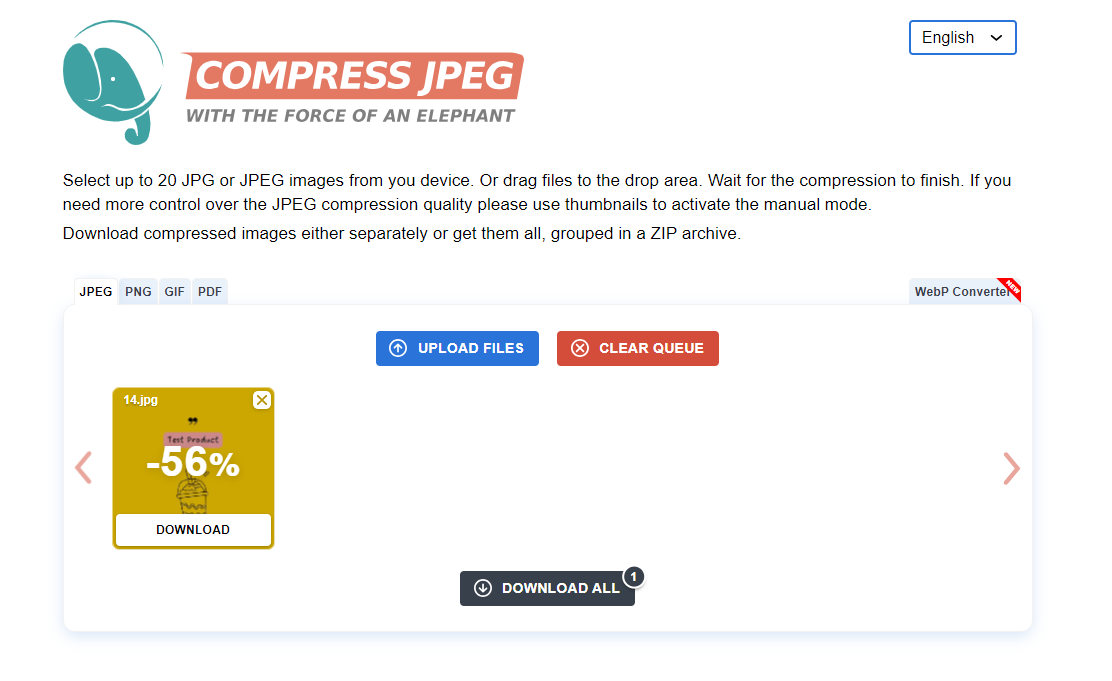
Step 2: Upload Your Image
Once you're on the Compress JPEG homepage, you’ll see a button labeled "Upload Files".
Click on "Upload Files", and a file selection window will open.
Select the image(s) from your computer that you want to compress. You can upload up to 20 images at a time for compression.
Step 3: Wait for the Compression
After uploading, Compress JPEG will automatically begin compressing your images. You’ll see a progress bar indicating the status of the compression.
Step 4: Download the Compressed Images
Once the images are compressed, you’ll see the "Download" button next to each image.
Click "Download" to save the compressed image to your computer.
If you uploaded multiple images, you can also click "Download All" to save a ZIP file containing all your compressed images.
Step 5: Upload to Your Zetpy or Online Store.
Now that your images are compressed and saved on your computer, then you can upload the images into your Zetpy or Online store backend.
Tips for Better Image Optimization:
Use the right file format:
JPEG for Photos and colorful images ( use for: banner/product images )
PNG for transparent images ( use for: logo/product images with transparent background)
SVG for scalable graphics ( use for: logos, icons).
Choose an appropriate resolution: Avoid uploading high-resolution images if it's not necessary for your design.
Slideshow banner: maximum width:1920px
Category image: maximum width: 500px
Product image: best width: 1000px , not more than 2000px.
By following these steps, you’ll ensure that your website runs faster and delivers a better user experience.