A) How to Setup the SQL sync in Zetpy?
1) Login to your Zetpy control panel.
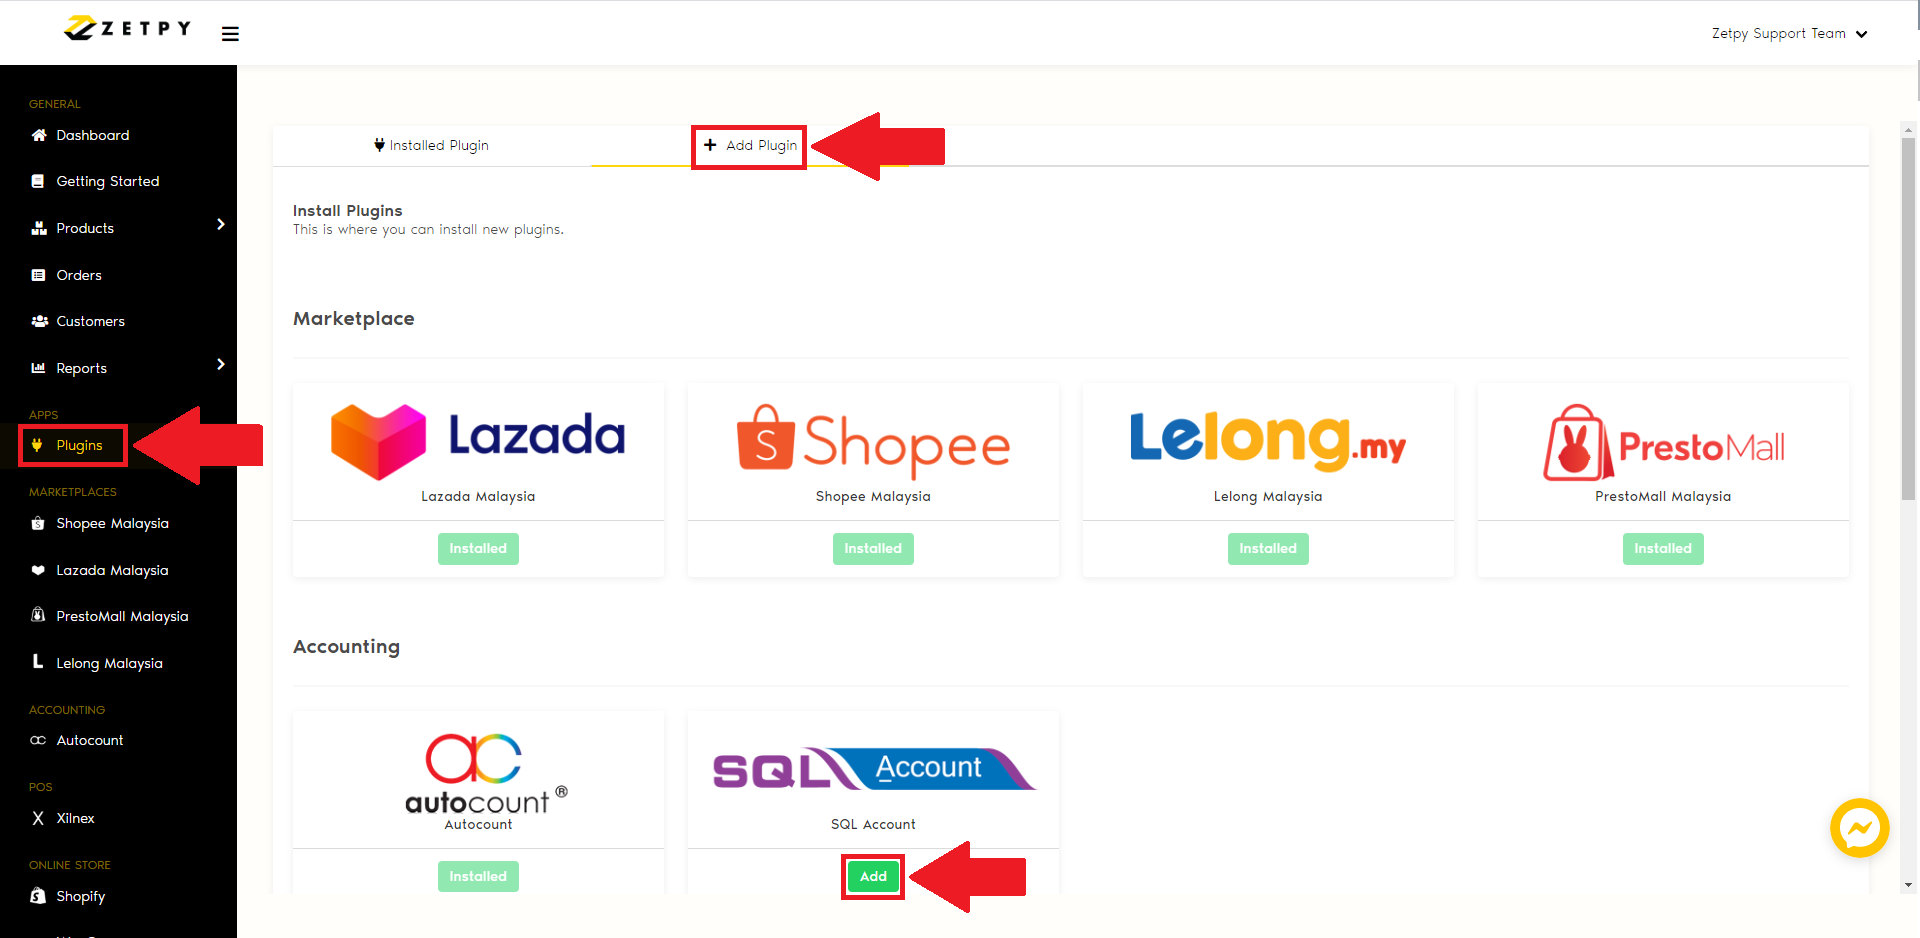
2) Go to Plugins.
3) Click on the Add Plugin tab.
4) You will see the SQL icon and click on the Add button.
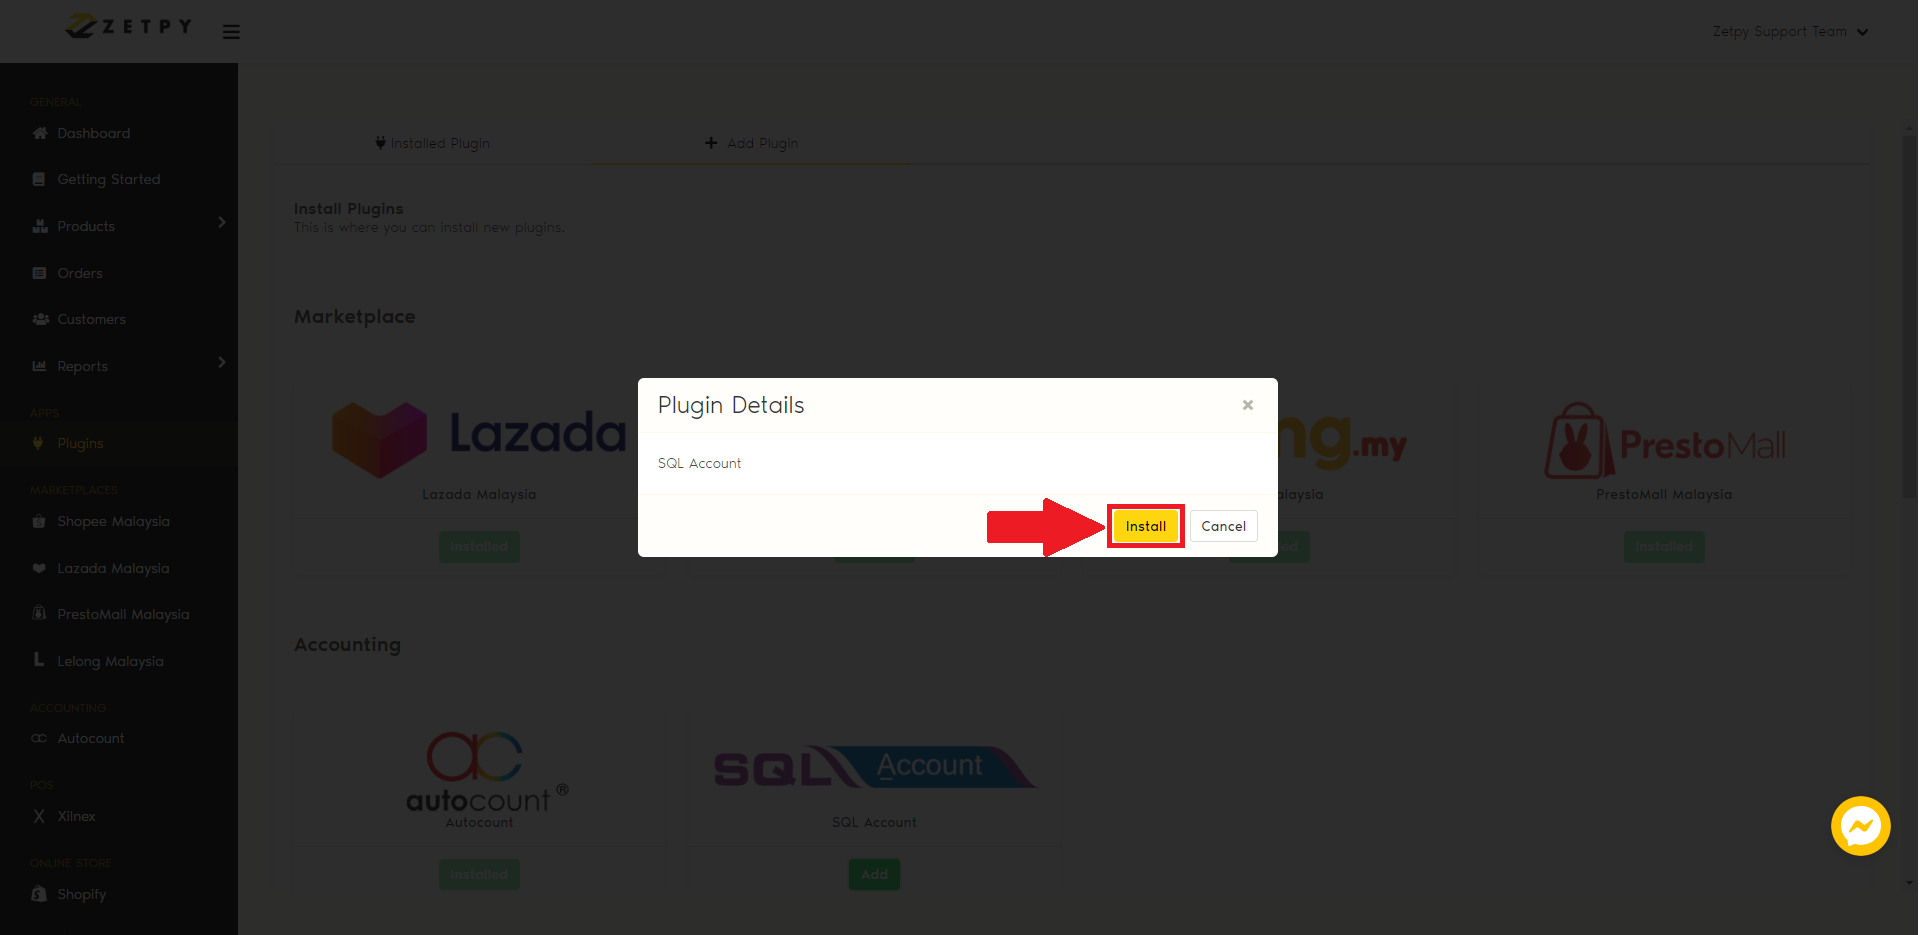
5) The Zetpy will pop-up the message and click on the Install button.
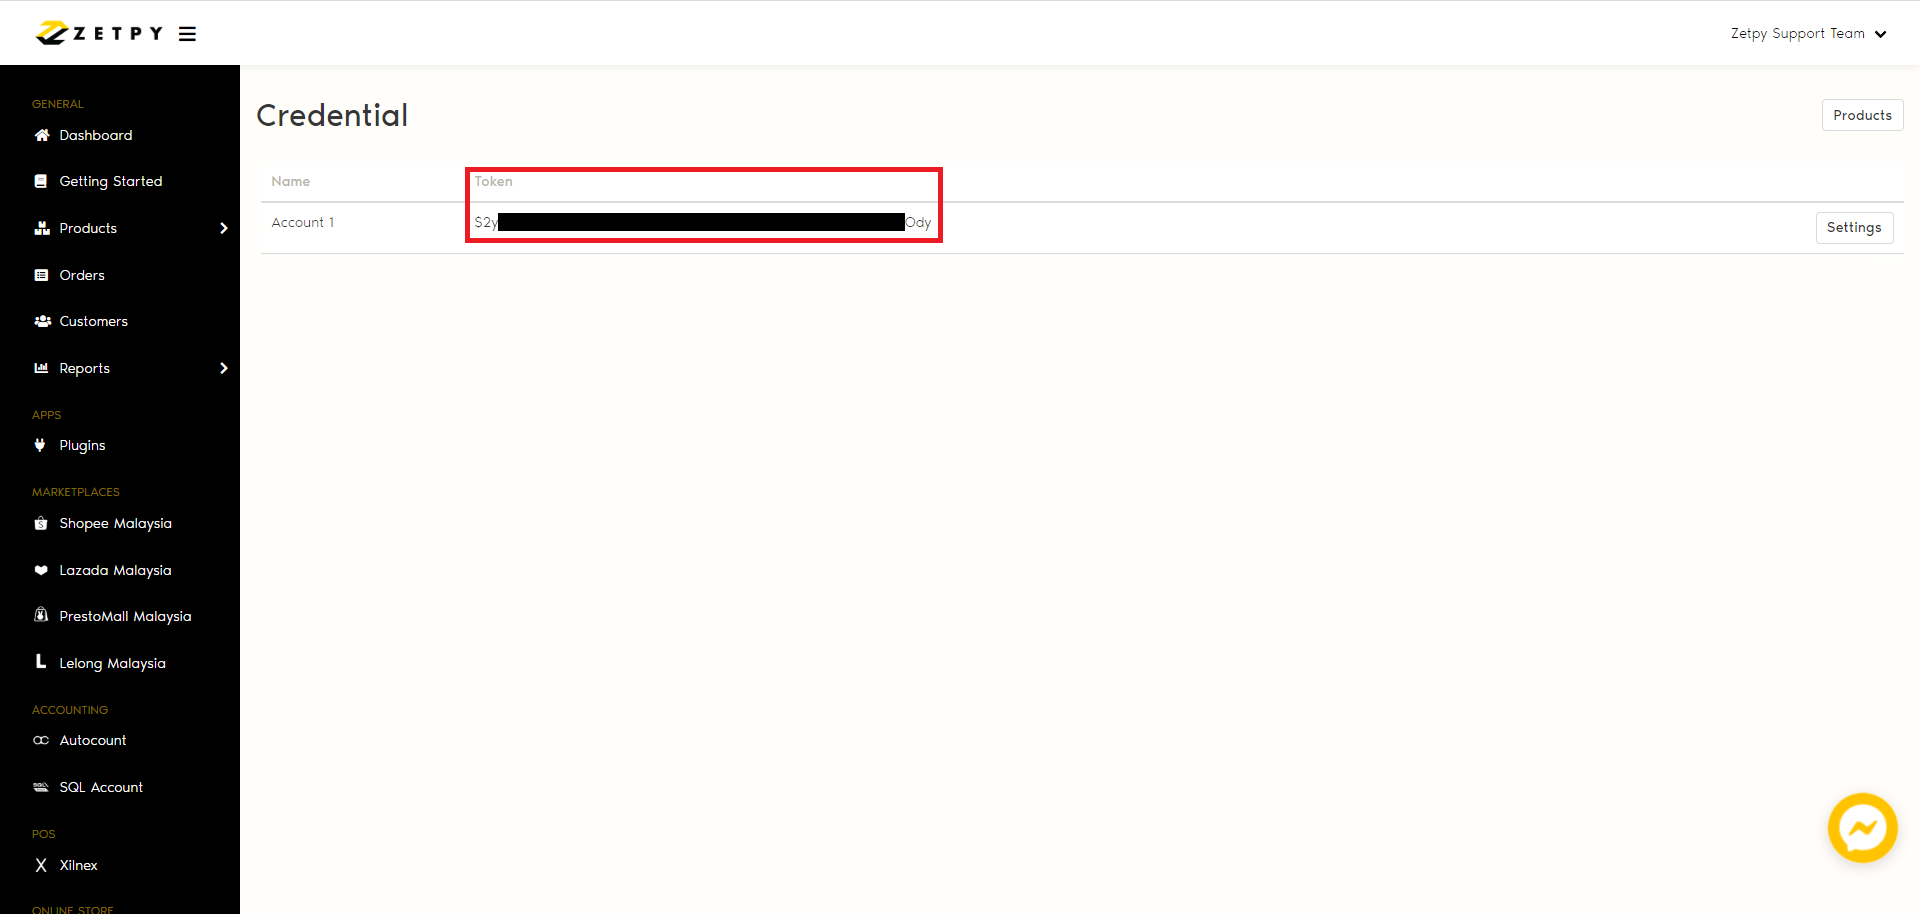
6) The SQL sync plug-in is already installed in your Zetpy control panel.
7) The API token will auto-generated.
B) Zetpy SQL Application Installation and Prerequisites
Note: Before starting to install Zetpy SQL middleware sync, make sure the 3 things below the version
must up to date:

a) The window update version is up to date or the version is latest.
b) The SQL Accounting Software version 5.2020.885.789 above.
c) The .NET Framework version 4.5.2 or higher.
d) For the sync order into SQL there required extra user account, the extra user account need to
purchase from your SQL dealer.
1) Kindly check the .NET Framework version 4.5.2 or higher - Download Here
2) Firebird SQL Client 5.9 – Download Here
3) DDEX Provider 3.0 – Download Here
4) Firebird Server (Install either one according to SQL Accounting version).
- Firebird Server Version 2.5 – Download Here (for SQL Accounting Version 4.2)
- Firebird Server Version 3.0 – Download Here (for SQL Accounting Version 5.0)
Noted: Please take note, if the Zetpy SQL middleware installs into client PC and connect to the server database, make sure both sites are installed Firebird 3.0
*While installing Firebird Server 3.0, it is important to set up server login (User ID and Password = masterkey),
and save it.
- User ID: SYSDBA
- Password: masterkey
(In case you use Firebird Version 3.0 and above, refer to installation steps below to configure the firebird server.)
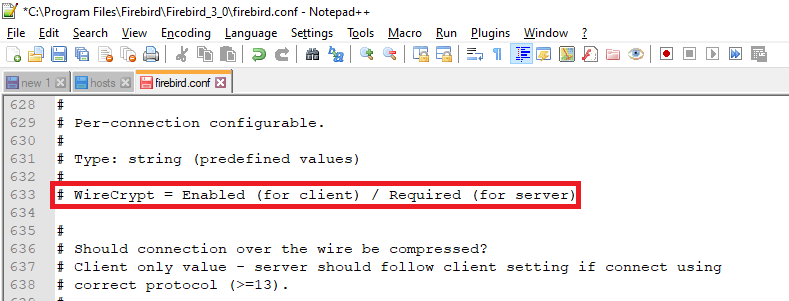
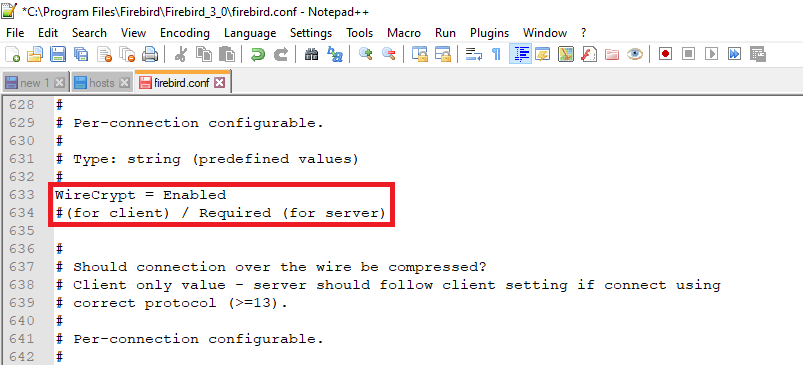
i. Edit firebird.config file located in “C:\Program Files\Firebird\Firebird_3_0\”.
ii. Search for “WireCrypt = Enabled”.
iii. Find line (# WireCrypt = Enabled (for client) / Required (for server) )
iv. Change the content of this line to: WireCrypt = Enabled
Kindly remove this word: #(for client) / Required (for server)
v. Save changes.
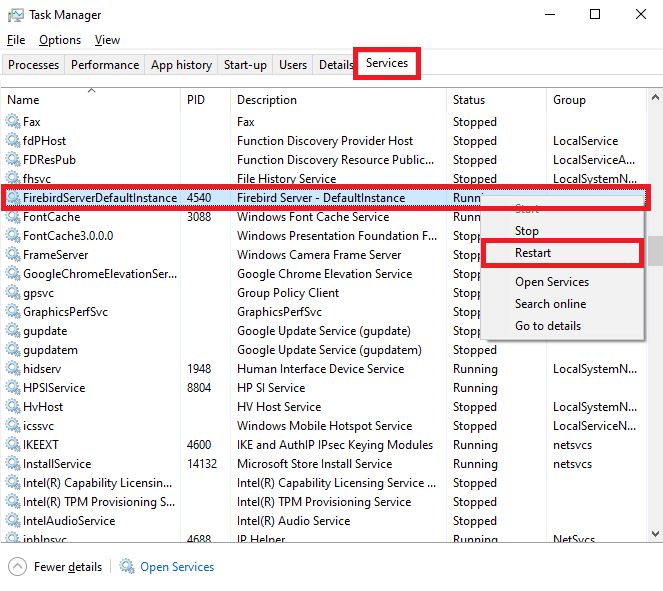
vi. Restart the firebird server.
a) Press your keyboard CTRL + Shift + Delete button
b) Click on Task Manager.
c) Select to Services.
d) Right-click on Firebird Server Default Instance, or Firebird Guardian – Default Instance and Firebird Server – Default Instance click on Restart, make sure the status is Running.
C) Set Zetpy SQL DataBase Connection
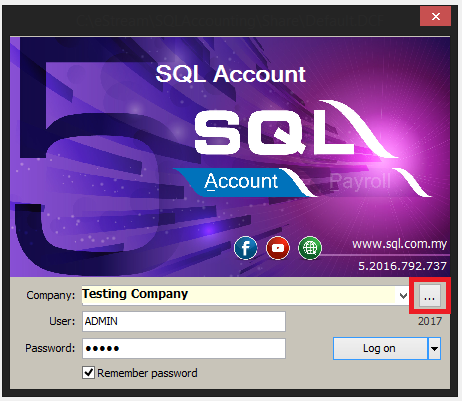
1) Open your SQL system without login.
2) Change the connection type to server connection in SQL Accounting.
You can find that in the “…” button near Company drop-down in the login window.
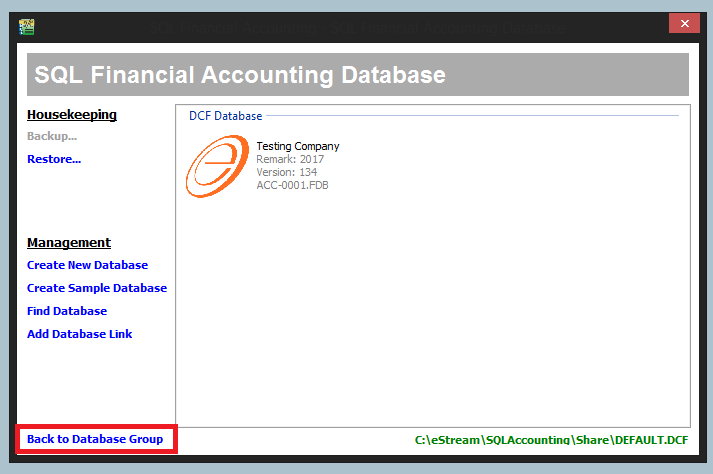
3) Click on Back to Database Group.
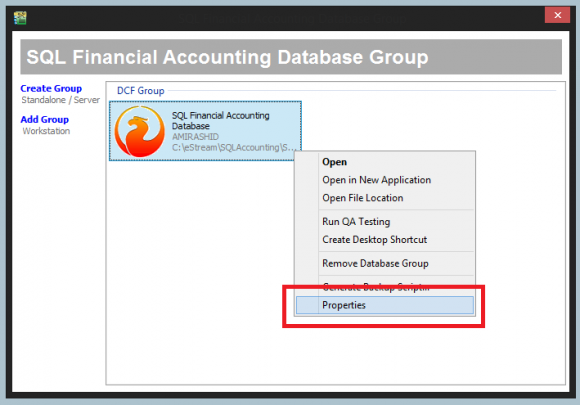
4) Choose the current database group, right-click it and choose Properties.
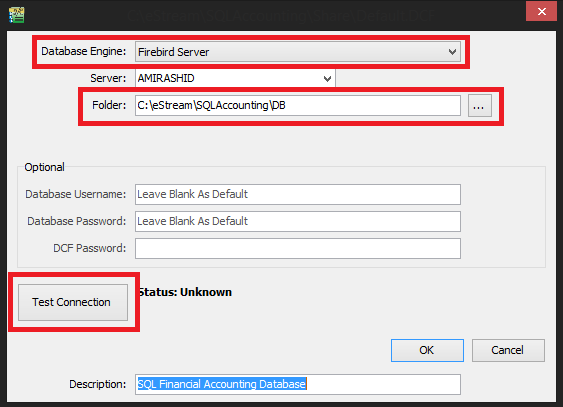
5) Change the Database Engine to Firebird Server and the Destination Folder for the database.
6) You can click Test Connection to test the connection through your Firebrid server.
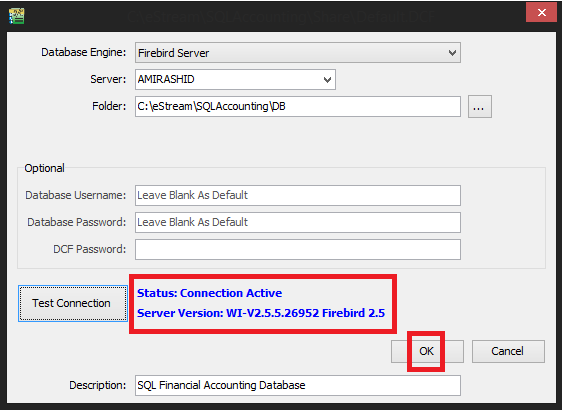
7) It will state that your Status: Connection Active.
8) Then, click OK.
D) Set Zetpy SQL Sync Settings
1) Install Zetpy SQL Accounting Version.
2) If windows prompt you to allow the installation of the program, allow it.
3) An icon to the application should appear on your desktop and your start menu.
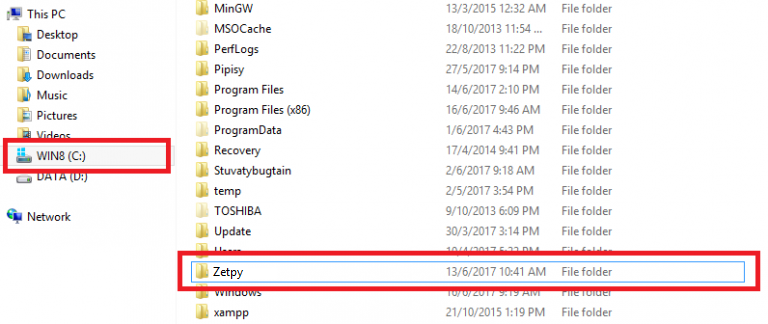
4) Make a sure that a folder named “Zetpy” is created under drive C.
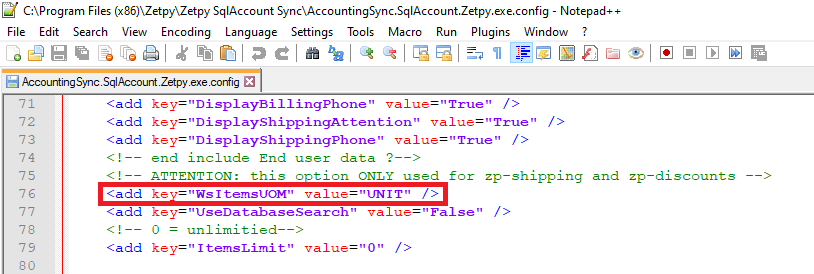
5) Before setup SQL settings on middleware sync, please check with the user the item that UOM using in SQL:
i) Go to C:\Program Files (x86)\Zetpy\Zetpy SqlAccount Sync
ii) Refer to AccountingSync.SqlAccount.Zetpy.exe open via notepad++
iii) Refer to WsItemsUOM and set the UOM, then click on save.
6) The application should be in the startup folder to start automatically when windows start.
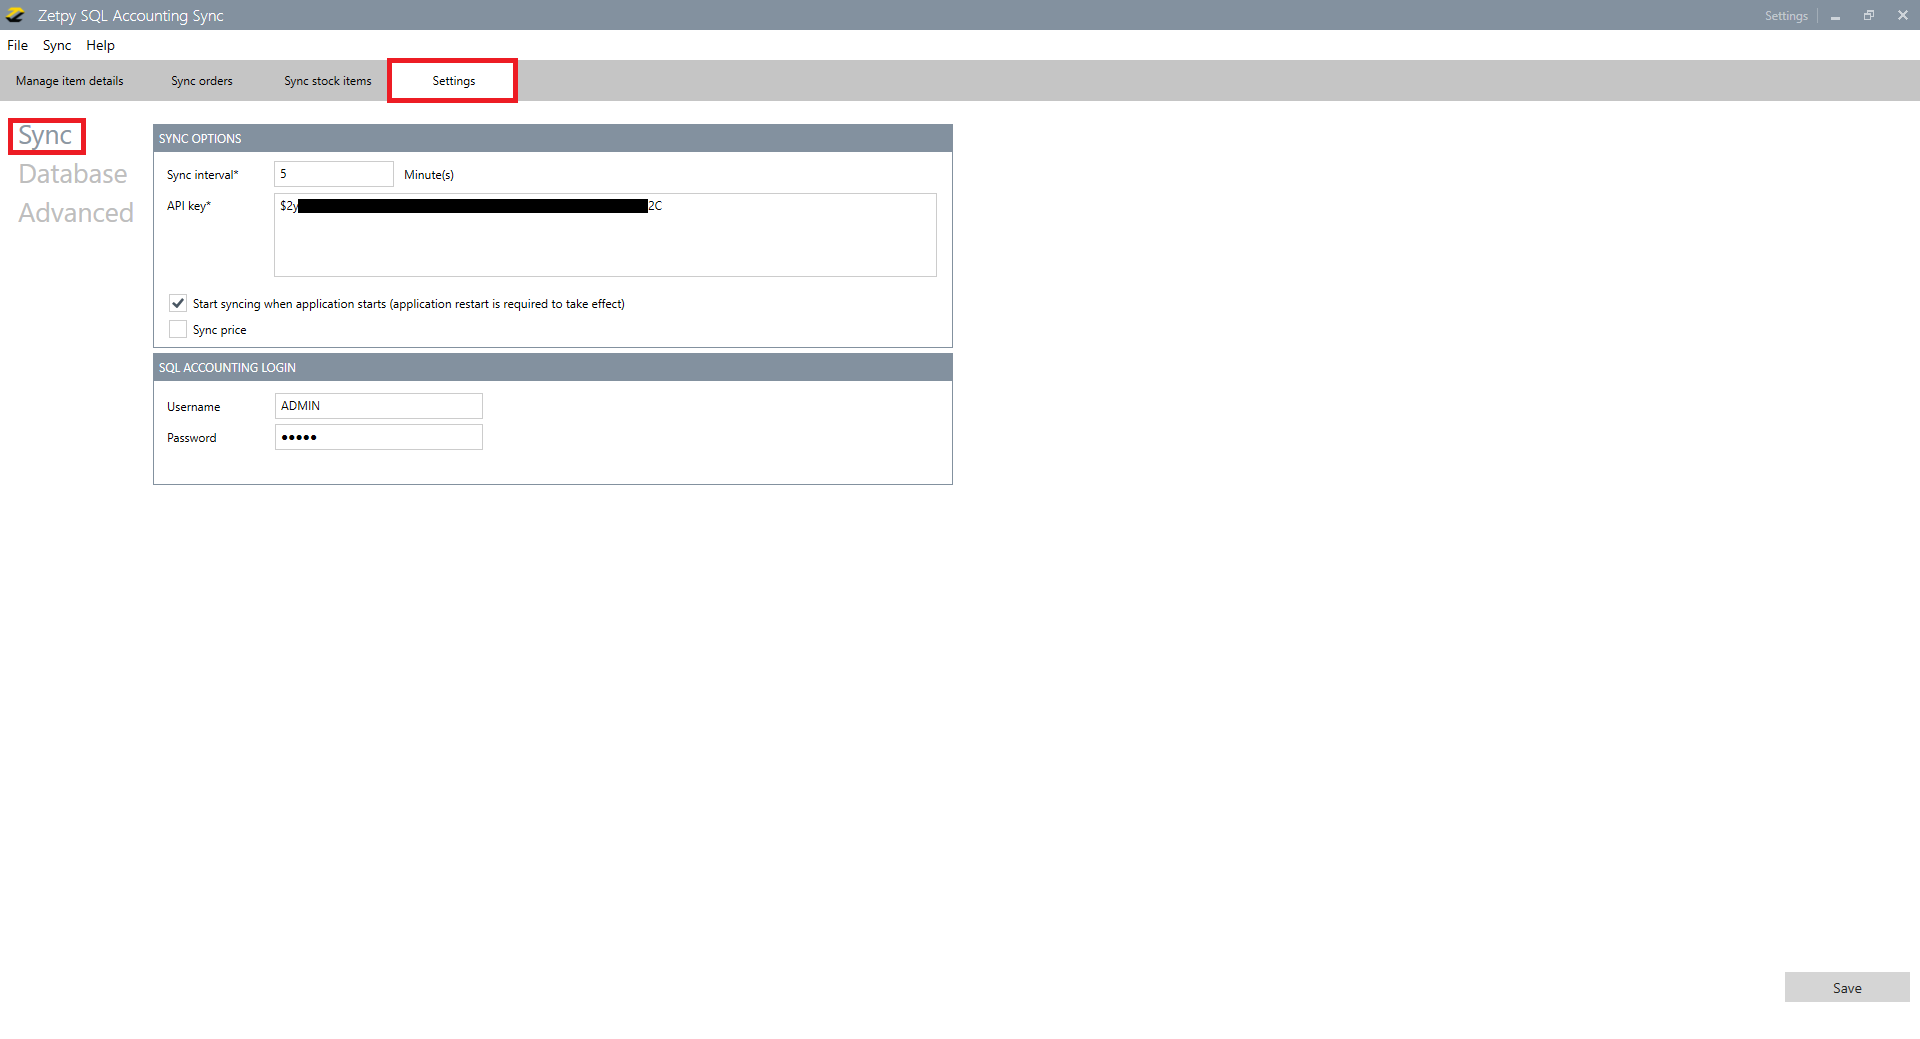
7) Go to Settings.
8) Click on the Sync.
9) Set Sync Interval (in minutes).
*Note: Example if you set the sync interval to 60 minutes, the application still starts to sync the stock quantity or price to your Zetpy in every 60 minutes.
10) Kindly paste your Zetpy API Key into the Zetpy SQL sync application.
11) If you did select the option below, the application will start working:
i. Start syncing when application starts.
ii. Sync price as Original Price.
12) Kindly to insert your SQL admin login details on the Username and Password.
13) Click on the Save button.
14) Run the program from your desktop. Open Zetpy SQL Accounting.
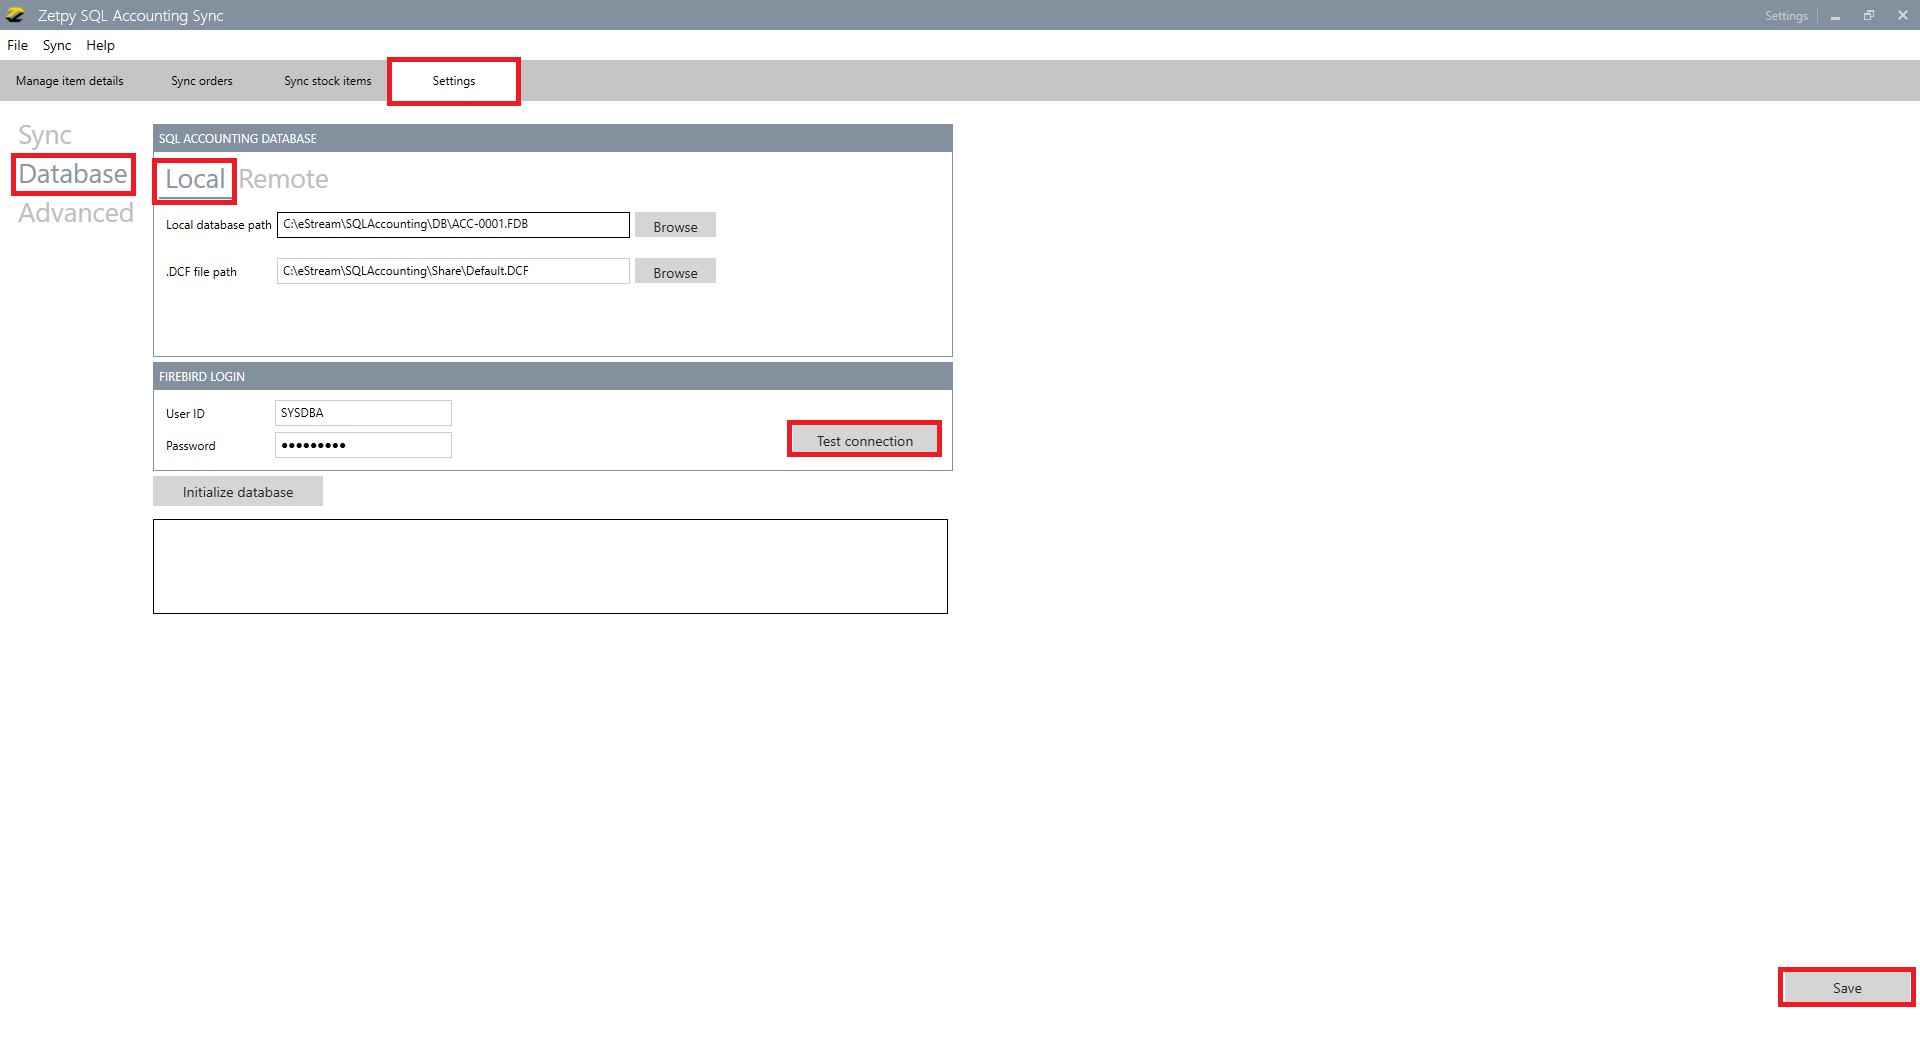
15) Go to Settings and make sure that the selected Database Path file exists.
**Note: If it does not exists, press Browse and choose selected SQL Accounting database defined at installation.
16) Set Database Location: (Select either Local @ Remote)
a) Local
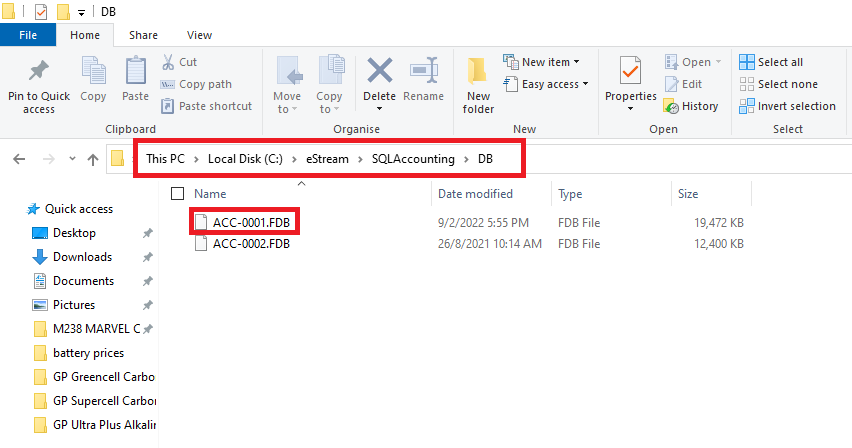
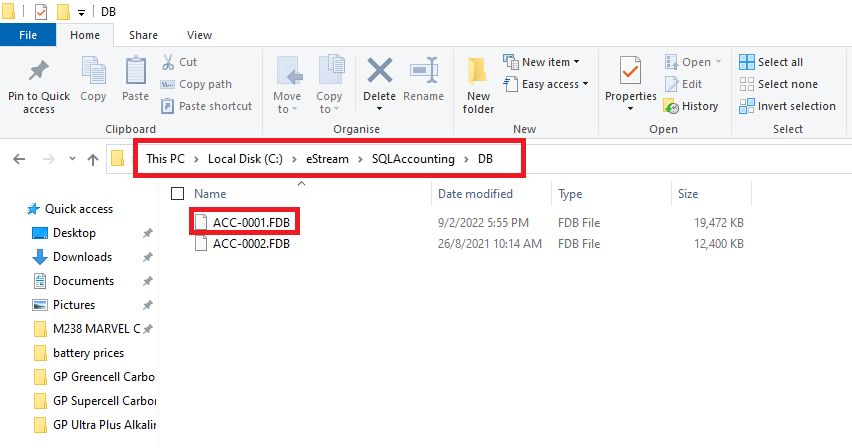
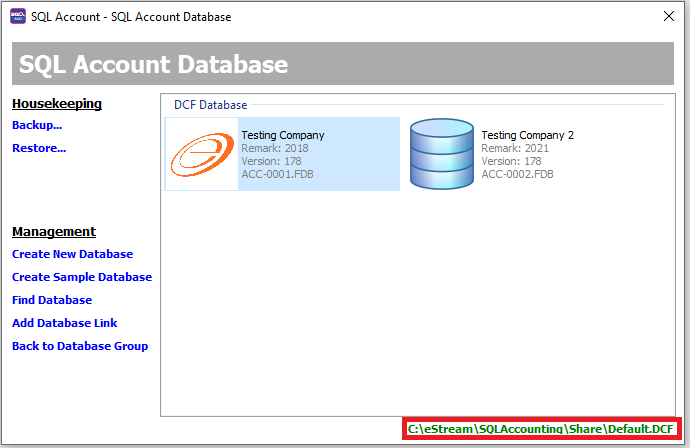
i) Just search the whether the Database and .DCF file will on below the screenshot or not.
ii) Click on the Browse button to select those files, and click on the Test Connection button, you will get the message "connected database".
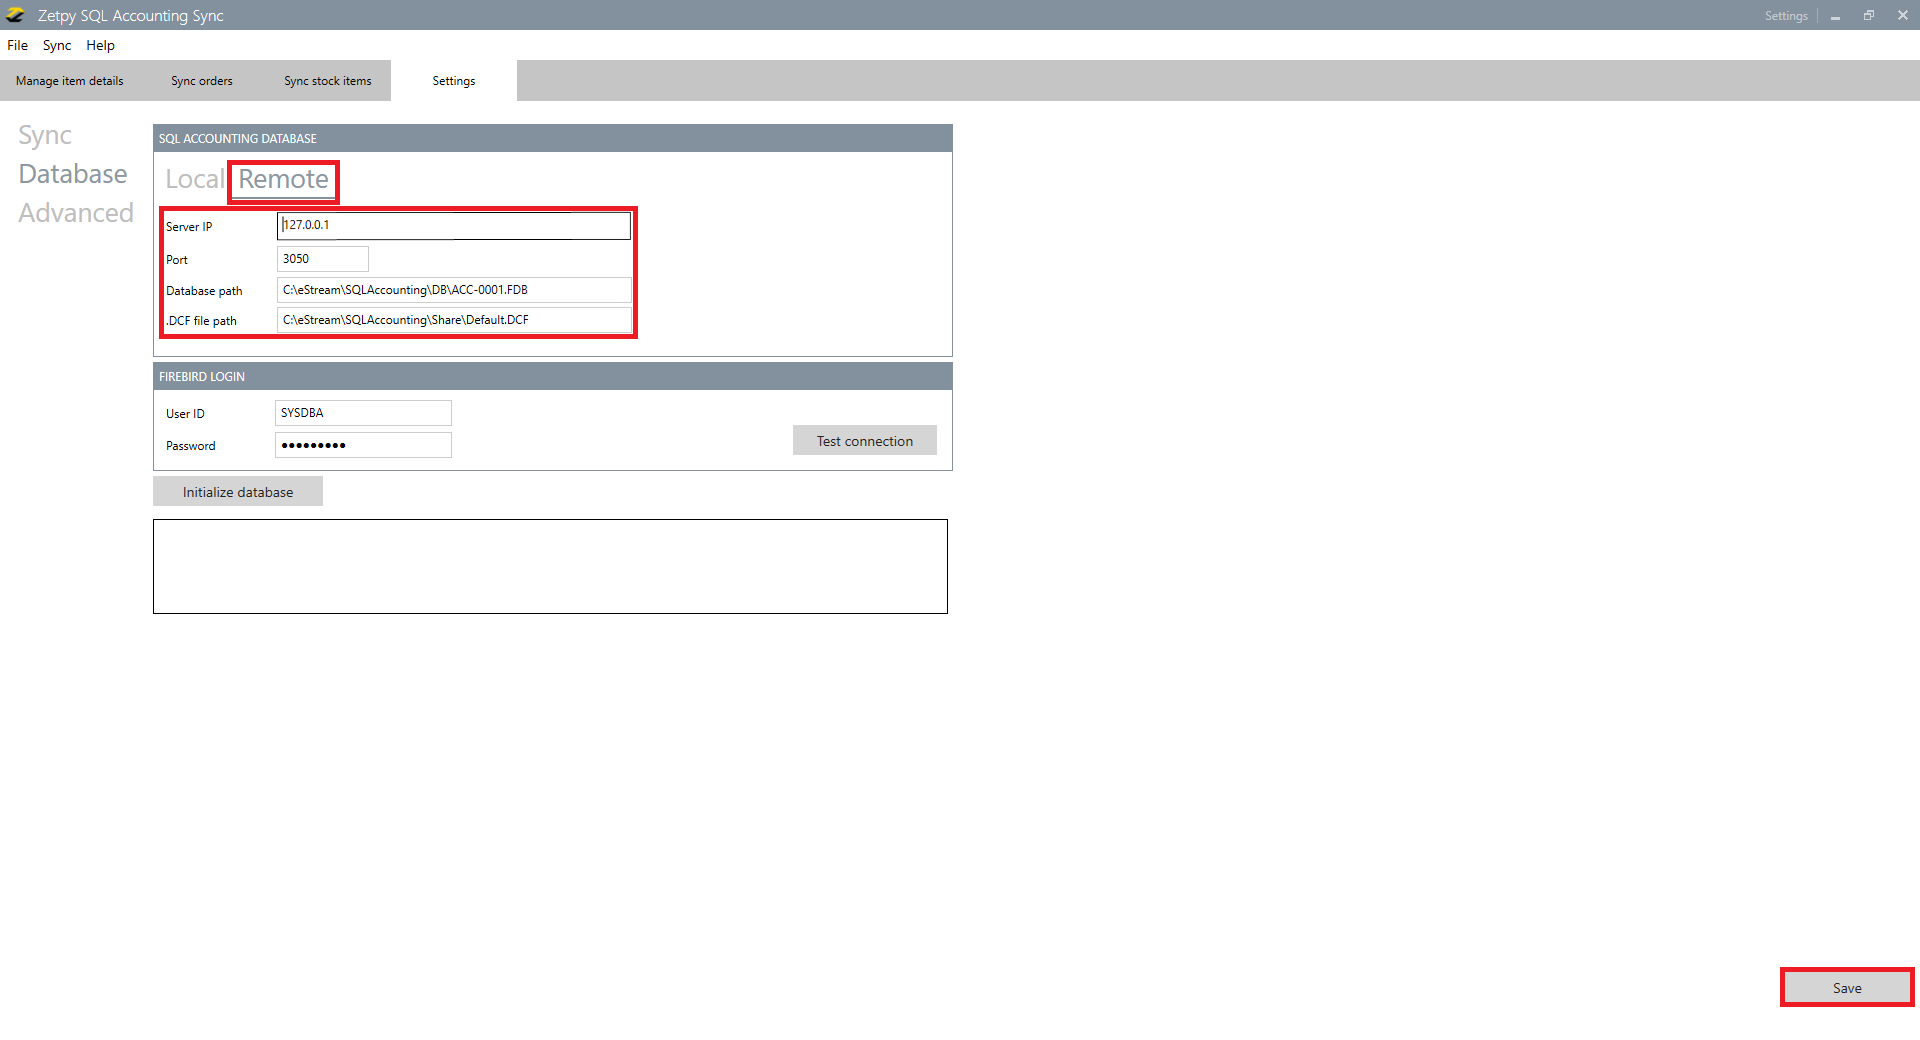
b) Remote
i) Kindly verify with the users for the SQL database located on the server or device and located on which folder.
ii) Search the Database and .DCF file will on below the screenshot.
Database(DB)
.DCF file
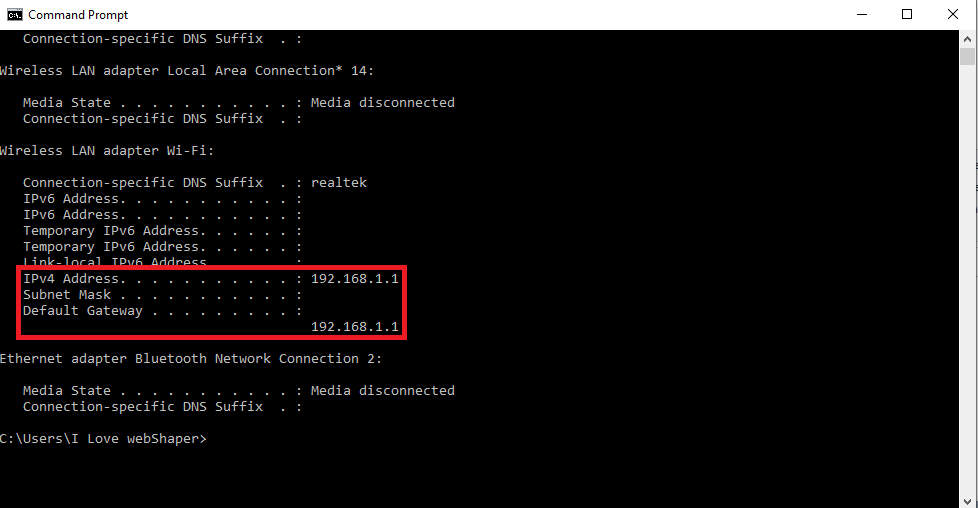
iii) Run the Command Prompt.
iv) Type the ipconfig.
v) Then you will see the IPv4 Address
vi) Kindly select Remote.
vii) Fill in the IP address,click on the Browse button to select those files, and click on the Test Connection button, you will get the message "connected database".
F) Set Zetpy SQL General Settings
*Note: If the selected option does not exist in the default values, you can create in SQL system.
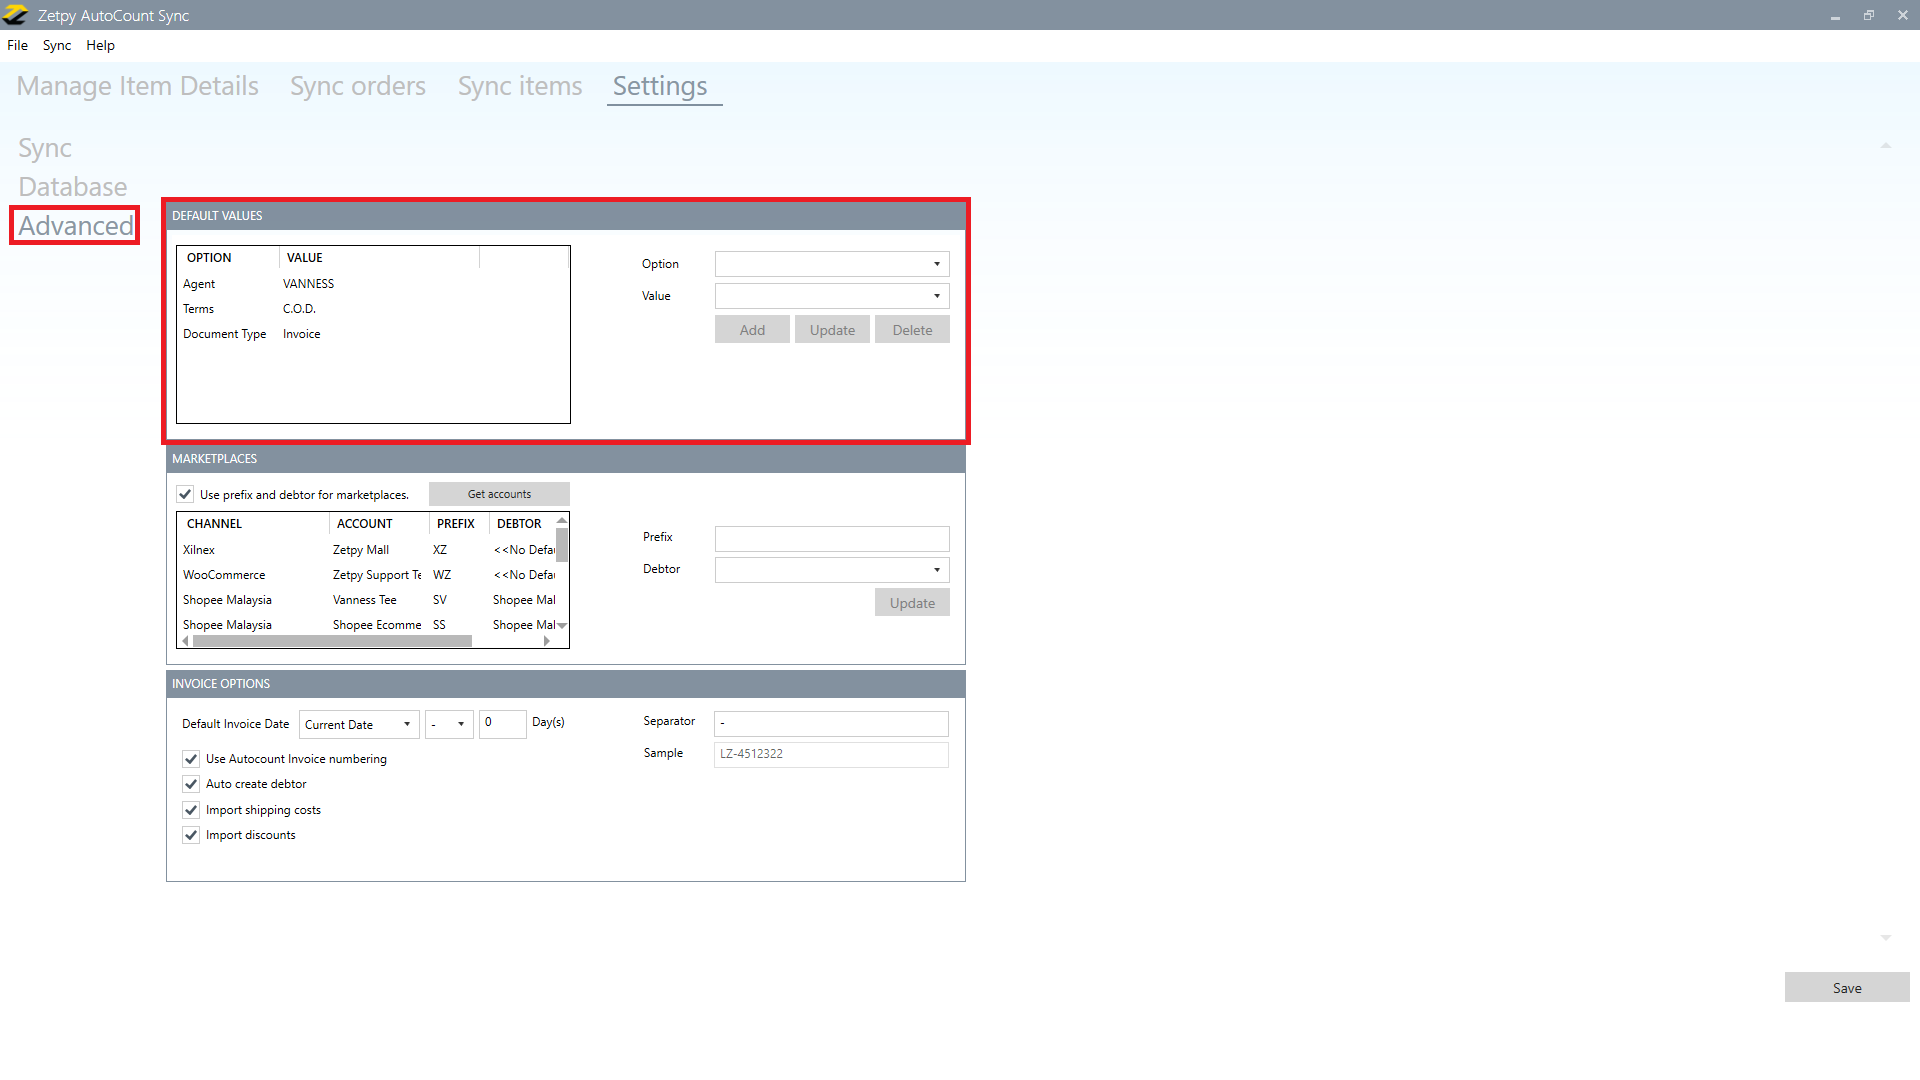
1) Setting Default Values
i. Go to Advanced.
ii. Select an Option from the default values group which are:
- Agent
- Terms
- Customer
- Location
- Document Type
iii. If the selected option does not exist in the default values, you can create it in the SQL system.
iv. Select a default value from the data grid, you can Update or Delete the selected option.
*Note: If you set your location in webShaper SQL Accounting inside Advanced Settings, this will require Multi-Location Stock module.
Which means:
i. Stock items shown will be filtered from this location.
ii. Sync Orders will be sync to this location.
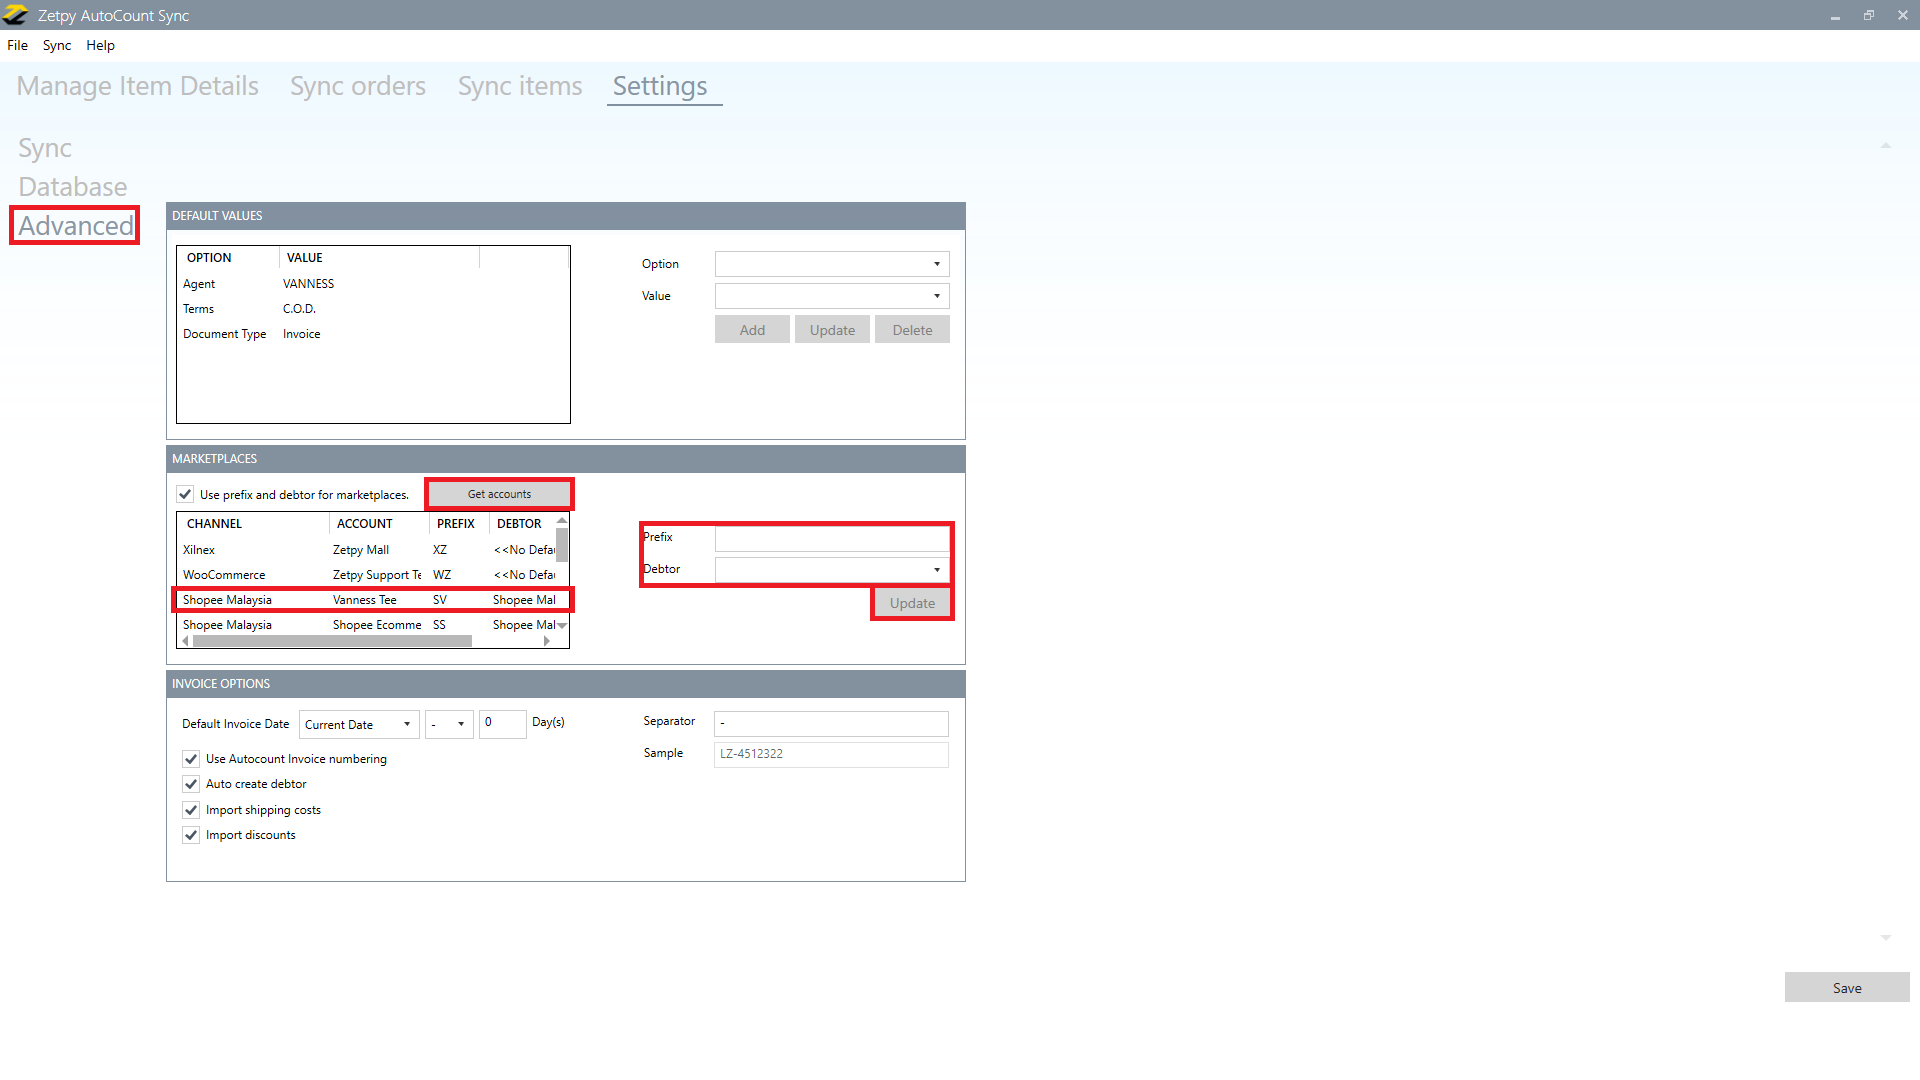
2) Setting Prefixes For Marketplaces
i. Go to Advanced.
ii. Click on the Get Accounts button to allow SQL middleware to check how many accounts you have in Zetpy.
iii. Choose to use Prefixes and change the values of marketplace code prefixes.
iv. Click on the Debtor to select during import order into which customer in SQL.
iv. Press Update.
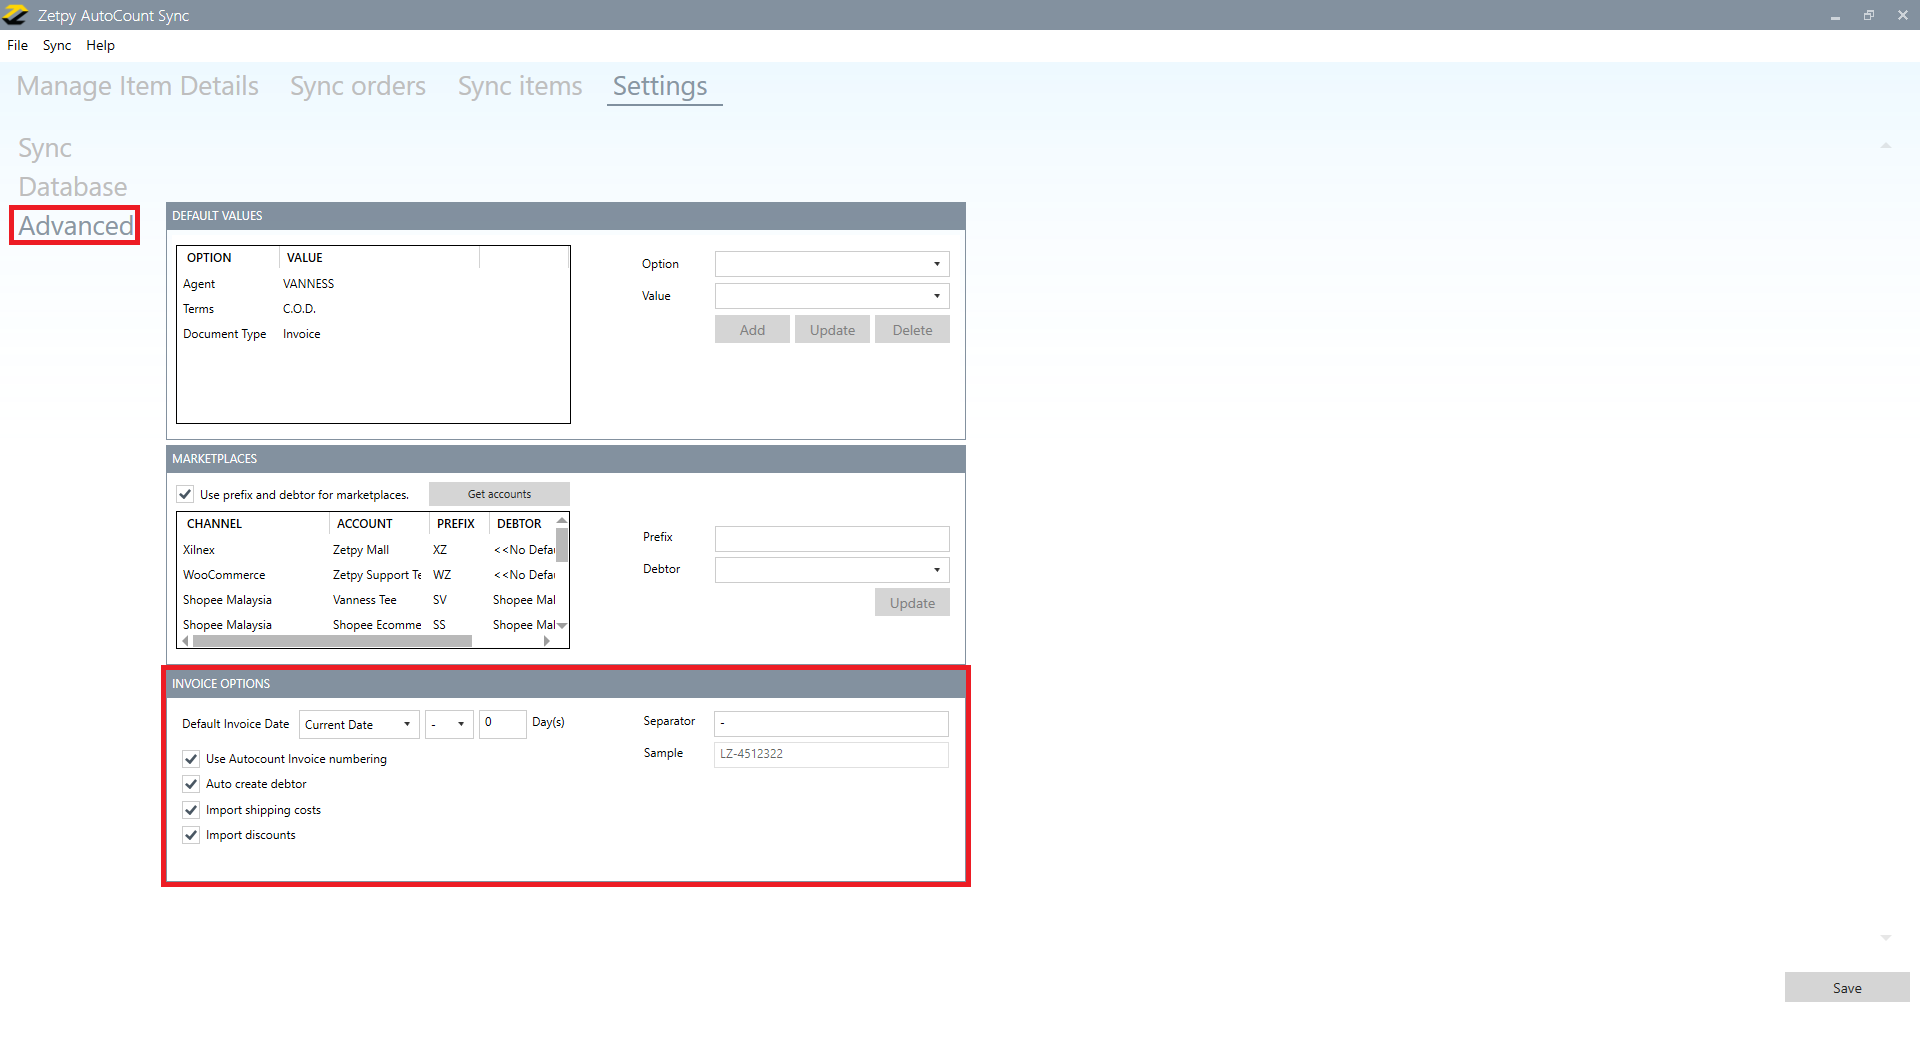
3) Set Default Invoice Date
i. Go to Advanced.
ii. Change the default invoice date to either Current Date or Order Date.
iii. You can add or subtract a certain amount of days.
iv. Click Save.
*Use SQL Invoice numbering:
i) Tick the option, after import the order to SQL system, it will be using the SQL system the Invoice numbering.
ii) Untick the option, after import the order to SQL system, it will be using the 3rd party order number.
*Auto-create debtor:
i) Tick the option, after import the order to SQL system, it will create the debtor in SQL system using the 3rd party order customer details.
ii) Untick the option, after import the order to SQL system, it will create the debtor based on the Default Value or Marketplaces setting in Zetpy SQL sync application.
*Import shipping costs:
During import the order into SQL you can either include the shipping cost or ignore the shipping cost.
*Import discounts(voucher):
During import the order into SQL you can either include the discount(voucher) or ignore the discount(voucher).
Note: To Sync Products from SQL to Zetpy, click here to find out more details.
If you have any issues or questions, please drop us an email at support@zetpy.com.

