Before you start, ensure that you have acquired the necessary information – the API Key, Subscription ID and Mod Code – from Zeoniq Support team. You will need these credentials to integrate with the Zeoniq API.
Kindly send an email to your Zeoqniq Support team and cc us ( support@zetpy.com ), to request the Zeoniq API's API Key, Subscription ID and Mod Code. They will send you the info, then you can forward it to us.
Sample Email:
Hi Zeoniq team,
We would like to get the API Key, Subscription ID, and Mod Code for Zeoniq API, which connects my Zeoniq account with Zetpy.
Thank you.
After you received the API Key, Subscription ID, and Mod Code from the Zeoniq Support team. You can proceed to step below.
Steps to Install & Authorize Zeoniq in Zetpy:
Install & configure the API Key, Subscription ID, Mod Code in Zeoniq plugin
Select 1 Outlet only
Step 1: Install & Authorize Zeoniq
1. Log in to Zetpy > under APPS, click on Add Plugins
Click on Add button to install the Zeoniq Plugin.
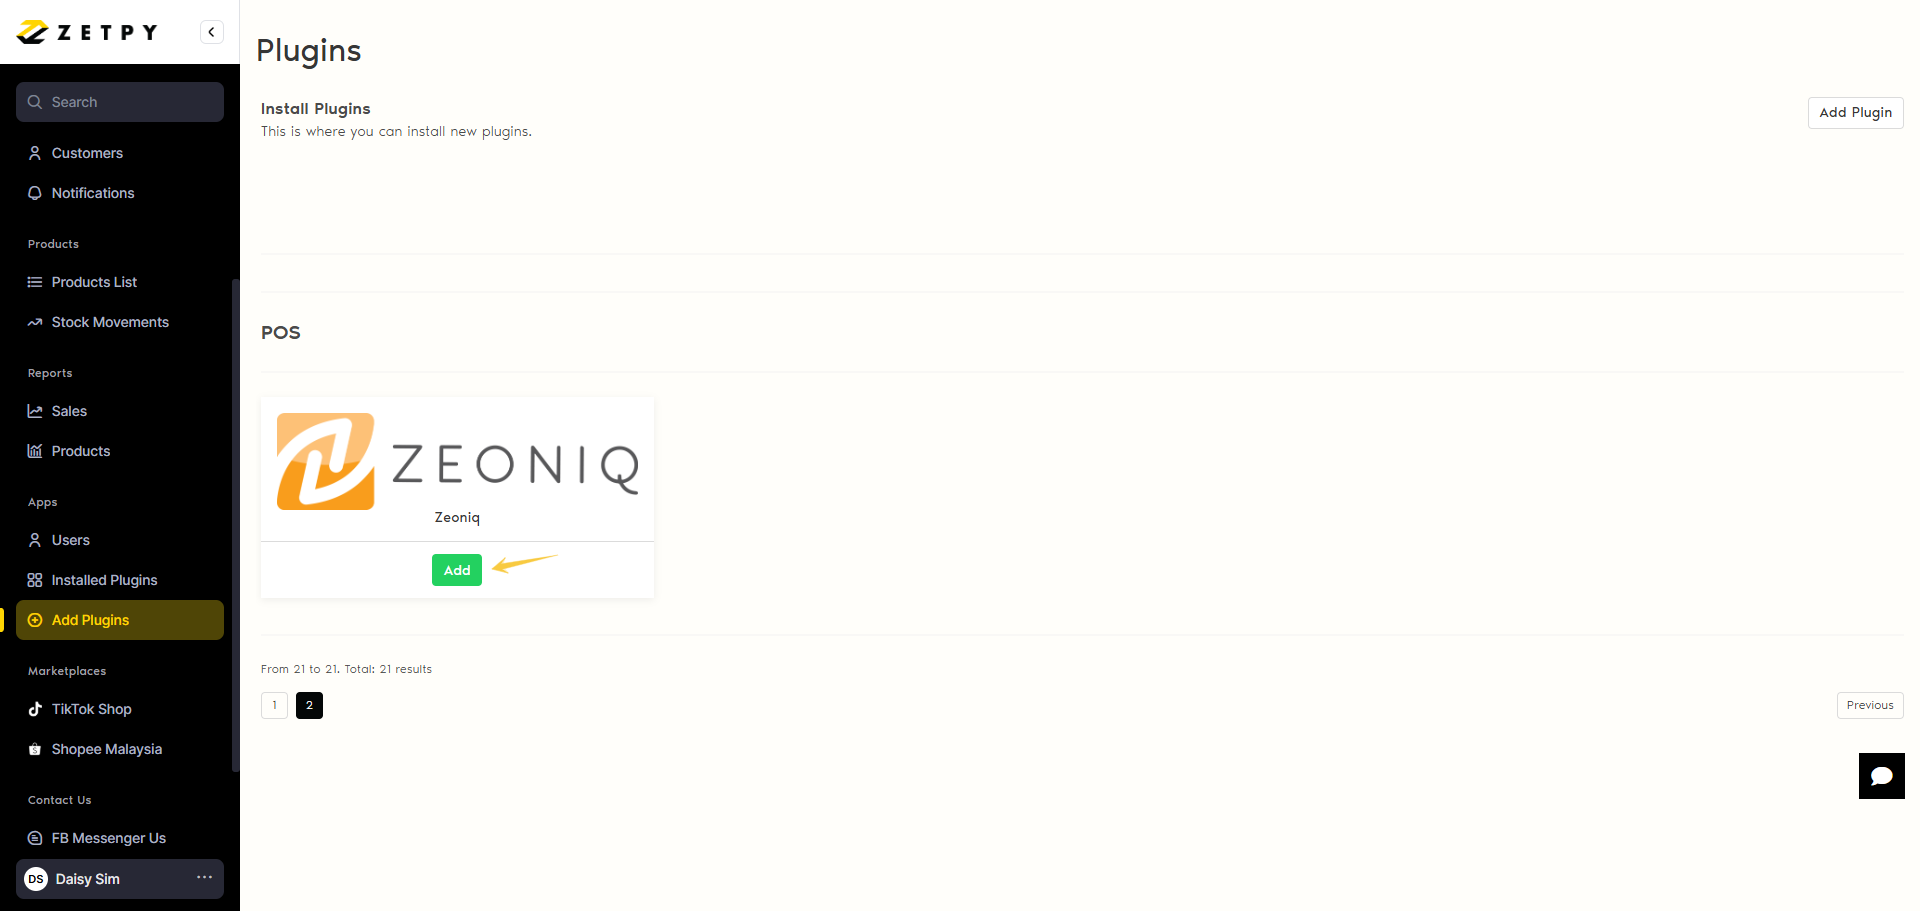
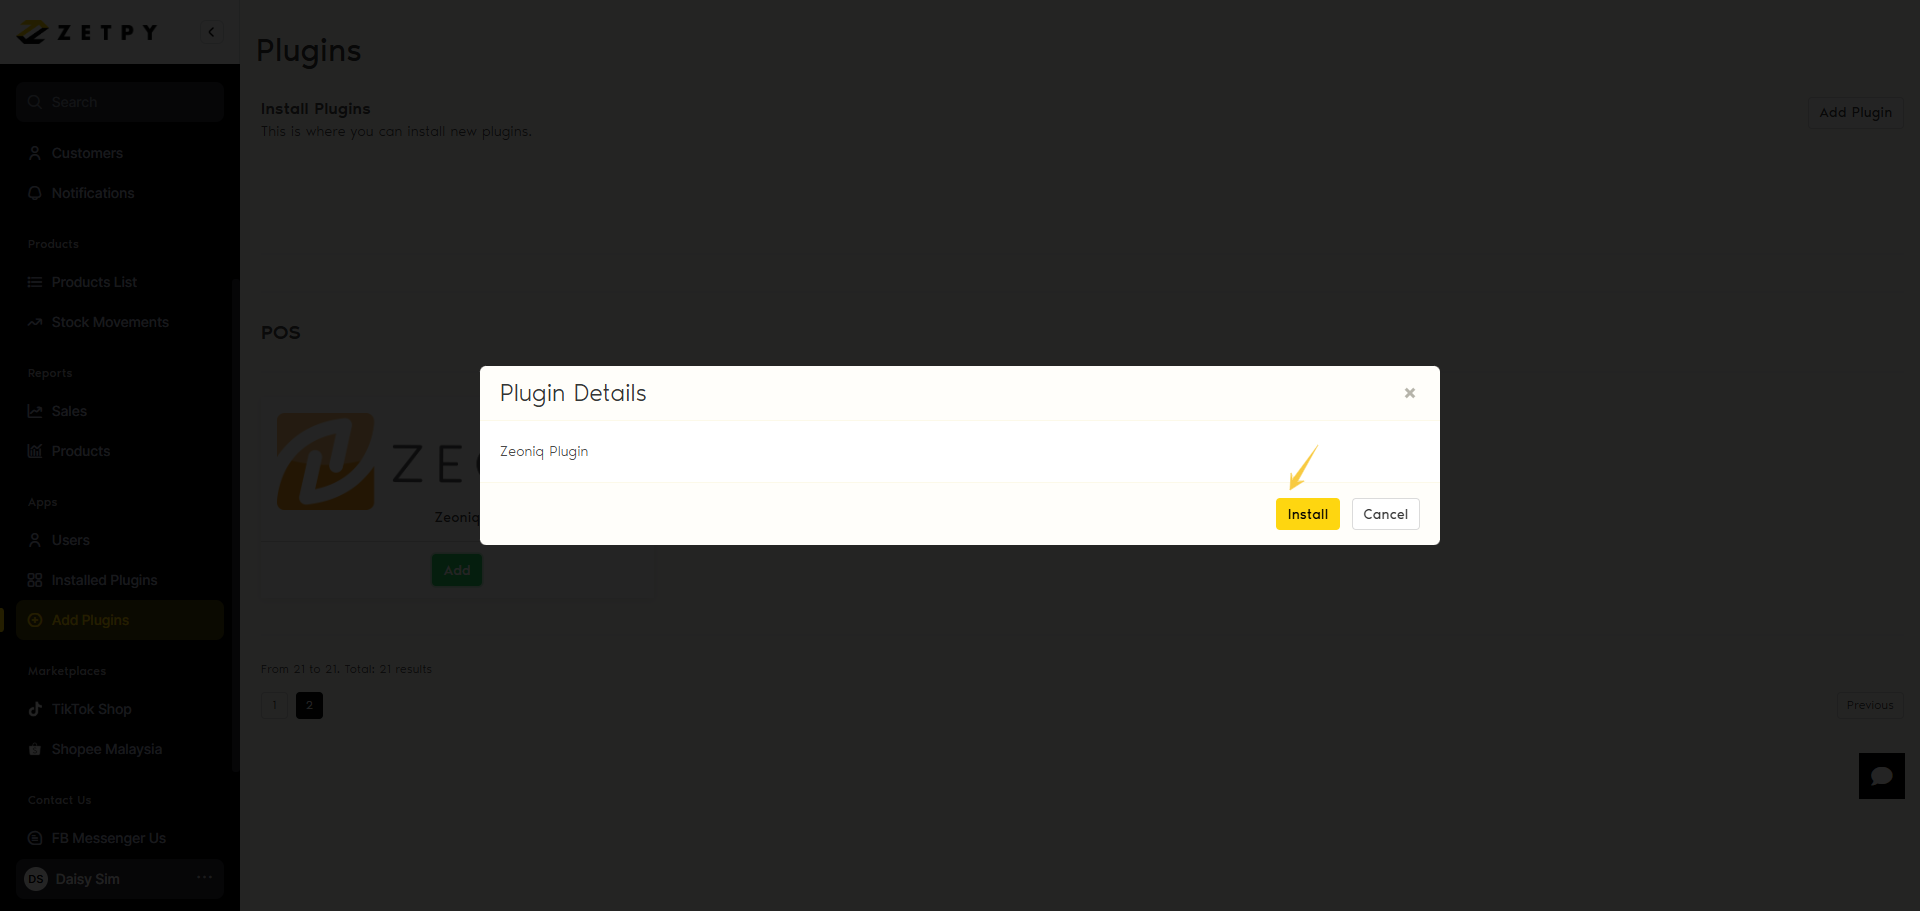
3. Click Install button to install Zeoniq plugin in Zetpy.
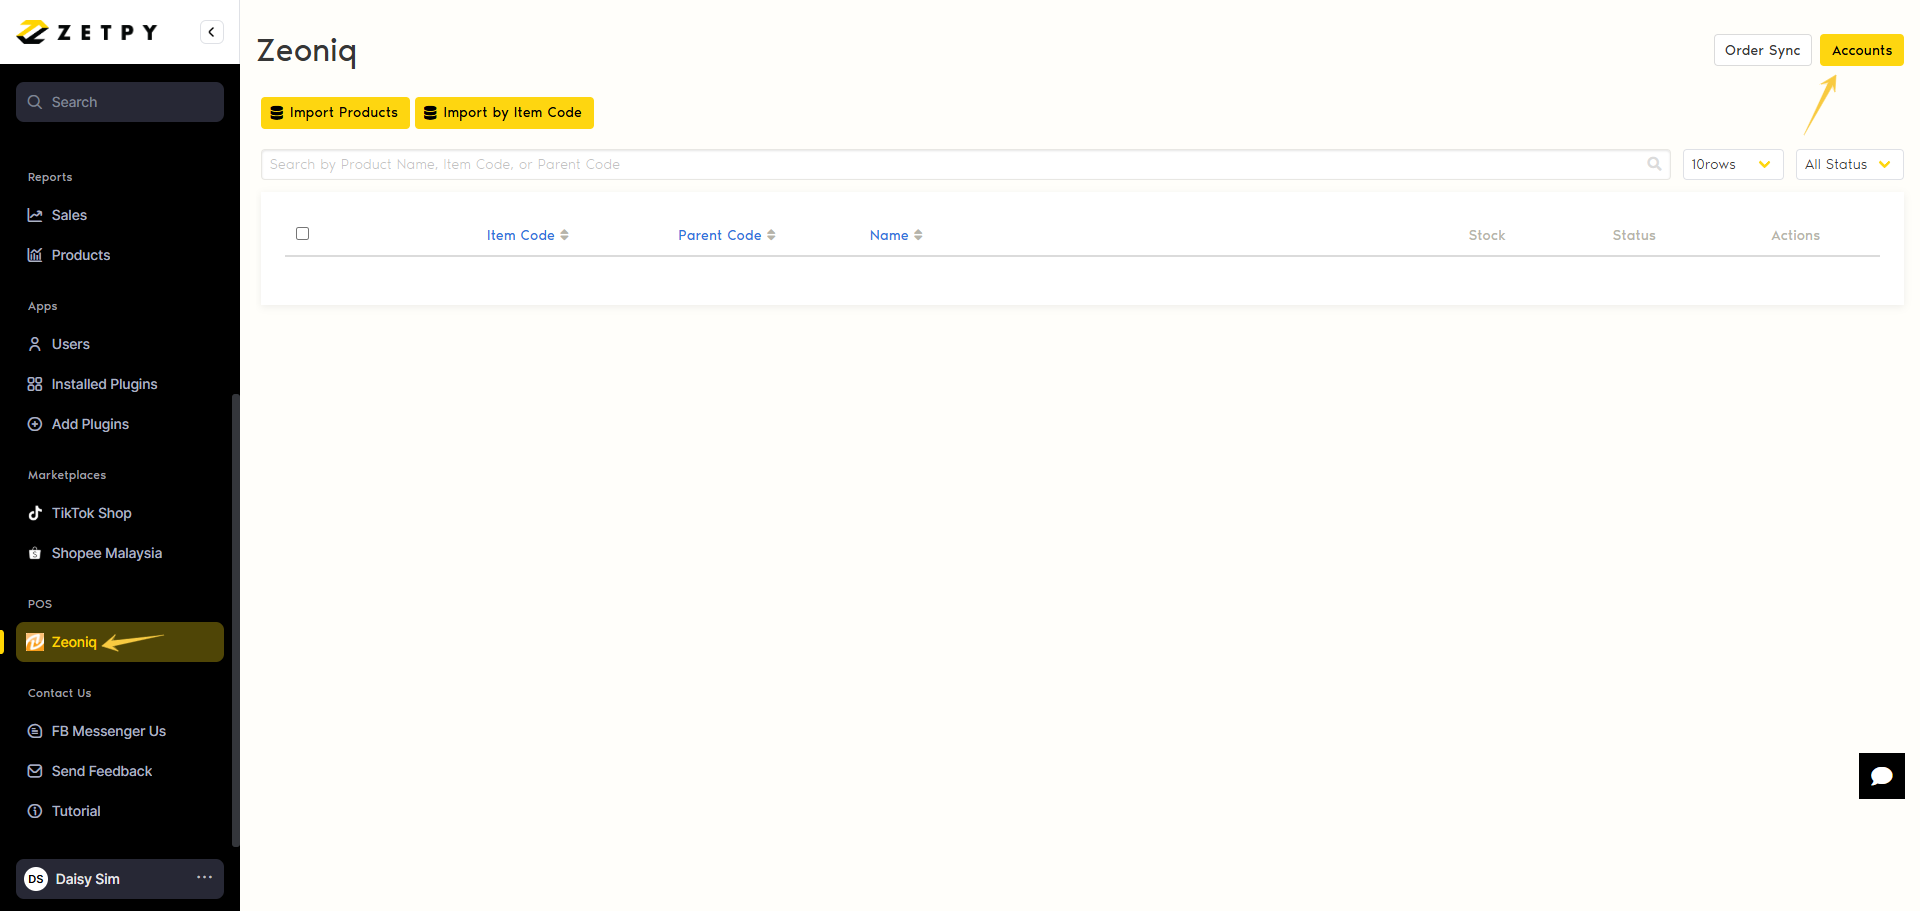
4. Now you can see the Zeoniq plugin is installed & appeared on the left menu bar.
Next, click on the Accounts button on the top right.
Click on Add Account
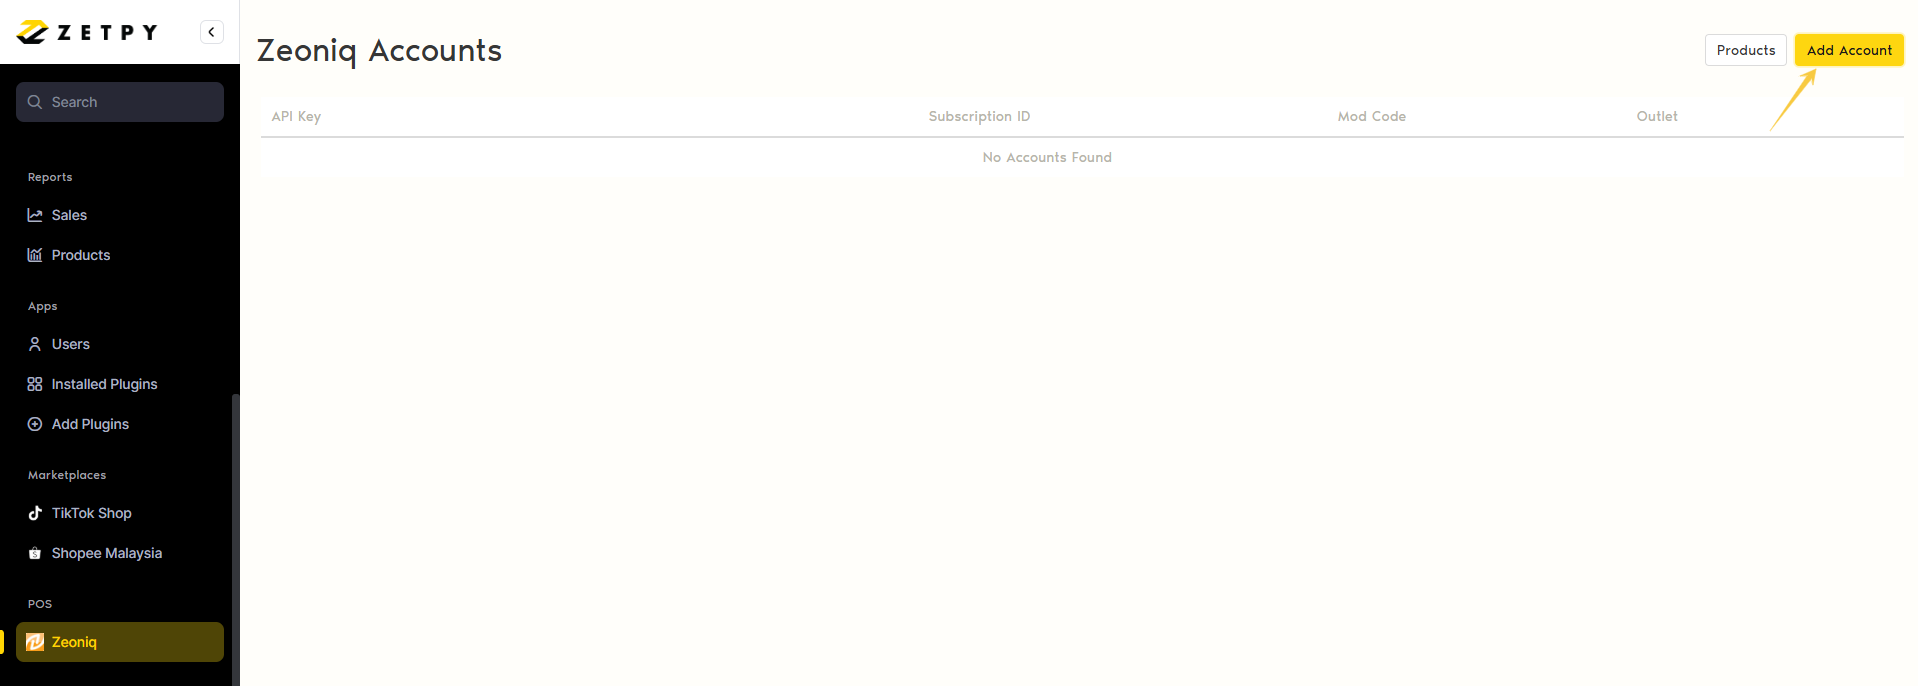
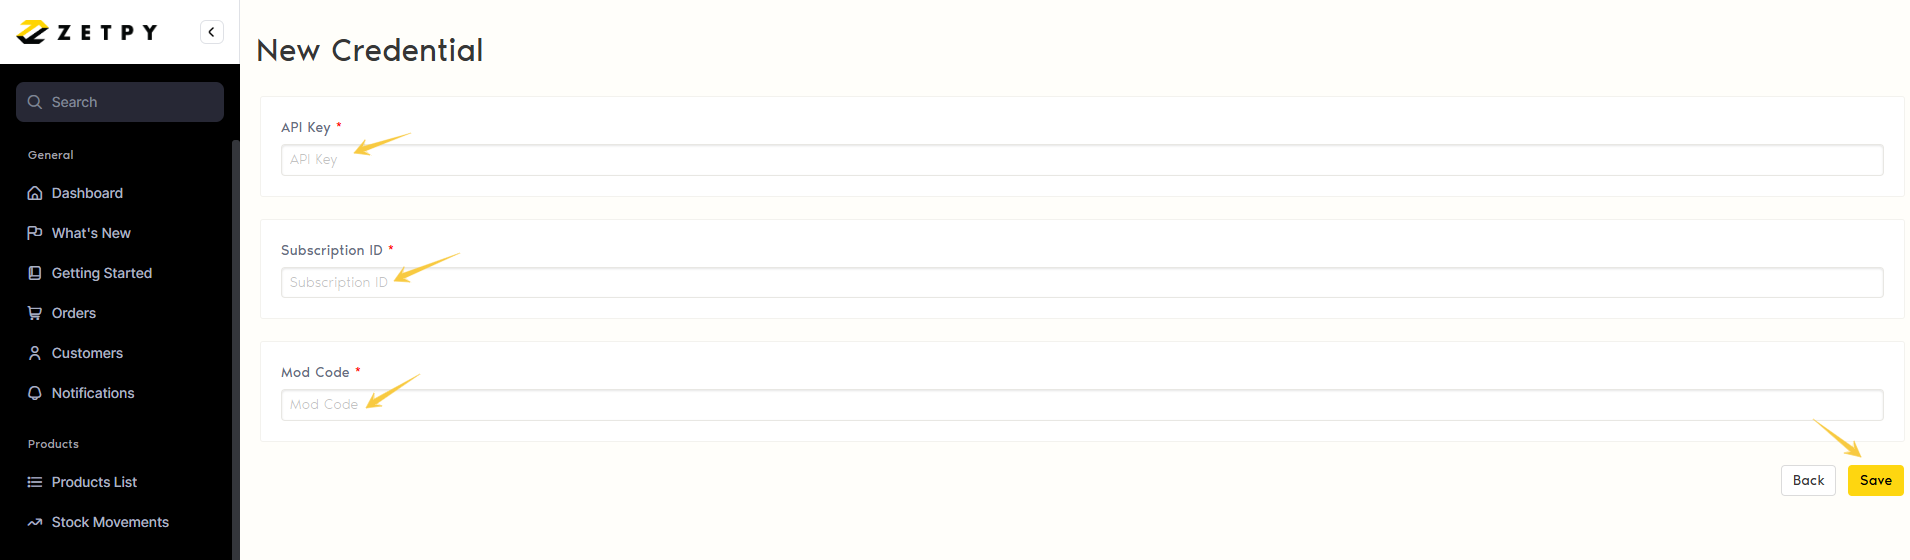
Enter the API Key, Subscription ID, and Mod Code that were given by the Zeoniq Support team
Note: The Zeoniq API key, Subscription ID, and Mod Code need to be given by the Zeoniq Support Team as mentioned above.Click Save.
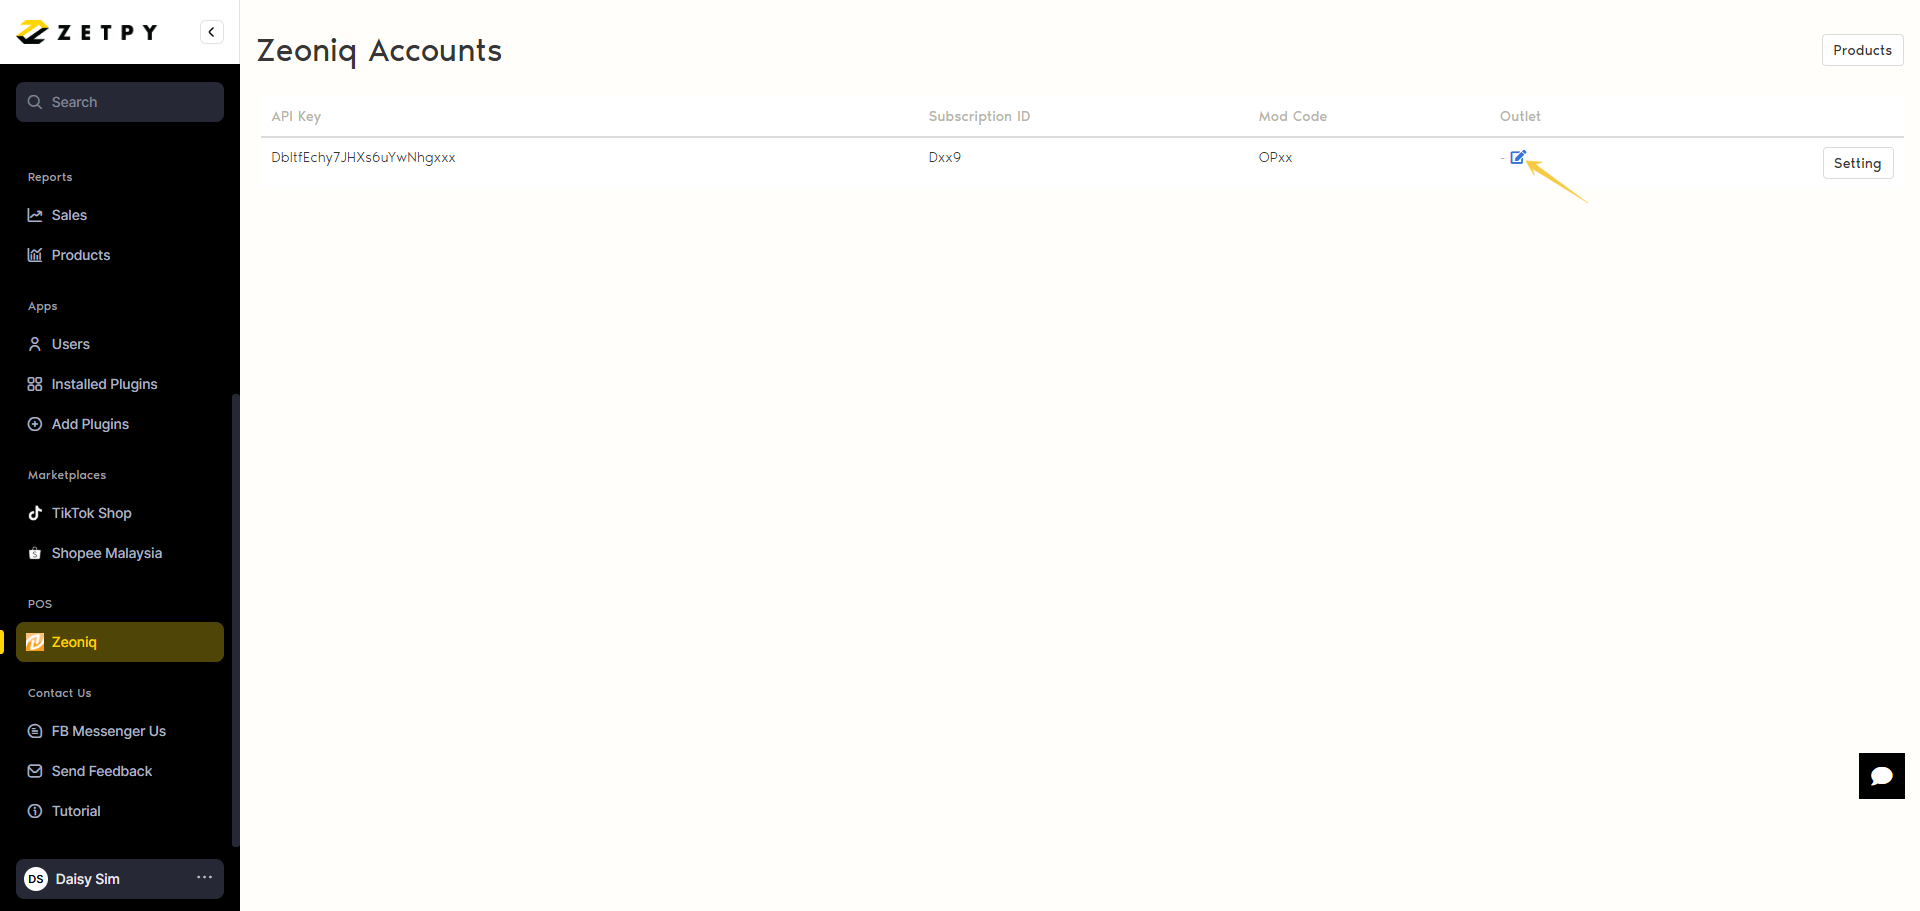
7. Once it successfully connects, it will show account credential is successfully updated!
Step 2: Configure the Outlet in Zeoniq Plugin
Only supported 1 outlet with Zetpy.
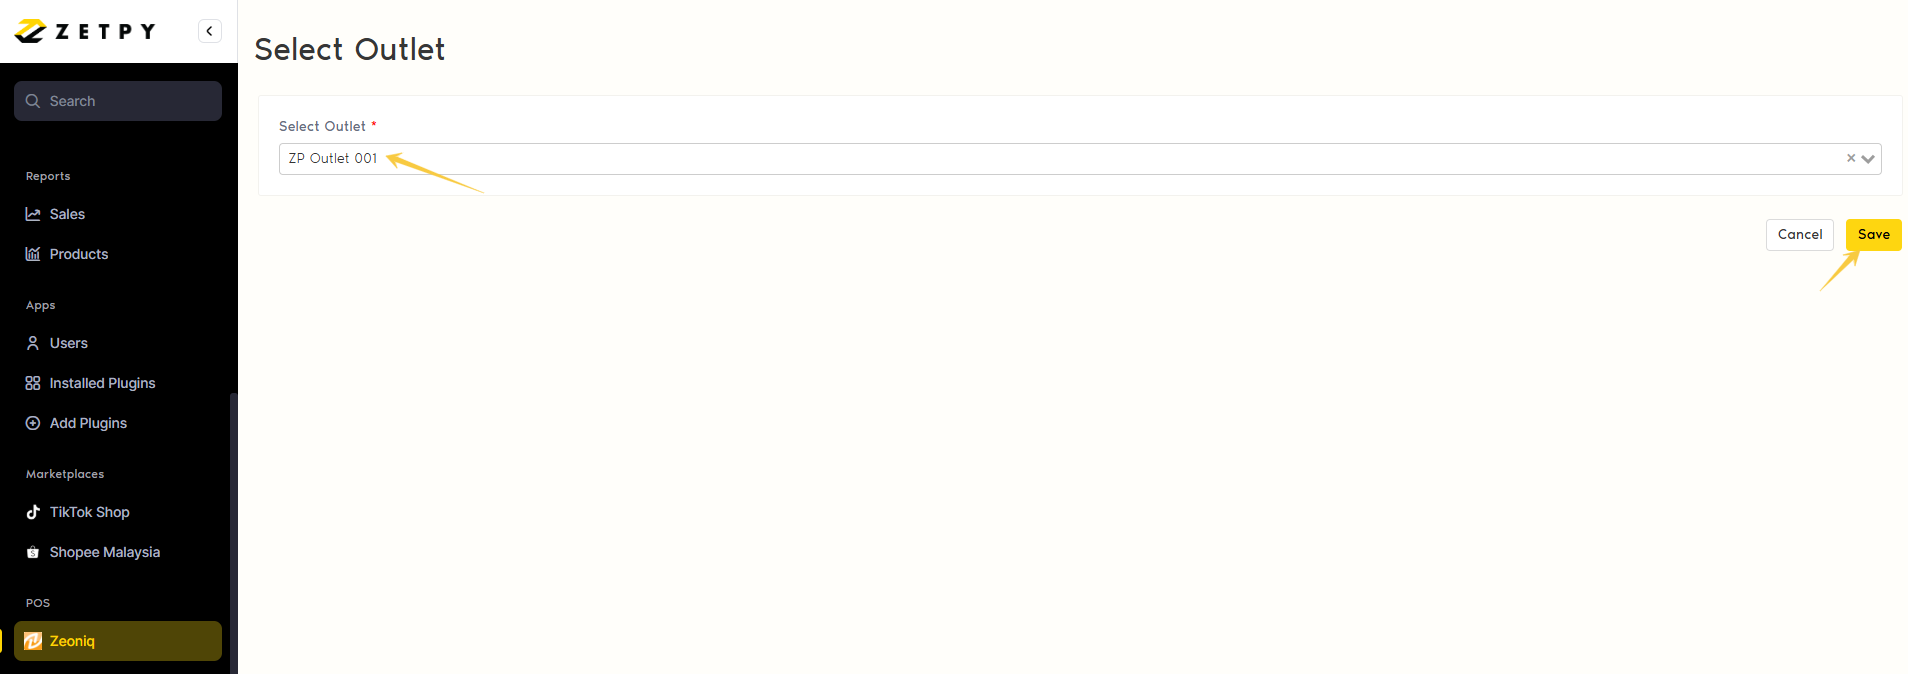
Click on the edit button to select your Outlet Name.
Select one Outlet that connects with Zetpy. ( only 1 outlet )
Select any one of the outlets that you want to connect with Zetpy. ( only supports 1 outlet )
*Important Tip: If you change the Zeoniq outlet name later, you will need to change it here in Zetpy's Zeoniq plugin, else the stock sync will be affected.
Lastly, click the Save button.
Done. The Zeoniq plugin is installed and authorized successfully.
Next, refer to the next tutorial for Configure the Sync Order setting in Zeoniq plugin.
If you have any issues or questions, please drop us an email at support@zetpy.com.