Choose Sync Order Methods
Assign the product item into Product Group in Zeoniq, before import into Zetpy.
Choose the fields to be sync into Zeoniq
Map your channels order into Zeoniq's customer.
Step 1. Choose Sync Order Method
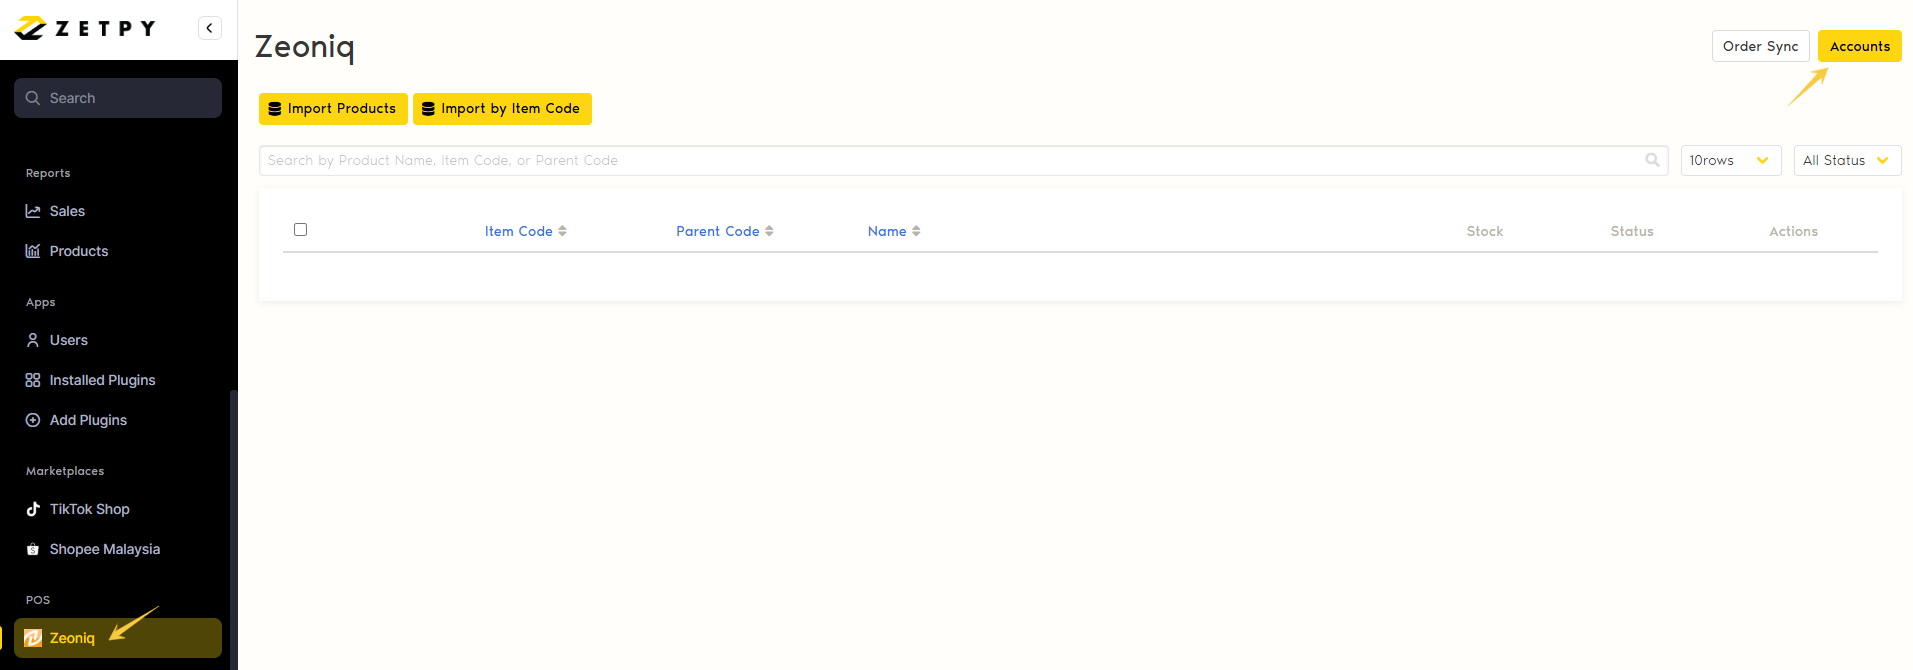
Go to Zeoniq plugin > click on Accounts
2. Click on Settings

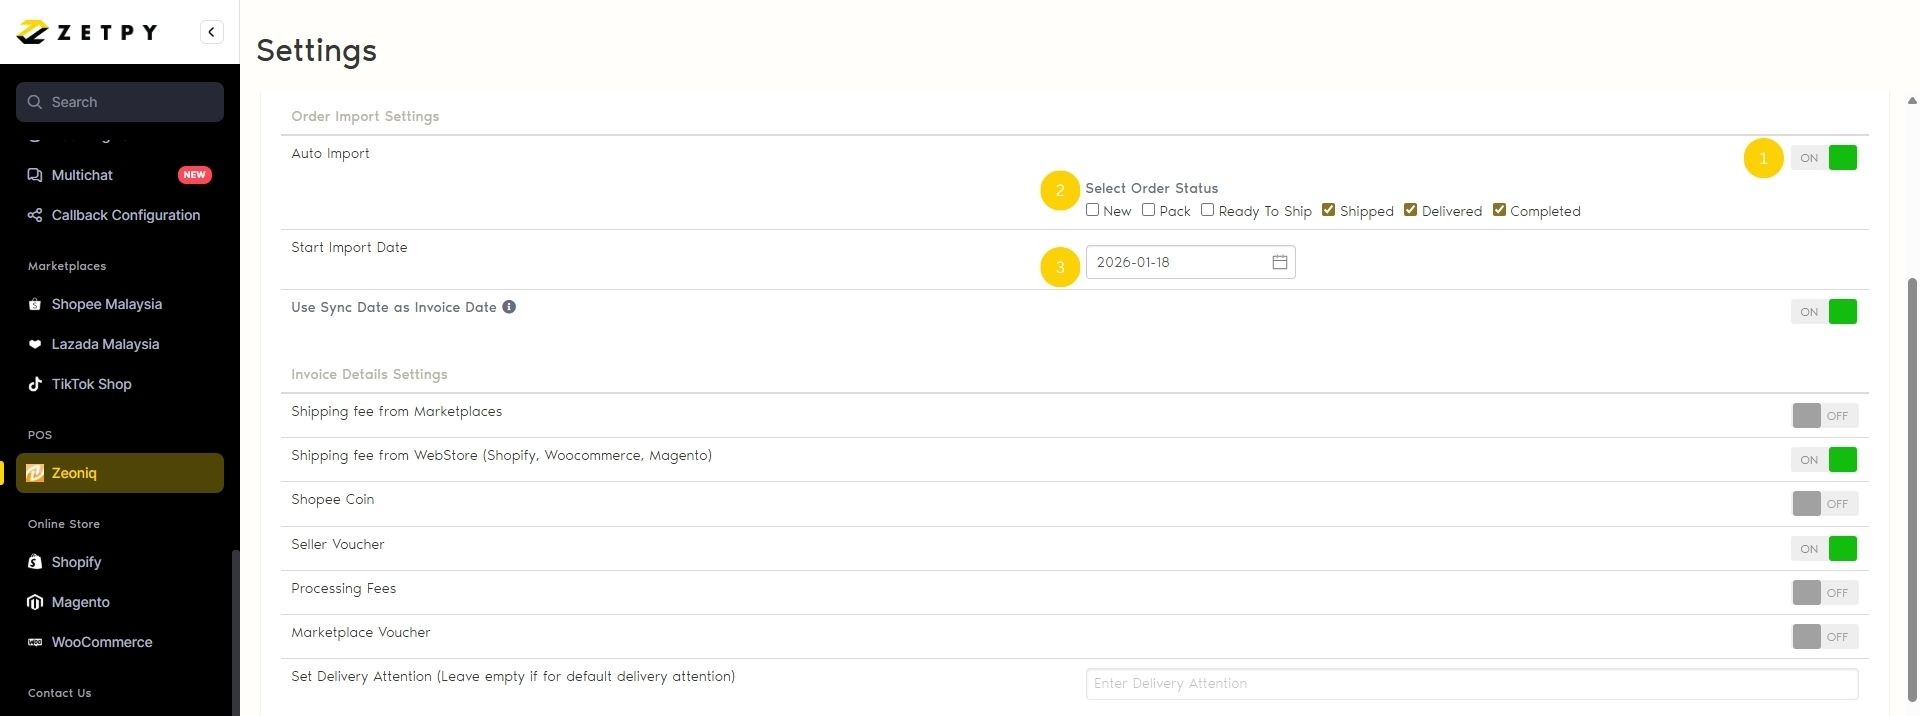
Under the Order Import Settings, there are 2 methods of importing orders to Zeoniq & generating sales invoices:
Auto Import order: the toggle is disabled > Manual Import Order
Toggle on Auto Import order > this means orders from Zetpy will be auto-imported into Zeoniq based on the selected order statuses.
Select the order status that needs to auto import (can select more than 1)
Select the date to start auto import - the date refers to the Order Date and can only be chosen from the next day onwards.
Orders will start auto-importing to Zeoniq based on the selected date and order statuses.
Example: Today is 16th Jan, and you select to date as 18th Jan as the date. Any orders placed from 1st until 17th Jan will never auto-import; only orders placed on 18th Jan onwards will be auto-imported to Zeoniq, according to the statuses you select.
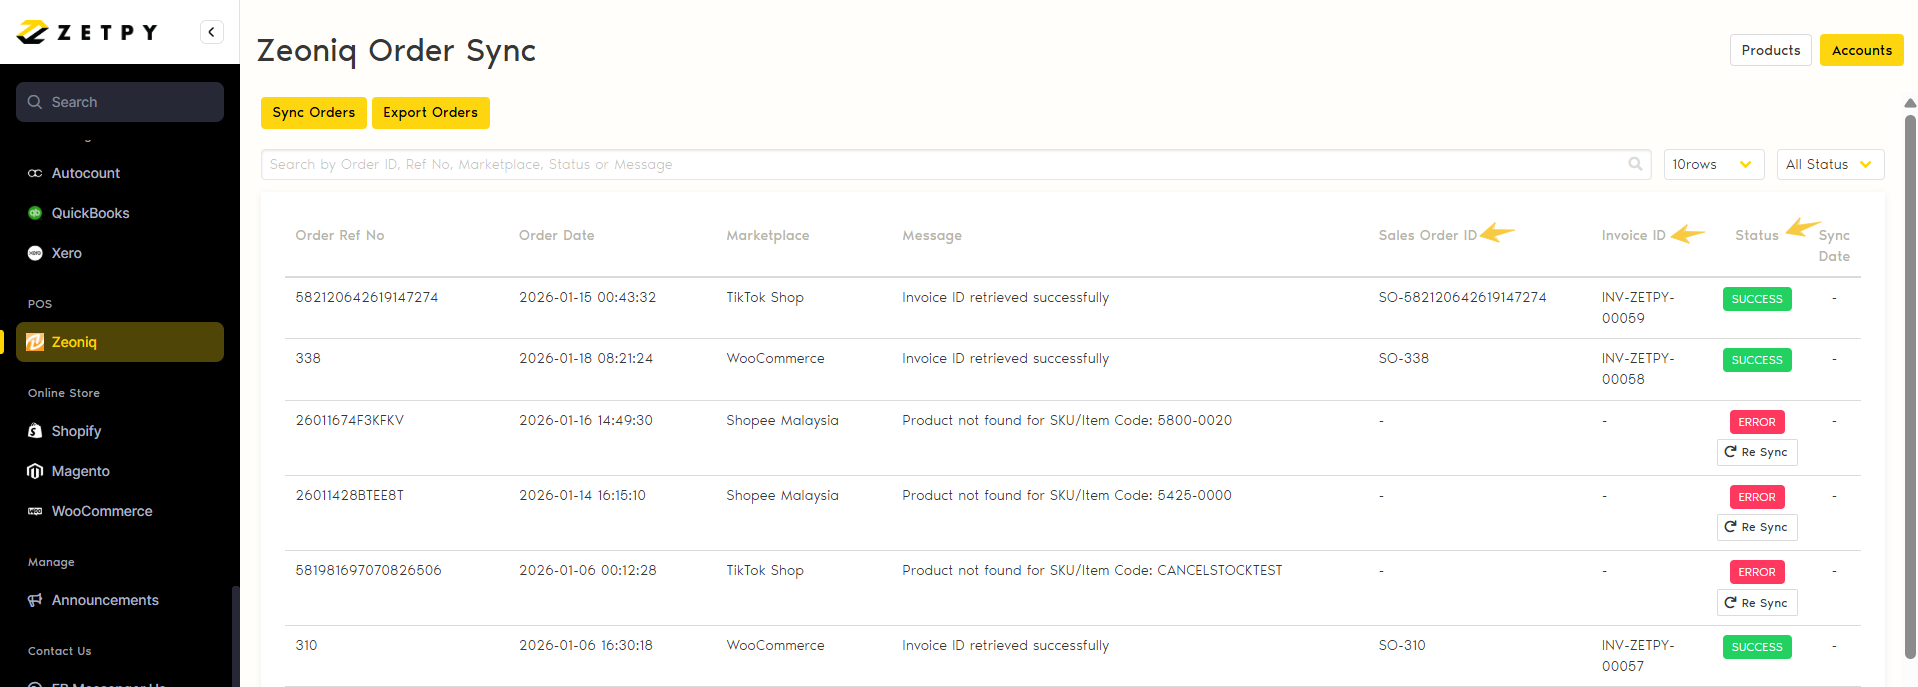
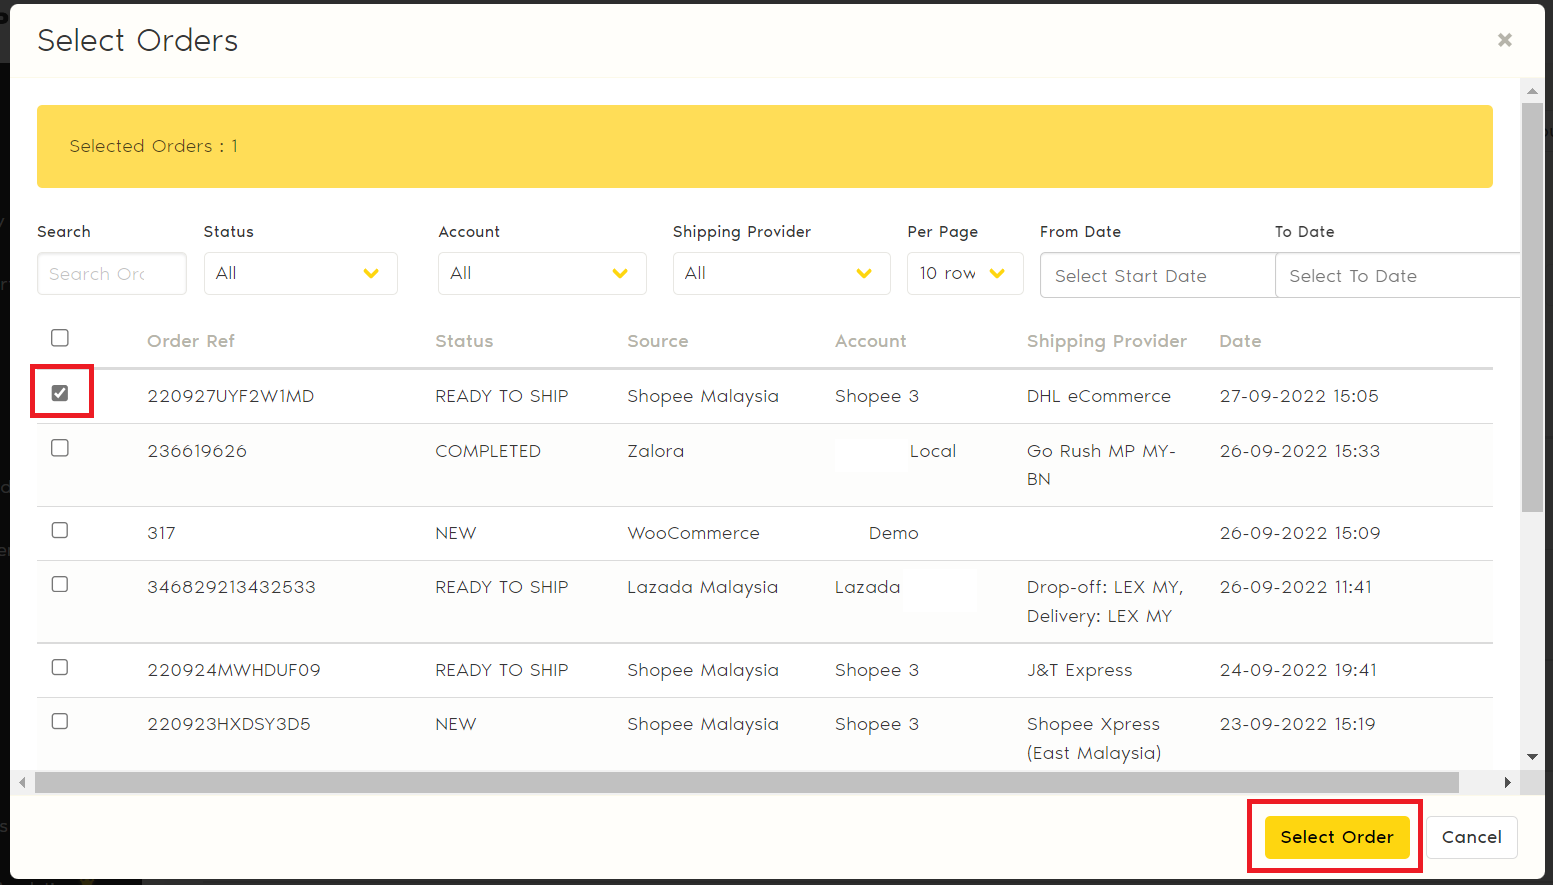
Go to the Order Sync page > Click Sync Orders, and a list of orders that have not been synced will be shown.
Tick the orders and click Select Order.
A loading bar will be displayed, and the status will be set to 'Queue'.
Wait for the order to appear with the Sales Order ID > Invoice order > Success Status.
As the order syncs into Zeoniq, a Sales Order will be generated in Zeoniq. The Delivery Order will be automatically converted, and Zetpy will automatically confirm the Delivery Order. Lastly, the Invoice will be converted, and the Invoice ID will be shown in Zetpy.
Method 1: Auto Import Order
Method 2: Manual Import Order (select order to sync)
Important Note:
Orders that have empty/invalid SKUs will not be able to sync.
Orders won't be able to sync into Zeoniq if the order item SKUs are not imported into Zetpy.
Use the Sync date as the Invoice date:
When it is enabled, the invoice creation date in Zeoniq is the date when the order is imported into Zeoniq.
If disabled, the invoice creation date in Zeoniq is the order creation date.
Step 2: Import Product Setting
Under Import Setting, select the product group to import > before import product into Zetpy, make sure each product in your Zeoniq has been assigned to a Product Group. ( Eg, you named the Product Group as 'ZETPY').

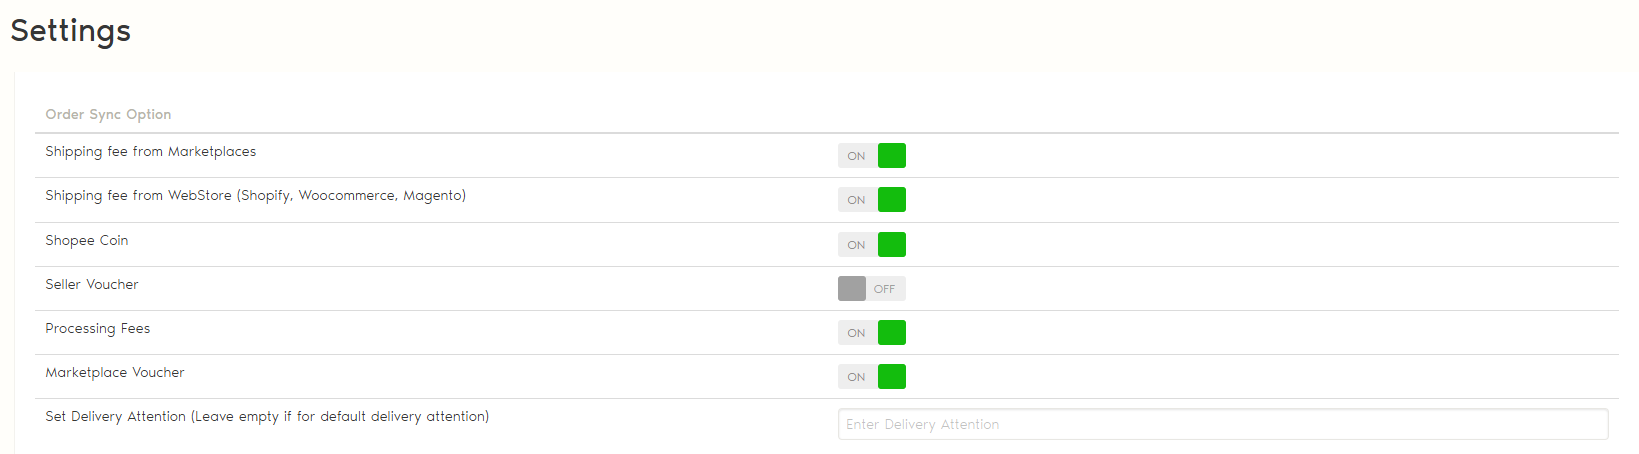
Step 3: Configure Order Sync Option
Enable the option below if you want to sync those fields into your Zeoniq and appears in your Zeoniq Invoice.
Shipping Fee from Marketplaces
Shipping Fee from WebStore (Shopify, WooCommerce, Magento)
Shopee Coin
Seller Voucher
Processing Fees
Marketplaces Voucher
Set Delivery Attention (Leave empty for default delivery attention)
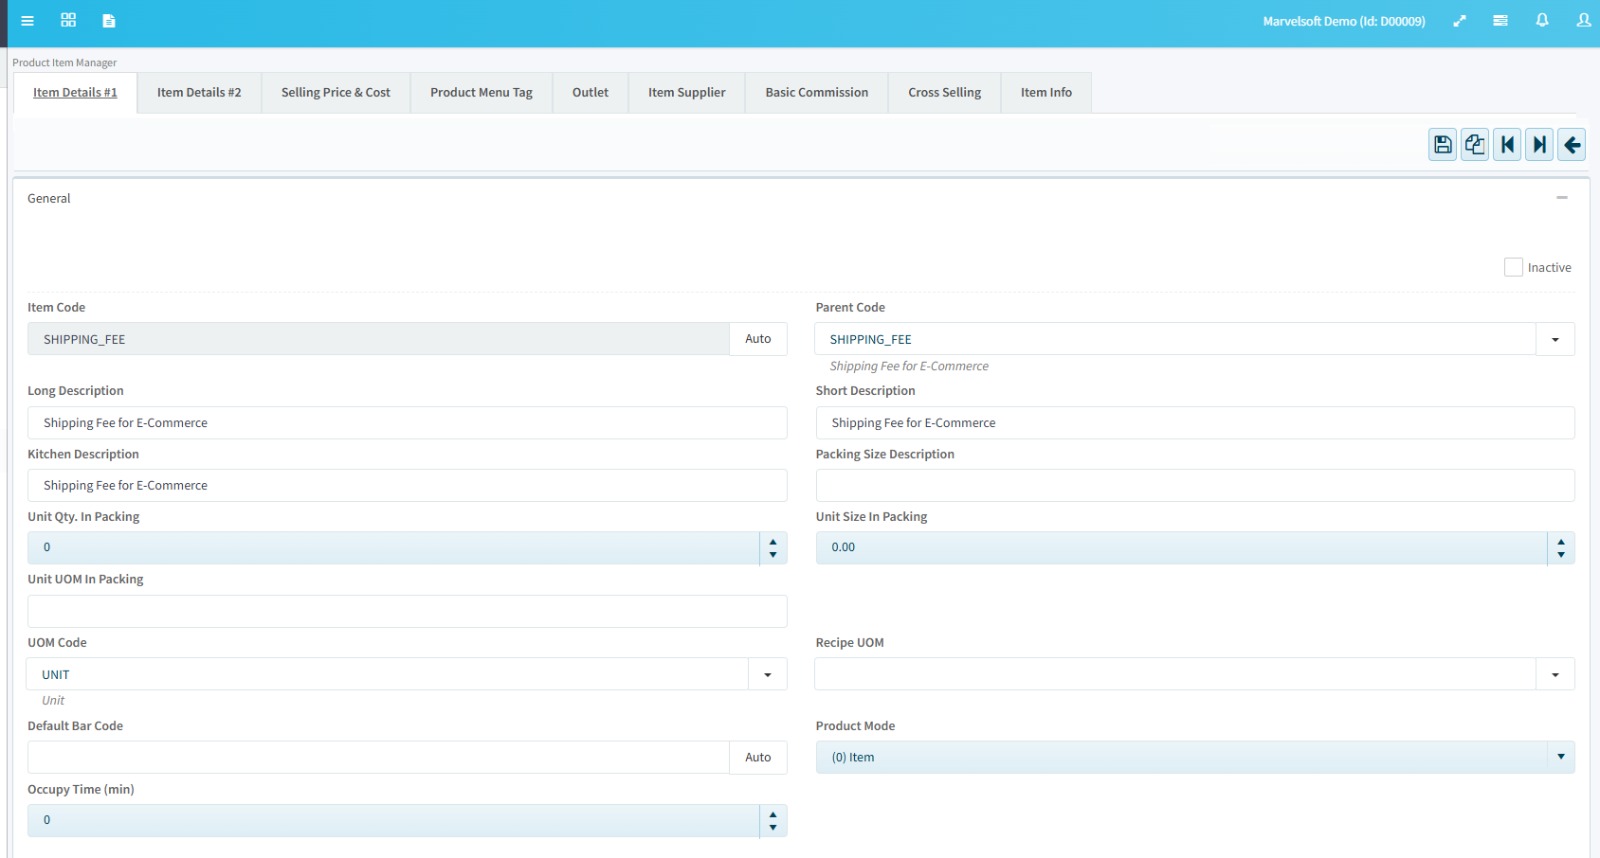
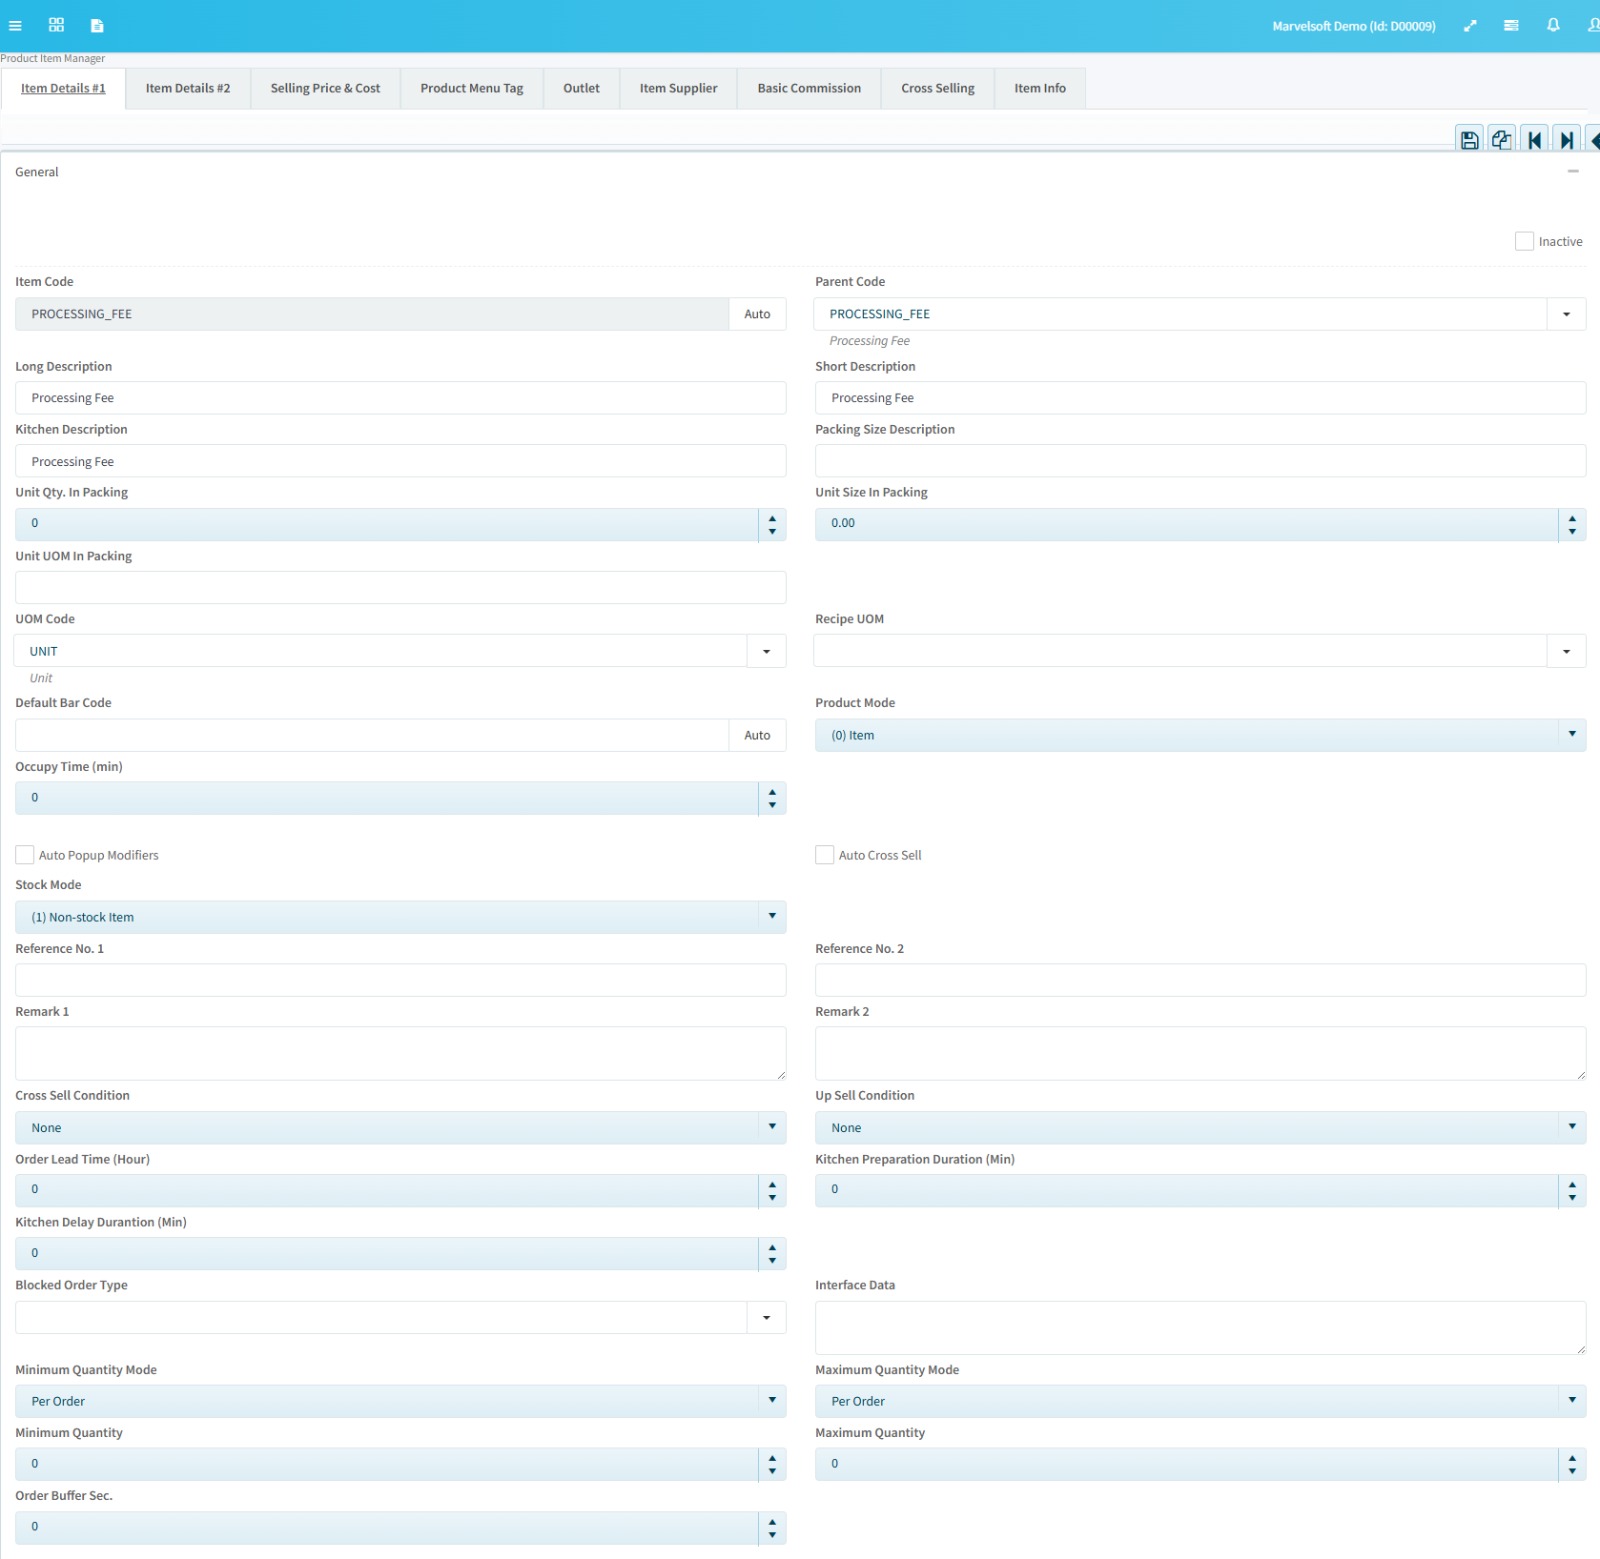
Settings required to set in Zeoniq ( for Step 3)
Create the Item code below if you enabled the sync options for Step 3 above.
**Make sure these item codes below ( must be exactly the same as below) exist on the Zeoniq Item List before starting to sync the orders.
Shipping Fee: For Sync Shipping fee from marketplace/webstore orders
Item Code: shipping_fee
Processing Fee: For WooCommerce processing fees
Item Code: processing_fee
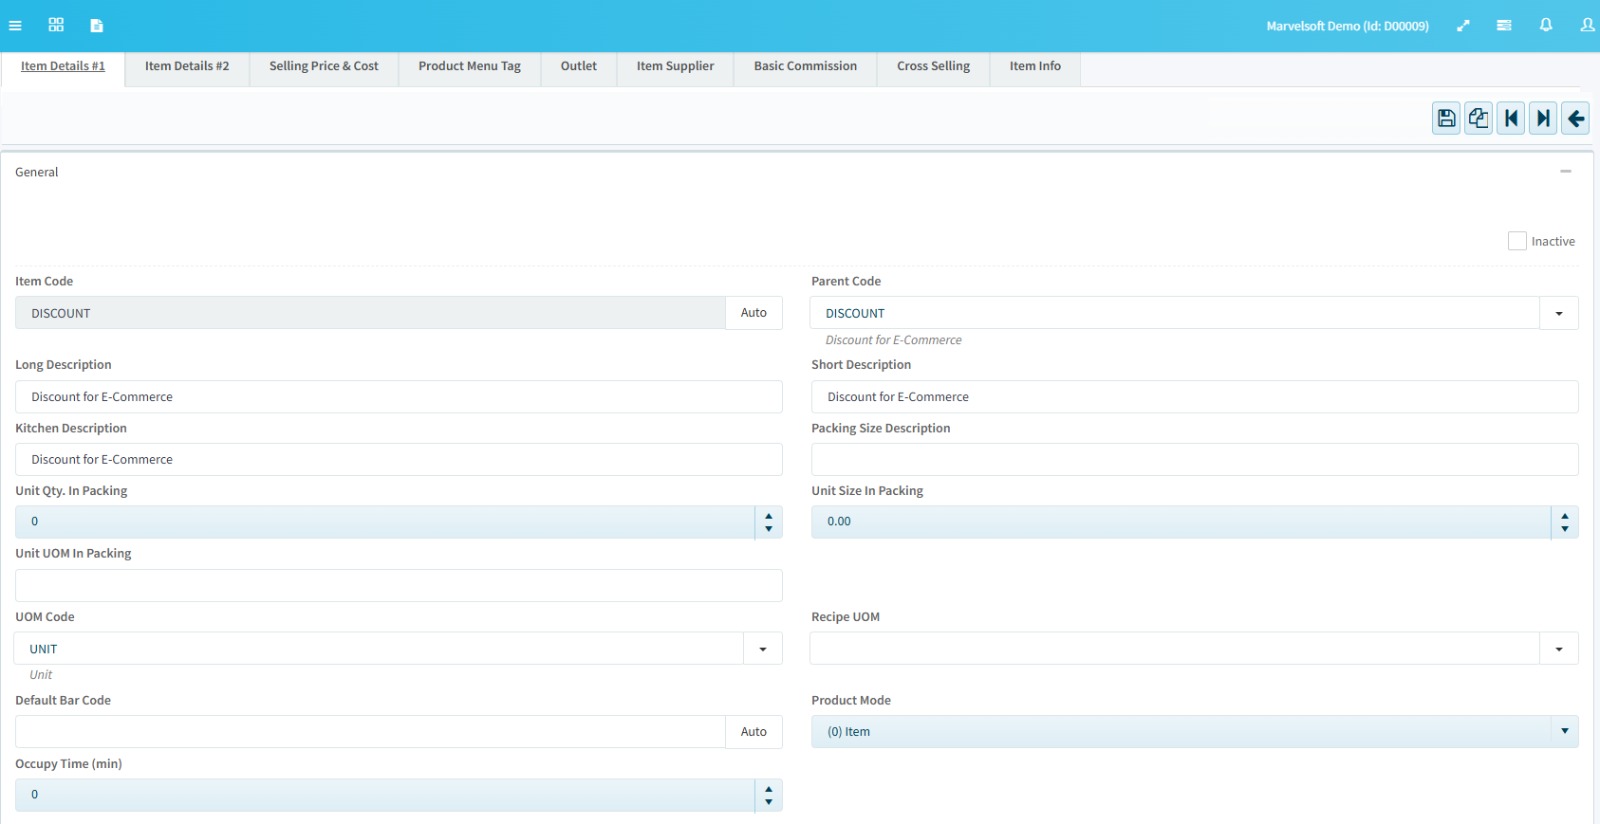
Discount: For Sync Seller vouchers or marketplace vouchers
Item Code: discount
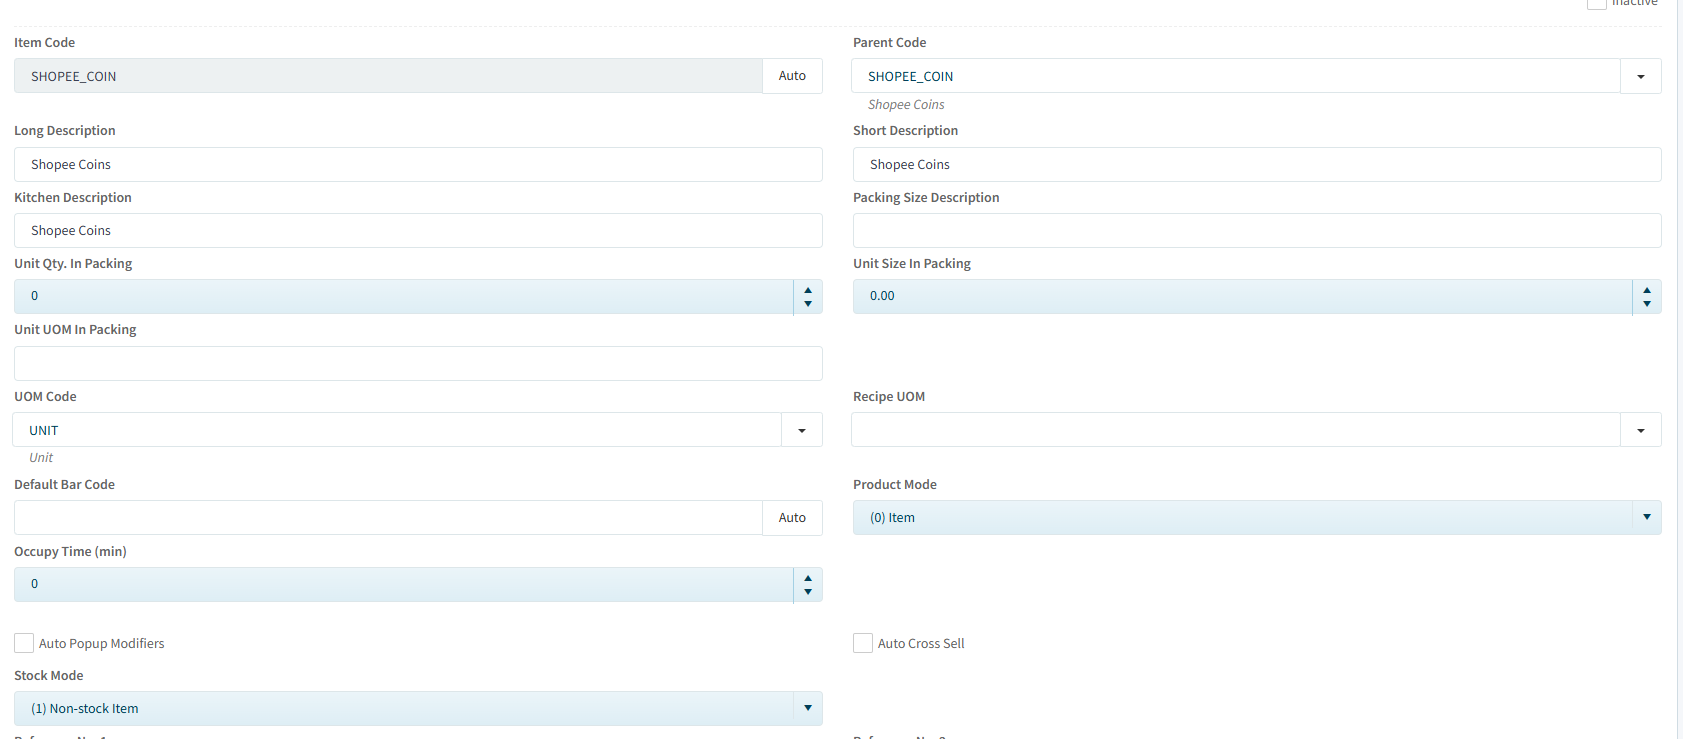
Shopee Coin: For Sync Shopee Coin
Item Code: shopee_coin
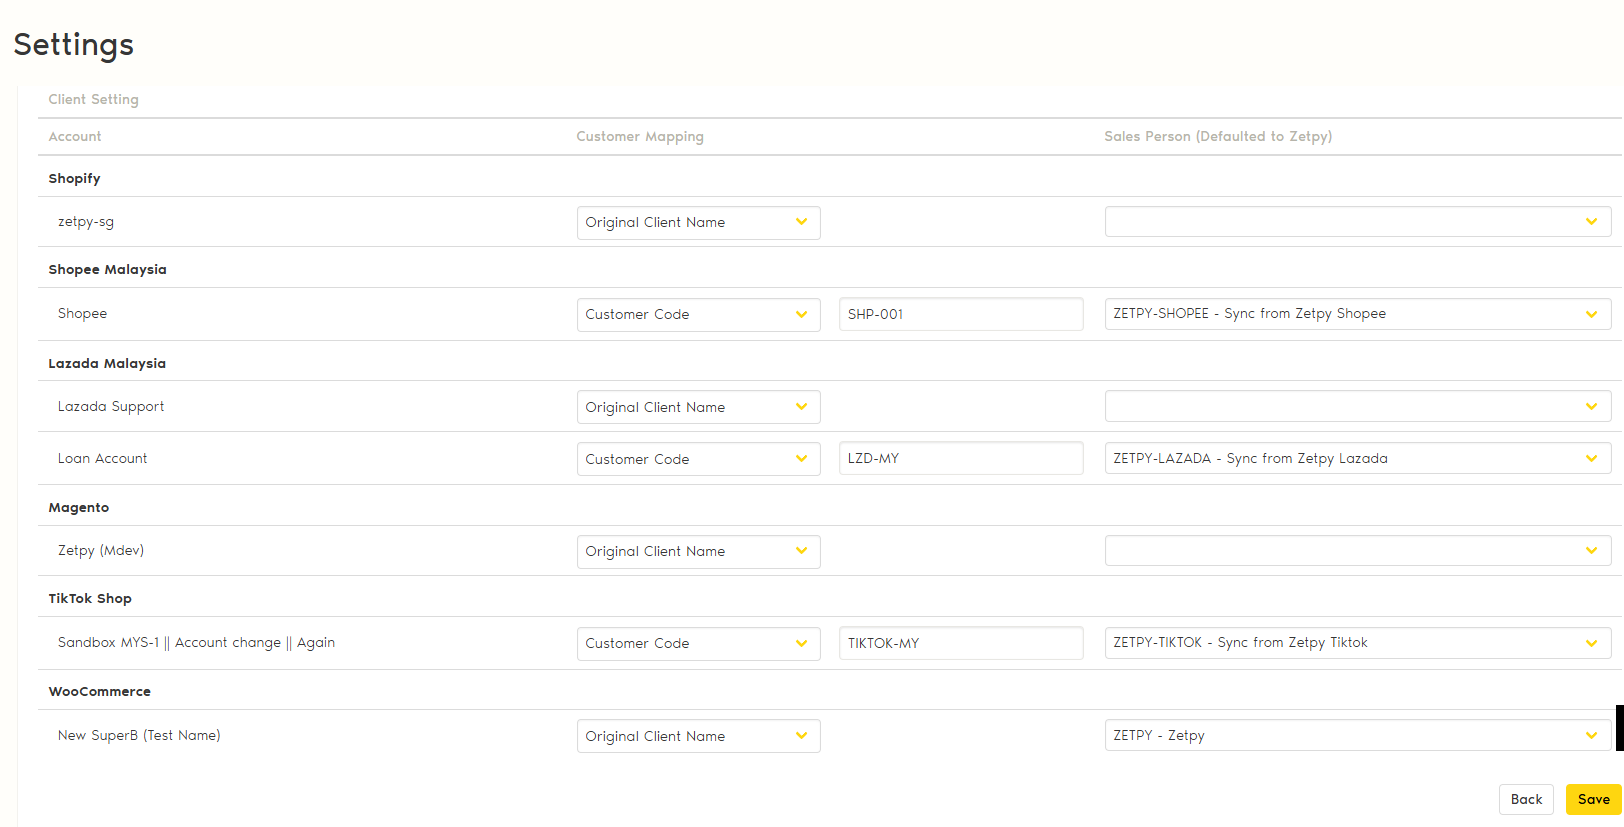
Step 4: Client Setting ( Customer / Sales Person Mapping)
1. Under customer mapping, choose 1 of the options:
Original Client Name: Buyer name from the Order Details - every customer will be created in the Zeoniq Client List.
Client Code: Map with an existing client in Zeoniq by inputting the Client Code from Zeoniq.
Under Sales Person mapping, choose 1 of the options for each online channel (*the default Sales person to Zetpy)
Lastly, once all settings are set, just click the Save button at the bottom right.