Important: Always complete the steps in order — Middleware first, then Autocount, then WooCommerce.
Steps 1–4 — Zetpy Middleware
Open the Sync menu
In the Zetpy Middleware application, click Sync in the top menu bar to expand the dropdown.
Select "Choose Sync Items"
From the dropdown, click Choose Sync Items. The "Choose SKU to Sync" dialog will open.
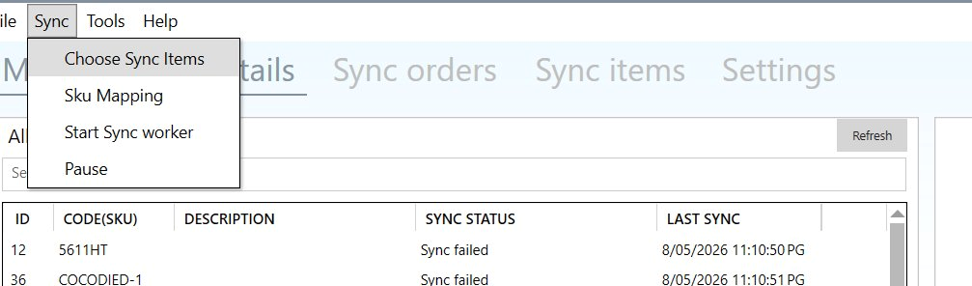
Image 1 — Sync menu showing the Choose Sync Items option
Uncheck the SKU you want to unlink
Scroll or use the Search bar to find the SKU. Uncheck the checkbox next to the item you no longer want to sync. Use the pagination arrows to navigate across pages.
Save the changes
Click Save changes in the bottom-right corner of the dialog. The SKU will no longer be synced by the Middleware.
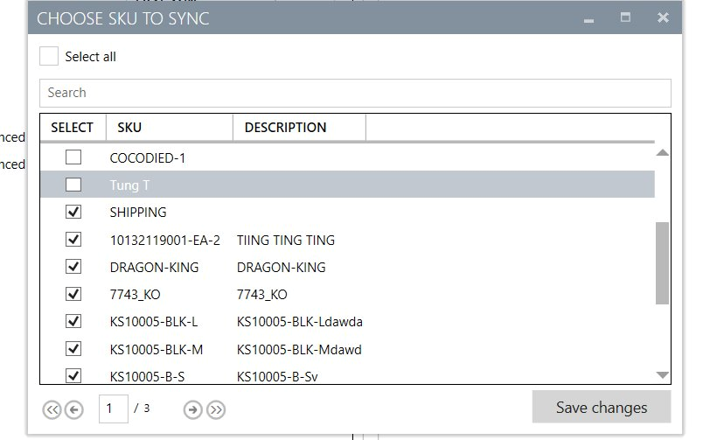
Image 2 — Choose SKU to Sync dialog. Unchecked items will be unlinked after saving.
Steps 5–6 — Zetpy Autocount Plugin
Open Products and find the listing
In the Zetpy Autocount Plugin, go to the Products tab. Find the listing that matches the SKU you unchecked in the Middleware.
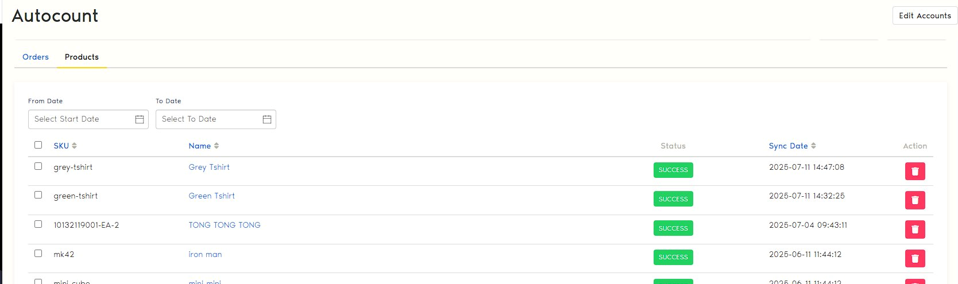
Image 3 — Autocount Products tab showing synced listings
Delete the product entry
Click the red delete icon on the right of the product row. A confirmation dialog will appear. Click Confirm to remove it.
Important: Delete the SKU in Middleware first (steps 1–4) before removing it here. Deleting from the plugin does not remove it from the Middleware.
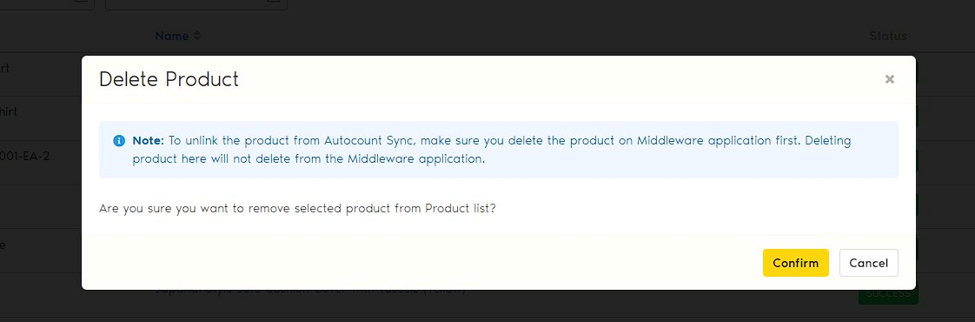
Image 4 — Delete Product confirmation dialog in the Autocount Plugin
Step 7 — Zetpy WooCommerce
Remove the listing in WooCommerce
In Zetpy WooCommerce, find the product by name, SKU, or WooCommerce product ID. Click the red delete icon in the Actions column and confirm the removal.
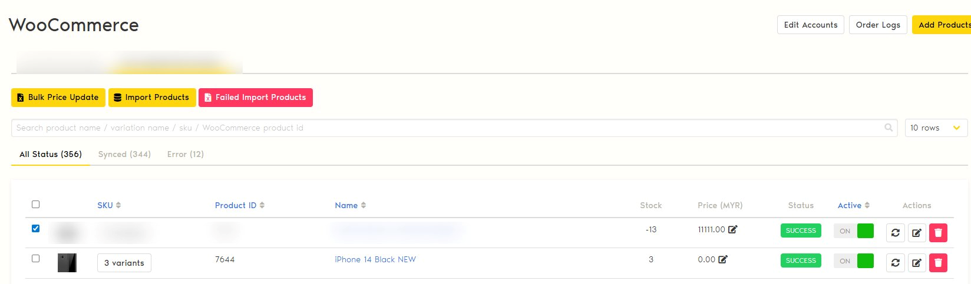
Image 5 — WooCommerce product listing in Zetpy with delete action
Done! What happens next
Once all three steps are completed across Middleware, Autocount, and WooCommerce, the listing is fully unsynced. No further stock or order updates will flow between Zetpy and that product.