A) How to setup the Autocount sync in Zetpy?
1) Login to your Zetpy control panel.
2) Go to Plugins.
3) Click on the Add Plugin tab.
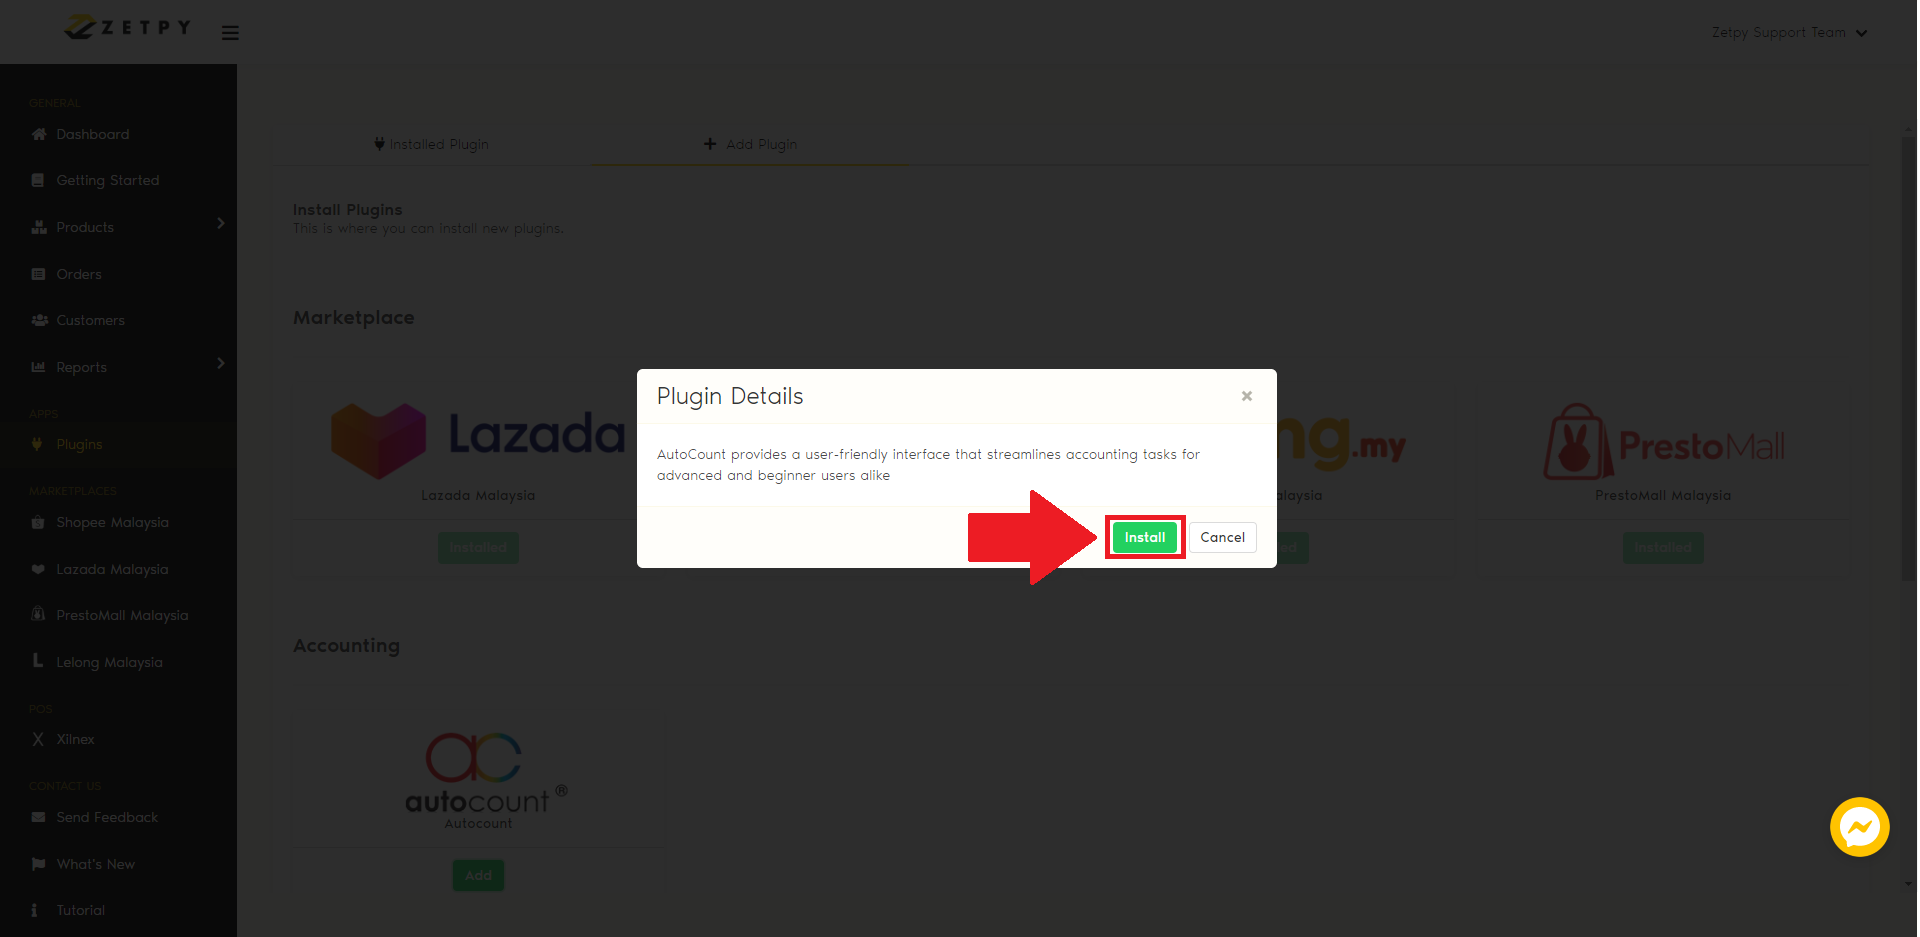
4) You will see the Autocount icon and click on the Add button.

5) The Zetpy will pop-up the message and click on the Install button.
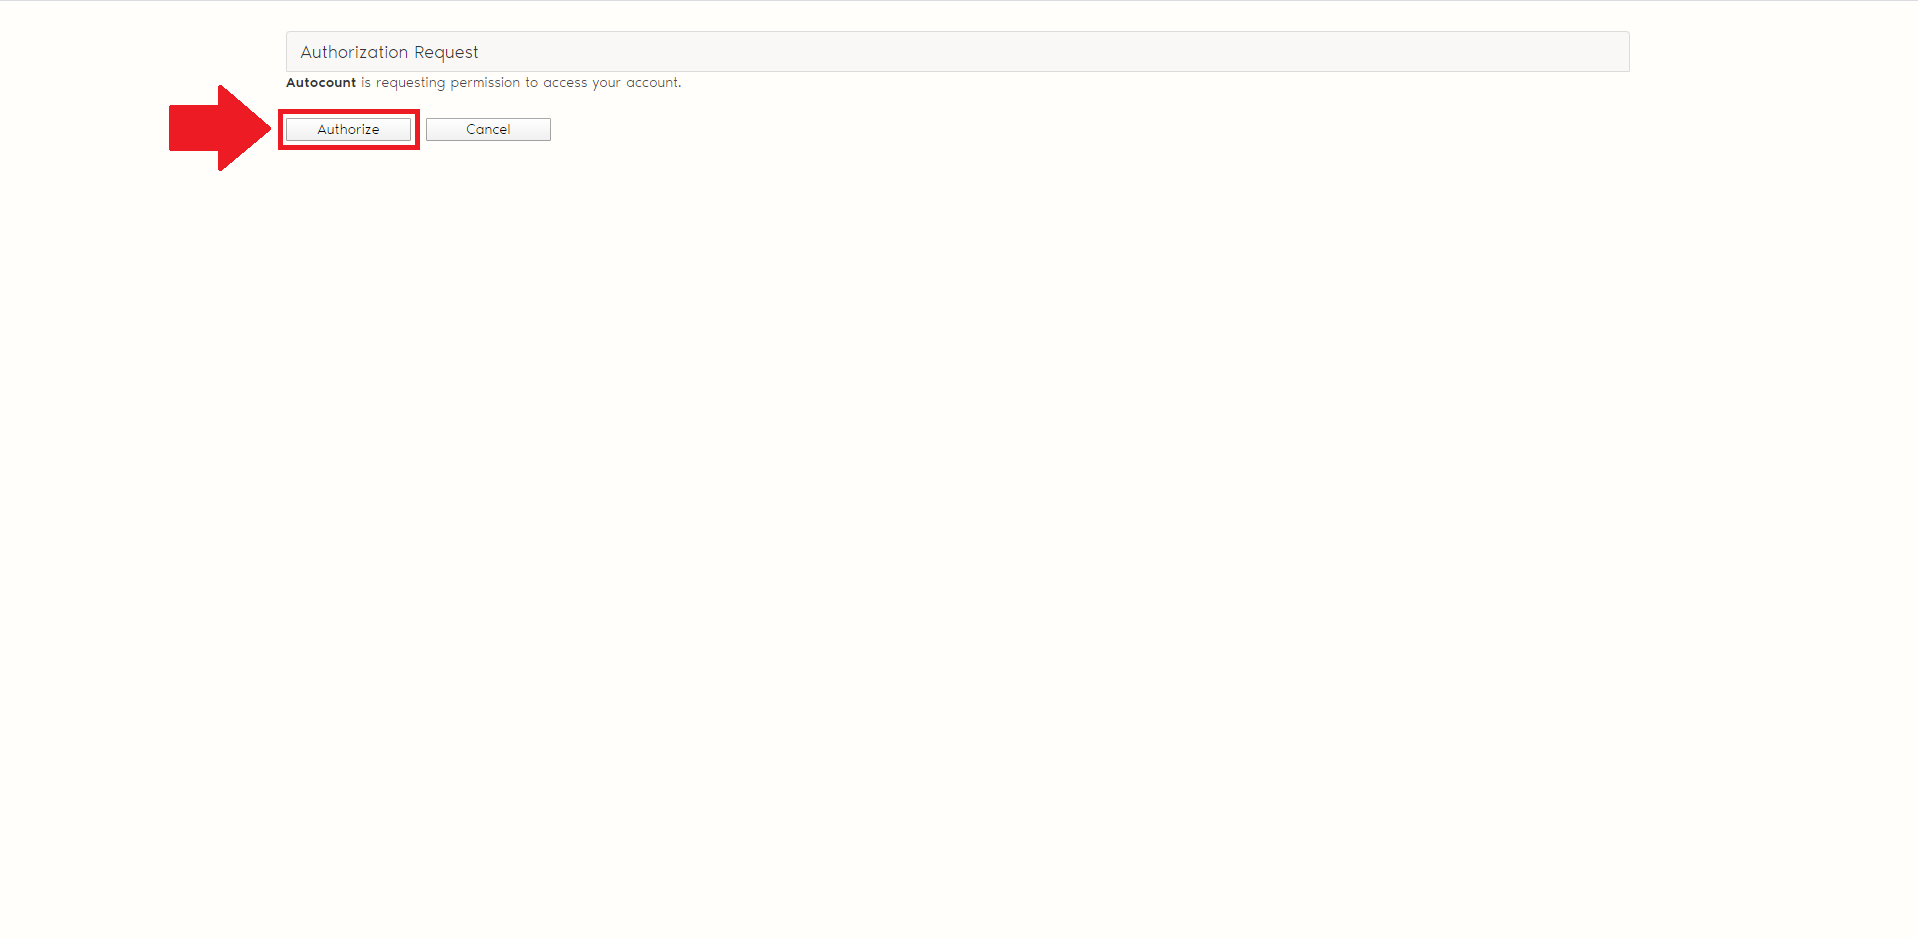
6) Once you click on the Install button, it will pop-up a new tab and click on the Authorize button to Install Autocount sync plugin into your Zetpy.
Note: If you not able to reach the page above, kindly to refer the step below how to unblock the pop-up in your browser:
i. Google Chrome
ii. Mozilla Firefox
iii. Microsoft Edge
**You can refer to our tutorial link here as well to unblock pop-ups on your browser.
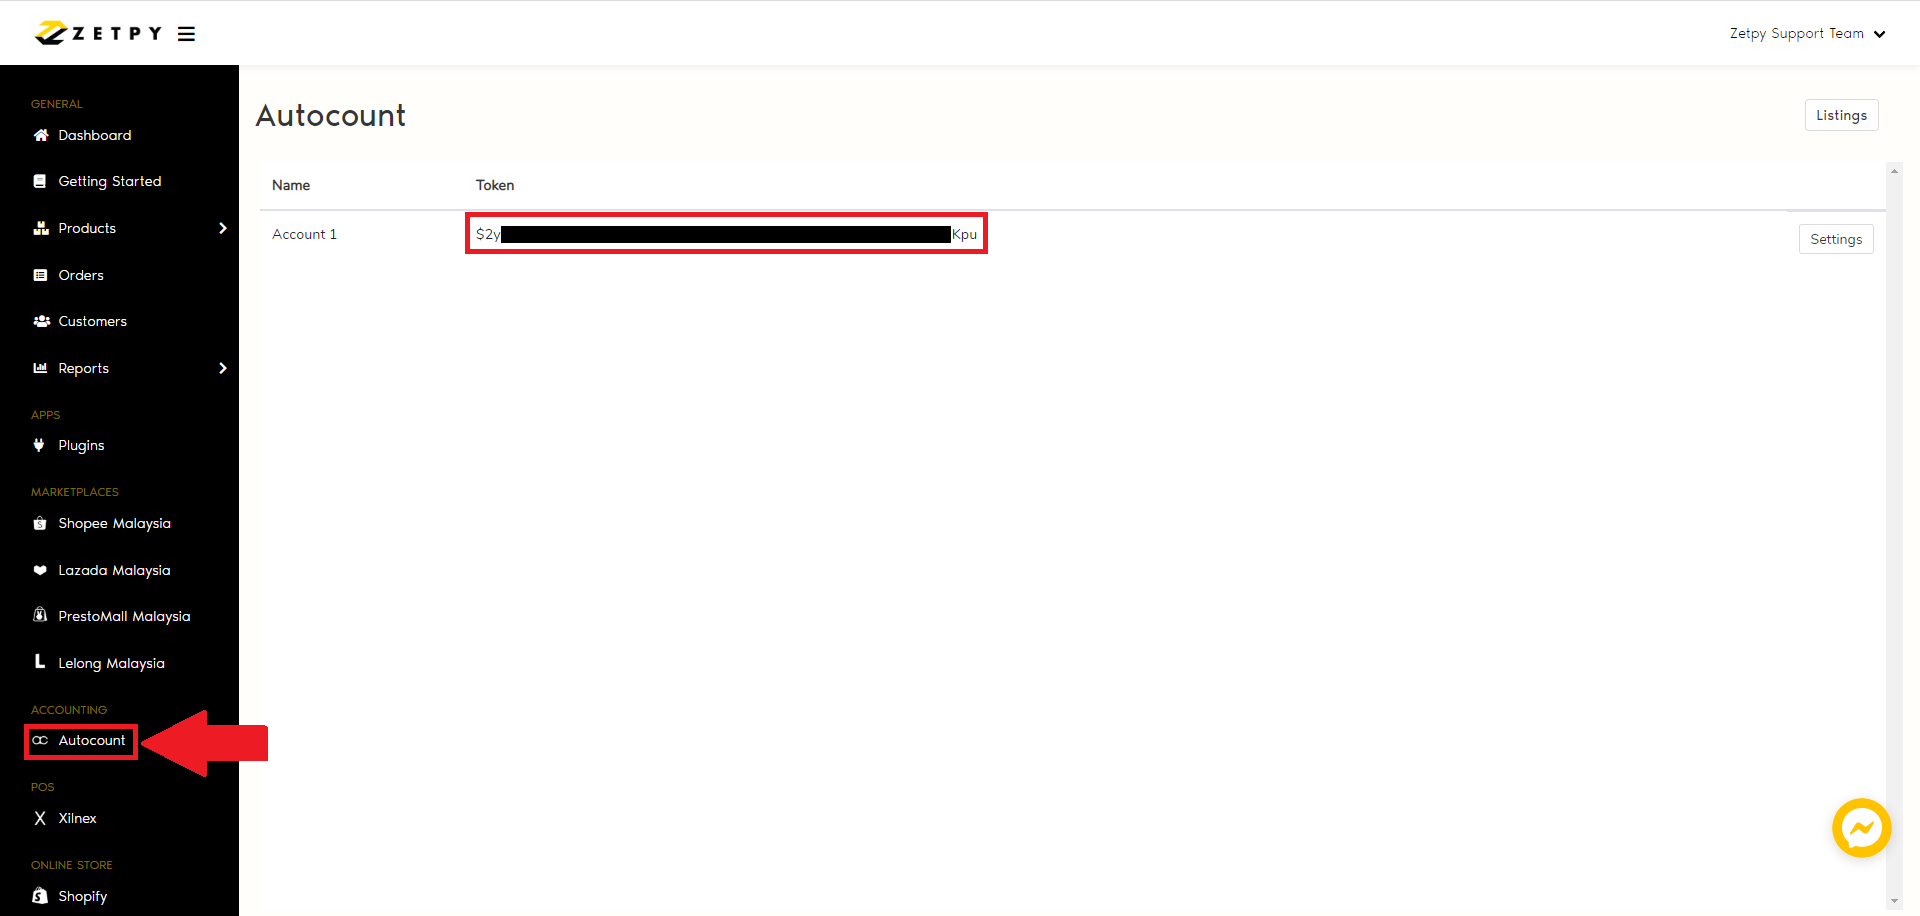
7) The Autocount sync plug-in is already installed in your Zetpy control panel.
8) The API token will auto-generated.
B) Zetpy Autocount Application Installation
<strong>Note:</strong> Before starting to install Zetpy Autocount middleware sync, make sure the <strong>3 things</strong> below the <br>version must up to date:<br><br>a) The Windows update version is up to date or the version latest<br>b) The Autocount Accounting Software version 2.0(Build: 31, Revision 205) above.<br>c) The <span class="tabColor">.NET Framework</span> version 4.8.0 or higher.<br>d) For the sync order into Autocount there required <strong>Desktop API module</strong>, the Desktop API module need <br>to purchase from your Autocount dealer and request your Autocount dealer to installing on your <br>Autocount system.Kindly check the .NET Framework version 4.8.0 or higher - Download Here
i) Autocount version 2.0, .NET Framework version at least 4.8.0
ii) Autocount version 2.1, .NET Framework version at least 4.8.1
Install the correct middleware version according to customer Autocount version. (2.0 or 2.1)
1) Install Zetpy AutoCount Accounting
2) If windows prompt you to allow the installation of the program, allow it.
3) An icon to the application should appear on your desktop and your start menu.
4) Before setup Autocount settings on middleware sync, please check with the user the item that UOM using in Autocount:
i) Go to C:\Program Files (x86)\Zetpy\Zetpy AutoCount Sync
ii) Refer to AccountingSync.AutoCount.Zetpy.exe open via notepad++
5) The application should be in the startup folder to start automatically when windows start.
C) Set Zetpy Autocount Sync Settings
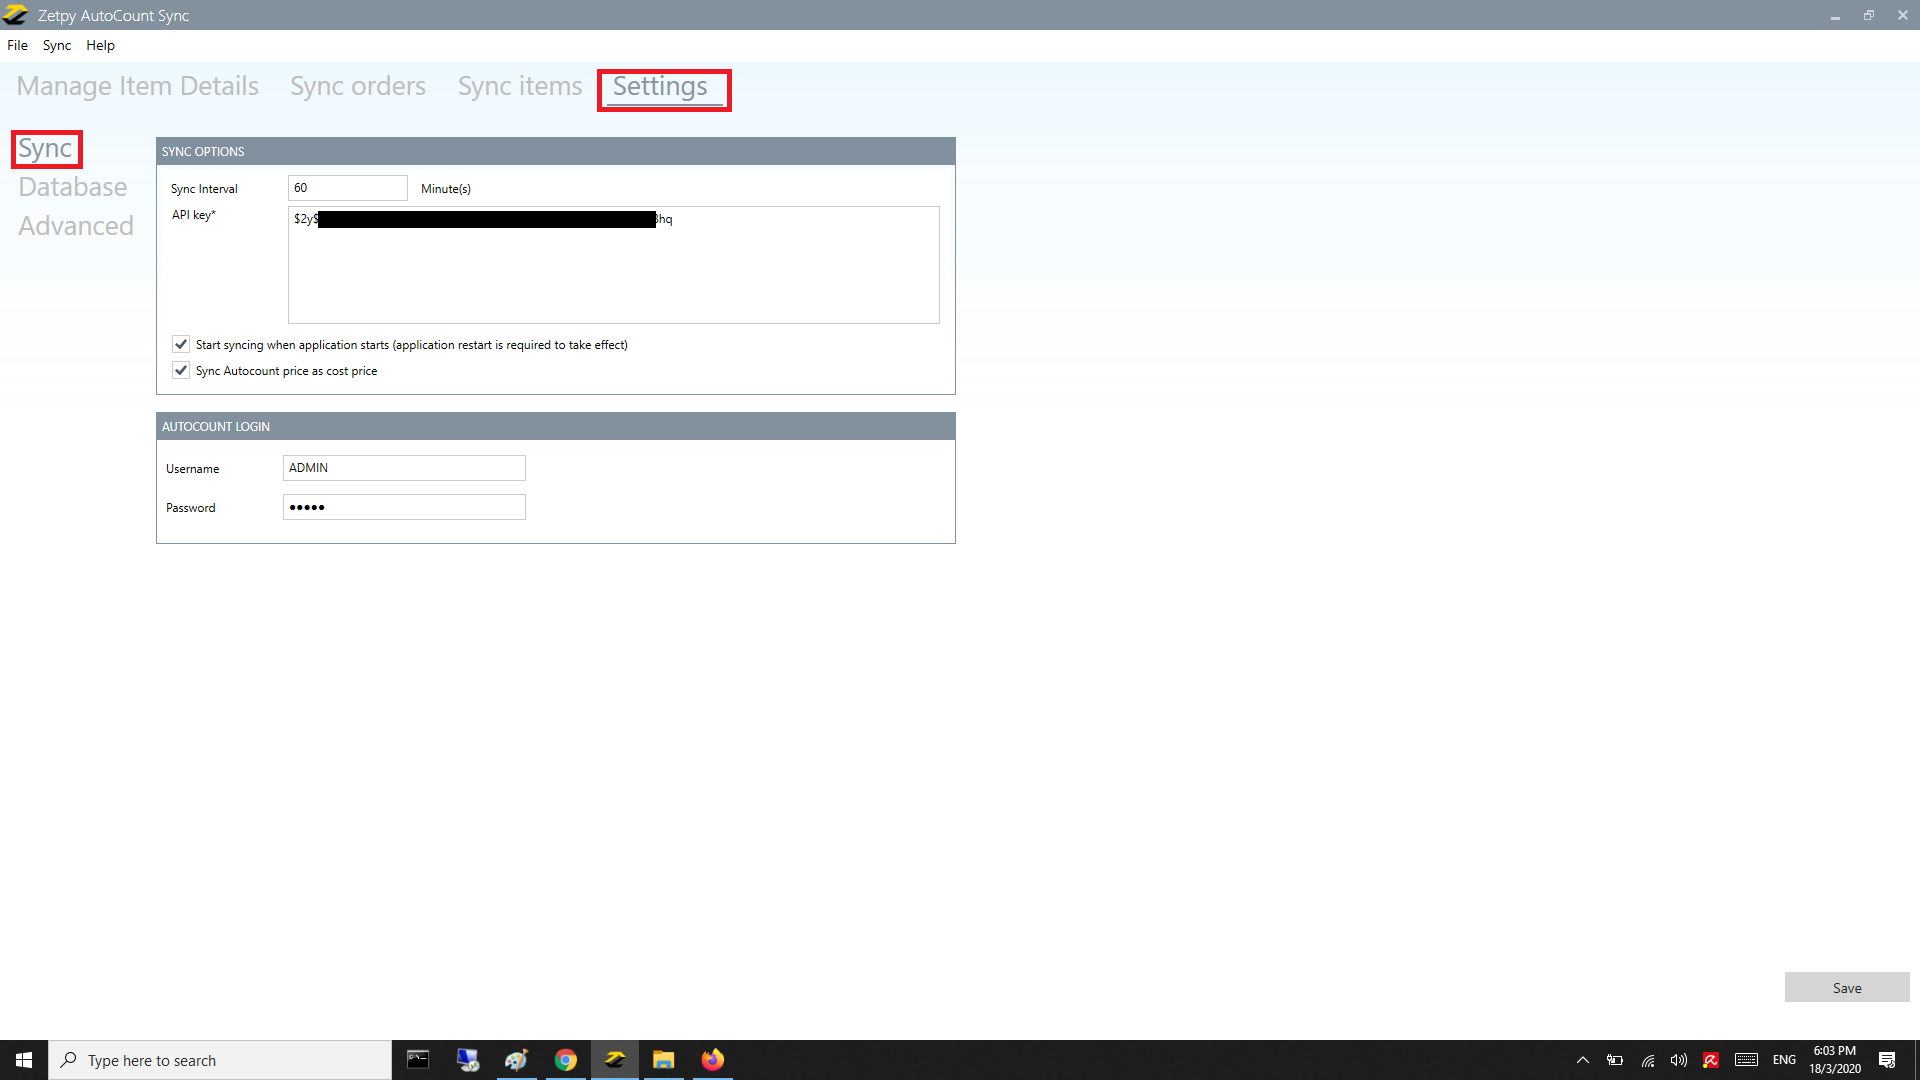
1) Go to Settings.
2) Click on the Sync.
3) Set Sync Interval (in minutes).
*Note: Example if you set the sync interval to 60 minutes, the application still starts to sync the stock quantity or price to your Zetpy in every 60 minutes.
4) Kindly paste your Zetpy API Key into the Zetpy Autocount sync application.
5) If you did select the option below, the application will start working:
i. Start syncing when application starts.
ii. Sync Autocount price as Original Price.
5) Kindly to insert your Autocount admin login details on the Username and Password.
6) Click on the Save button.
C) Set Zetpy Autocount DataBase Connection
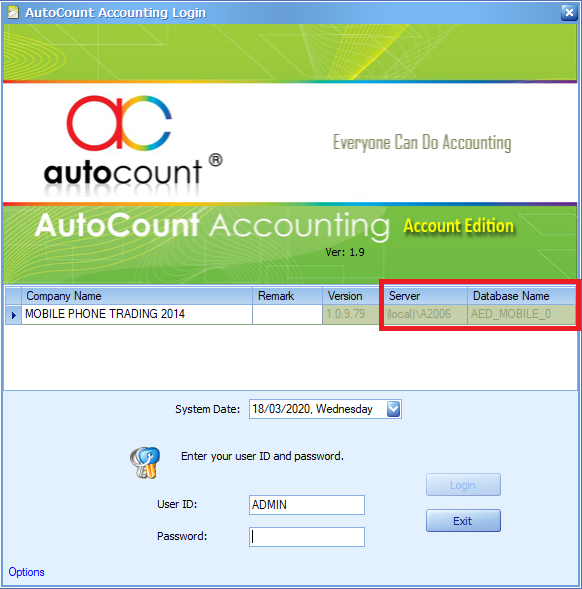
1) Open your Autocount system without login.
2) You can see the Server and Database on your Autocount system.
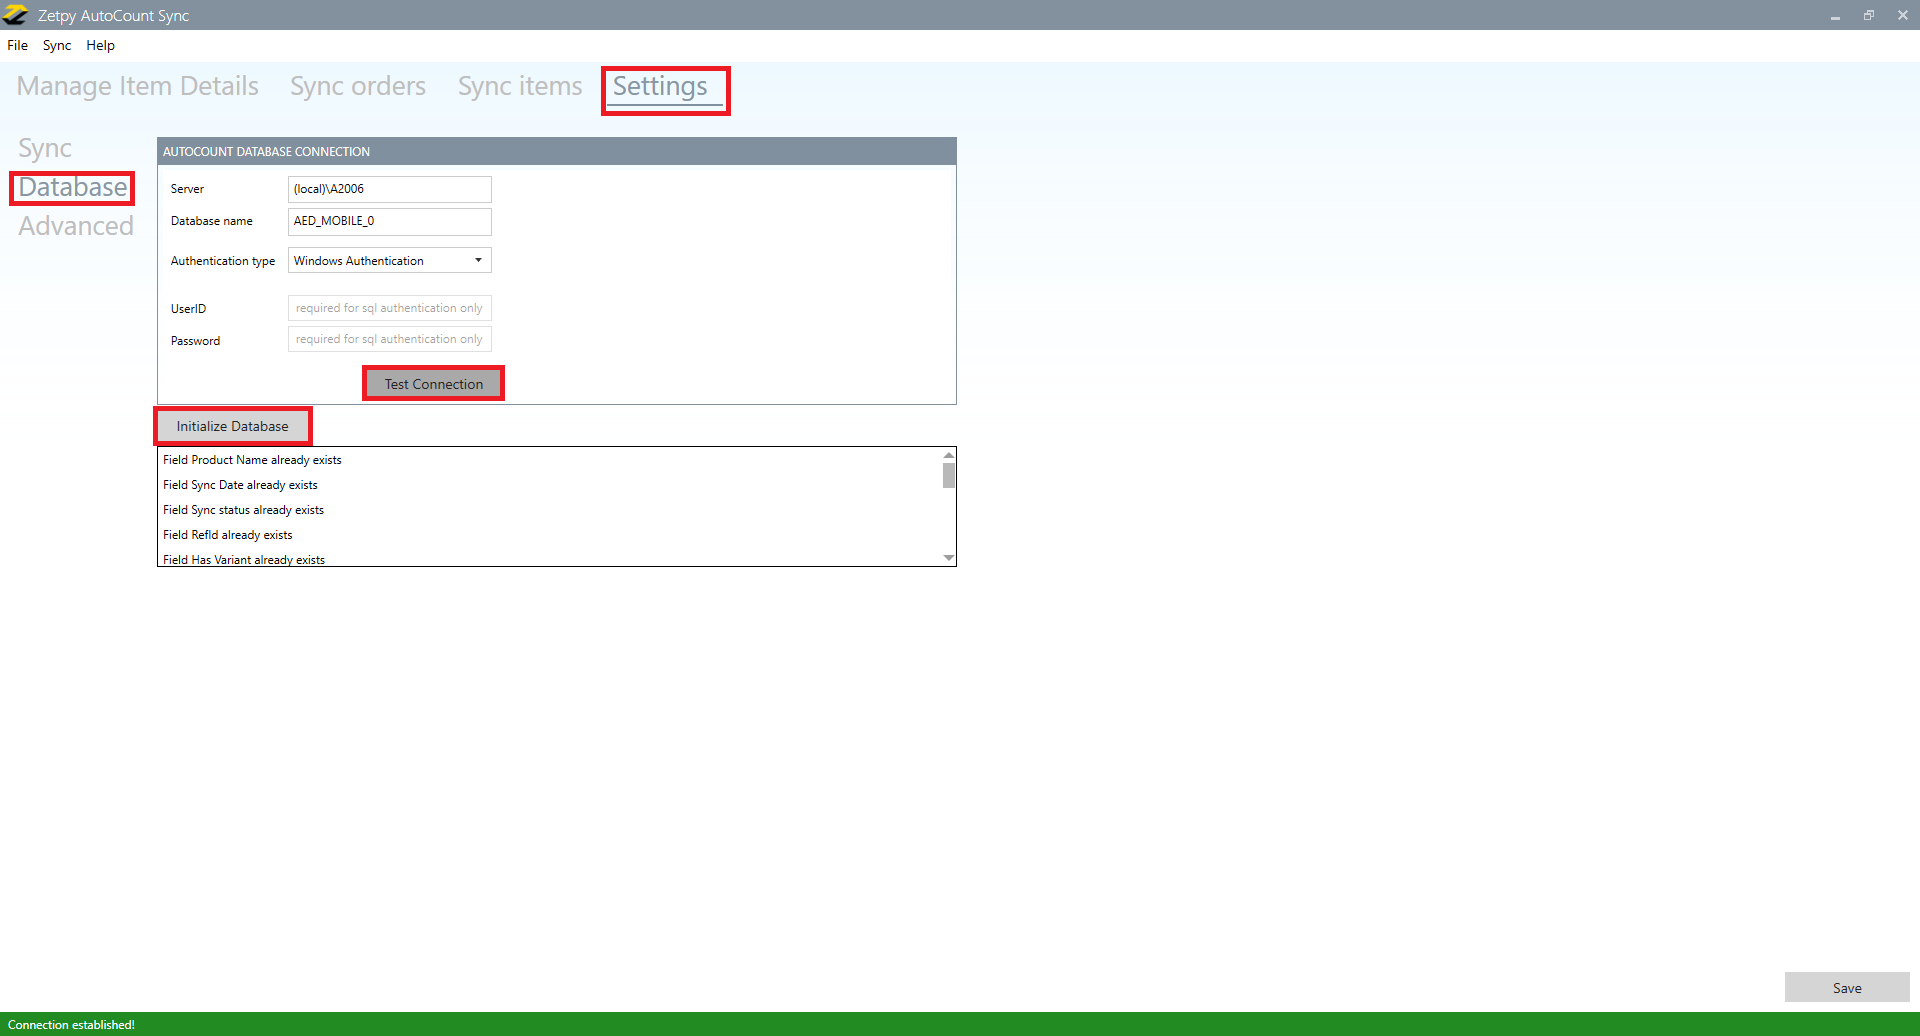
3) Click on Database.
4) Kindly insert the AutoCount Database Connection checkbox on the Server and Database Name.
5) Authentication type change to Sql Server Authentication:
UserID: sa
Password: oCt2005-ShenZhou6_A2006
5) Click on the Test Connection button and it should state that Connection Established.
6) Click on the Initialize Database button. Then it stated that it's done and you can continue to create items in AutoCount Accounting.
D) Set Zetpy Autocount General Settings
*Note: If the selected option does not exist in the default values, you can create in Autocount system.
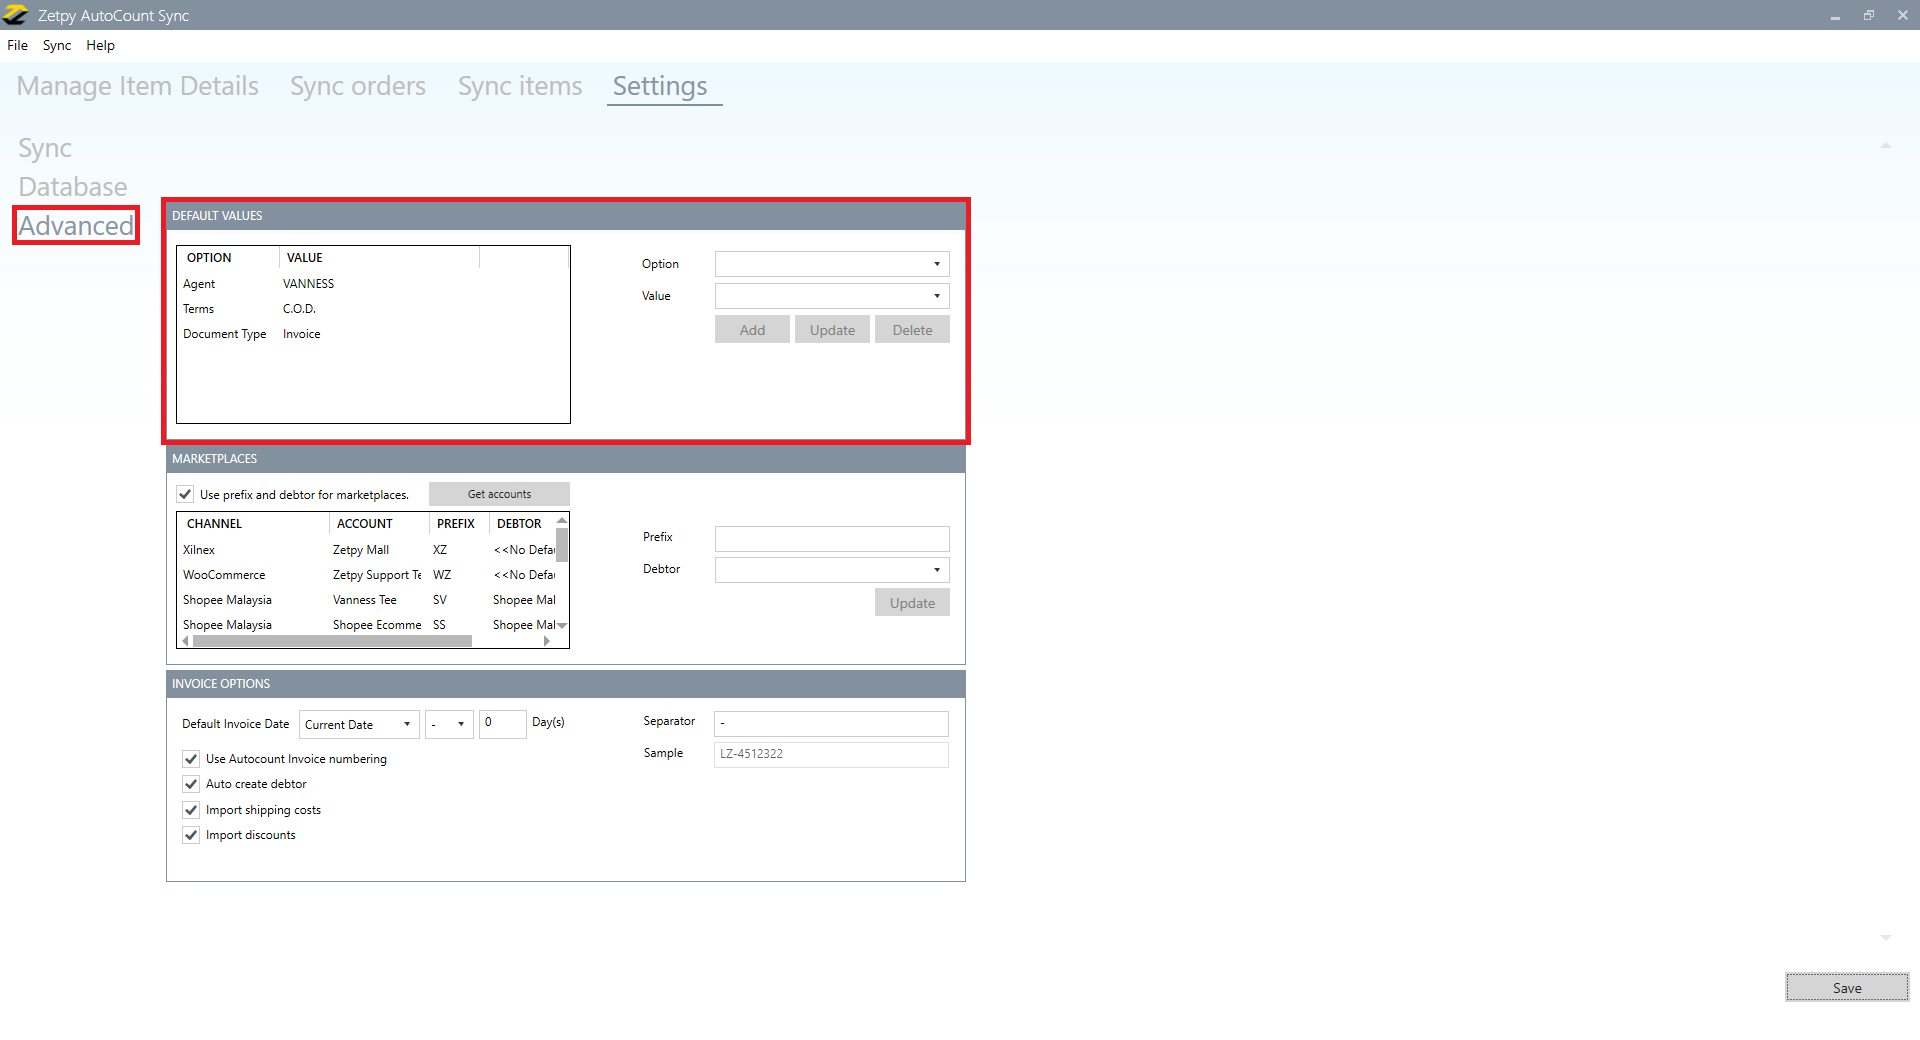
1) Setting Default Values
i. Go to Advanced.
ii. Select an Option from the default values group which are:
Agent
Terms
Customer
Location
Document Type
iii. If the selected option does not exist in the default values, you can create in Autocount system.
iv. Select a default value from the data grid, you can Update or Delete the selected option.
*Note: If you set your location in webShaper AutoCount Accounting inside Advanced Settings, this will require Multi-Location Stock module. Which means:
i. Stock items shown will be filtered from this location.
ii. Sync Orders will be sync to this location.
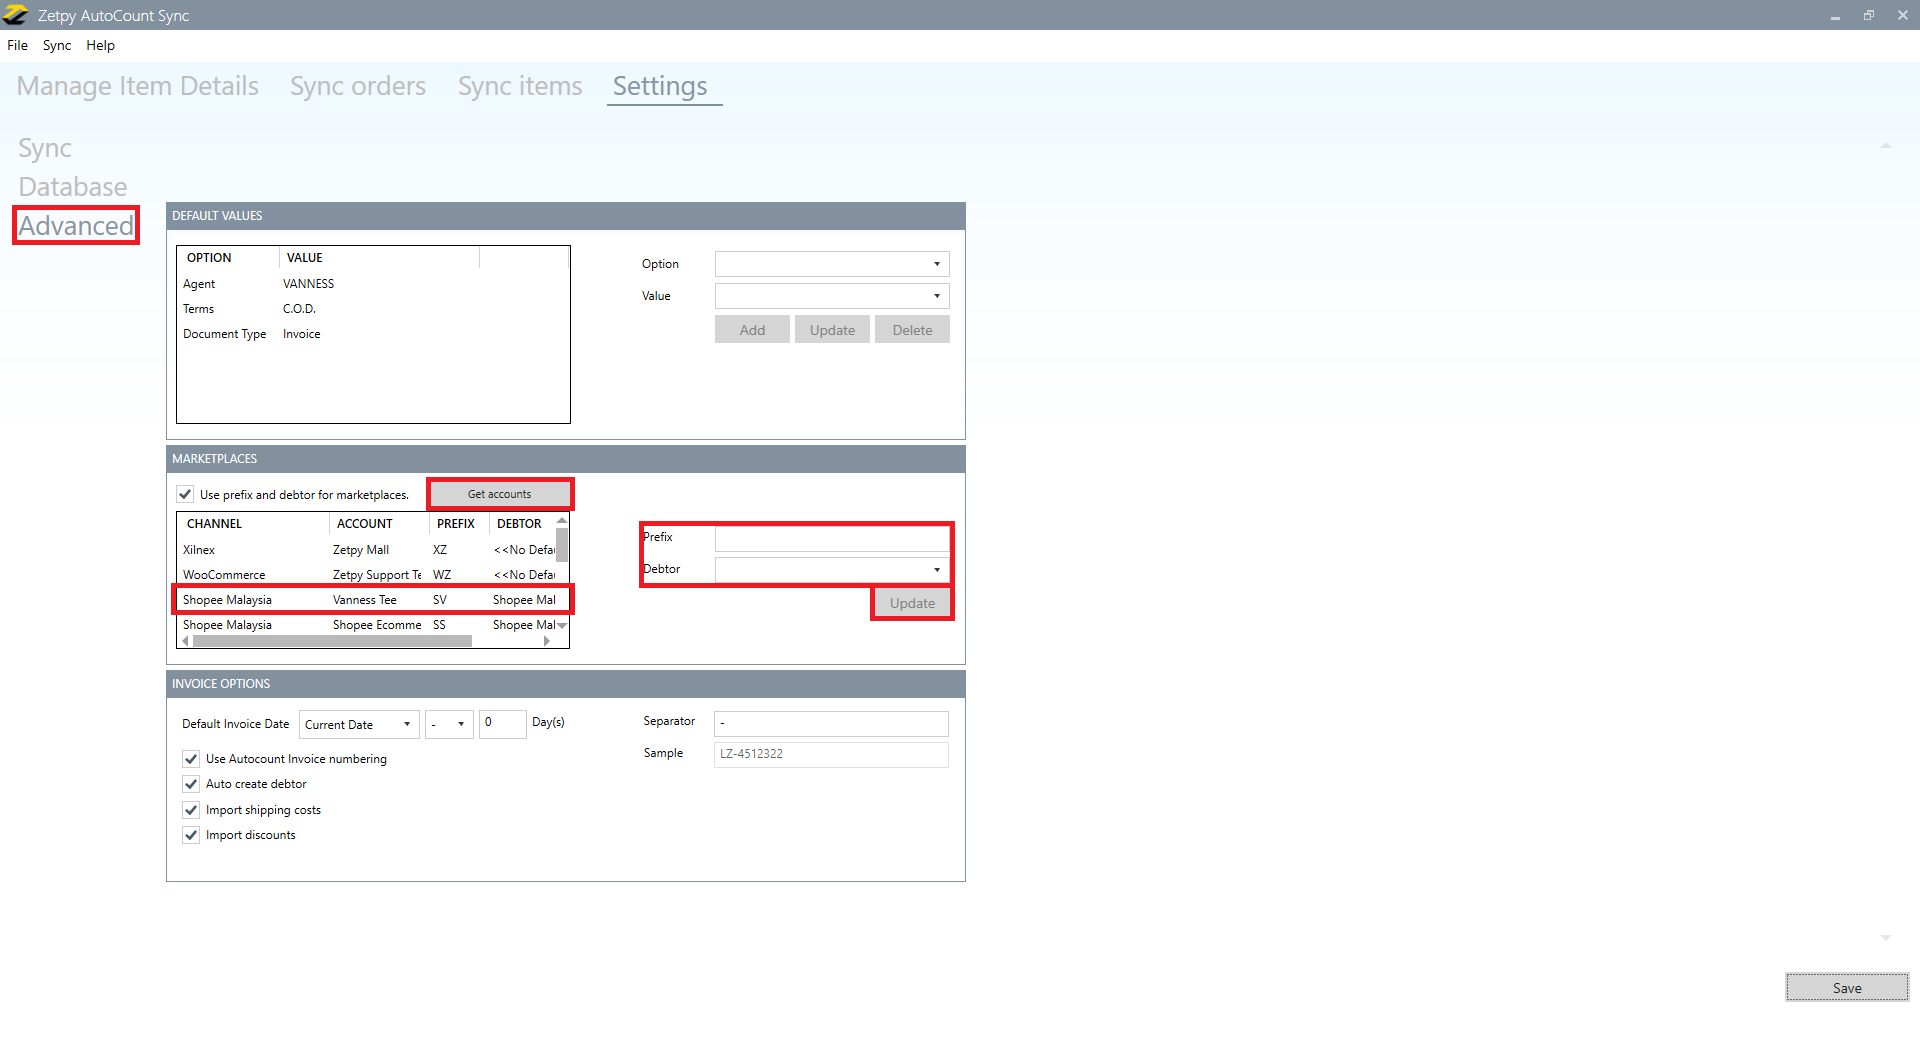
2) Setting Prefixes For Marketplaces
i. Go to Advanced.
ii. Click on the Get Accounts button to allow Autocount middleware to check how many account you have in Zetpy.
iii. Choose to use Prefixes and change the values of marketplace code prefixes.
iv. Click on the Debtor to select during import order into which debtor in Autocount.
iv. Press Update.
3) Set Default Invoice Date
i. Go to Advanced.
ii. Change the default invoice date to either Current Date or Order Date.
iii. You can add or subtract a certain amount of days.
iv. Click Save.
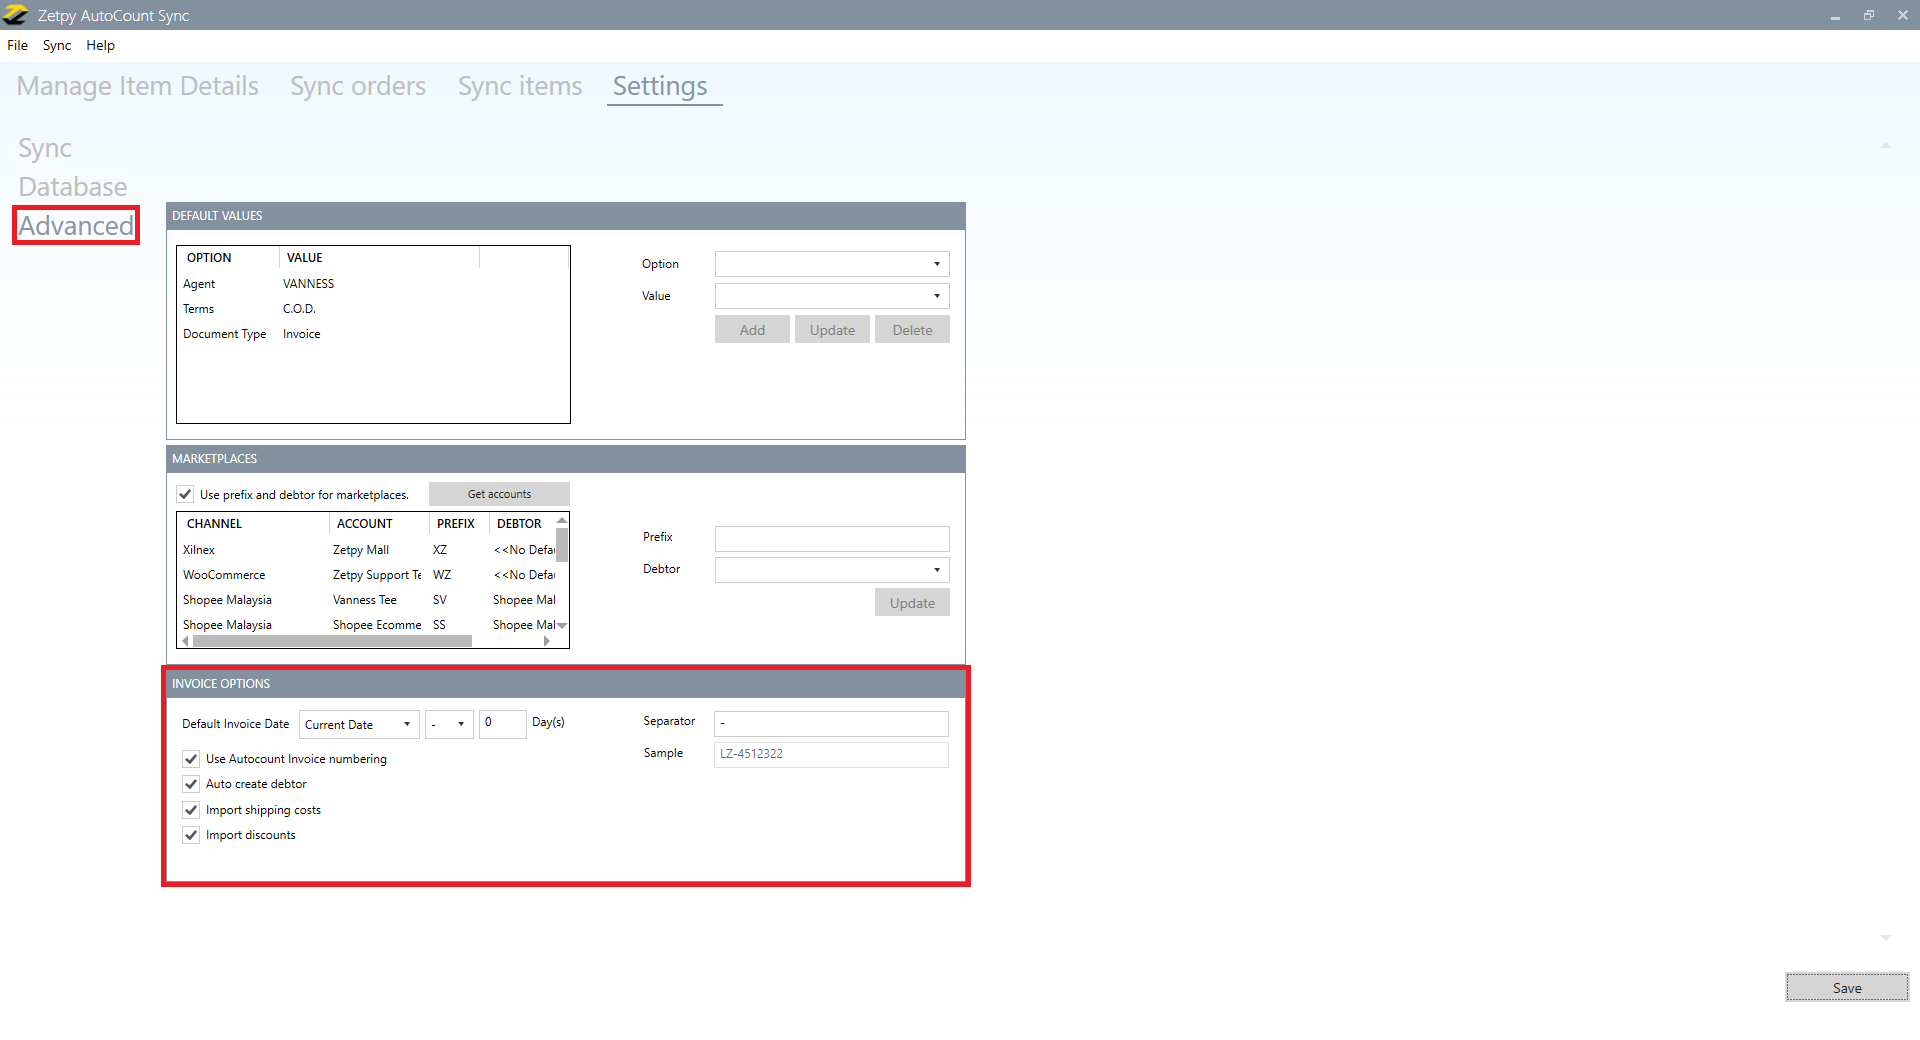
*Use Autocount Invoice numbering:
i) Tick the option, after import the order to Autocount system, it will be using the Autocount system the Invoice numbering.
ii) Untick the option, after import the order to Autocount system, it will be using the 3rd party order number.
*Auto-create debtor:
i) Tick the option, after import the order to Autocount system, it will create the debtor in Autocount system using the 3rd party order customer details.
ii) Untick the option, after import the order to Autocount system, it will create the debtor based on the Default Value or Marketplaces setting in Zetpy Autocount sync application.
*Import shipping costs:
During import the order into Autocount you can either include the shipping cost or ignore the shipping cost.
*Import discounts(voucher):
During import the order into Autocount you can either include the discount(voucher) or ignore the discount(voucher).
If you have any issues or questions, please drop us an email at support@zetpy.com.