In order to import product into Zetpy, must create product group in Zeoniq and assigned the product group into each product item.
Step 1: How to create a Product Group in Zeoniq:
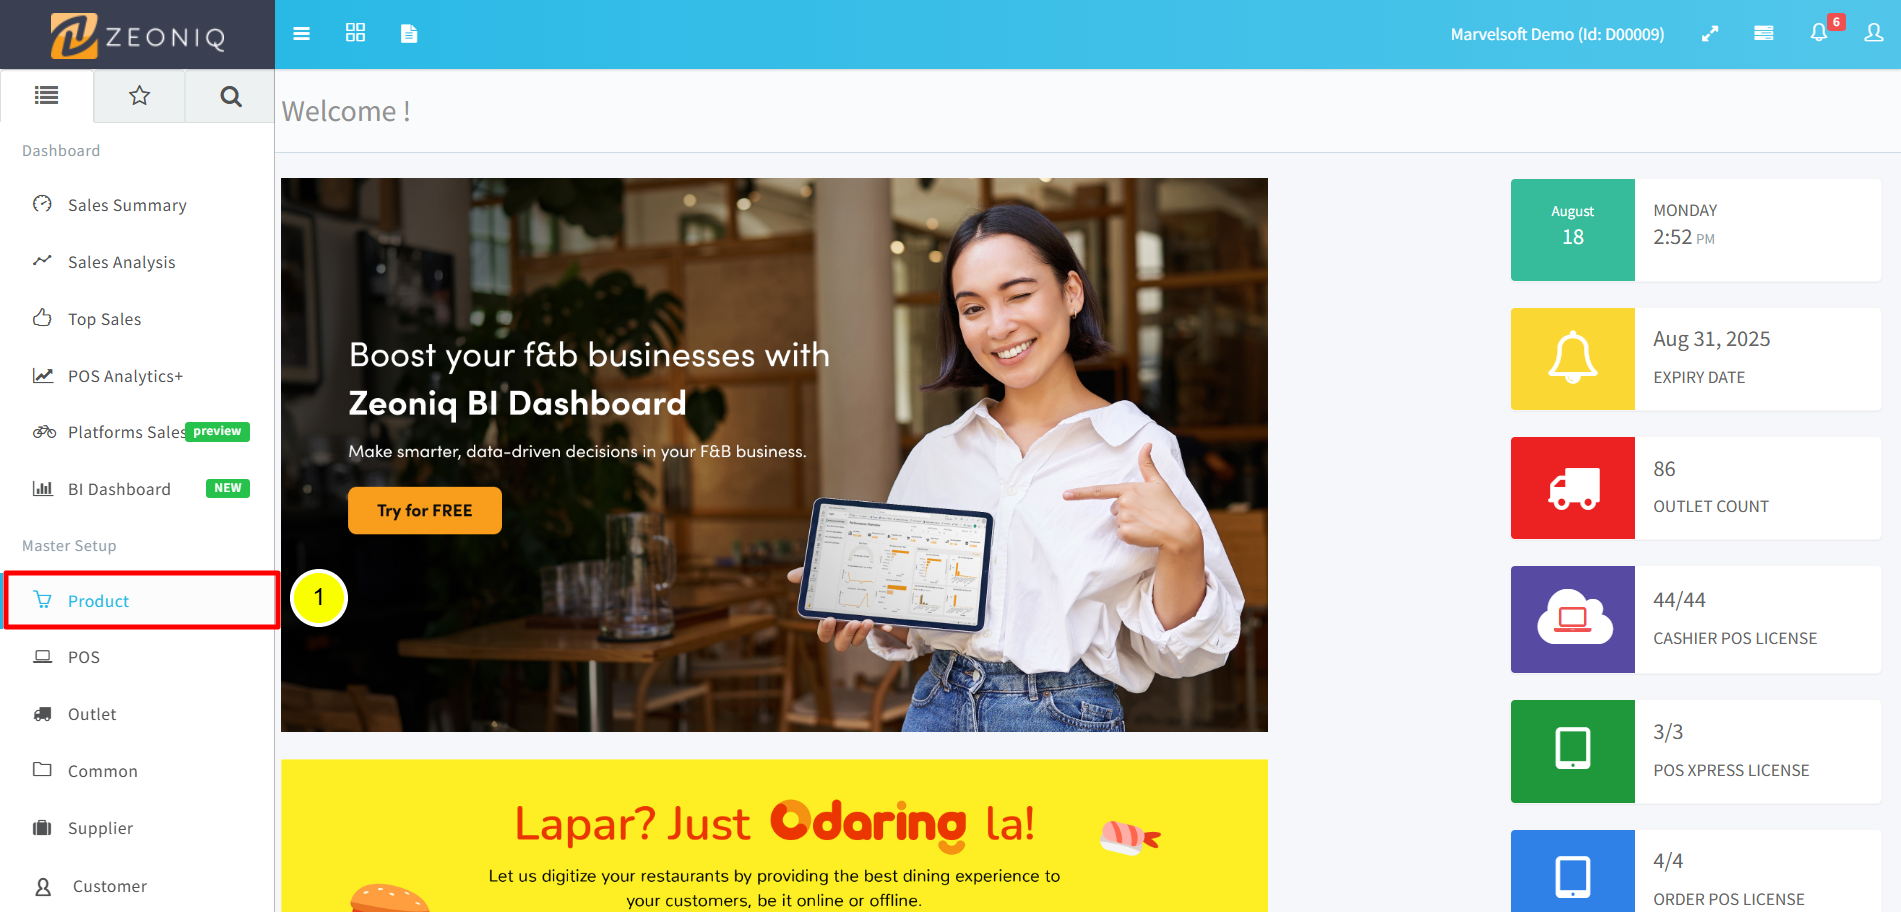
Log in to the Zeoniq RMS backend and go to the Product tab.
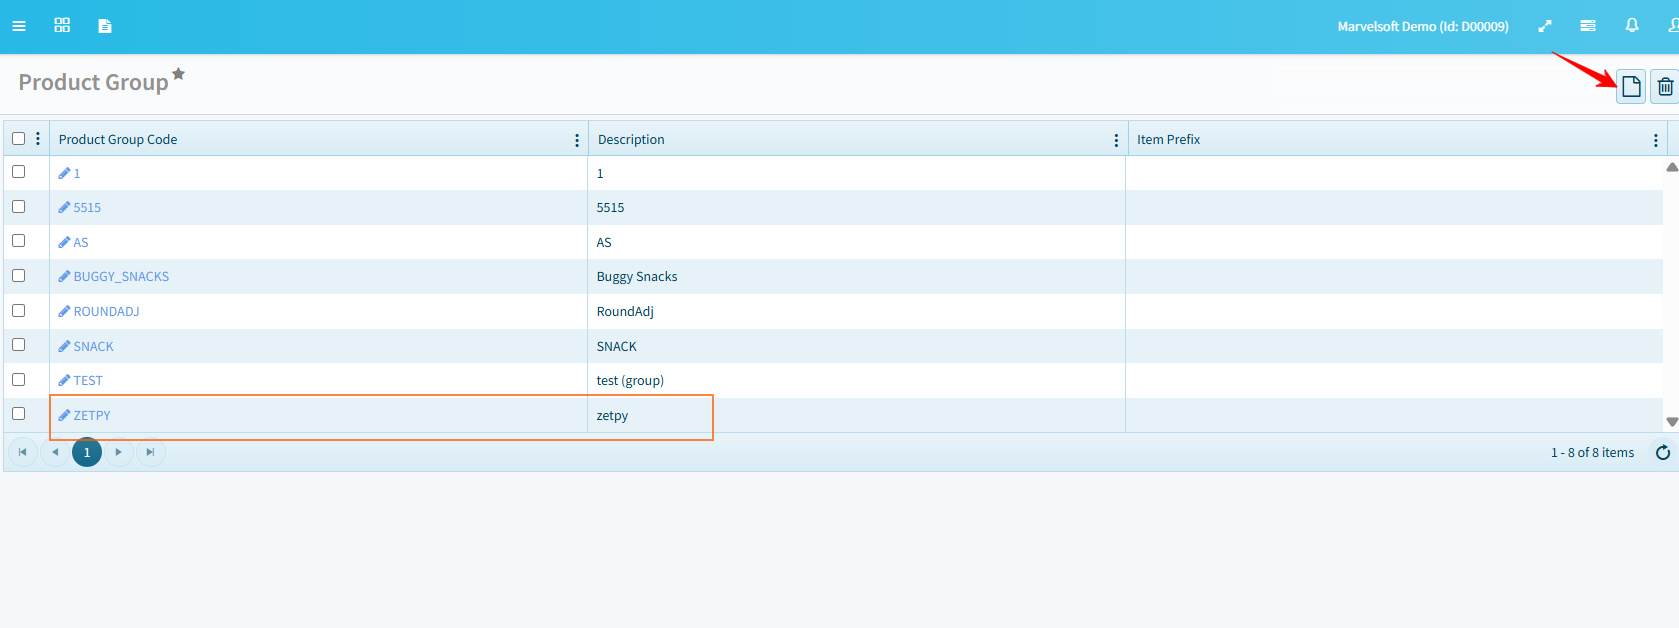
Select Product Group
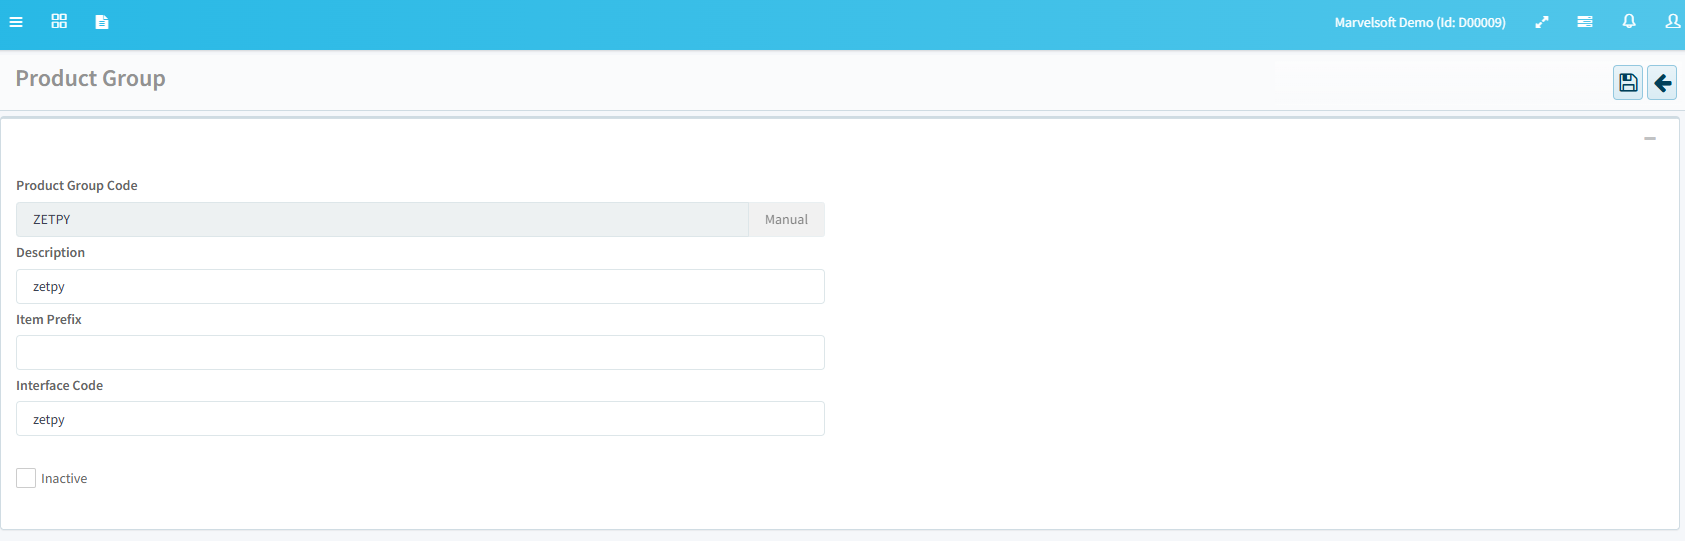
Create a New Product Group > name the Product Group code as any code you want to define that item to be synced into Zetpy.
Save.
Step 2: Create a new product in Zeoniq
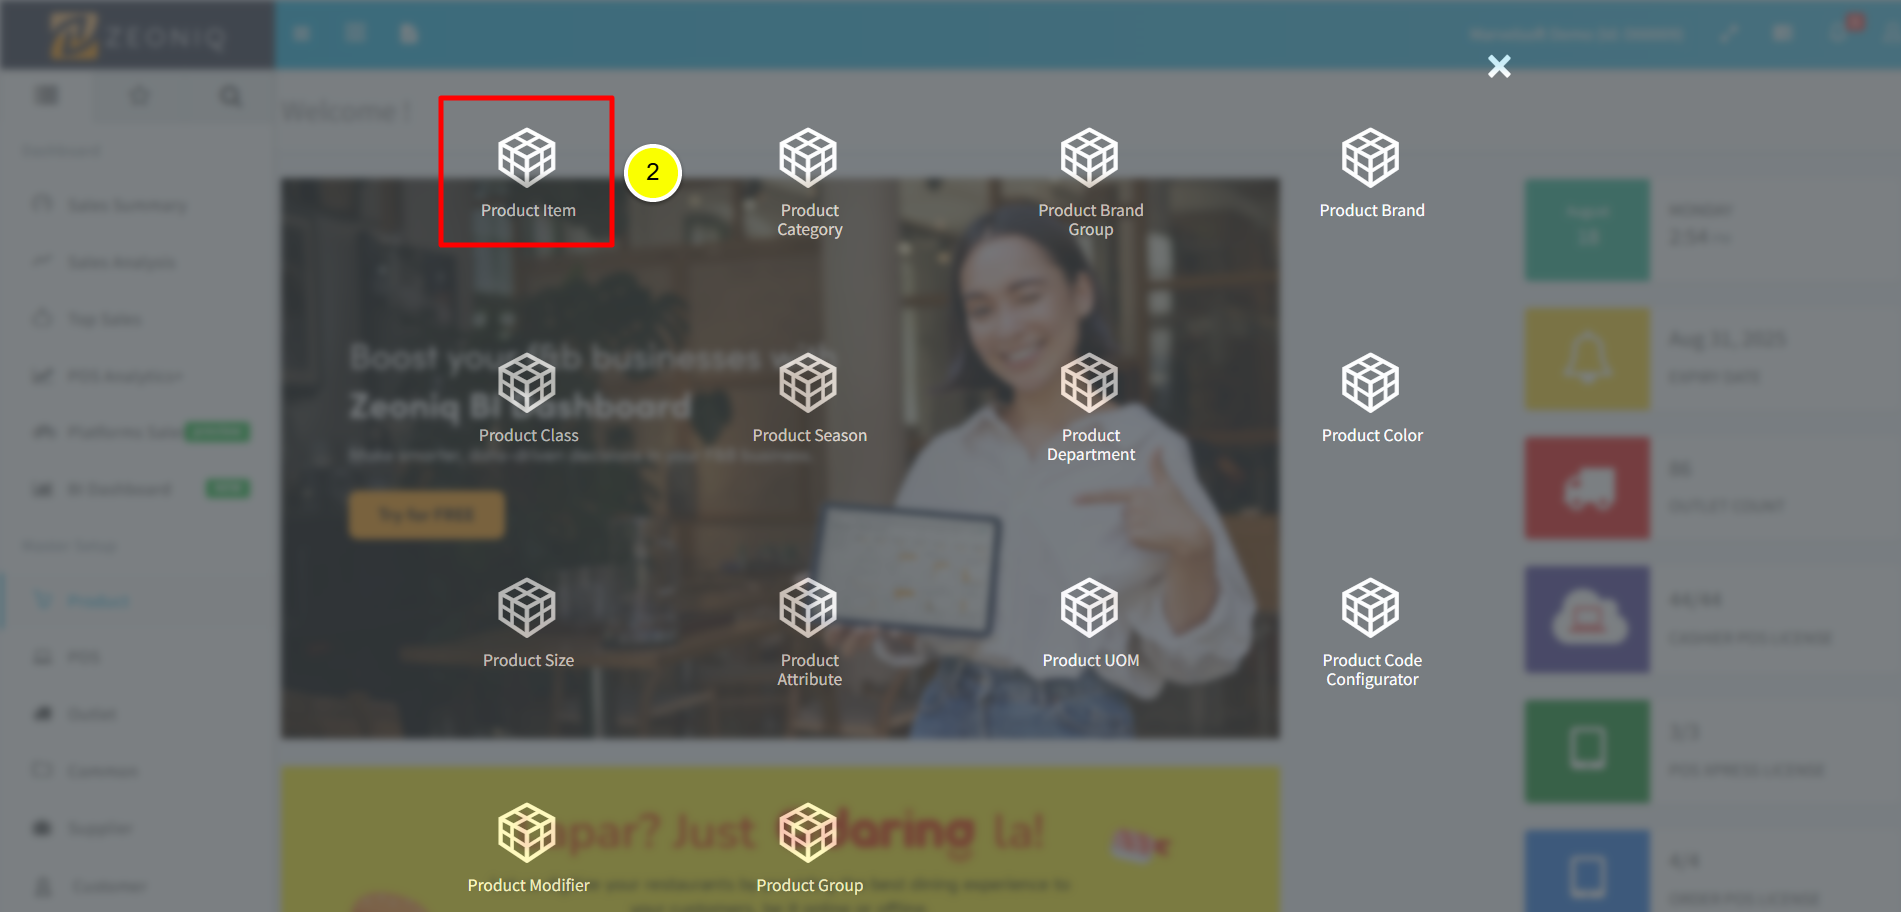
Go to Product. Click Product Item icon.
Click the New Document button.
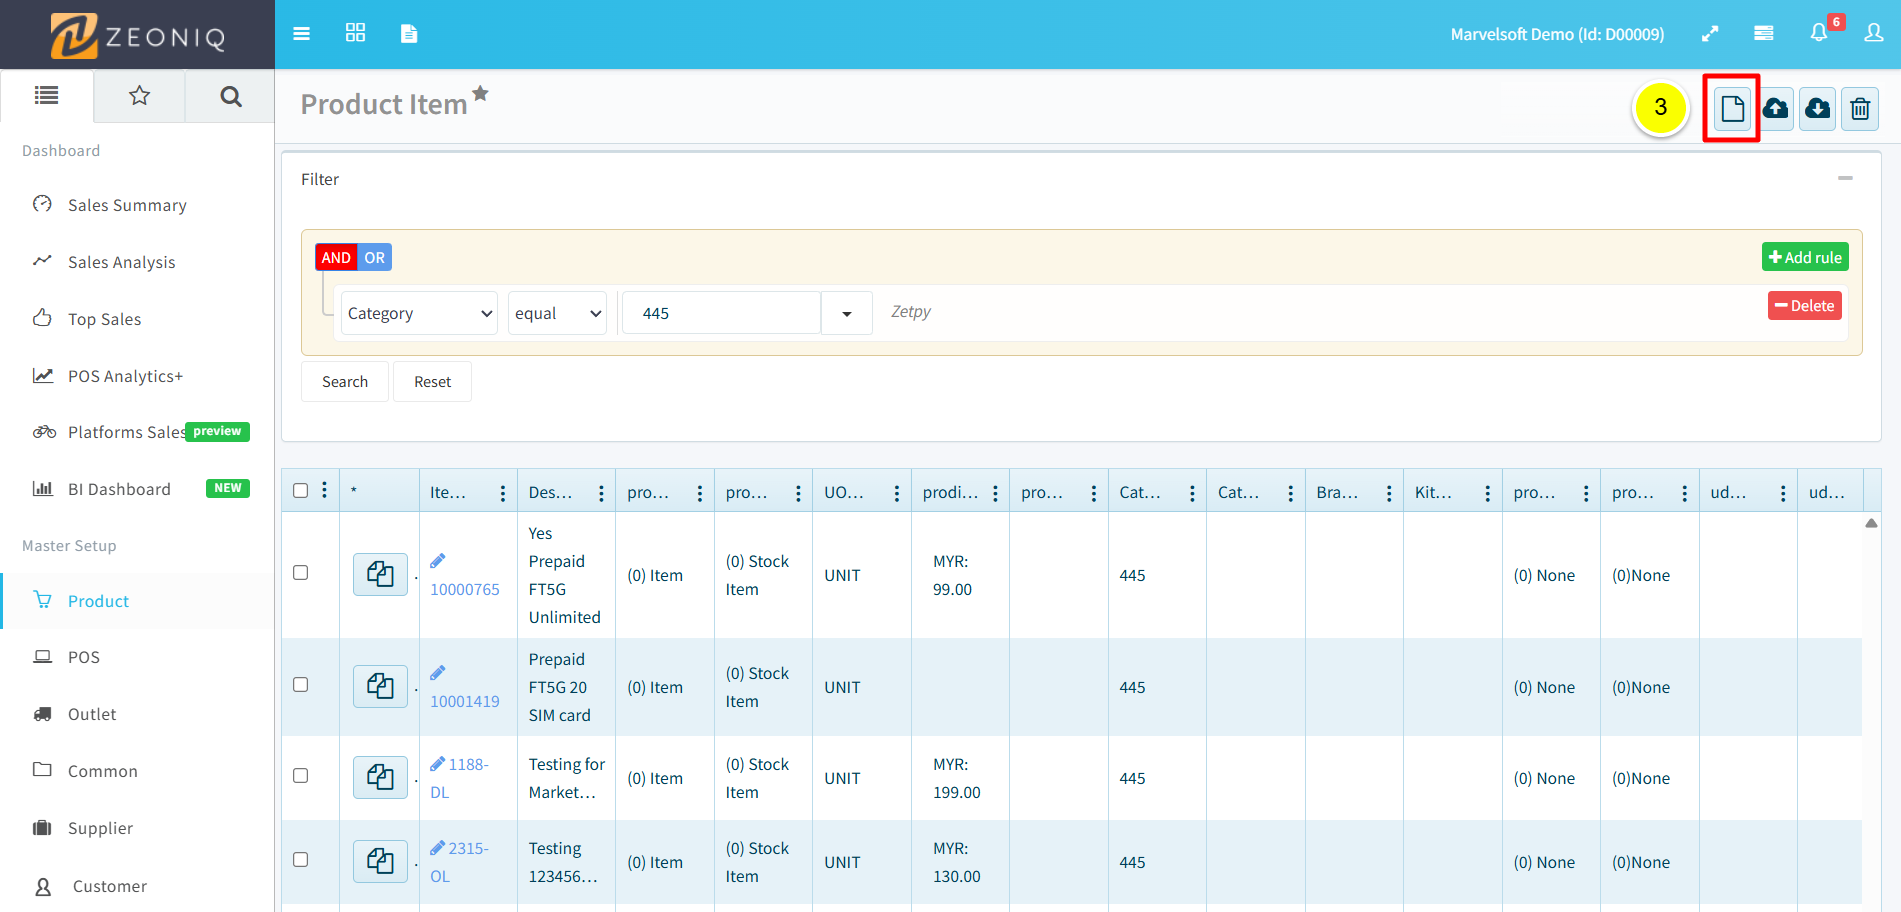
Fill in the product details, in order for the item to be imported into Zetpy, please make sure:
Stock Mode: Stock Item
Product Group: must be assigned to one of the product groups that you set in Zetpy's Zeoniq Import Settings. (eg, Zetpy) - Refer to this tutorial.
Once done, click the Save button.
Step 3: Add Selling Price of the product item
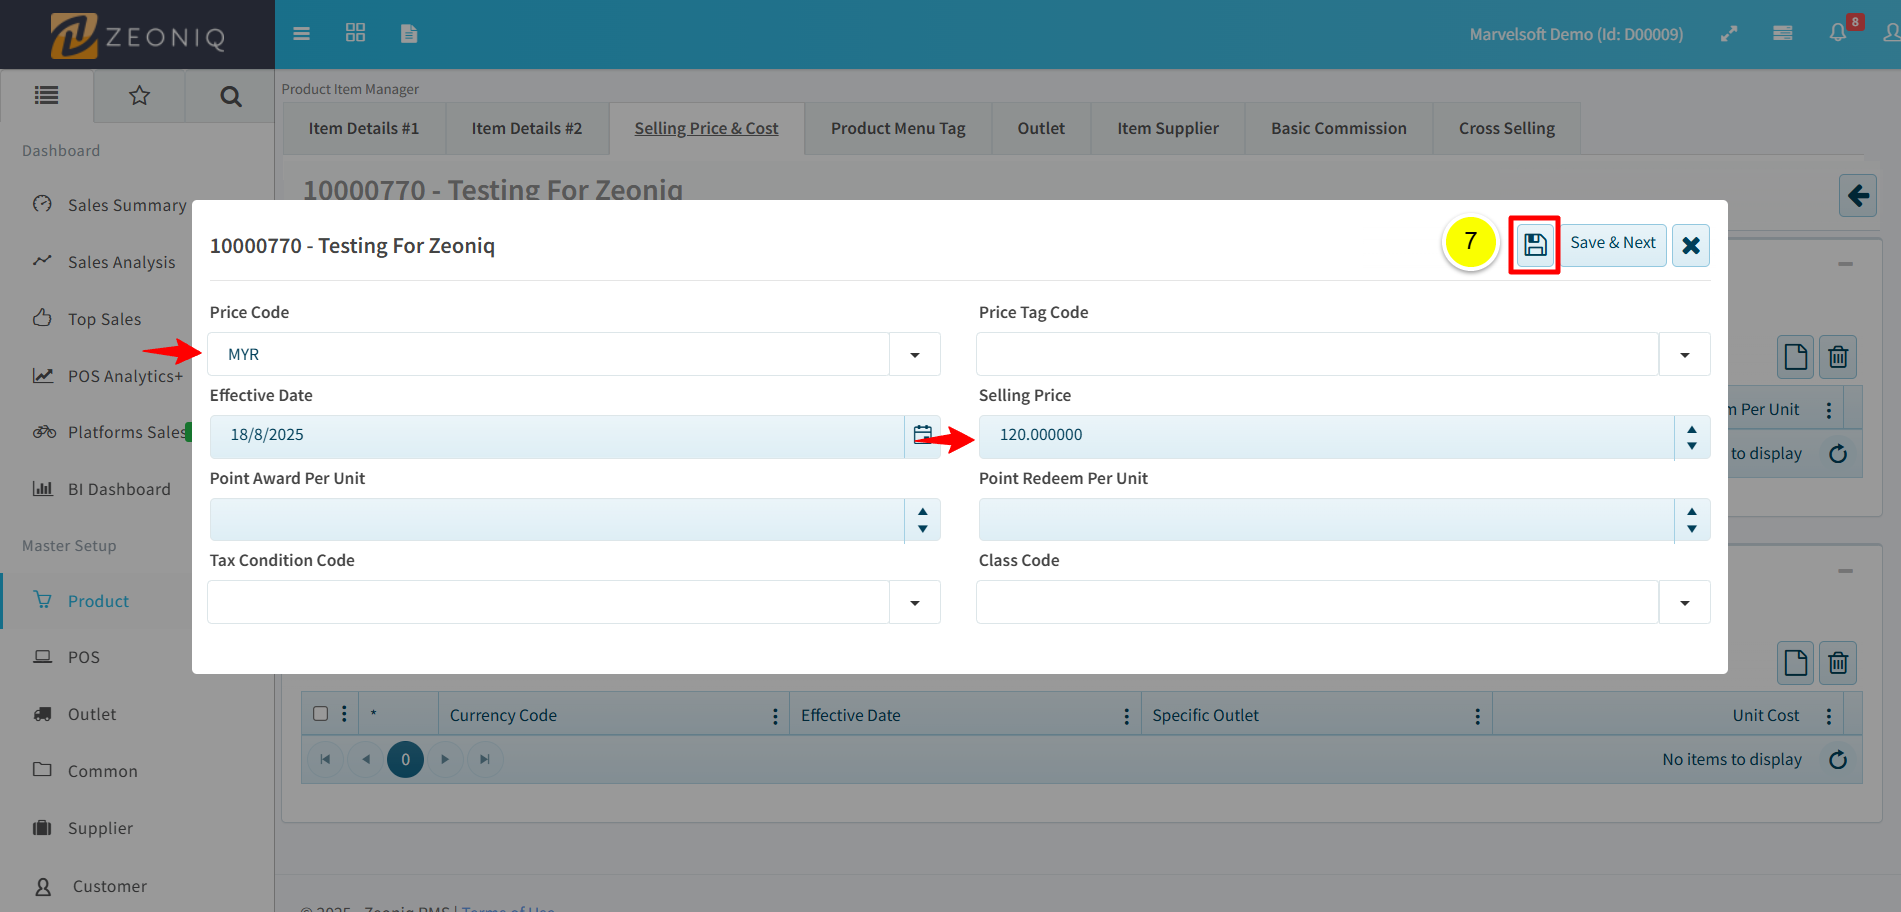
To add price, click the Selling Price & Cost tab. Then, click the New Document button.
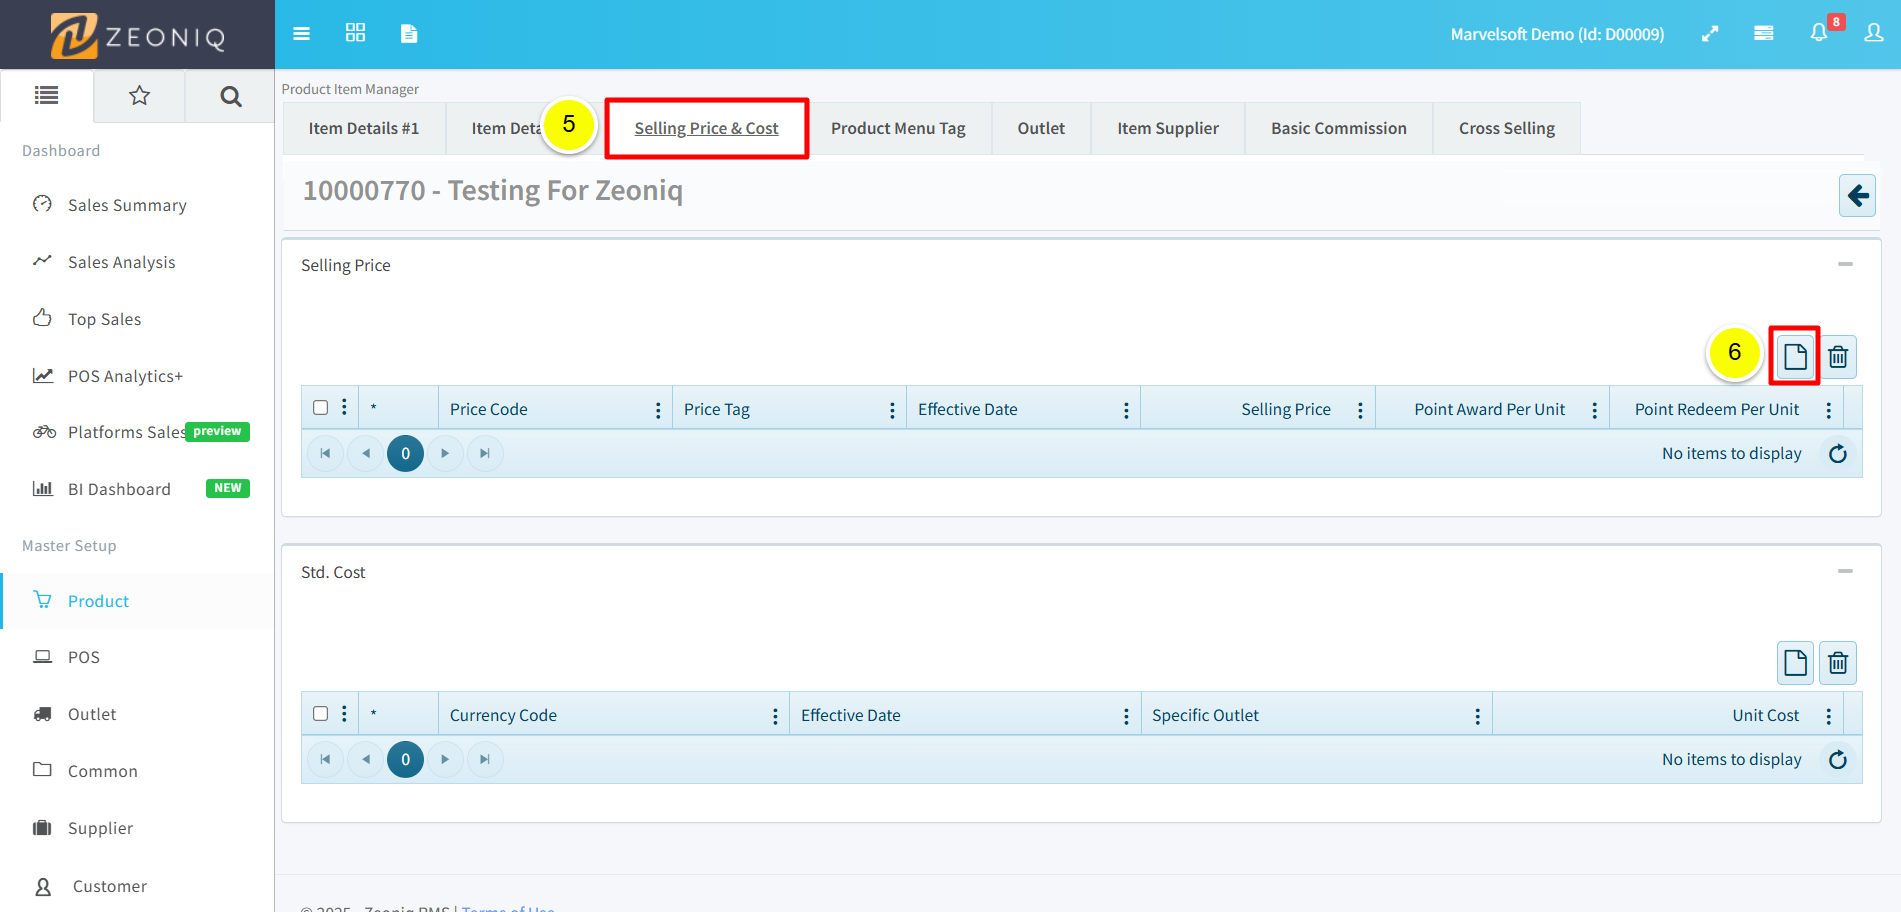
Fill in the details. Price Code is for currency. Then, click Save button.
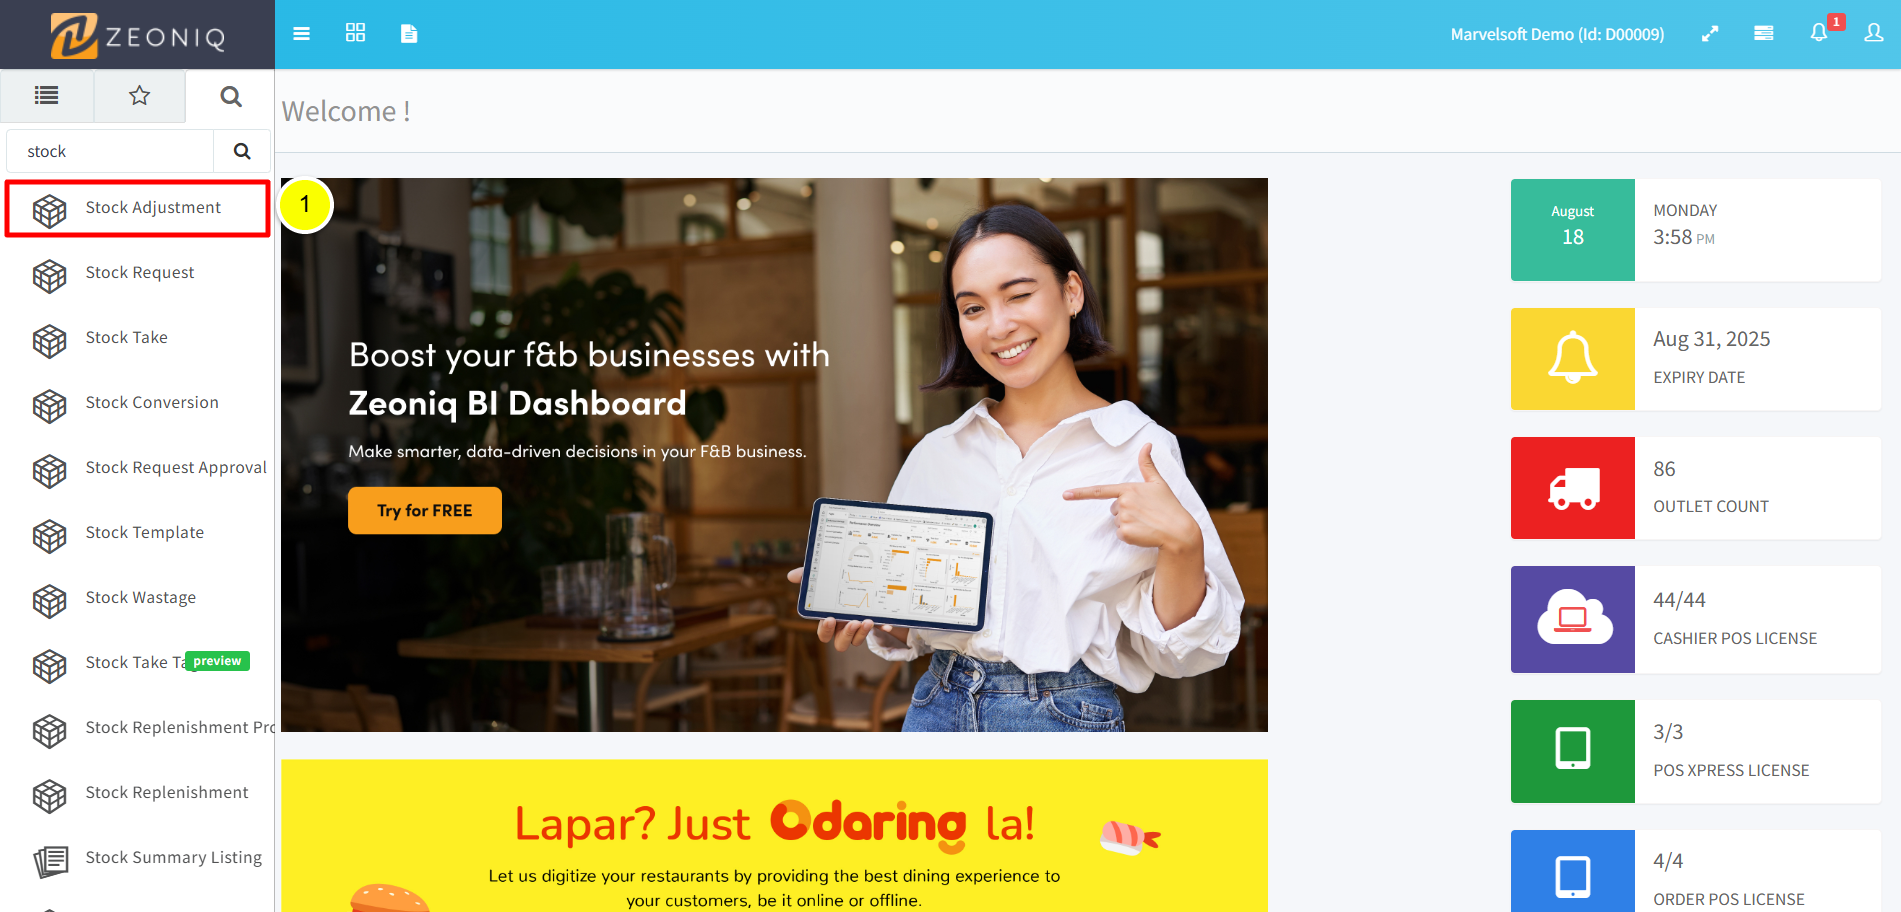
Step 4: Add stock quantity into the created product in Zeoniq
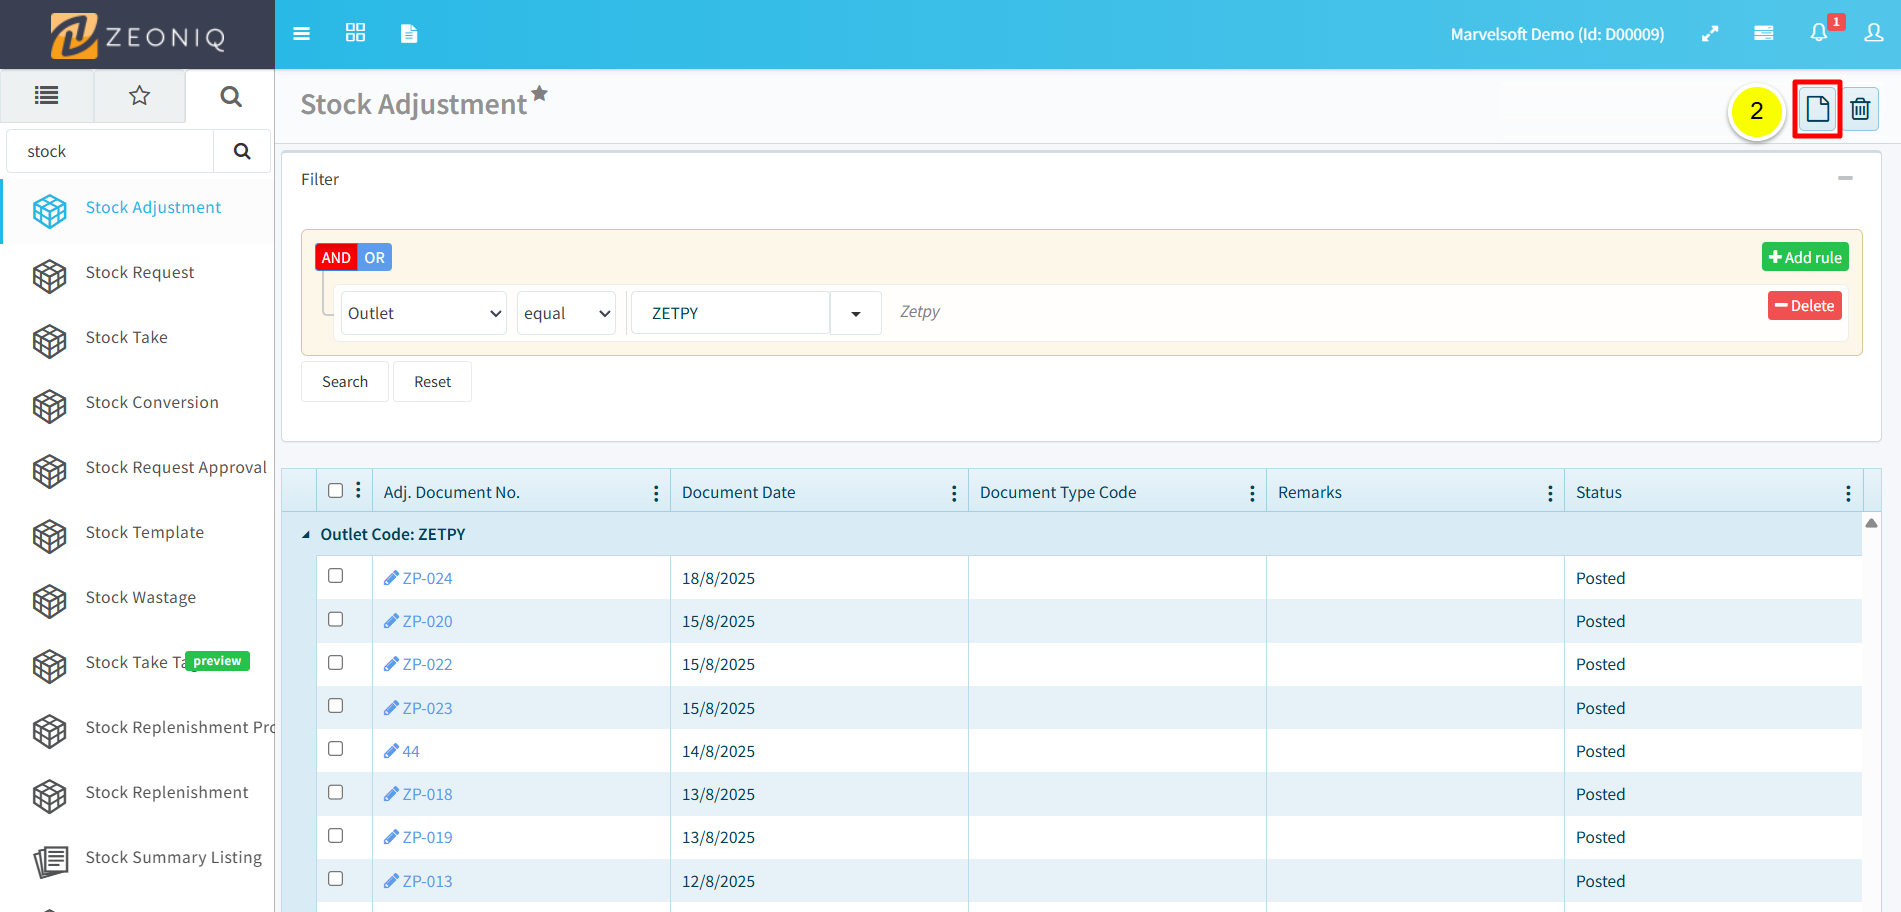
Use the search field to find Stock Adjustment. Click Stock Adjustment menu.
Click New Document button.
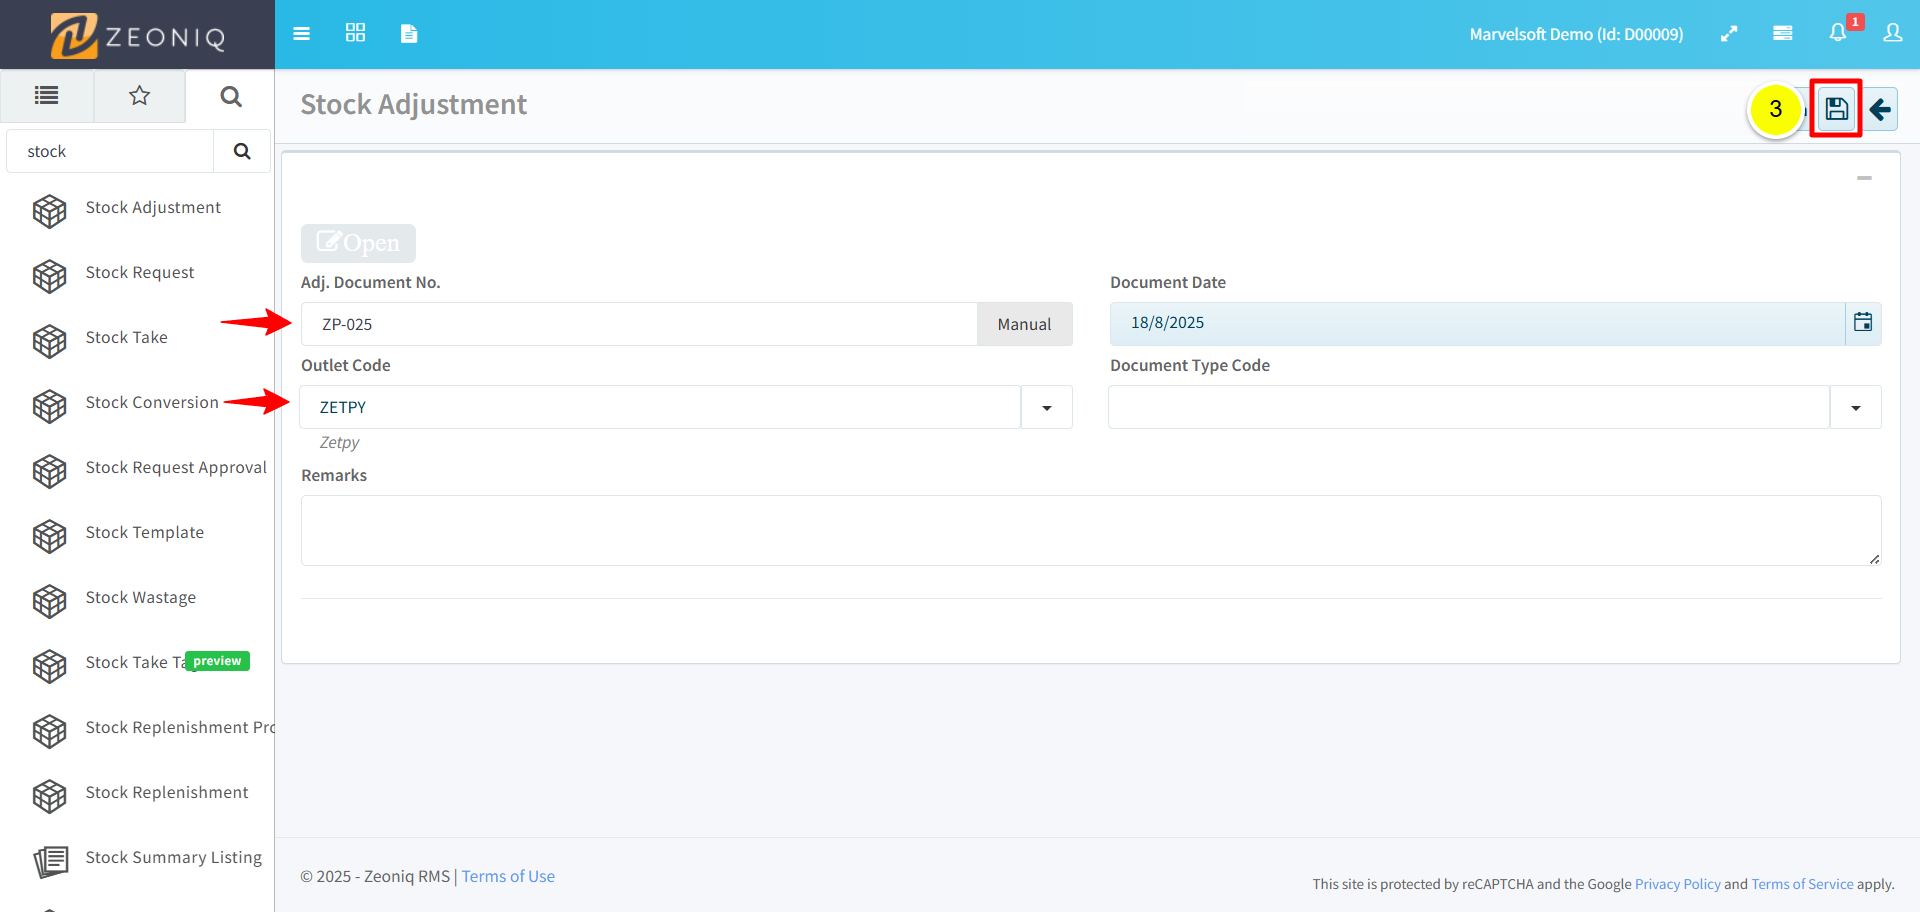
Fill in the details below. Then, click Save button.
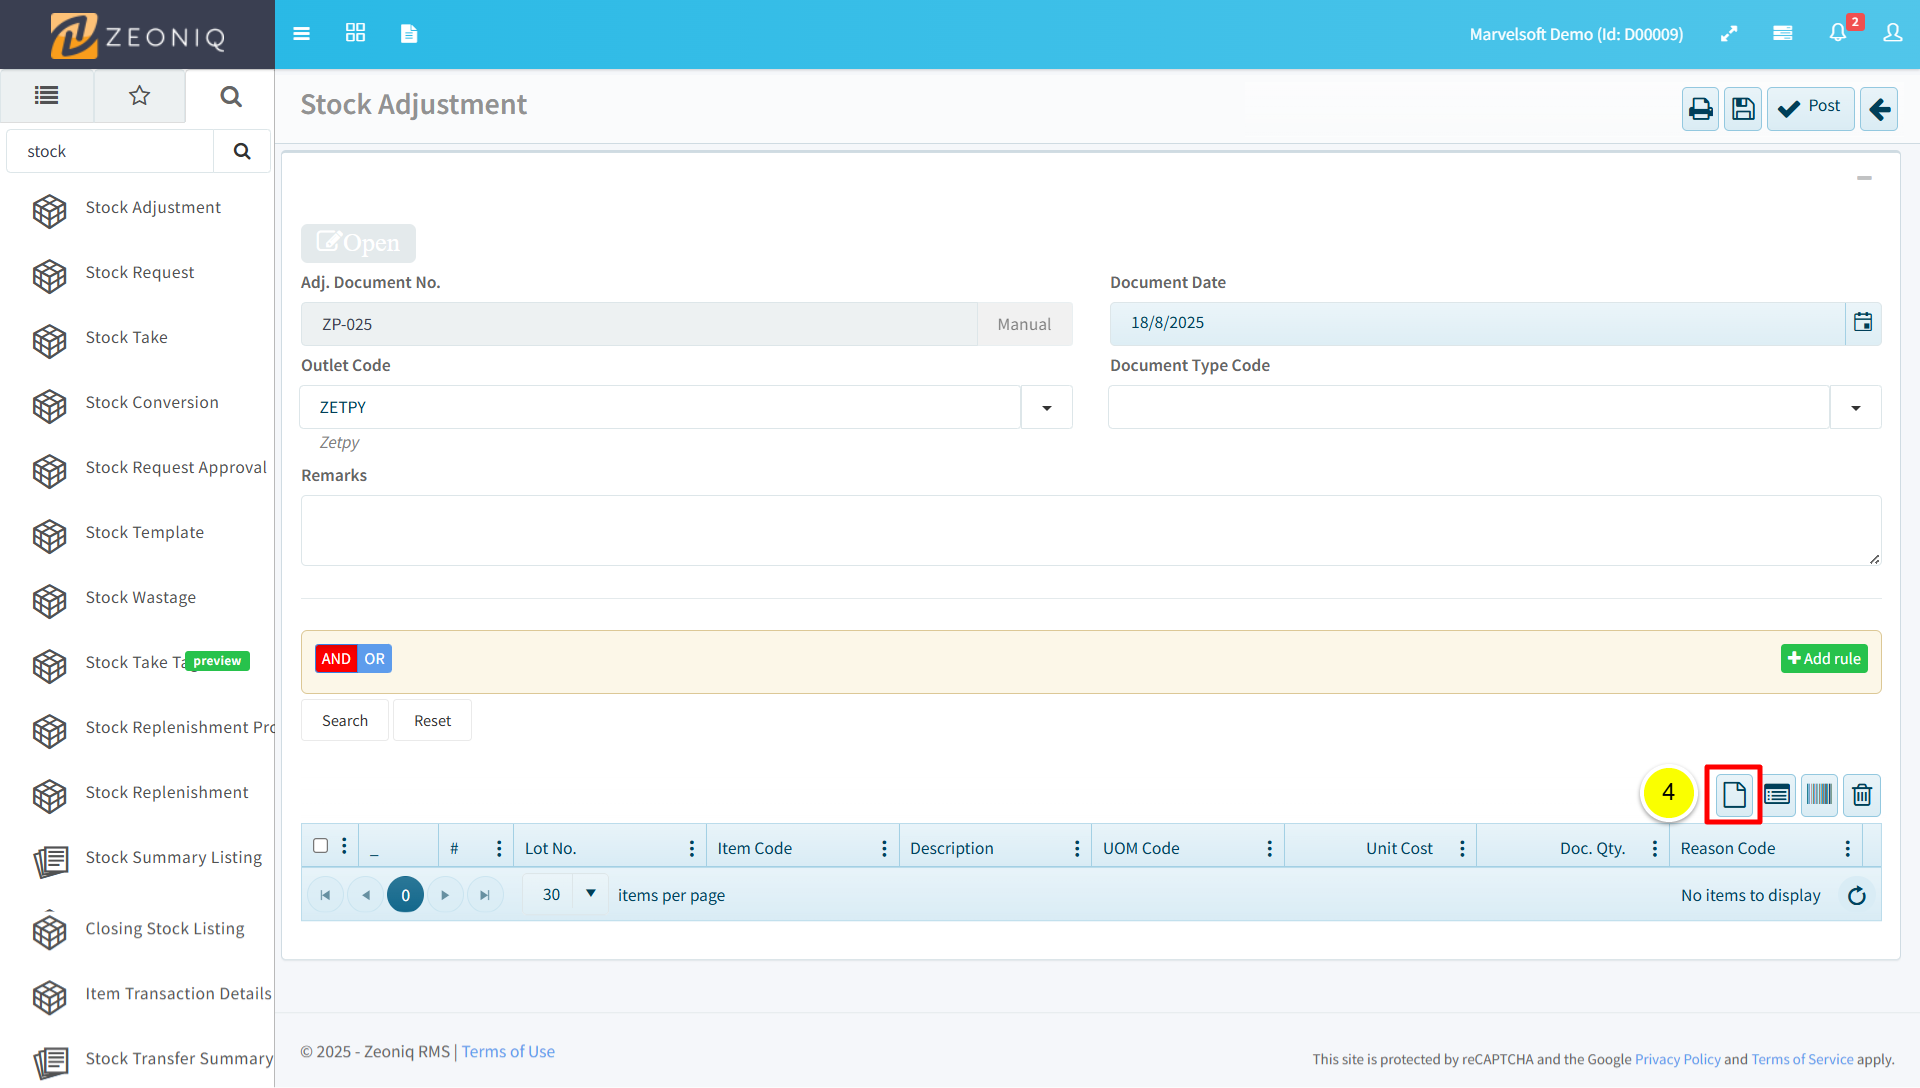
Click New Document button.
Search for the item you want to adjust the quantity. The quantity under Doc Qty reflects the stock in Zetpy. Then, click the Save button.
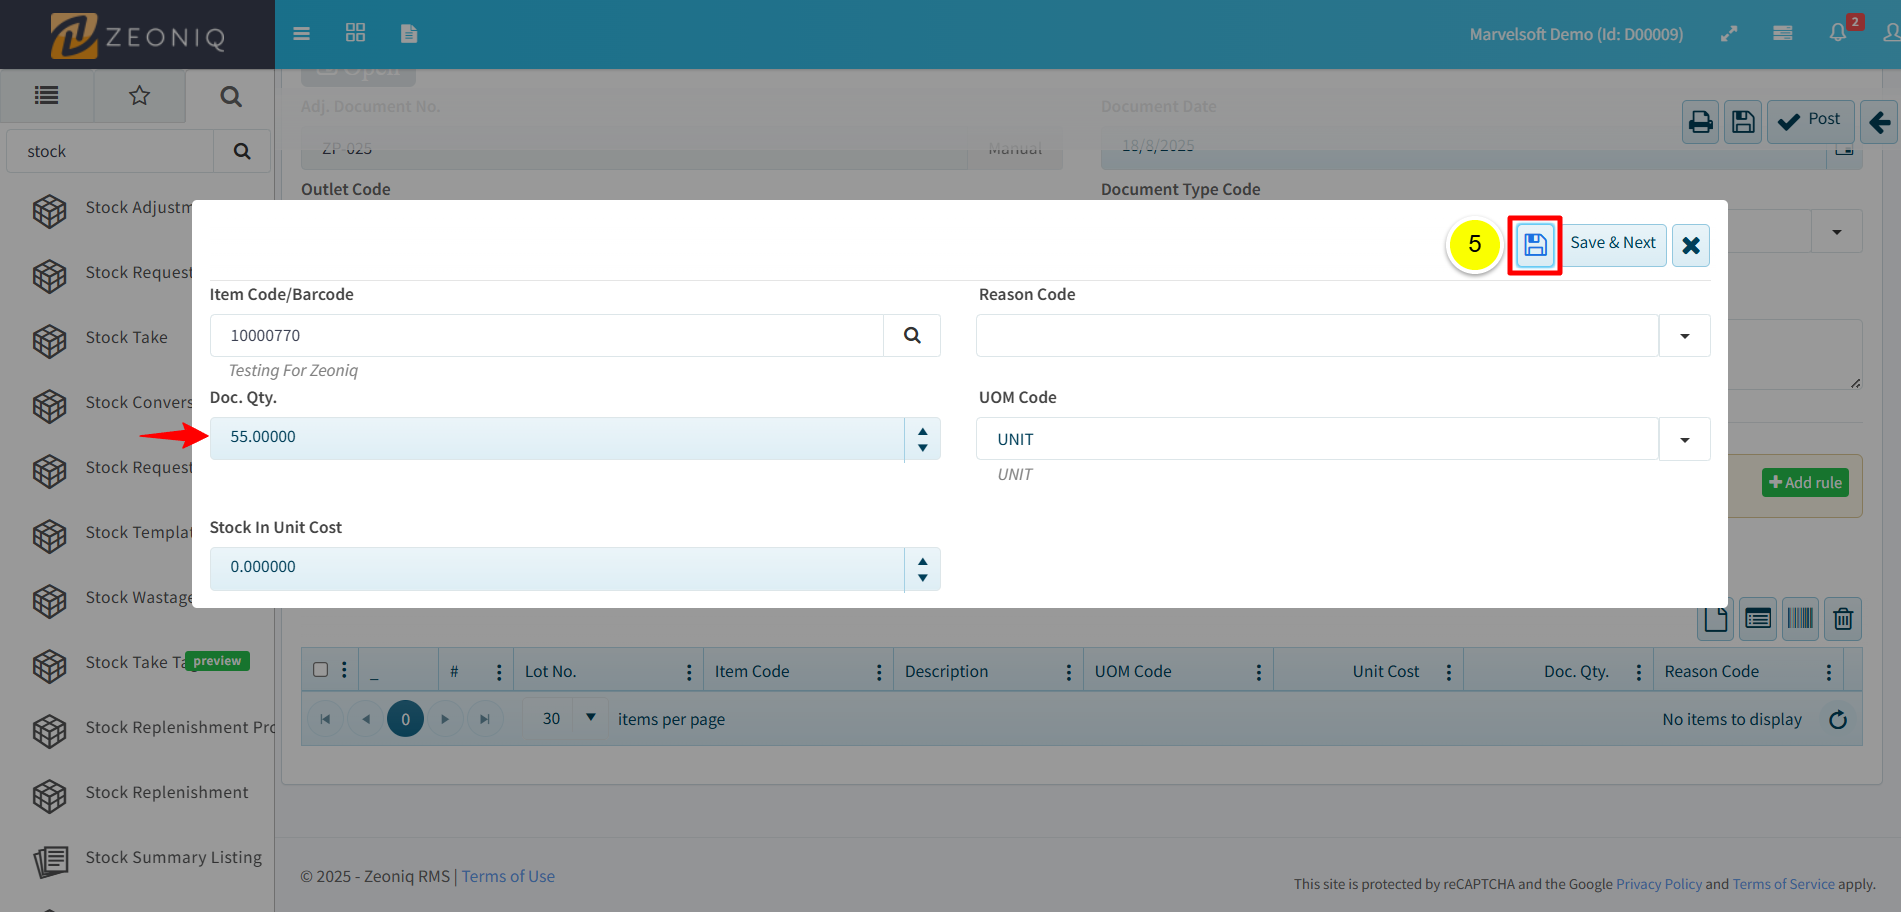

Lastly, click the Post button.
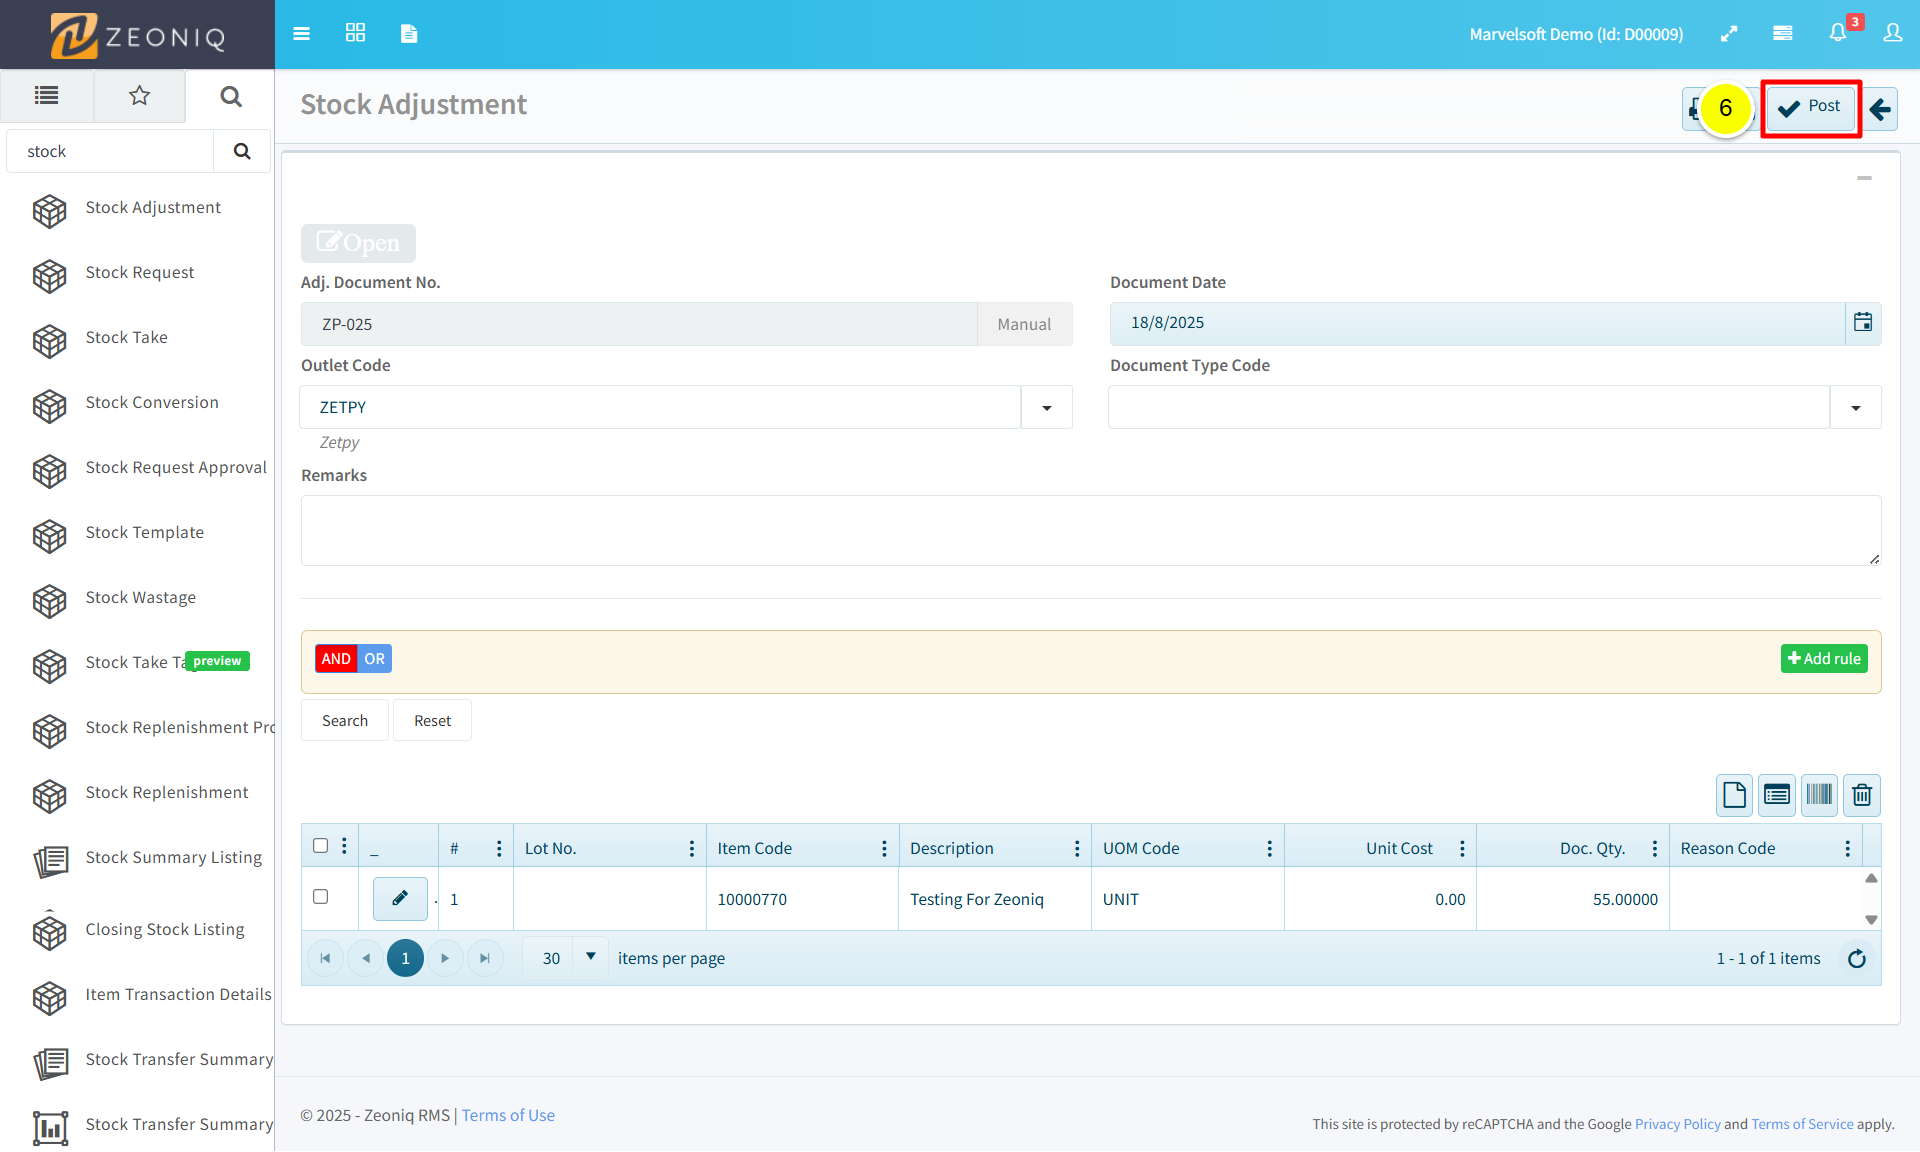
Once you click the Post button, you cannot adjust the stock. To adjust the stock again, you need to repeat the steps from the beginning.
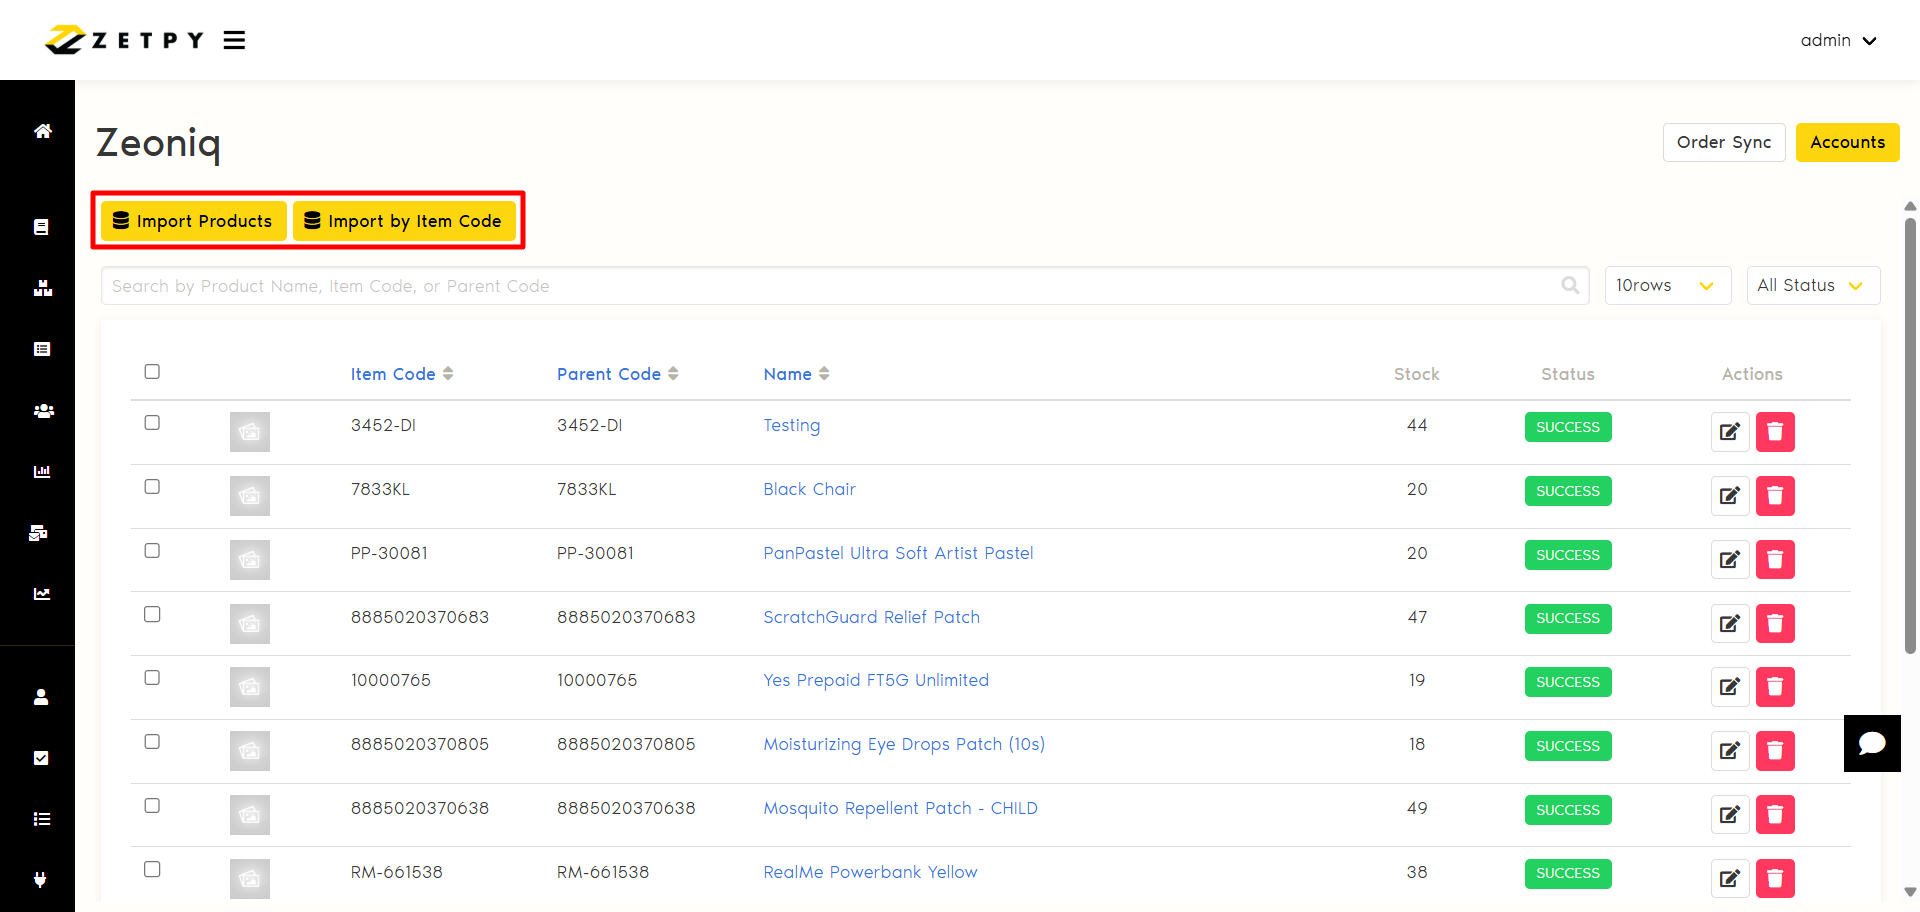
Step 5: Sync the product to Zetpy
You can choose to import products in bulk or import a single product.
Import Product: Import all products in Zeoniq with the assigned Product Group, except the existing ones in your Zetpy Zeoniq plugin.
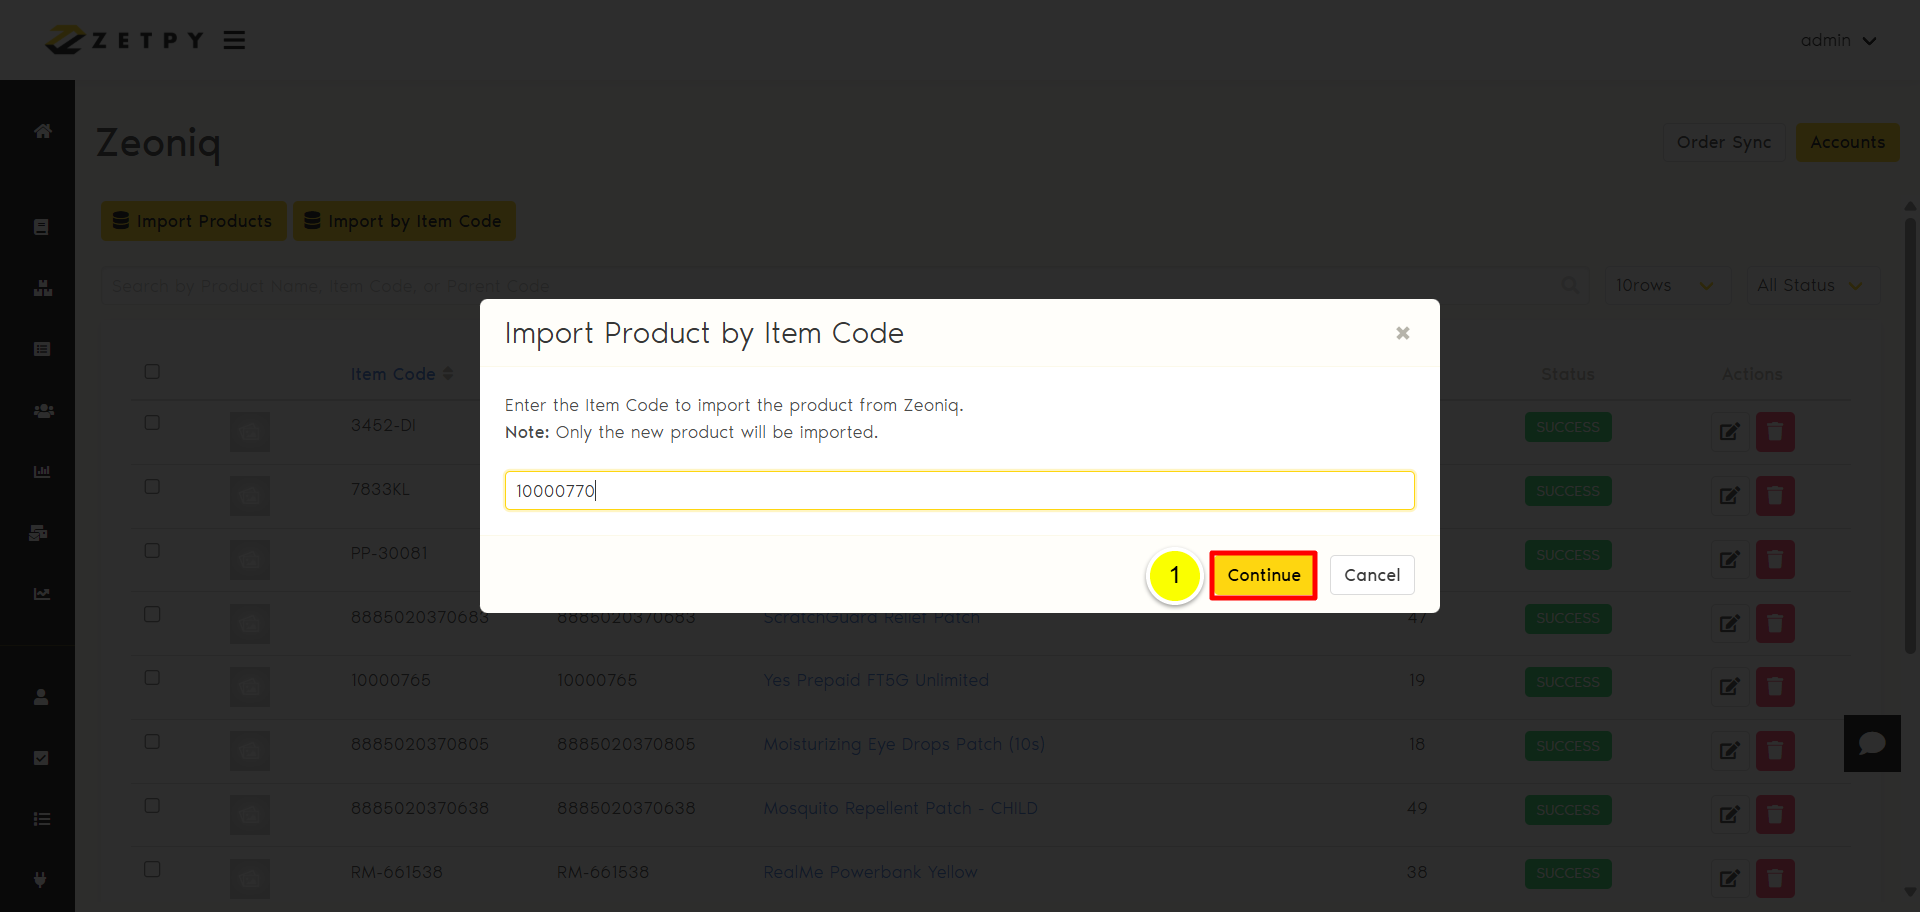
Import by Item Code: Import a specific product only from Zeoniq into Zetpy.
You can put the item code based on Zeoniq. Then, click the Continue button. Your product has been added to Zetpy successfully.
If you have any issues or questions, please drop us an email at support@zetpy.com