

With AI Image Studio, you can use your existing product image as a reference and let AI create new product visuals for you.
No photography setup or design skills required.
Usage cost: 10 zCredits for each image generated.
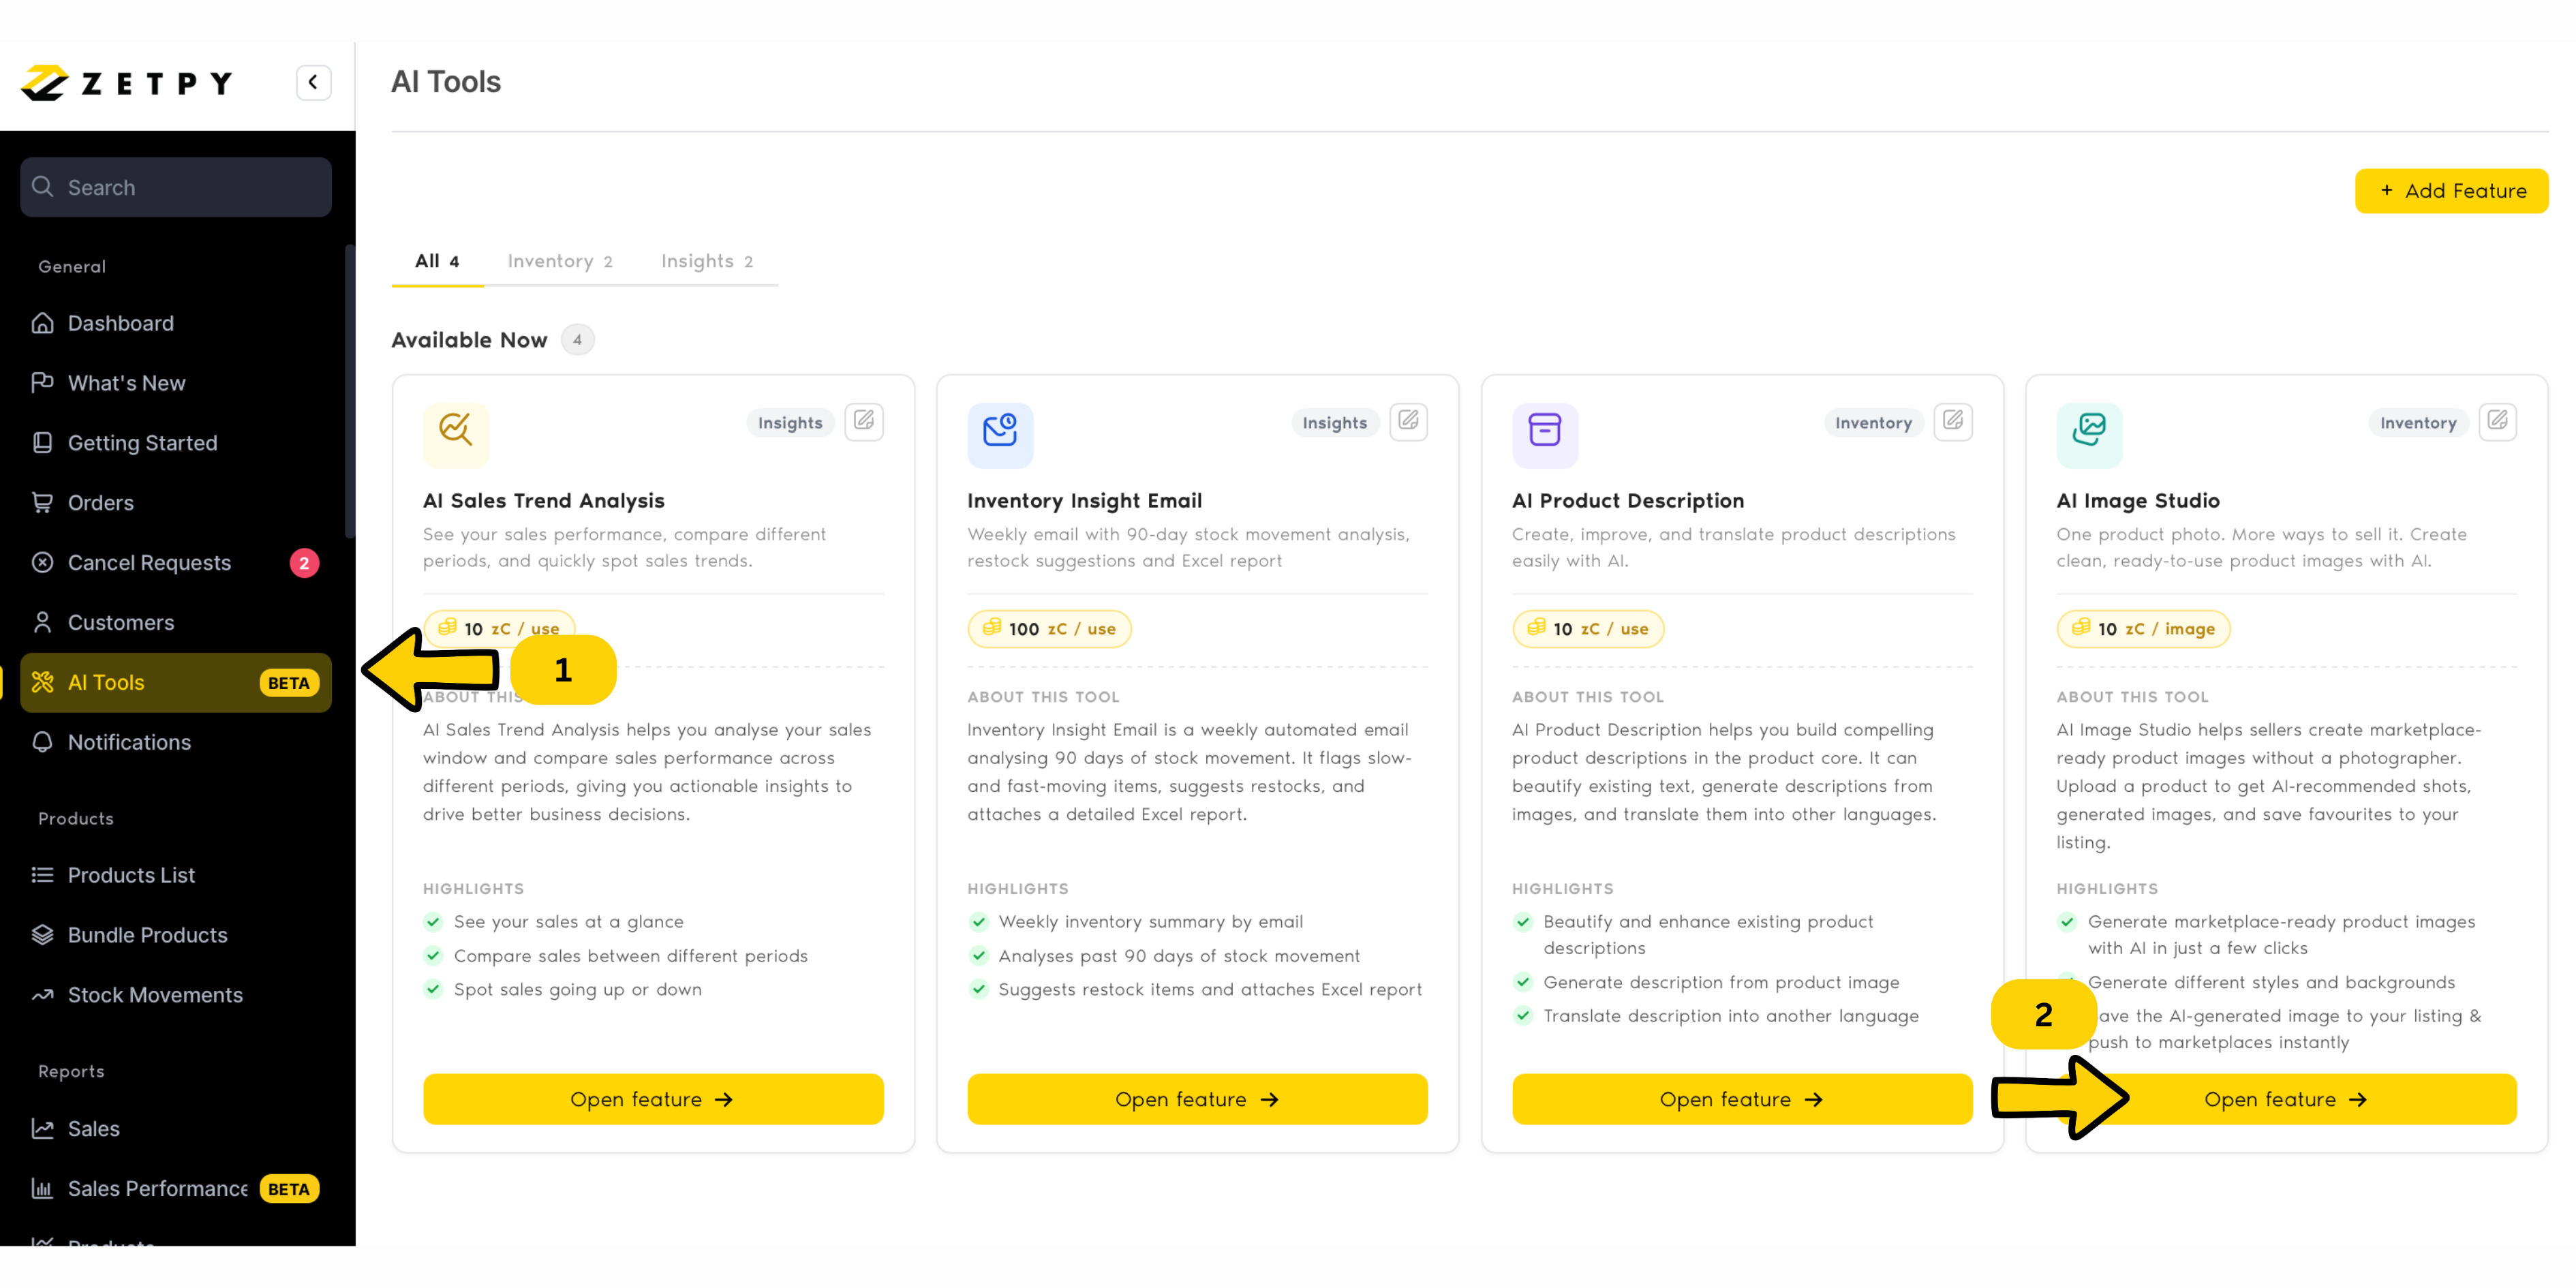
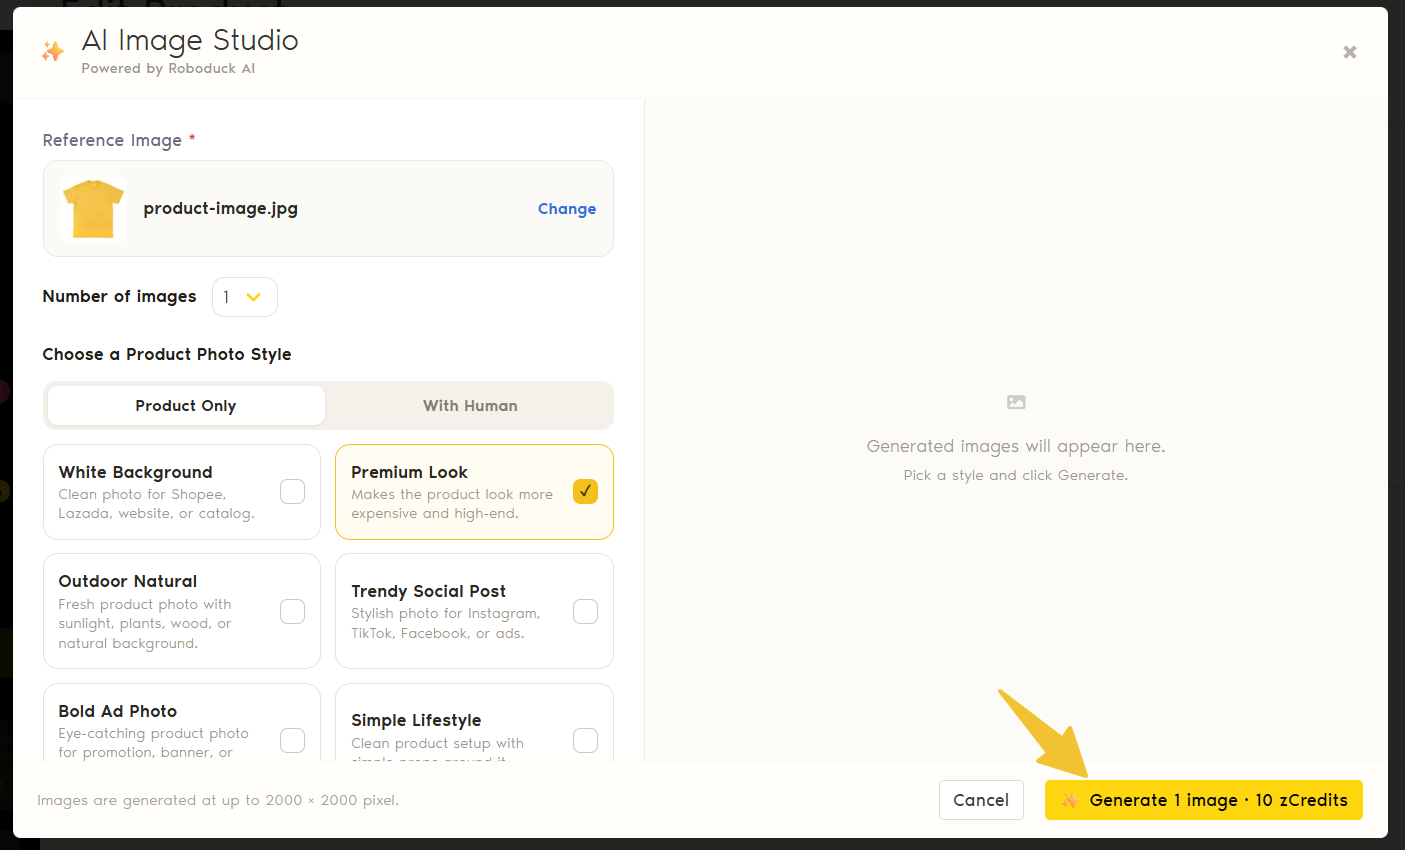
Step 1: Open a Product
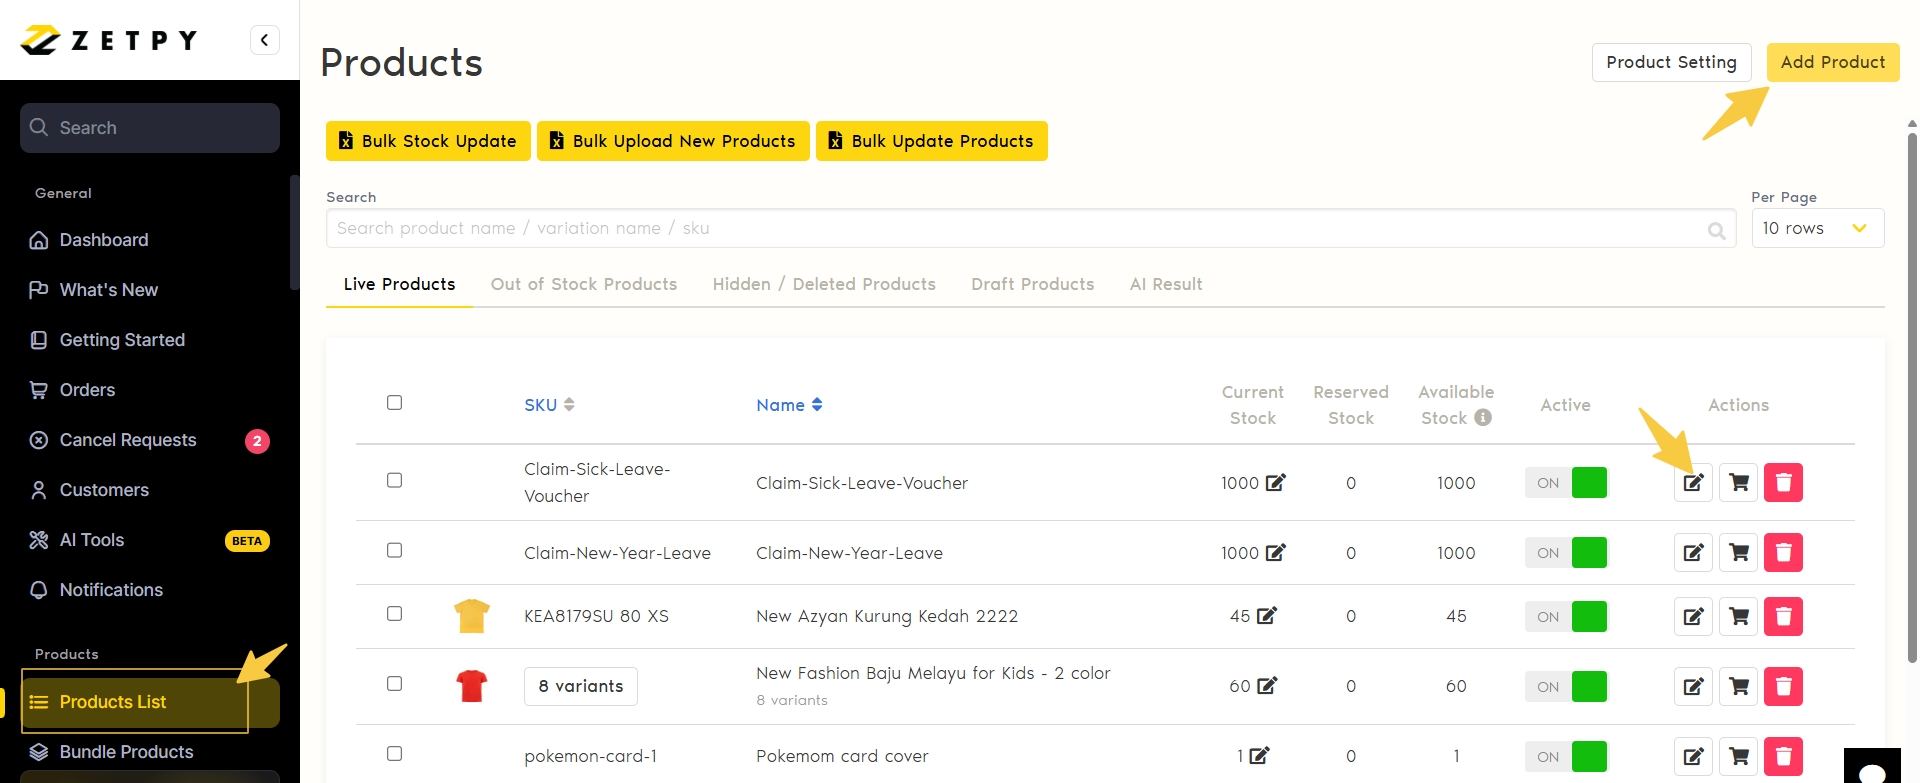
Go to Zetpy → Product List.
Open an existing product or click Add New Product.
In the Product Editor, scroll down until you find the Images section.
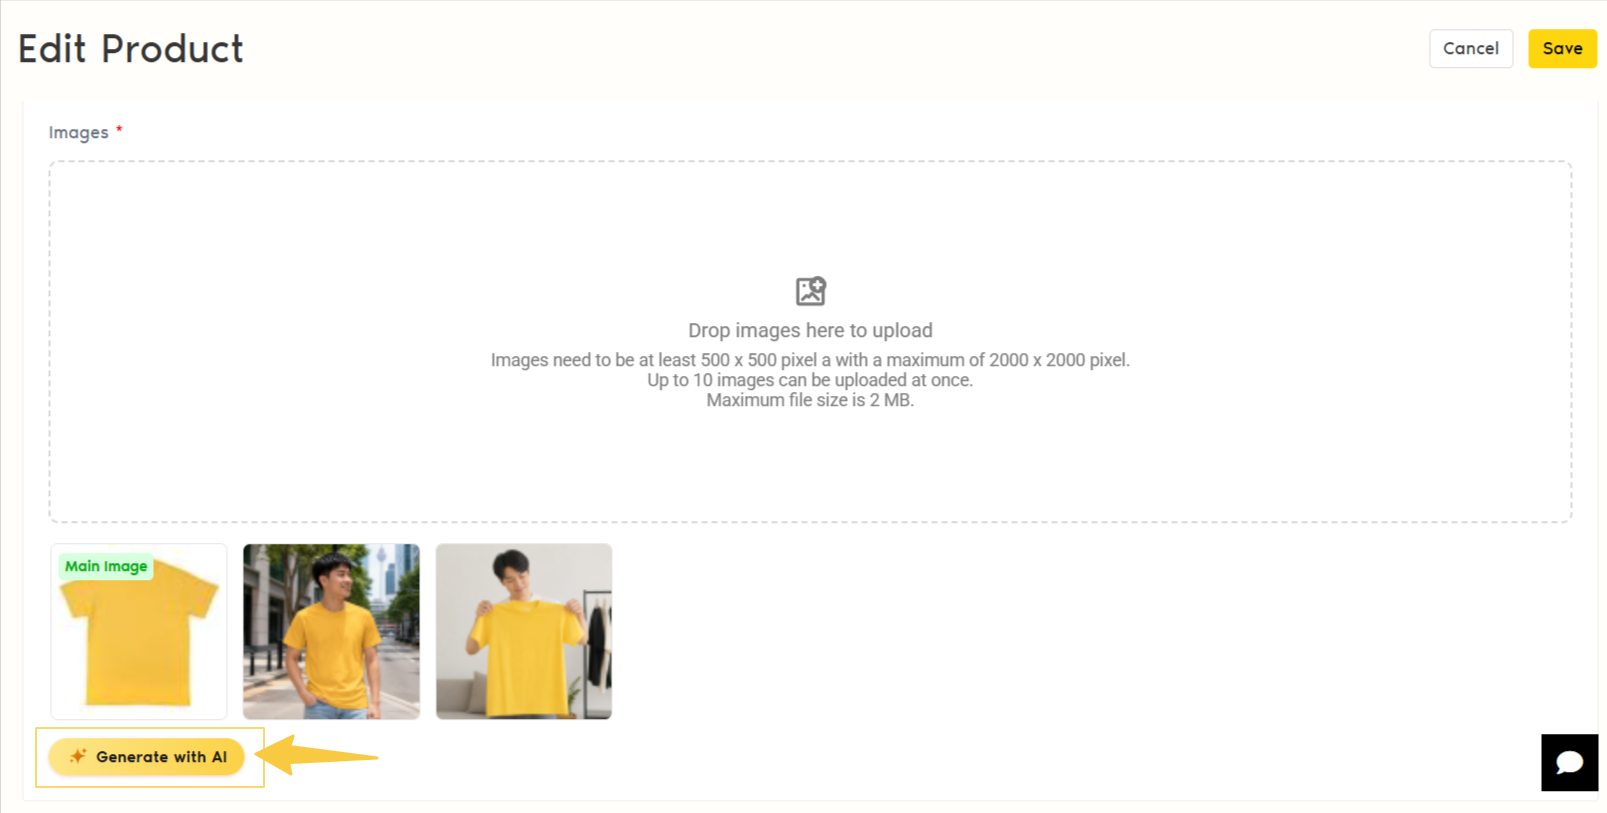
Step 2: Open AI Image Studio
Under the Images section, click:
✨ Generate with AI
This will open AI Image Studio.
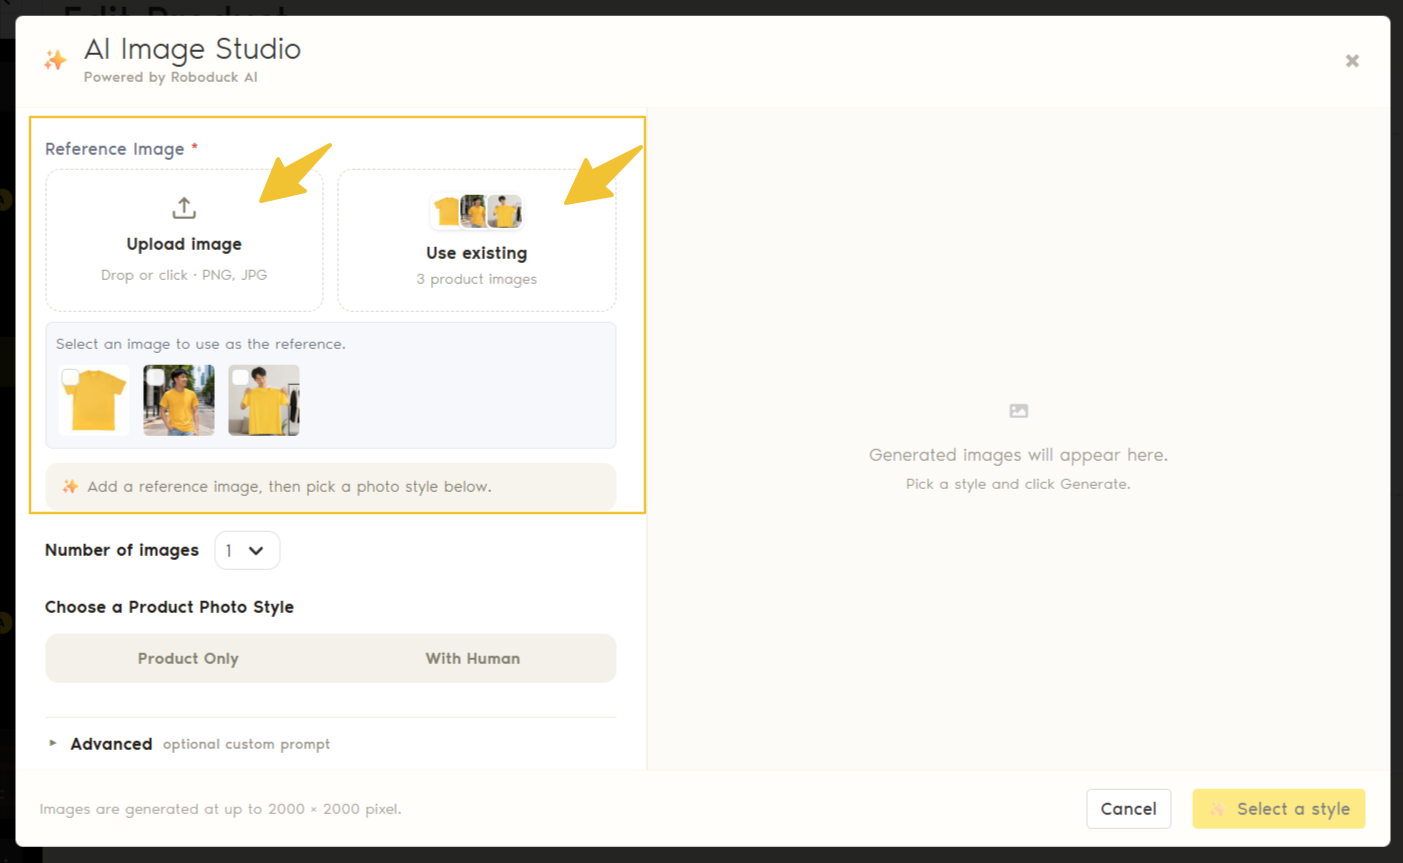
Step 3: Choose a Reference Image
AI needs a product image as a reference before it can create new images.
You have two options:
Upload Image
Upload a new JPG or PNG image from your device.
Use Existing
Choose from the images that are already added to your Zetpy product.
For the best results, use a clear product image where the product is easy to see.
Step 4: Choose the Number of Images
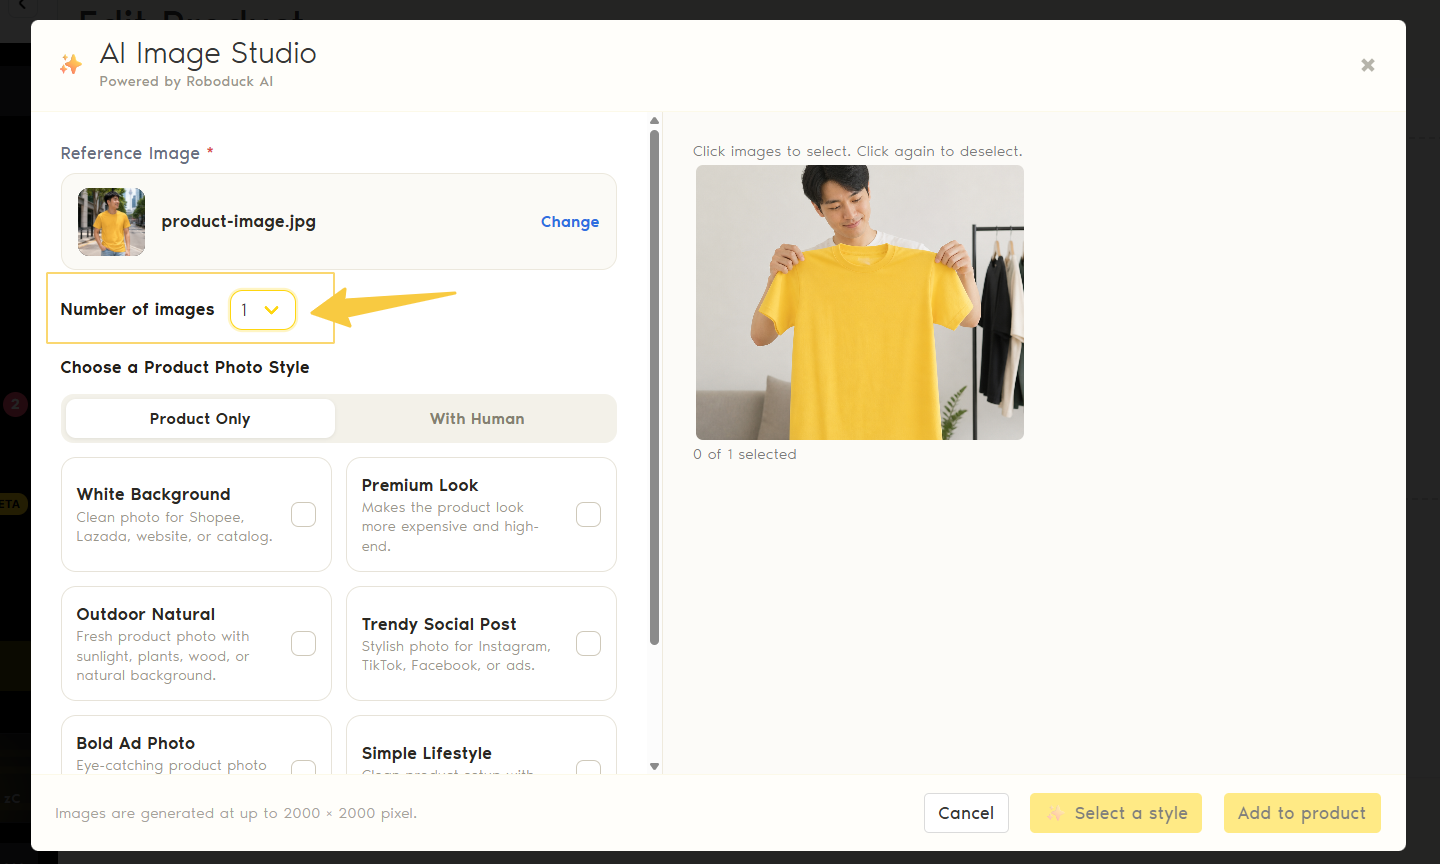
Select how many AI images you want to generate.
Remember: Each generated image uses 10 zCredits.
For example, if you generate:
1 image = 10 zCredits
2 images = 20 zCredits
Step 5: Choose a Product Photo Style
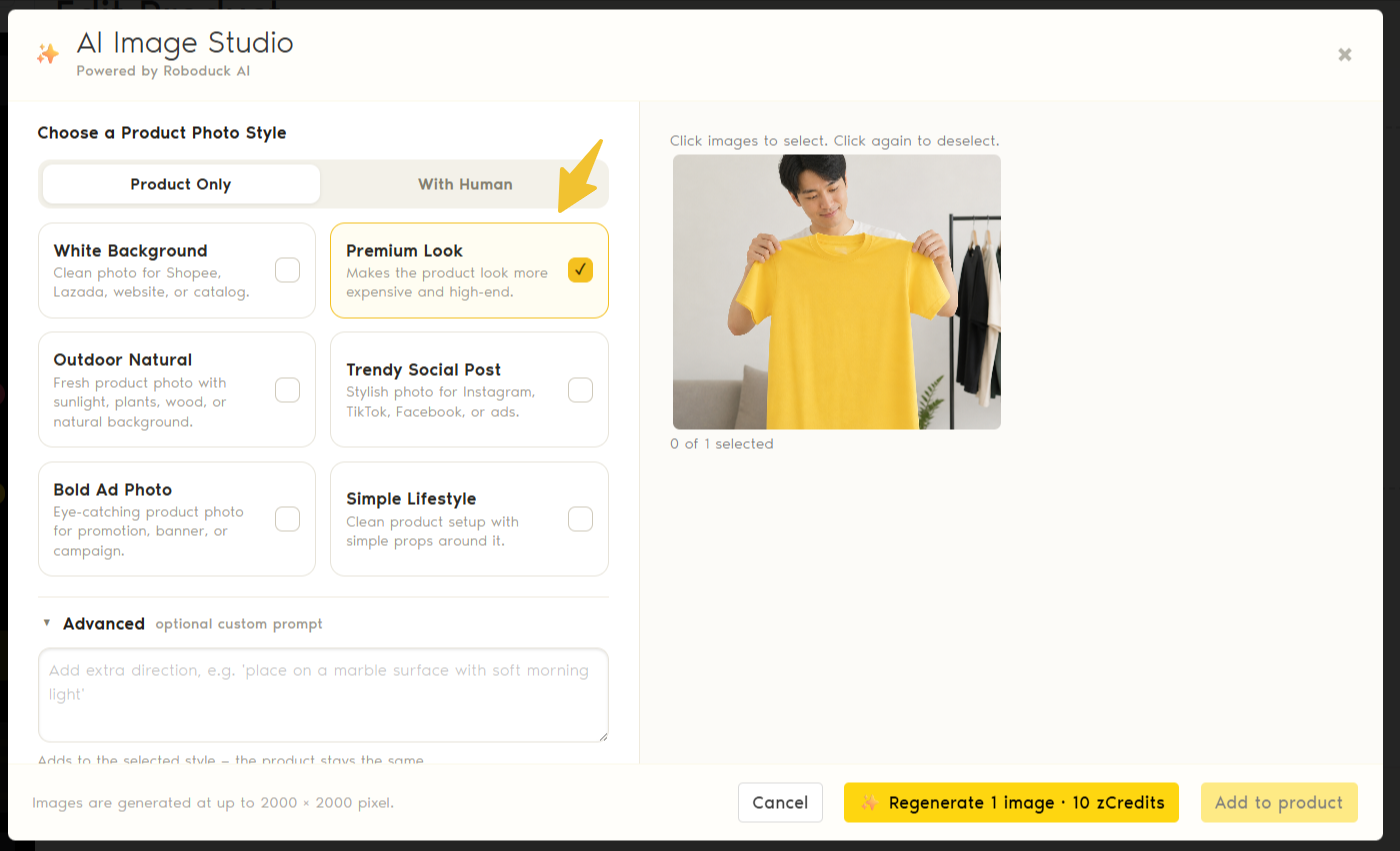
Choose the type of image you want AI to create.
You can first choose between:
Product Only — keeps the focus on the product.
With Human — creates a lifestyle-style image featuring a person with the product.
Depending on the selected option, different photo styles will be available.
White Background
Creates a clean product image with a white background.
Good for marketplaces, websites, and product catalogues.
Premium Look
Creates a more polished and high-end presentation for your product.
Outdoor Natural
Places the product in a natural outdoor-style setting.
Trendy Social Post
Creates a more eye-catching visual suitable for social media, ads, or promotional content.
Bold Ad Photo
Creates a stronger promotional-style image for banners, campaigns, or advertisements.
Simple Lifestyle
Places the product in a clean lifestyle setting with simple props or surroundings.
Step 6: Add Advanced Instructions (Optional)
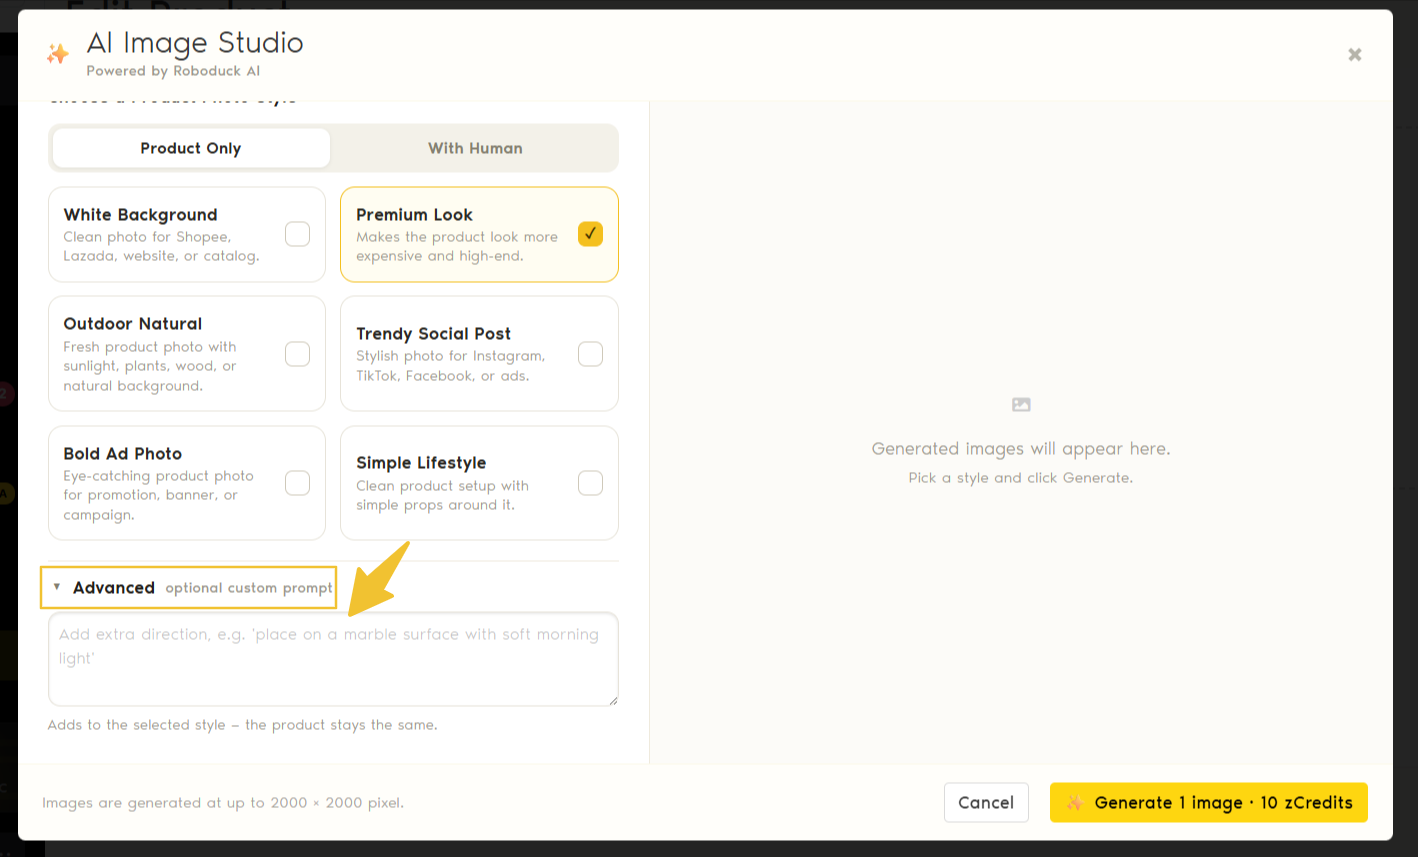
Need something more specific?
Open Advanced to provide additional instructions for the image you want AI to create.
Use this when you want more control over the setting, mood, background, or presentation.
This step is optional.
Step 7: Generate Your Images
Once you've selected your reference image and preferred photo style, generate your AI images.
AI will create the requested images based on your selections.
10 zCredits will be deducted for each image generated.
Step 8: Choose Your Favourite Images
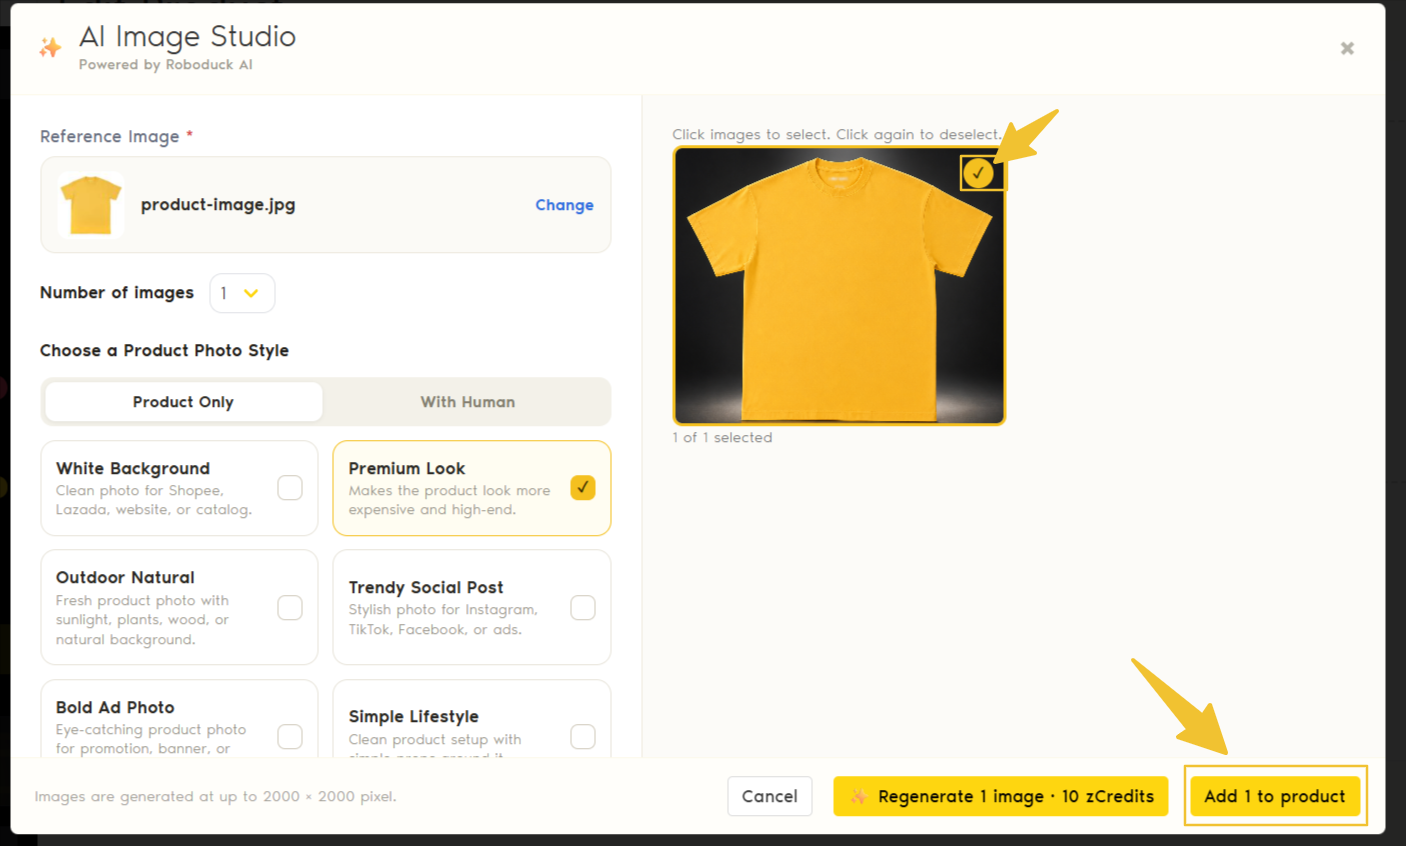
Once generation is complete, the AI-generated images will appear on the right side of the AI Image Studio.
Click the images you want to keep.
You can select one or multiple generated images.
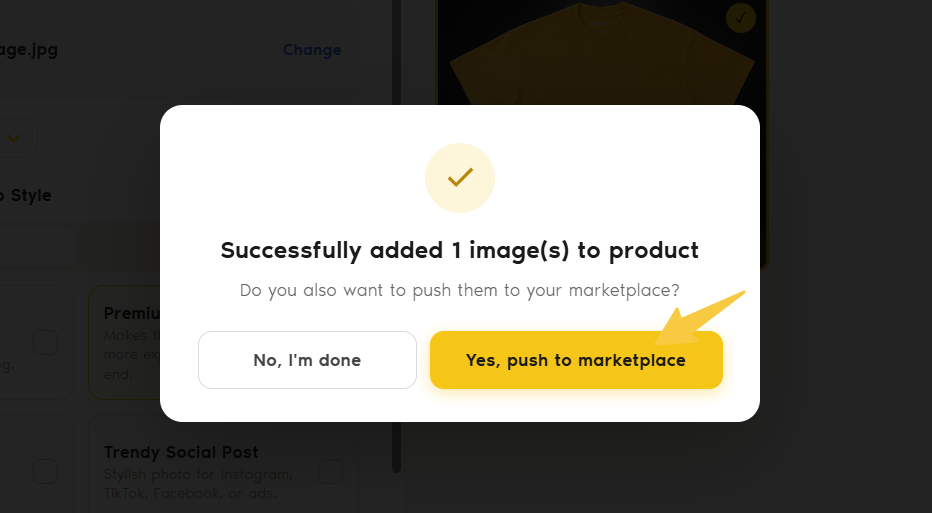
Once you've selected the images you want, click Add to product
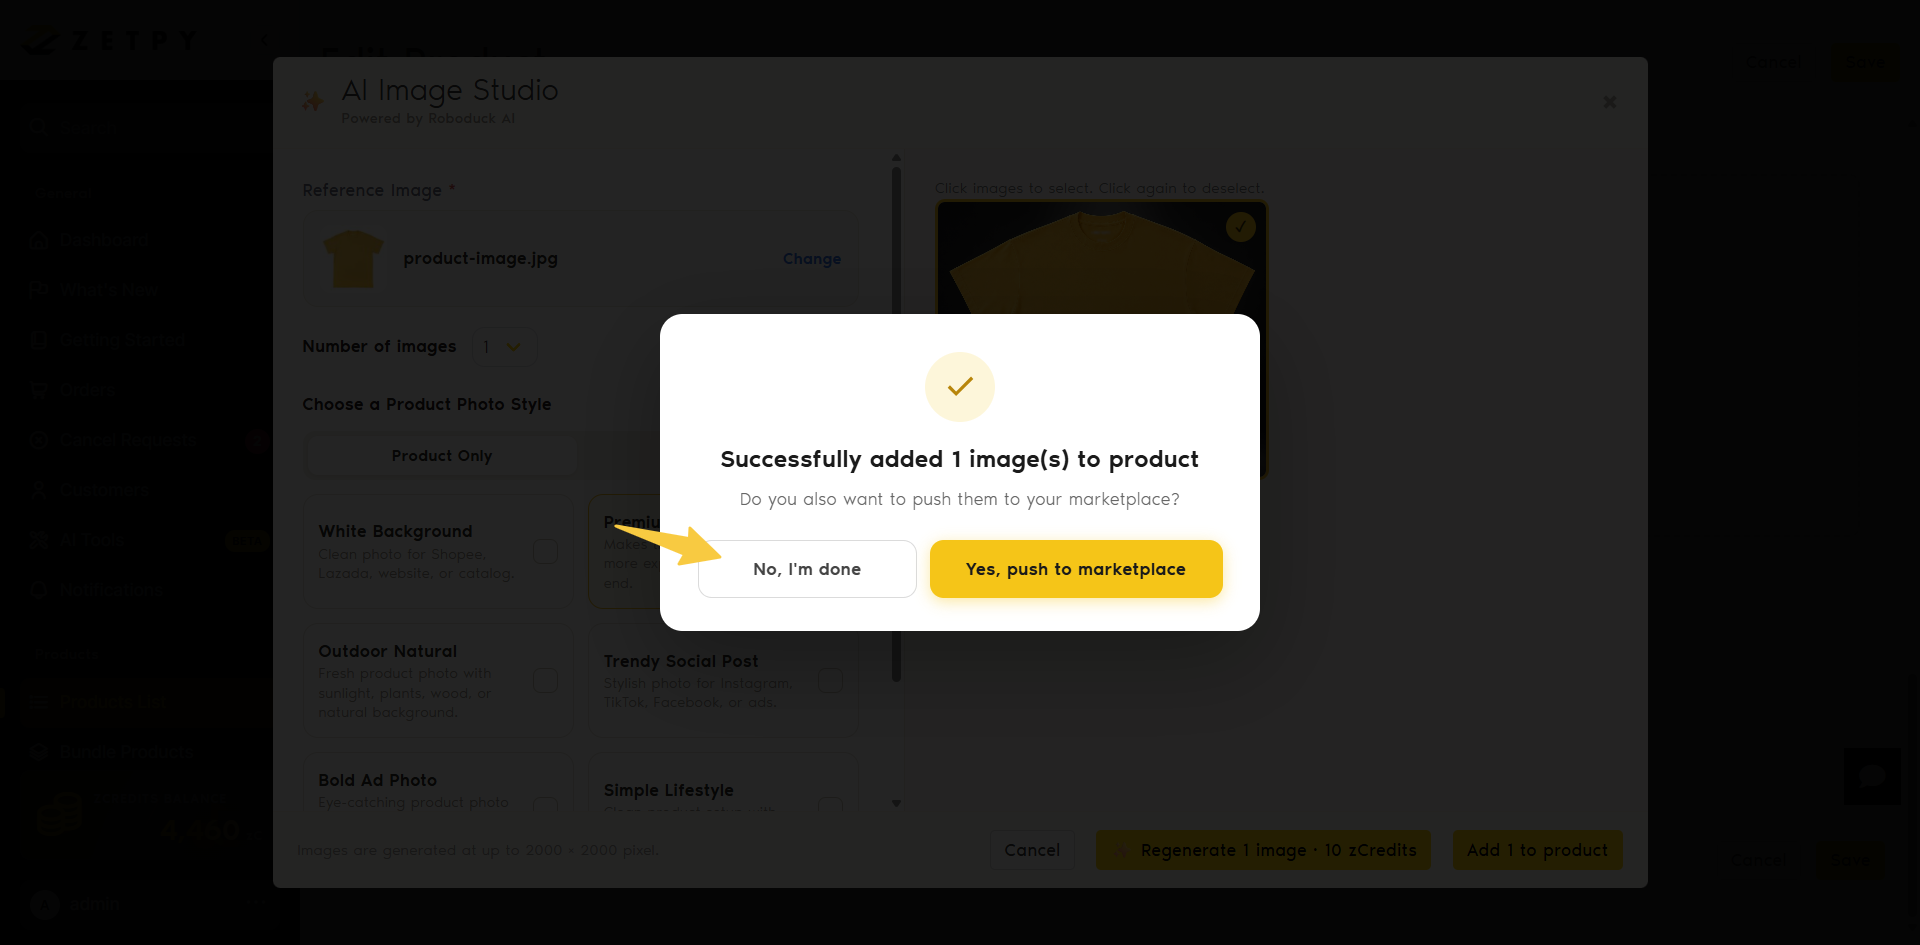
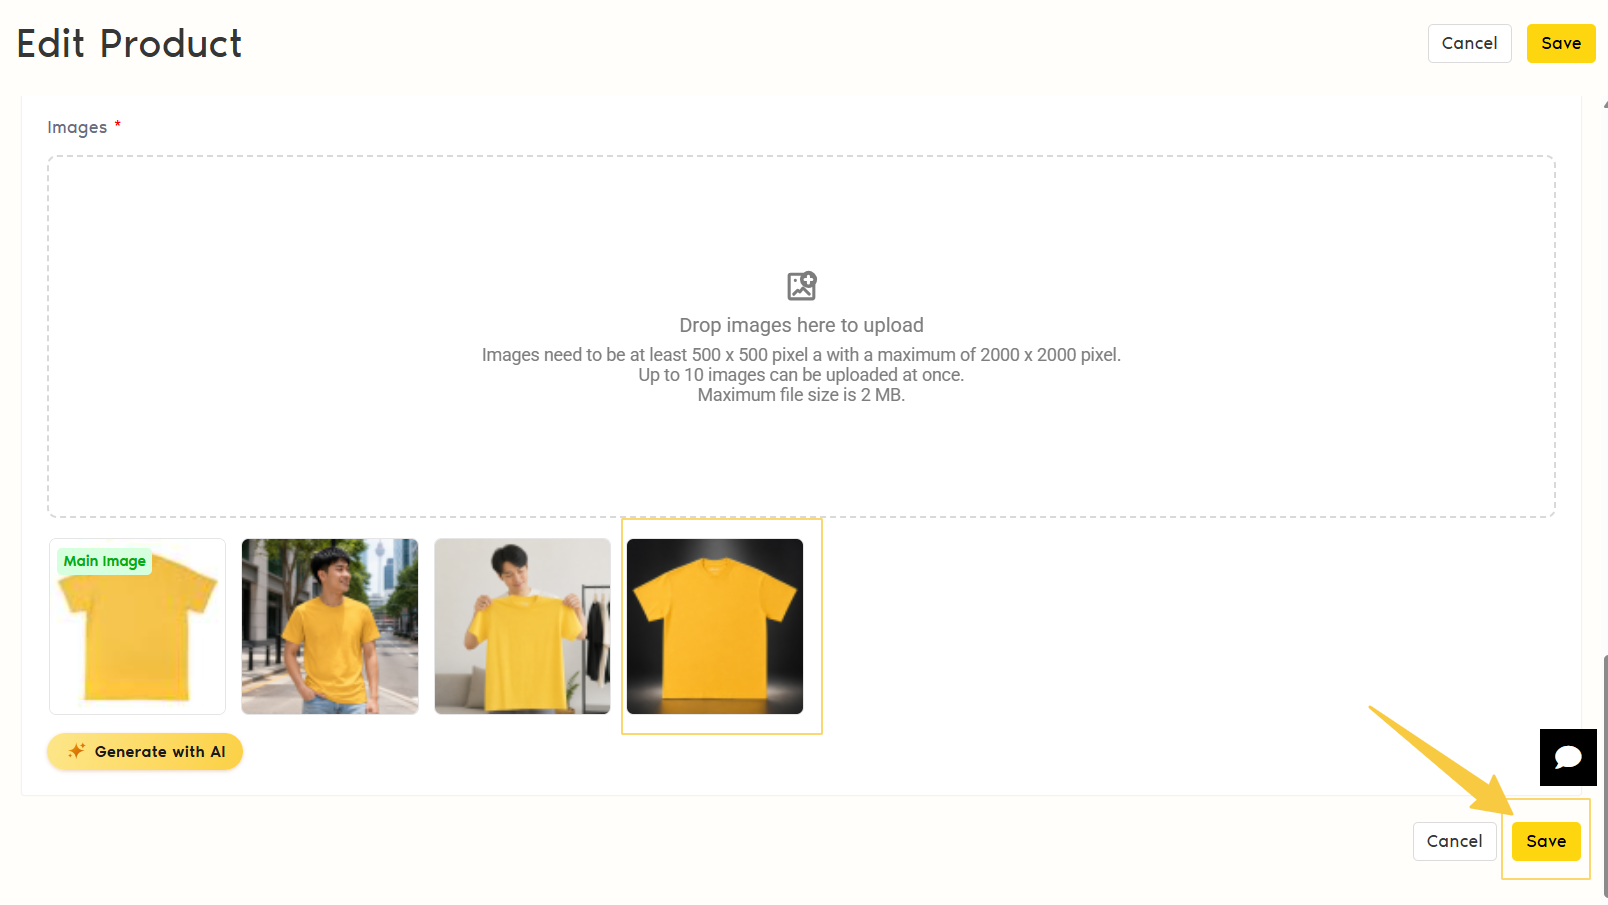
The selected AI-generated images will be added to the Images section of your Zetpy product.
Review the images and make sure everything looks correct before saving.
Click Save button after you have reviewed.
Step 10: Push the New Images to Marketplaces (Optional)
If the product has already been synced to supported marketplaces, you can choose to push the newly added images to those marketplaces.
Currently supported:
Shopee · Lazada · TikTok Shop
This allows you to update the product images in the respective marketplace Seller Center using the newly added images.
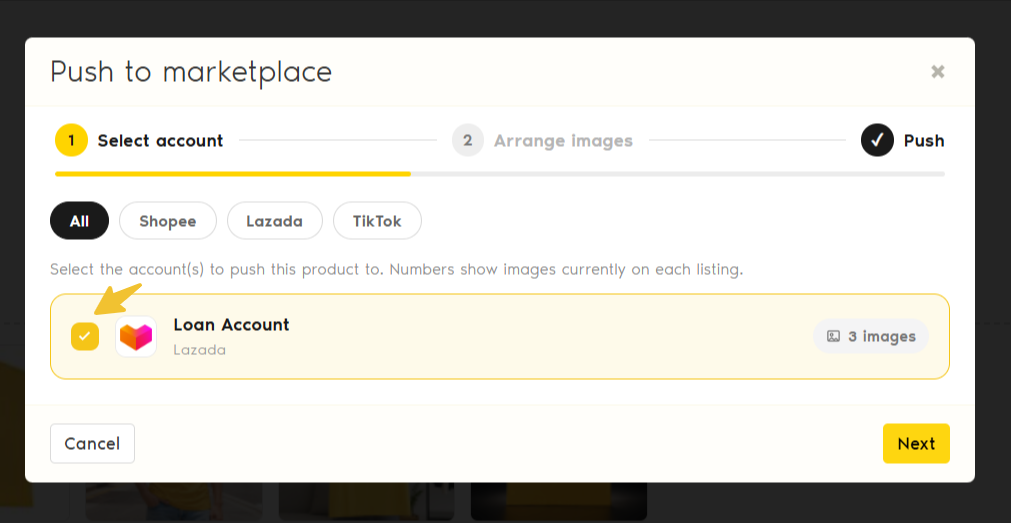
Select any accounts that to push this product image to > click 'Next'
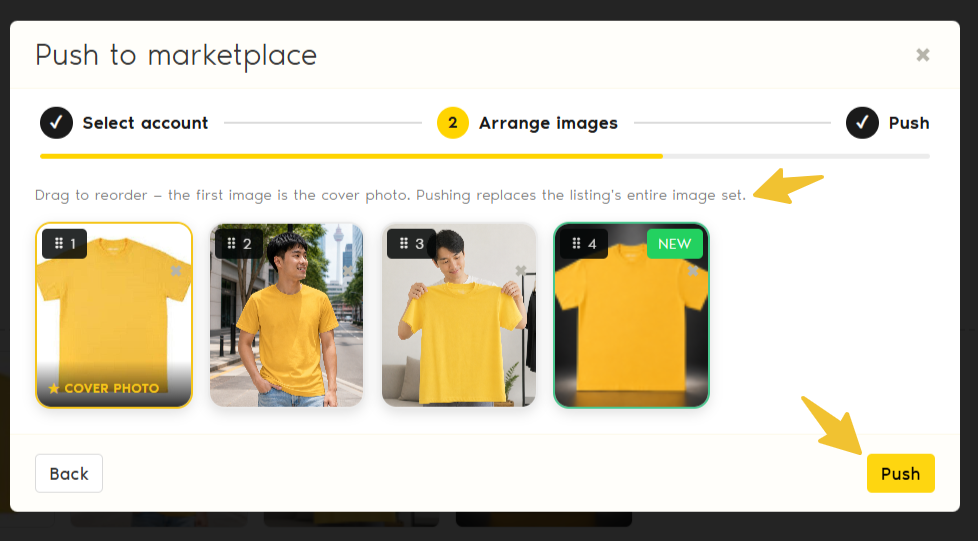
Rearrange the sequence of the existing images with the newly AI-generated image by dragging and dropping the images.
Once done, click Push.
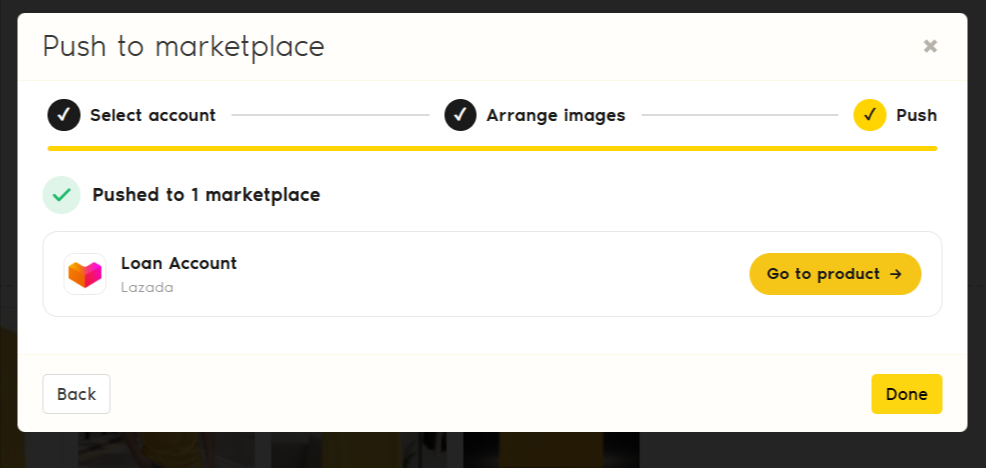
Once it has updated completely, you can go to the product page by clicking Done or go to the plugin's product page by clicking Go to product to review the changes.
Important: Check AI-Generated Images
Before using an AI-generated image on your marketplace or website, check it carefully.
Make sure:
The product still looks accurate
Important product details have not changed
Colours are reasonably represented
Logos, labels, text, and packaging are correct
The image does not show features or accessories that are not actually included with the product
AI-generated images are designed to help you create product visuals faster, but the seller should review the final image before publishing it.
Should you have any further questions, feel free to email our support team at support@zetpy.com