

Note: Custom Labels are for internal use only. They are not shown to customers or synced to marketplaces, and they do not affect order status, stock movement, invoice sync, POS sync, or fulfillment.
Assign label to OR remove label from multiple orders
Step 1: Create a Custom Label
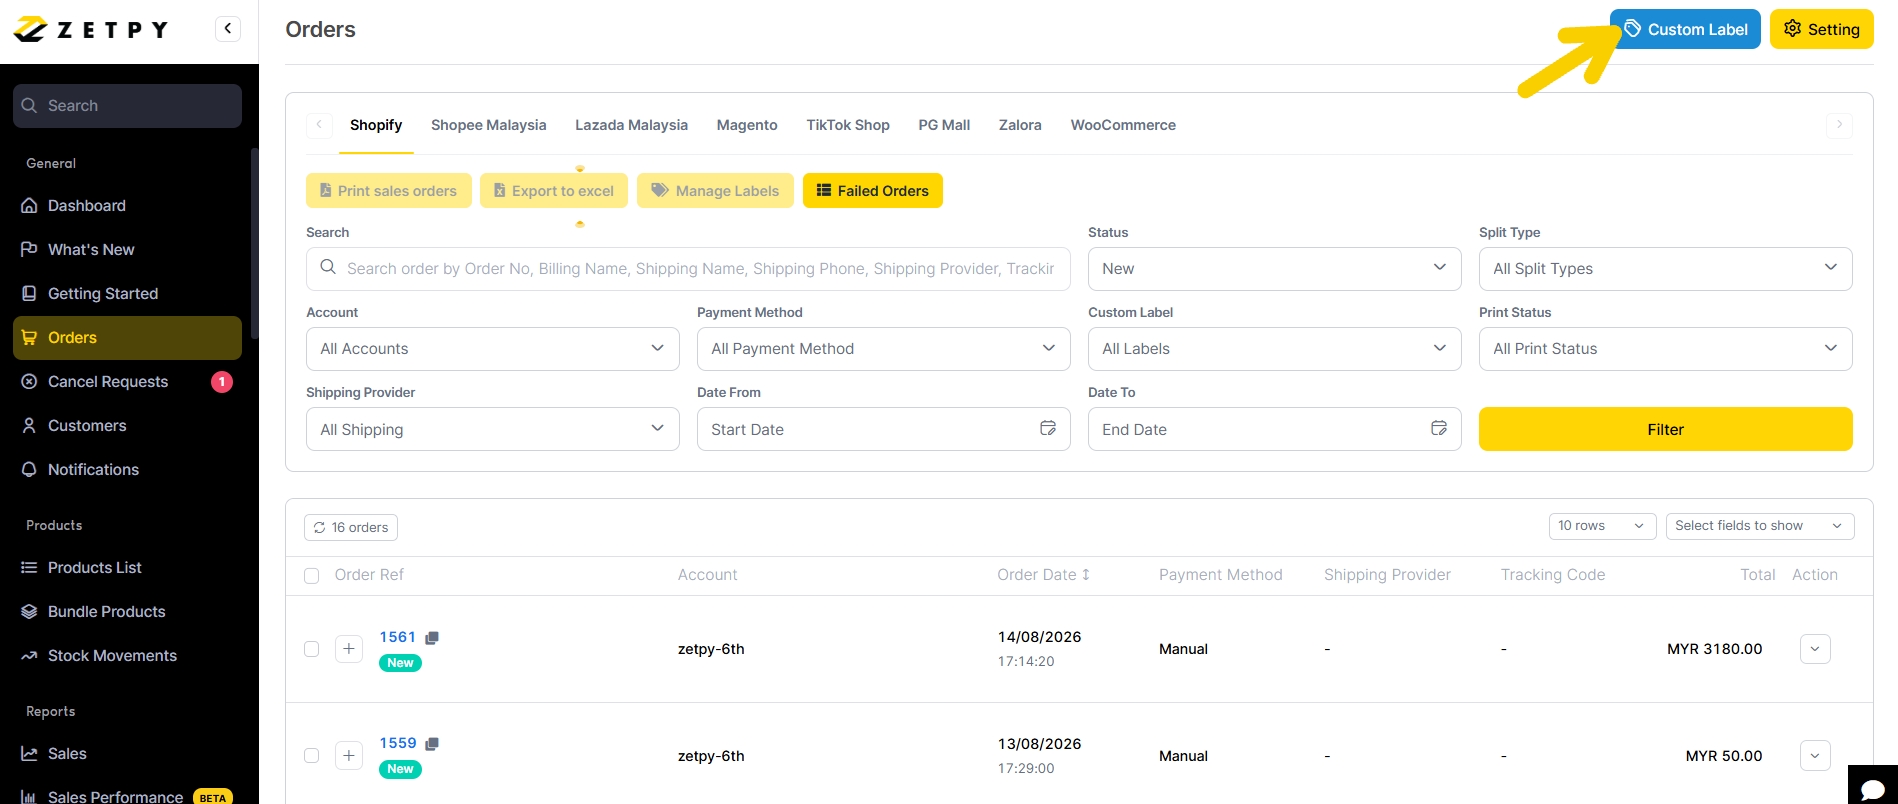
Go to Orders, then click into Custom Label.
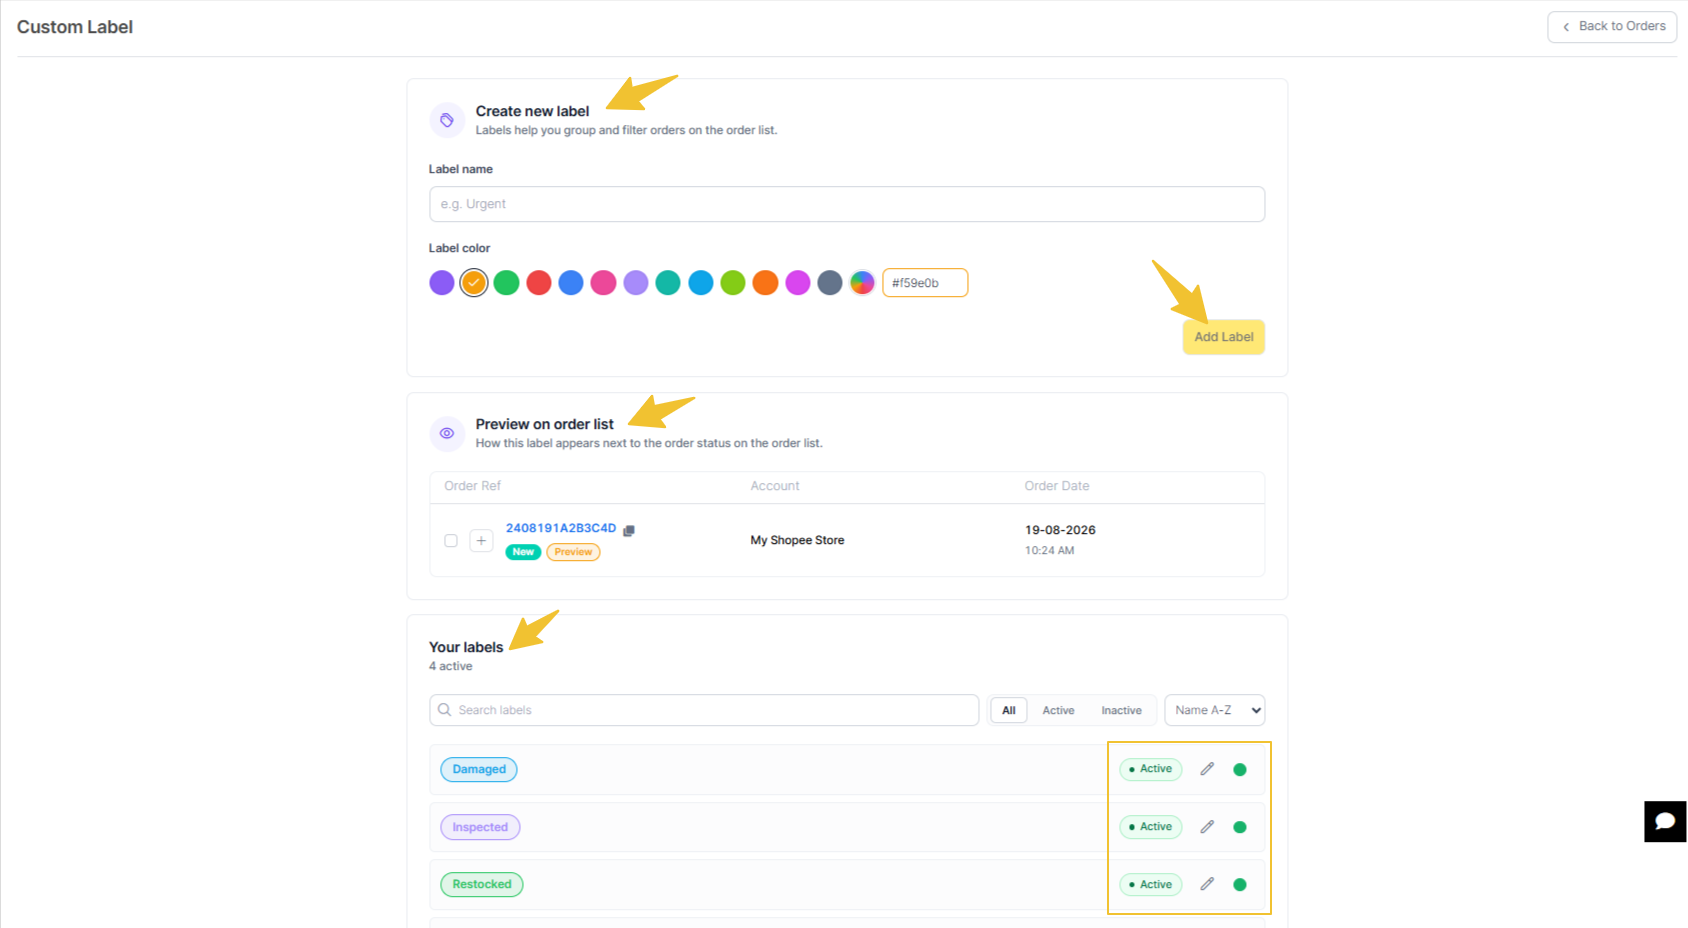
Fill in the label details:
Label name (e.g. "Damaged")
Label color (optional, helps the label stand out in the order list)
Click Add Label.
Preview on order list: To show you how the label appear next to the order status in the order list.
Under Your Labels: Display the labels that you added. You can create as many labels as you need, and inactive/deactivate any label you no longer use from this same page.
Step 2: Assign a Label to a Single Order
Open the order from the Orders list.
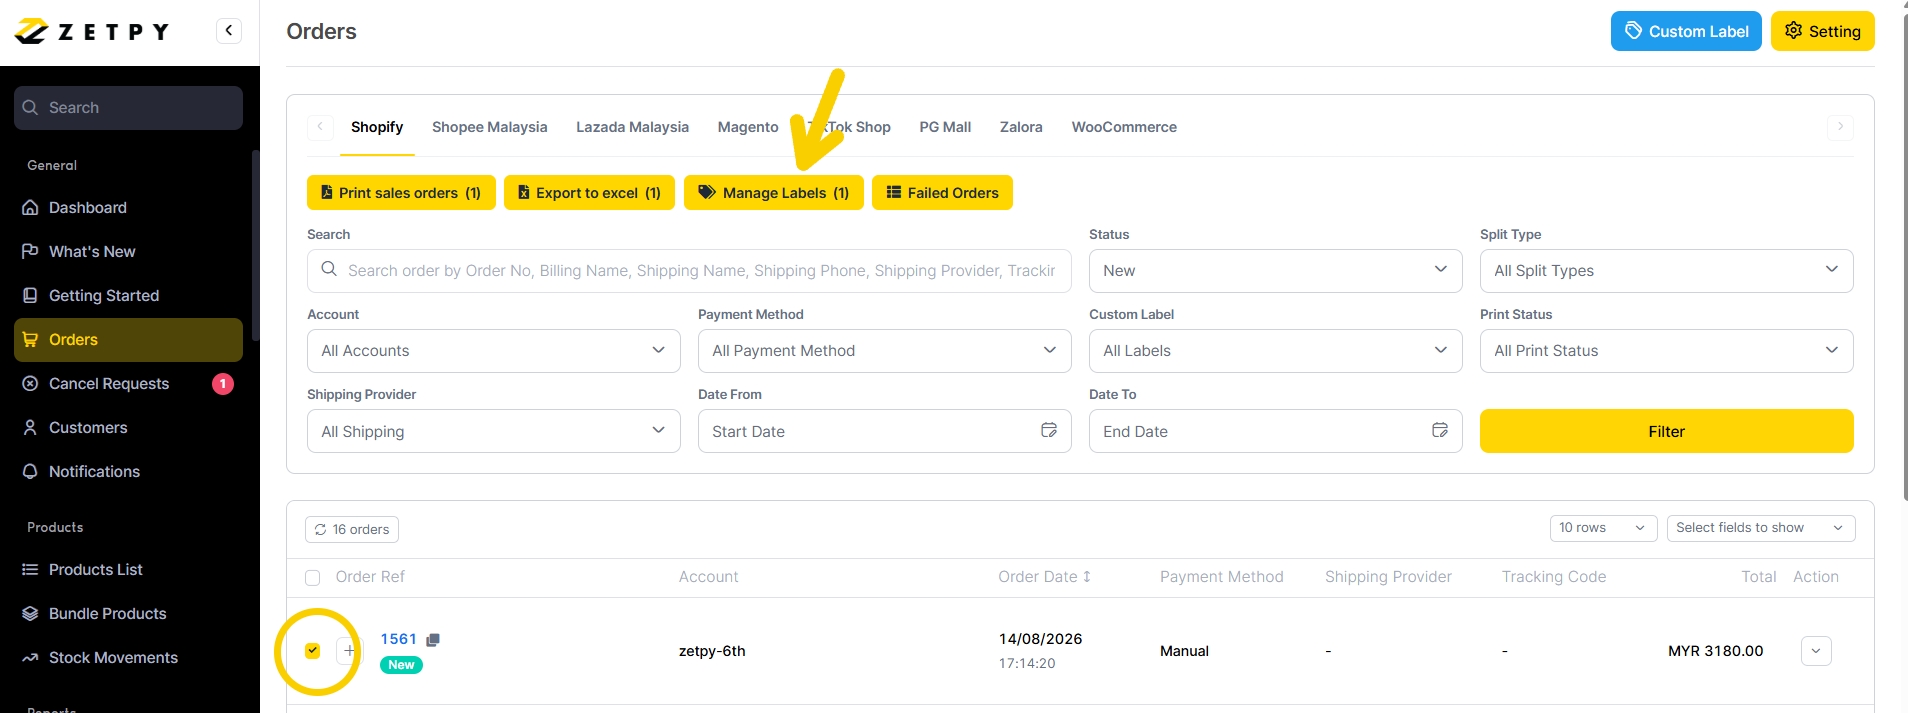
Select the order > click on Manage Labels.
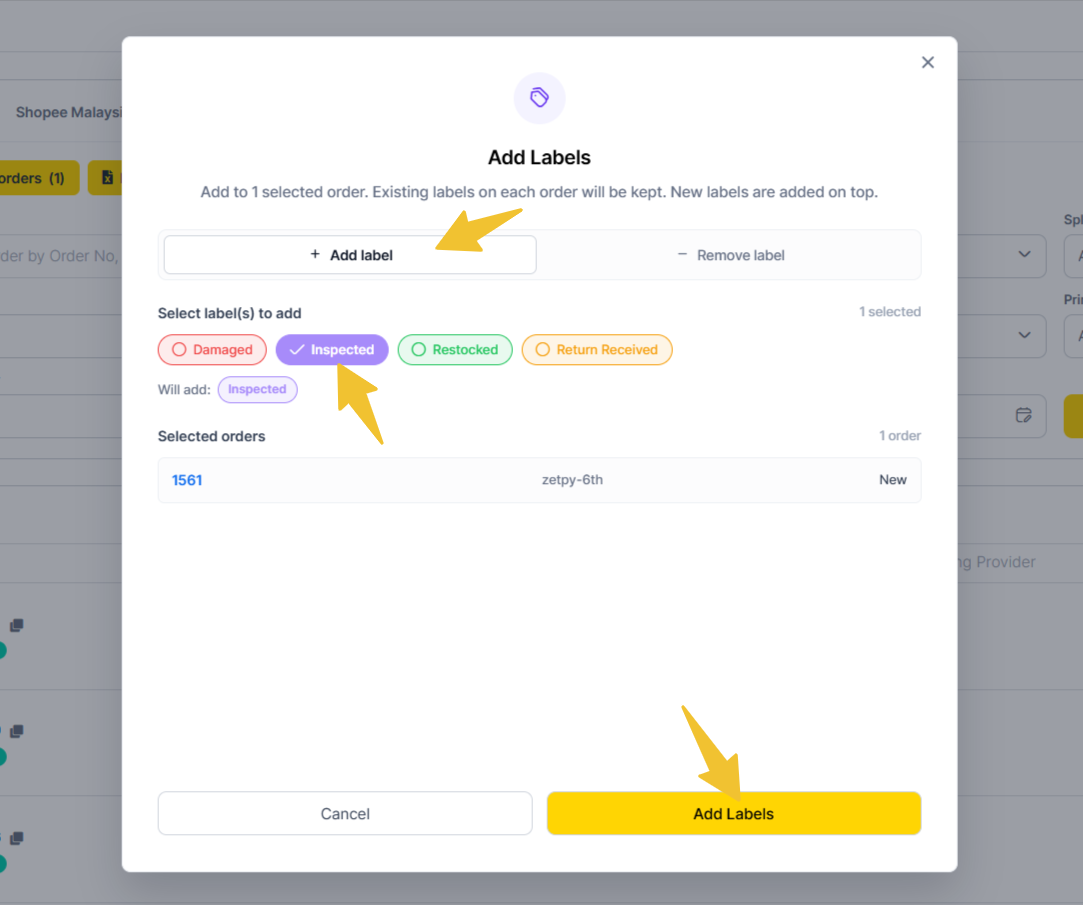
Select one or more labels from the list (eg, Inspected, restock, etc - can be added multiple labels at once) then click Add Labels.
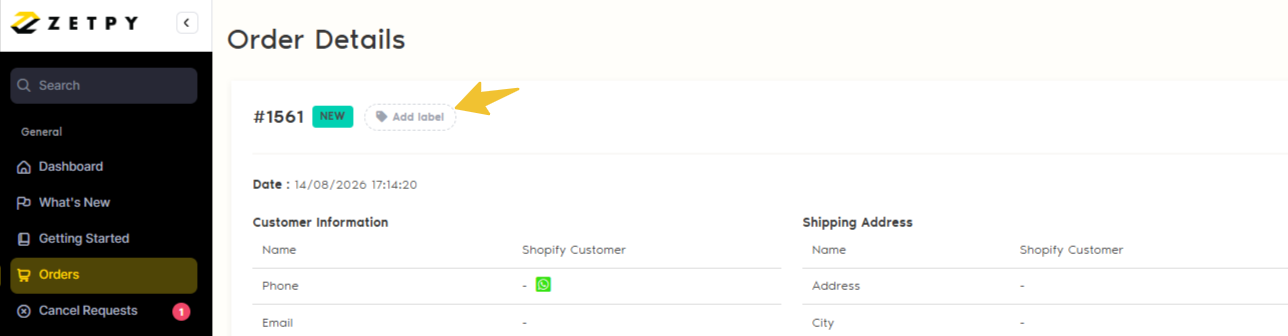
The selected labels now appear beside the order status on the order detail page.
To remove a label from the order, click the label again and deselect it.
Step 3:Assign a Label to Multiple Orders at Once
If you need to tag several orders in one go (e.g. after a batch of returns is checked in):
From the Orders list, tick the checkbox next to each order you want to tag.
Click Manage Label.
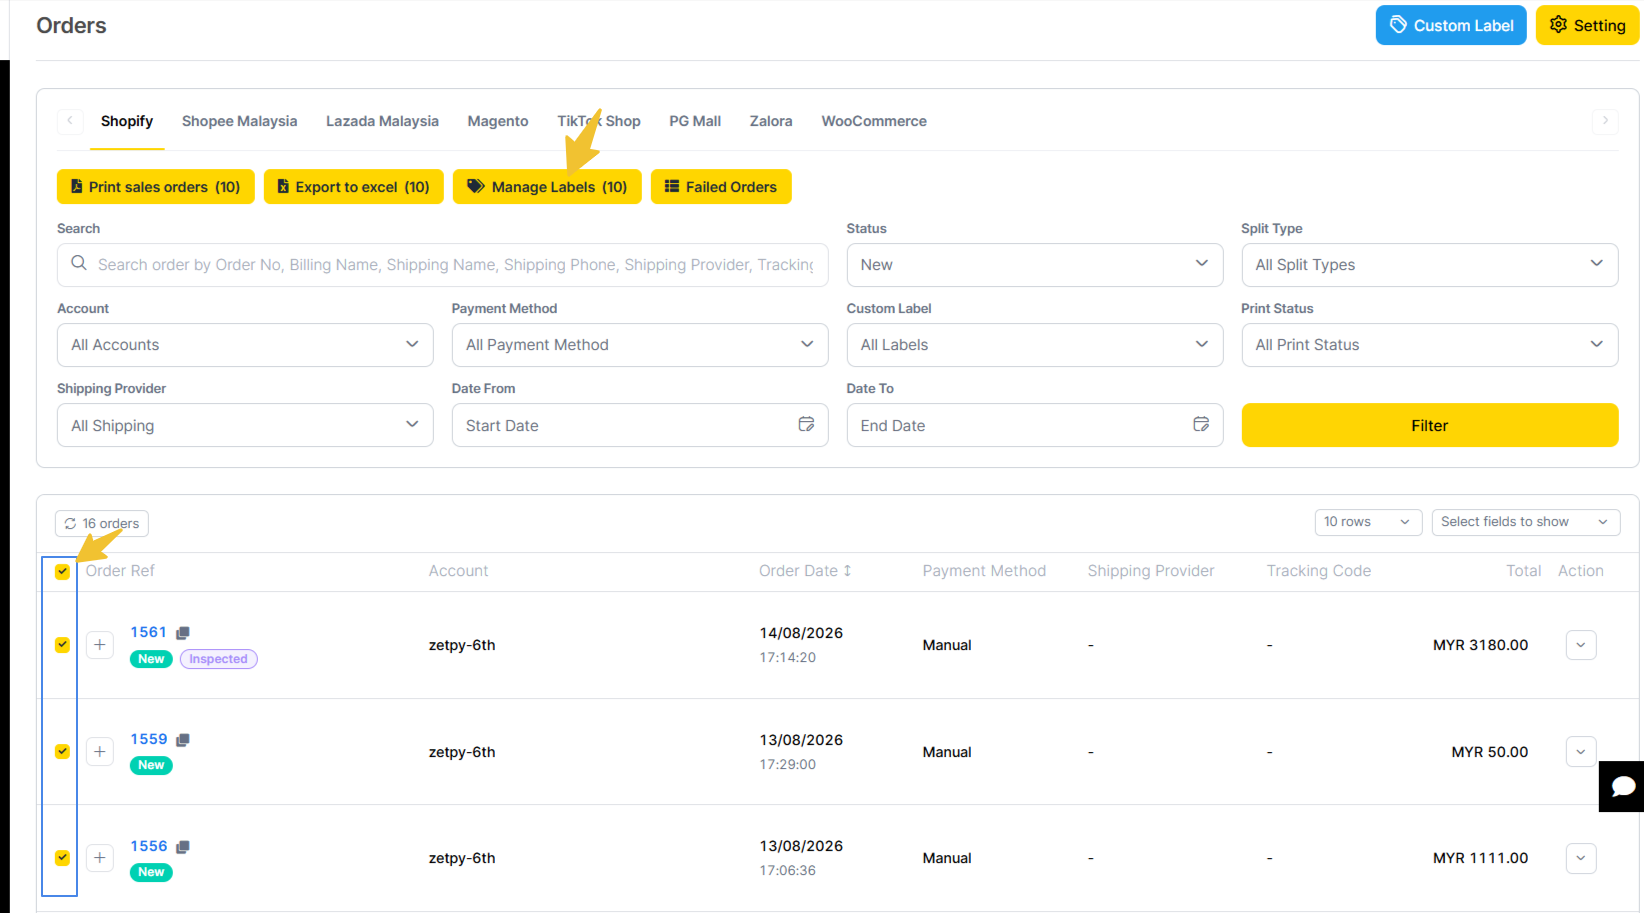
Choose the label(s) to assign, then apply.
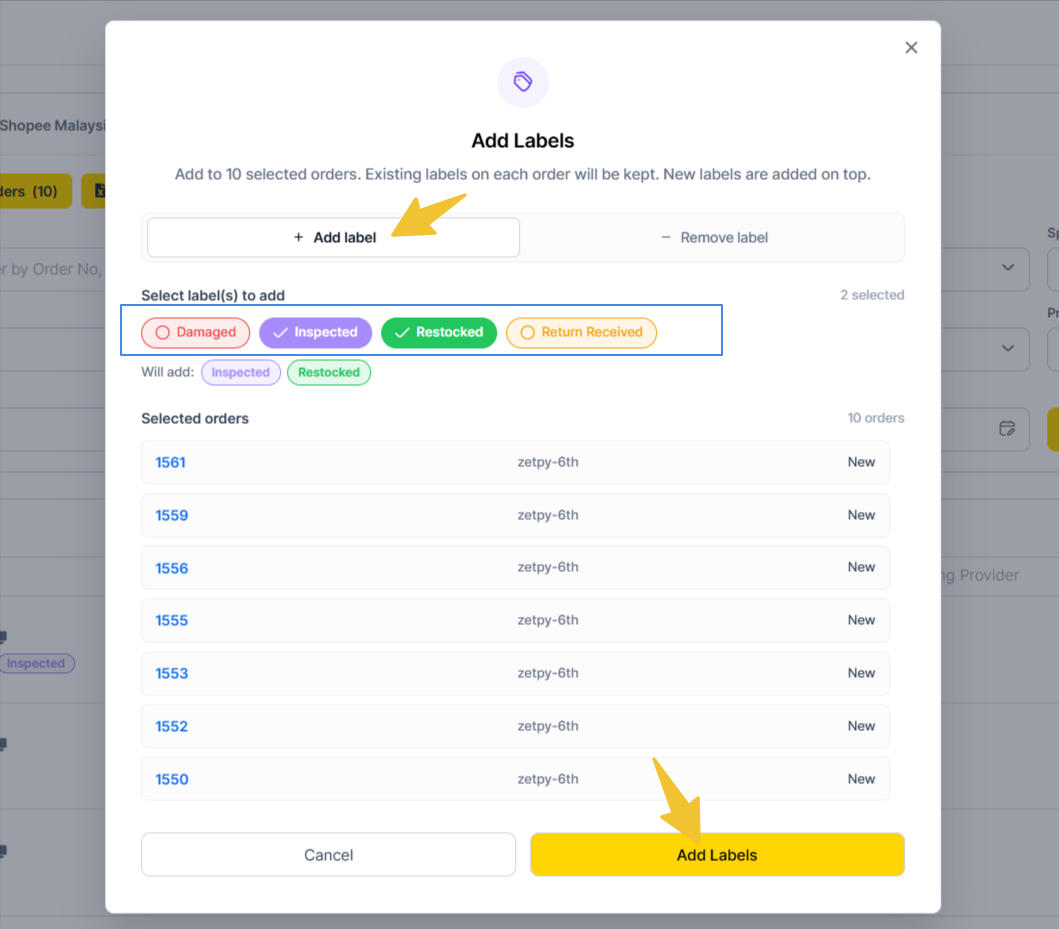
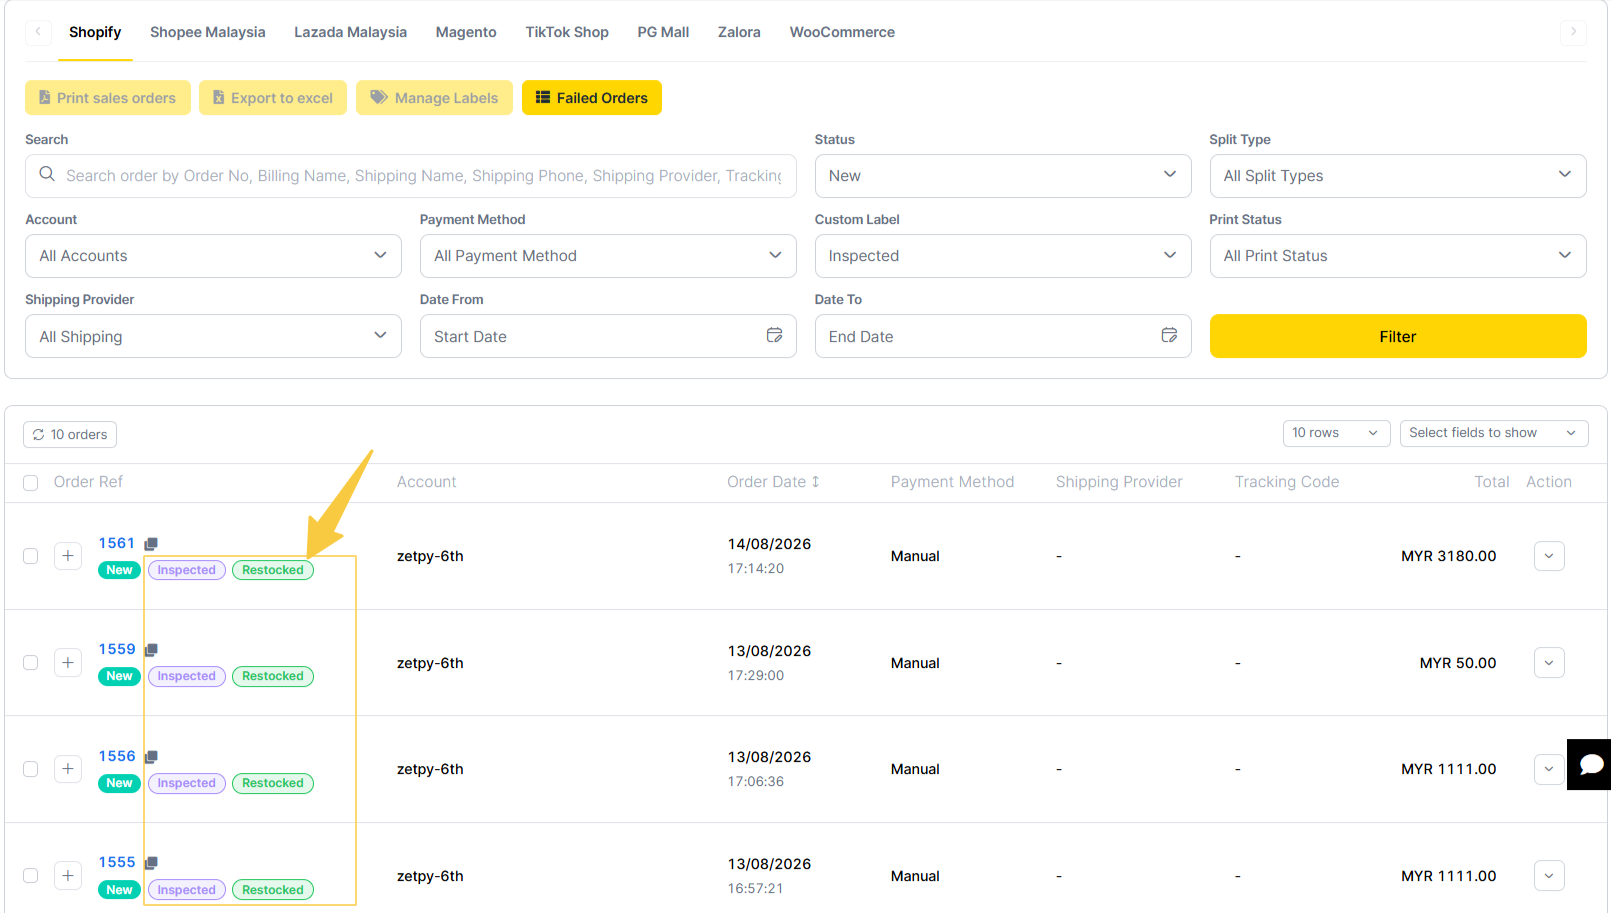
All selected orders are updated with the chosen label(s).
Remove the Assigned Label from Multiple Orders at Once
From the Orders list, tick the checkbox next to each order you want to untag.
Click Manage Label > click on the Remove Label tab.
Deselect the label(s) you want to remove, then click on Remove Labels.
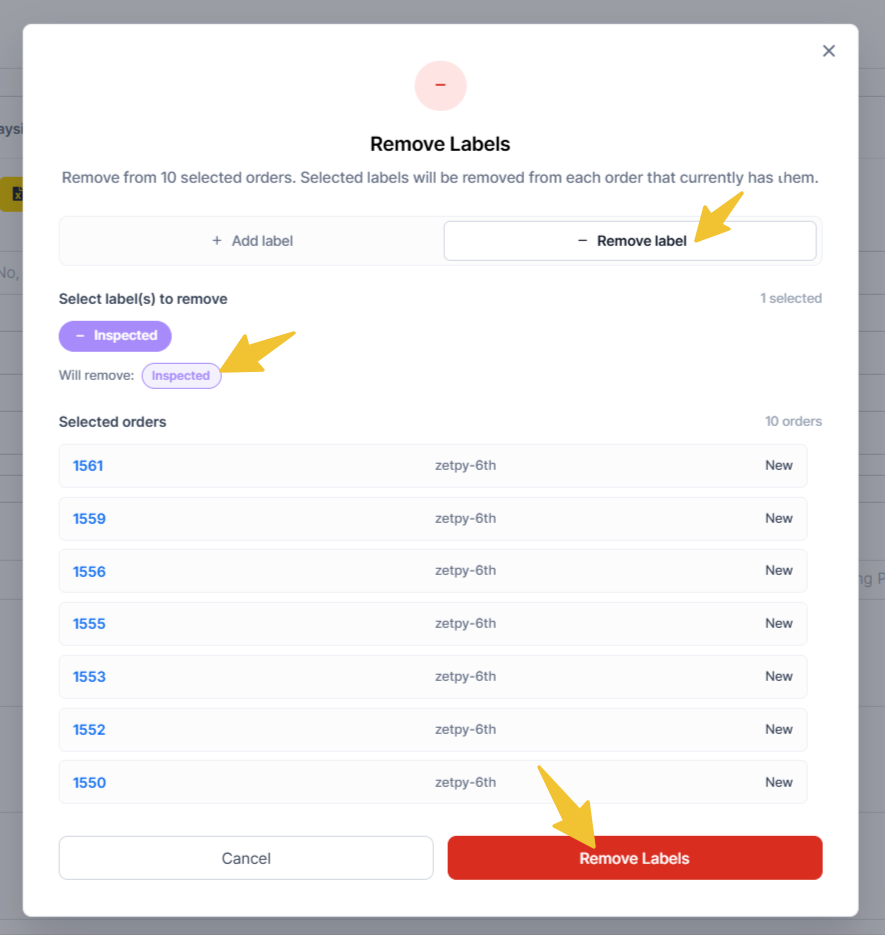
The label(s) are removed from all selected orders at once.
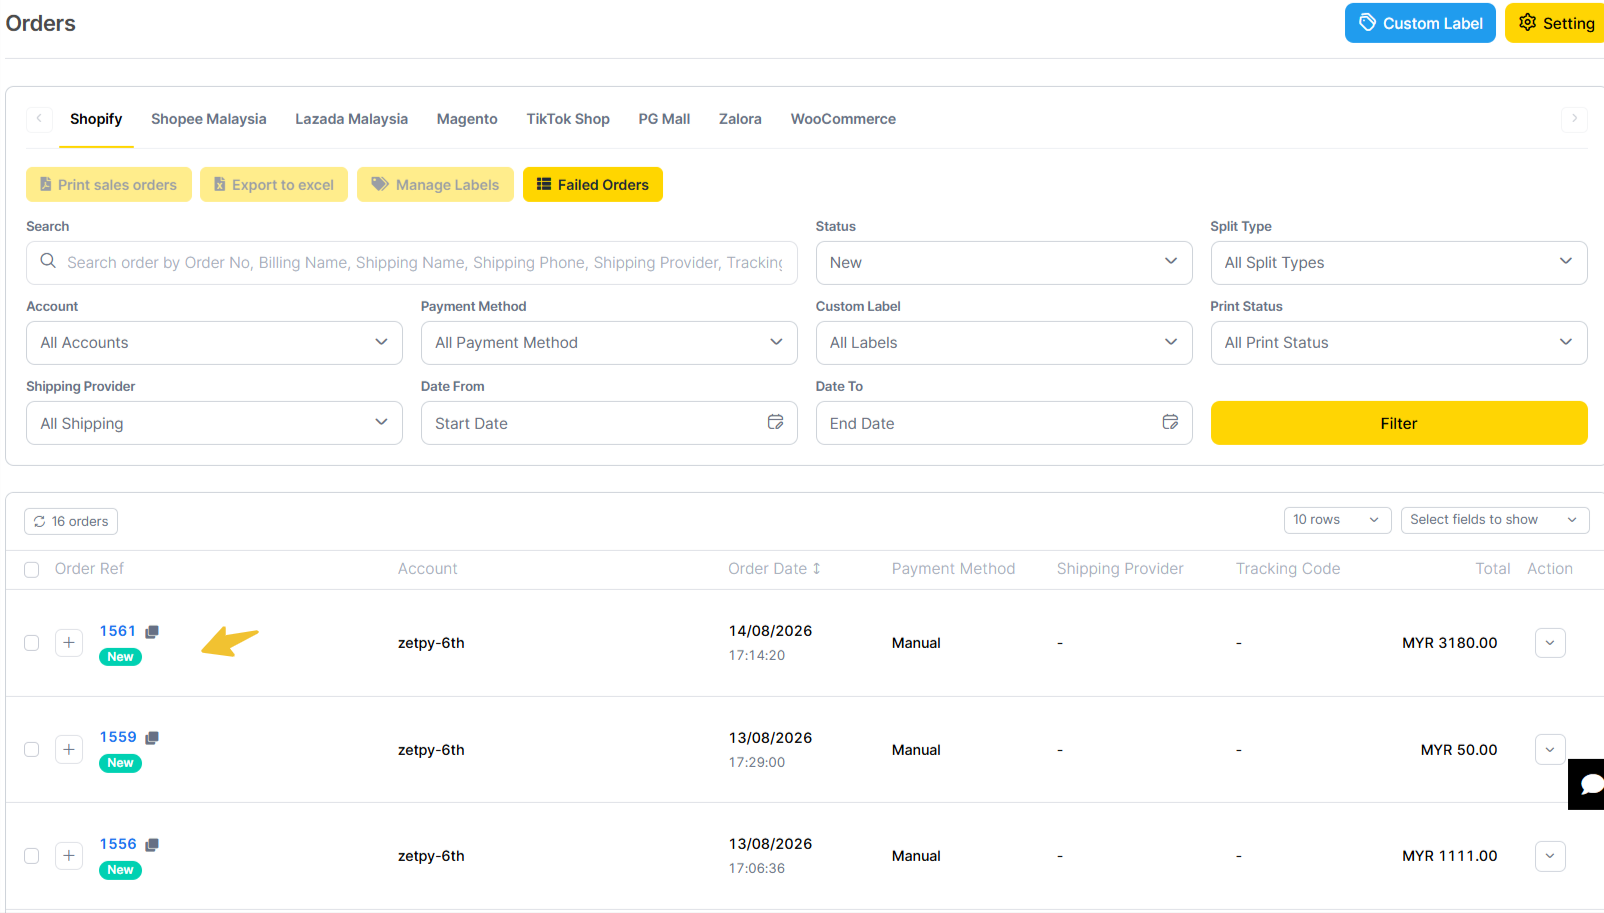
Step 4: View and Filter Orders by Label
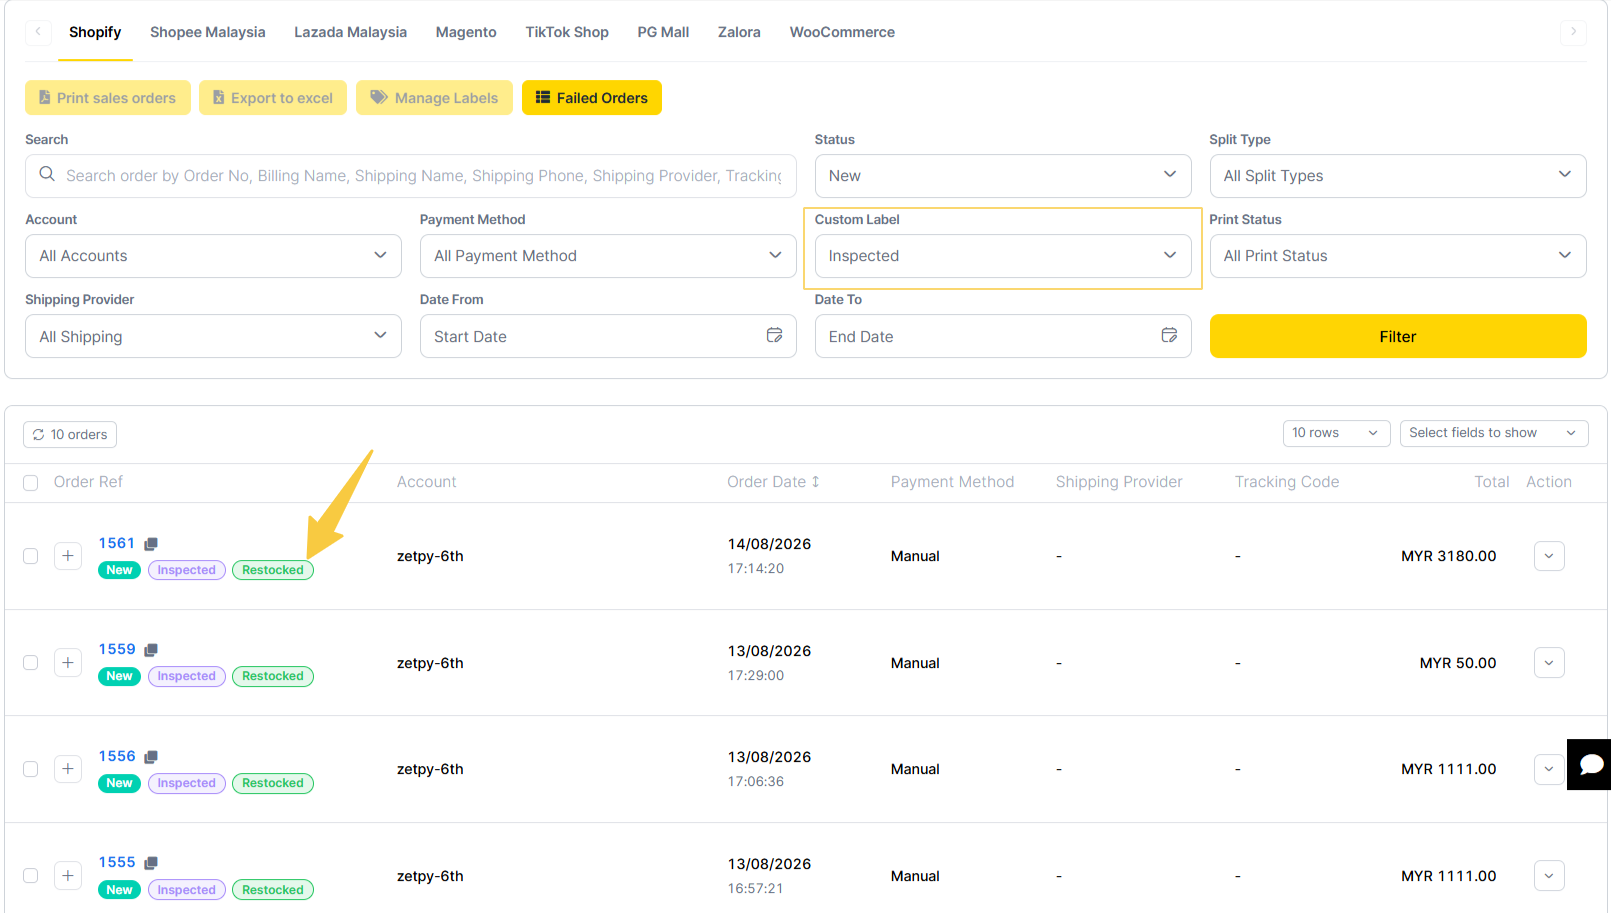
In the Orders list, assigned labels are displayed next to the order status, so you can see the handling status without opening each order.
To narrow down your view, use the Custom Label filter at the top of the Orders page. You can select one label and combine this with your existing filters (order status, marketplace, date range, keyword search).
In each specific Order page, you can view the label assigned or assign the new label as well.
If you run into any issues setting this up, reach out to us at support@zetpy.com — we're happy to help.